Make-A-Card Monday!

Mondays are usually my least favorite day of the week. Nothing brightens someone’s day more than happy mail, especially on a Monday! So today I whipped up a few adorable cards that can be adapted to whatever sentiment you desire. they are simple, quick, and guaranteed to bring a smile to the recipient’s face. My challenge to you today is to make a card, simple or more elaborate, and send it to a special someone by good ol’ snail mail! Please feel free to post a link to your card project in the comments if you would like. I would love to see your card-creations!

My first card is a simple “Hello”:

Make a card Monday @thecraftypickle.com

This card was made using the Pebbles Basics papers and some Pebbles / American Craft’s die cut shapes from the silhouette store. It came together super quick and I love the bright cheery colors. The Pebbles Basics really is a fabulous basic set every cardmaker, scrapbooker, project lifer, and papercrafter should have.

Here are the cut design ID numbers for the Silhouette Shop:

Design ID #20725

Design ID #19946

Design ID #42918

My next card was inspired by the new Pier slide frames. I adore them and thought they made the perfect frame for a shaker card!

Make-a-card Monday @thecraftypickle.com

The paper and the frame are from Crate Paper’s The Pier line and the floral die cut is from Crate Paper’s DIY shop. I added a touch of glitter to the yellow portion of the die cut and the stamp “celebrate” is from Technique Tuesday: AE studio. I added a bit of bakers twine and called it done. This is perfect for any type of celebration. You could even replace the flower die cut for a cupcake or birthday cake if you wanted a more birthday-like card.

Finally for you today, I have a super simple, super quick gift card that is perfect size for a Starbucks, iTunes, or other gift card to tuck inside:

Make-a-card Monday @thecraftypickle.com

The frame was a project life style card cut from a 12×12 sheet from Crate Paper’s The Pier collection. I added a dimensional die cut from American crafts Pretty Party stand outs and simply stamped a “Thanks A Bunch” sentiment from Dear Lizzie that fit perfectly with this card.

Don’t be afraid to mix and match collections, especially from the same manufacture. The colors generally match perfectly and it gives you a chance to really stretch your supplies.

I hope you feel inspired to create a few cards of your own. Spread some smiles with some handmade card love!

Happy Crafting!

Turn your leftover project life cards into greeting cards!

Hi Everyone

Today I thought I would share a few greeting cards I made using leftover journal/filler project life style cards. I made these three cards in less than an hour! They were so simple to make and far more personal than store-bought. The added bonus was being able to use up some cards and supplies I had on hand. There are so many pocket filler cards out there both in 3×4 and 4×6. I gathered up some cards that I wasn’t using to see what I could create. The assortment I grabbed was from different companies. Pebbles, Becky Higgins, Me and My Big Ideas, and the Studio Calico monthly project life kit.

Turn your leftover project life cards into greeting cards @thecraftypickle.com


The first one that I made was this adorable “you are simply wonderful” card from Pebbles. It’s almost that this little filler card was made for a delightful greeting to brighten someones day! I added very little to this card. some background paper, a die cut flower that matched the flowers printed on the card, a few sequins, some yellow string, and some detail on the bee with my glitter pen.

Turn your leftover project life cards into greeting cards @thecraftypickle.com


The second card that I made, I used a card leftover from a Studio Calico pack. It was just a plain card that said “Together”. I stamped the “Let’s Get” with versafine smokey gray ink and colored in the “Together” with some copic markers. There was a lot of empty space on the card so I decided to trim it and use some colorful scrap pieces of pebbles basics paper behind for a fun look. to finish it off I sewed around the edges of the card, Popped the title up with foam dots and added a little car paperclip.

Turn your leftover project life cards into greeting cards @thecraftypickle.com


For my final card I actually used two project life style cards. The gray background card was from a Pebbles pack and the white square was just cut from a grid journaling card from Me and My Big Ideas. I did not alter the bigger card at all as I already loved the scalloped border. On the grid card square I used a paper smooches stamp set called Squeaky Clean and stamped the vacuum and the sentiment “that sucks”. I did a little coloring with my copic markers and added some sequins and pen detailing. I attached it to the bigger card with a bit of Queen and Co. Washi Tape.

Turn your leftover project life cards into greeting cards @thecraftypickle.com


I hope you enjoyed my little card tip for this Monday, and maybe you too can use up any leftover cards you might have in your scrappy stash. Tomorrow I promise I will use my Project Life cards in my actual Project life album!

Until then,

Happy Crafting!

Cutting into Monday: A Silhouette card tutorial.

Happy Monday! Have your little ones started summer vacation yet? Today is our first “official” summer vacation day. With a bit more time on my hands (not playing taxi service and homework police for a few months) It is my goal to share more tutorials, fun projects, and some great giveaways on TheCraftyPickle. I hope you will join me on a summer scrappy adventure! We are going to have a great time! Don’t forget that my giveaway is going on though this week. Subscribe to my blog and leave a comment for a chance to win a great project life kit in an adorable box.

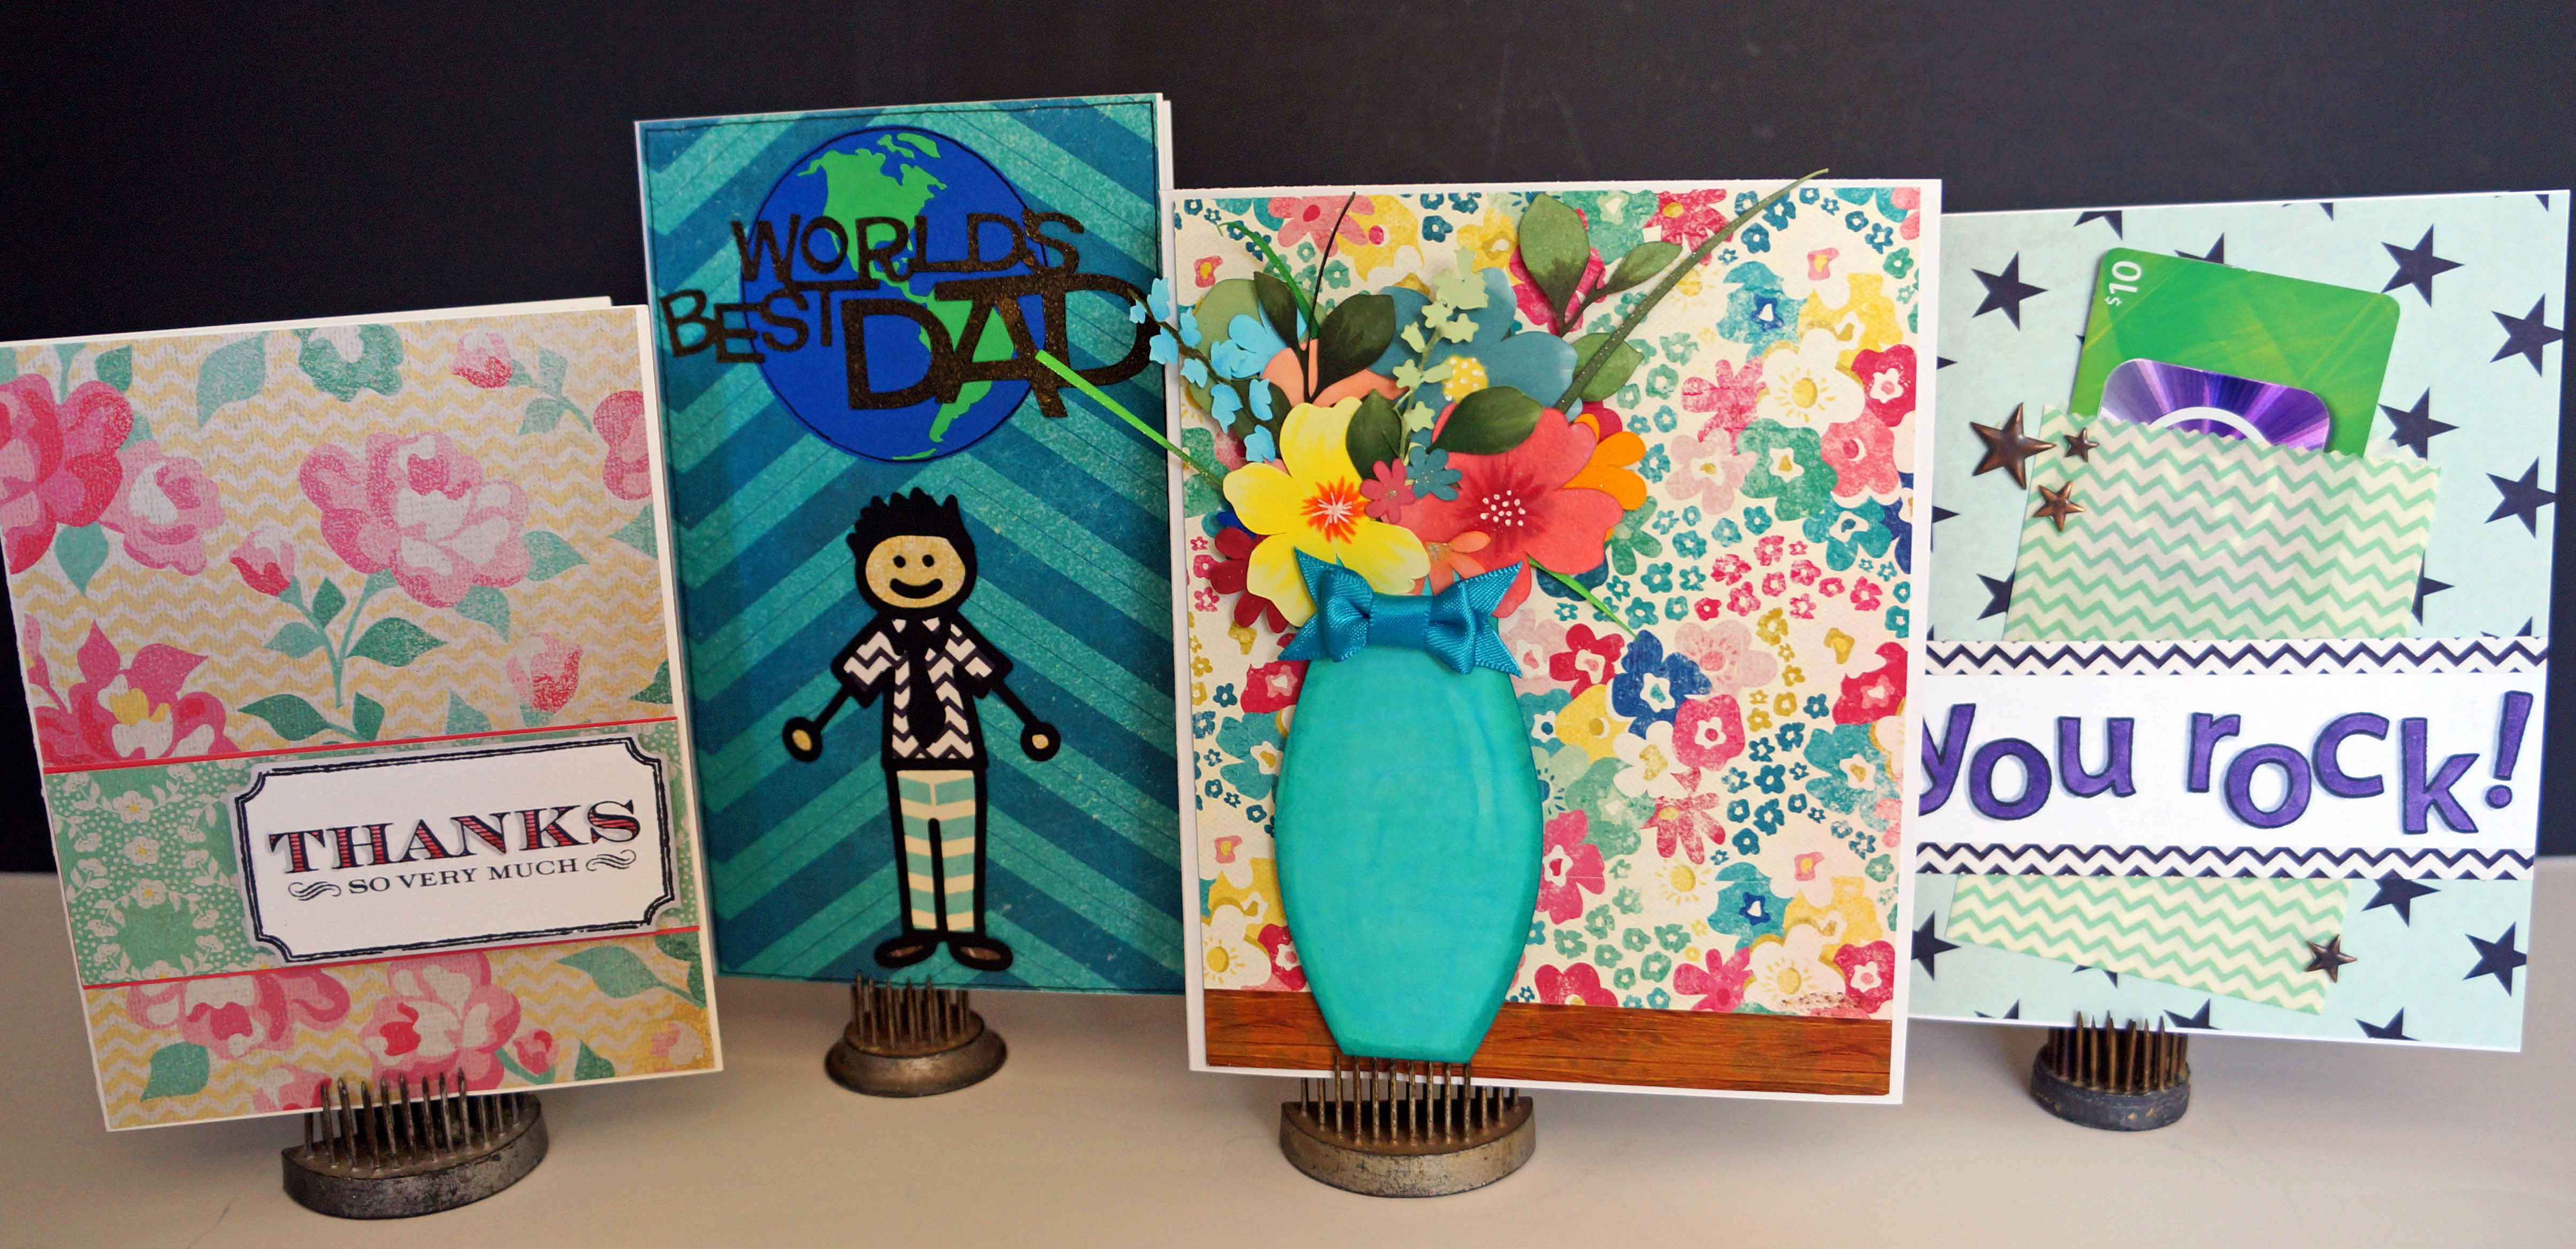
For today’s tutorial I thought it would be nice to start with a simple yet beautiful card project. This card is so versatile you can use to for nearly anything from birthday, sympathy, just because, or thank you as I did for my card example below.

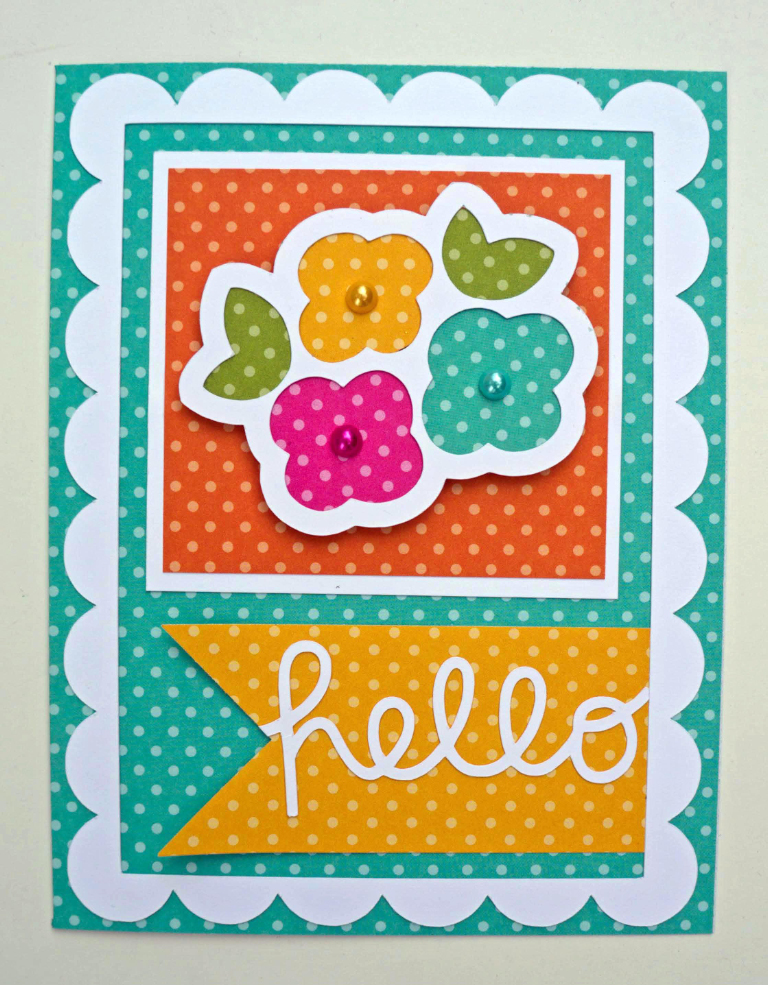
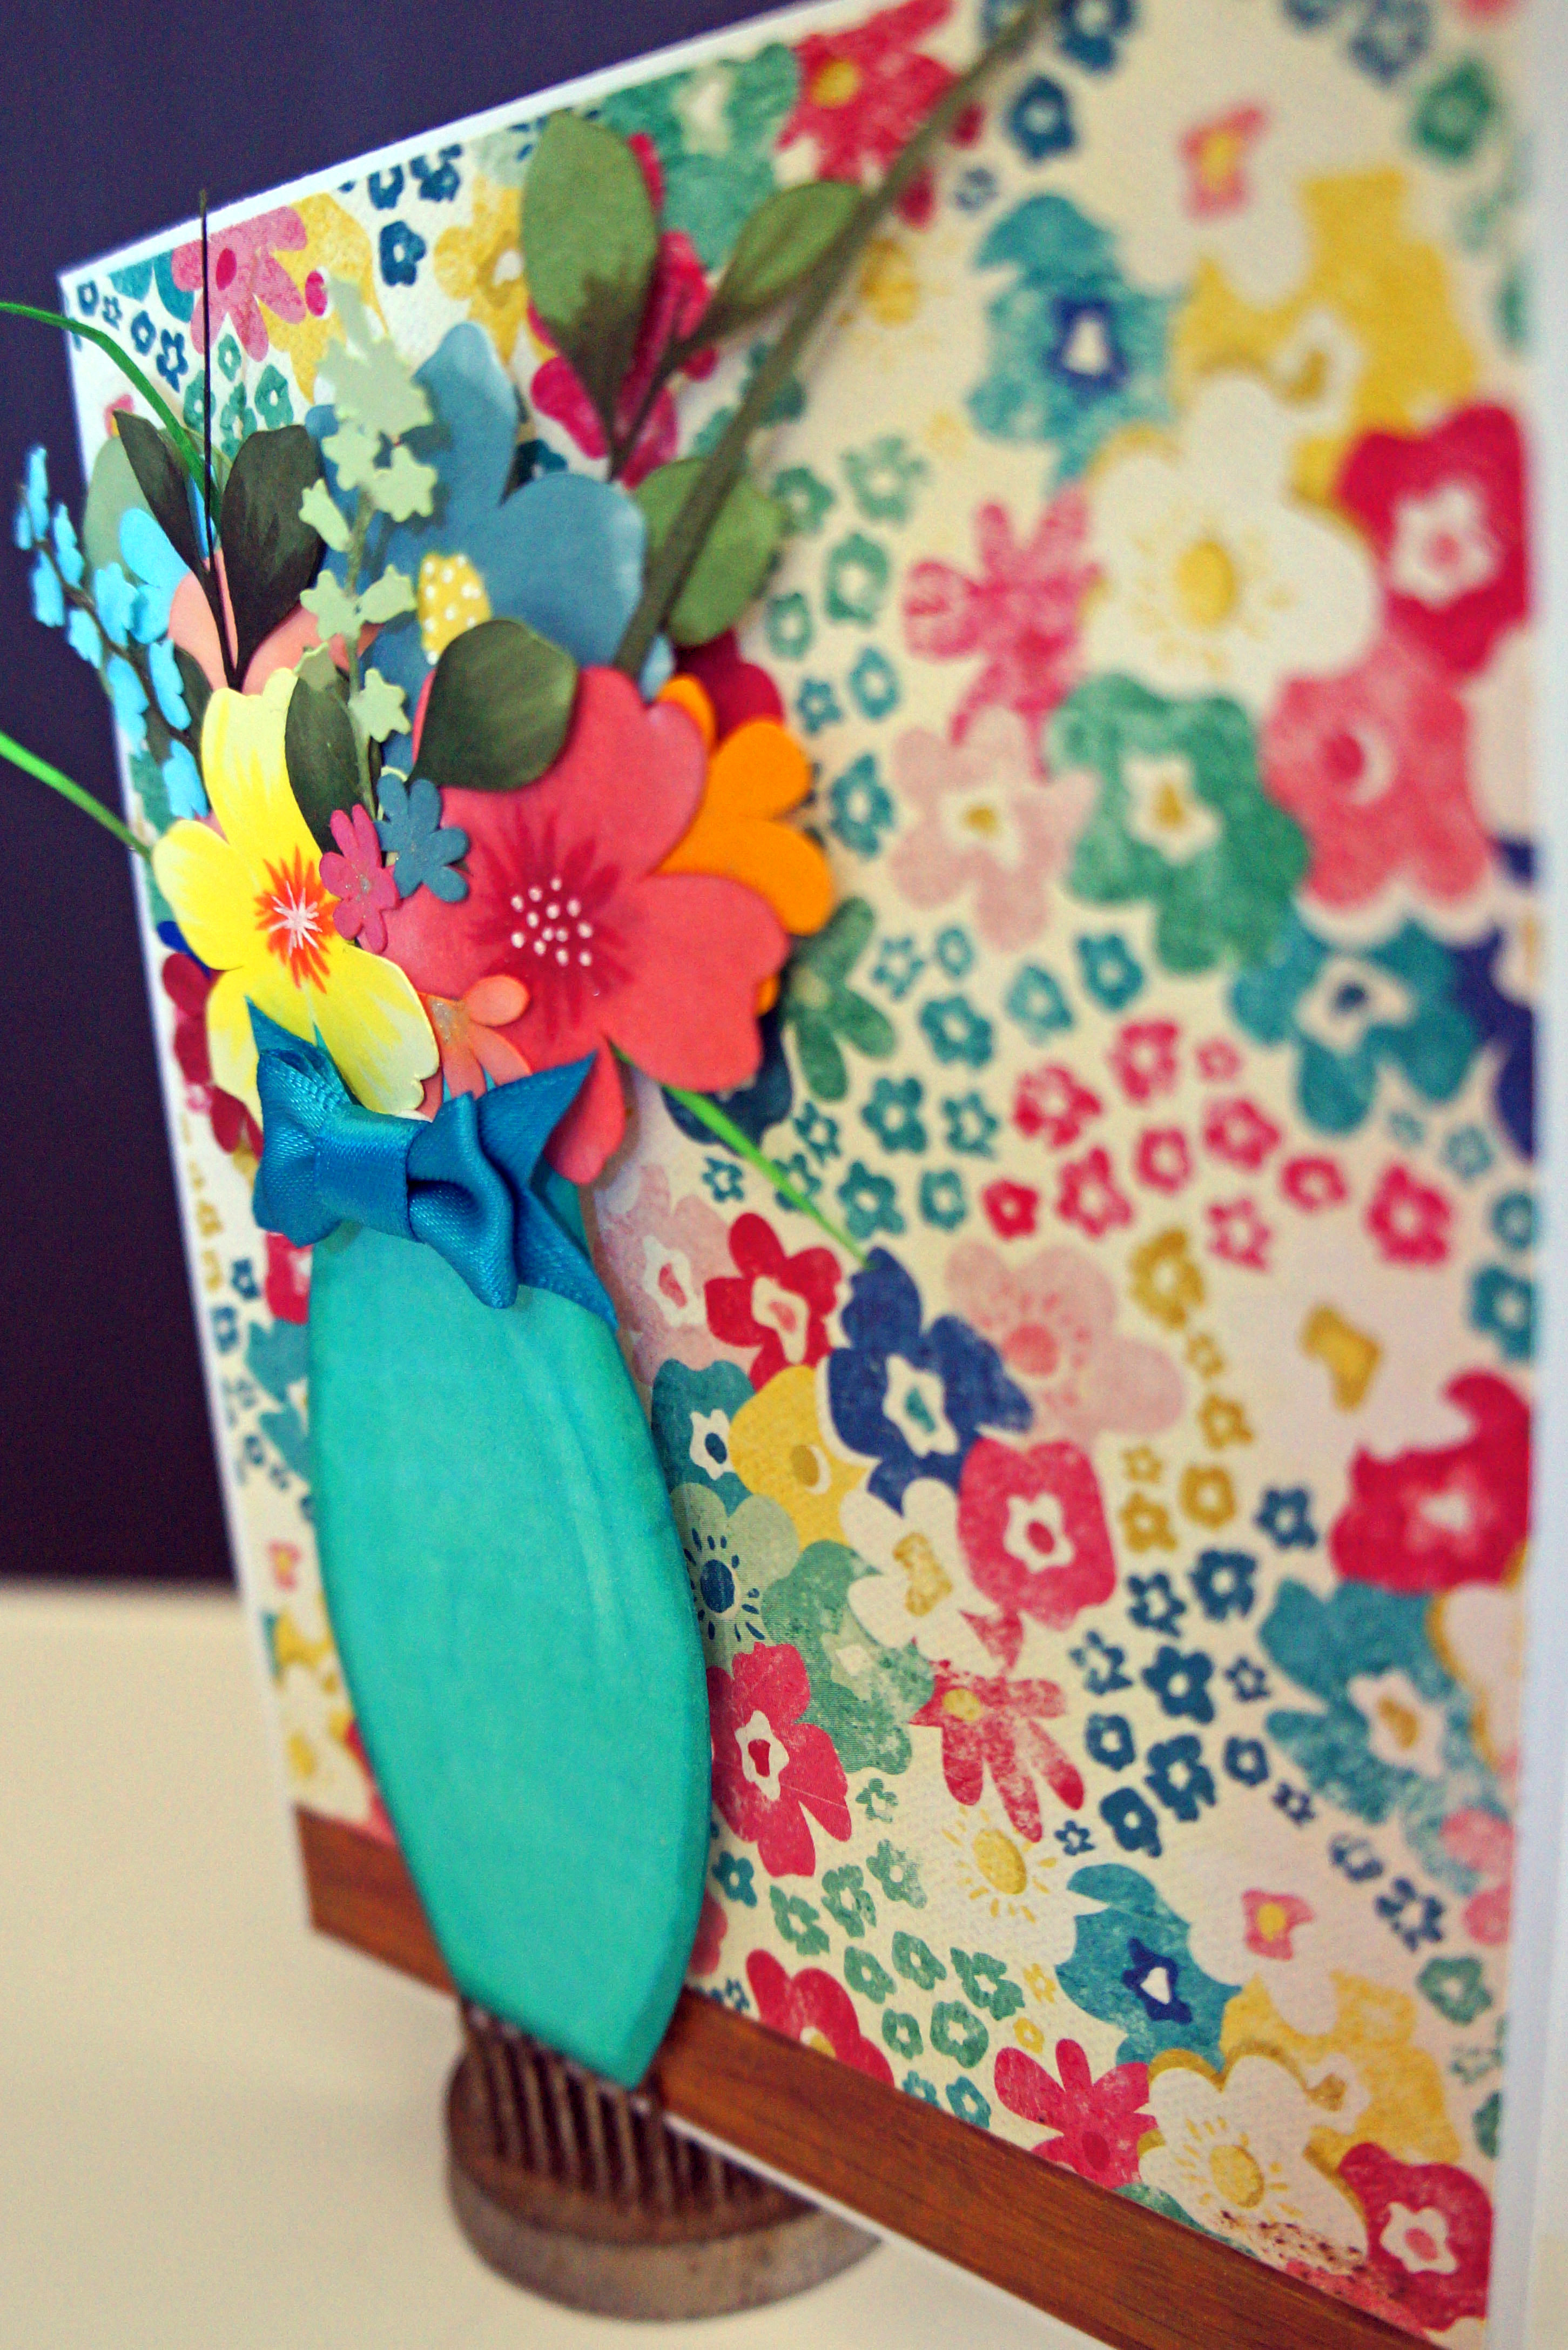
Here is what the finished card looks like.

Tutorial @thecraftypickle-1-7

Supplies needed: (links added if you need any of these supplies)

Your Silhouette (or you could substitute a paper punch in this case or other die cutting machine either electronic or manual) ***edited to include the flower cut file I used from the silhouette store (Design ID #1692) I took out the center circle piece***

Card base (white, cream, or any neutral color you prefer)

White cardstock (Neenah solar white is my favorite)

Adhesives, including mini glue dots, and pop dots

Sewing machine (optional)

Twine,ribbon,or string in a neutral color

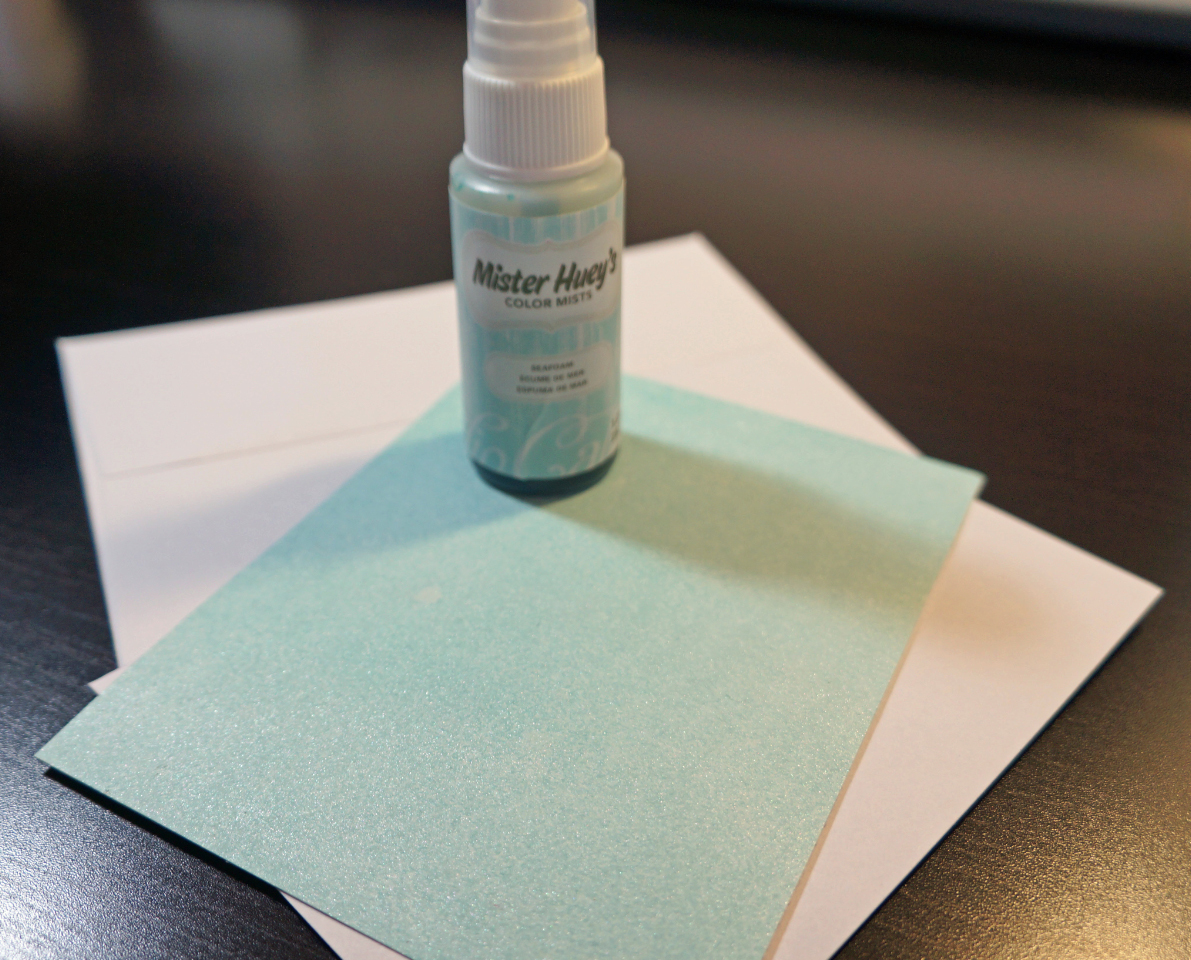
Ink Mist (I used Mister Huey’s in seafoam but any light blue, aqua, or prefered color shade works)

1/4 yard of May Arts leaf ribbon (BY-16 is the color I have)

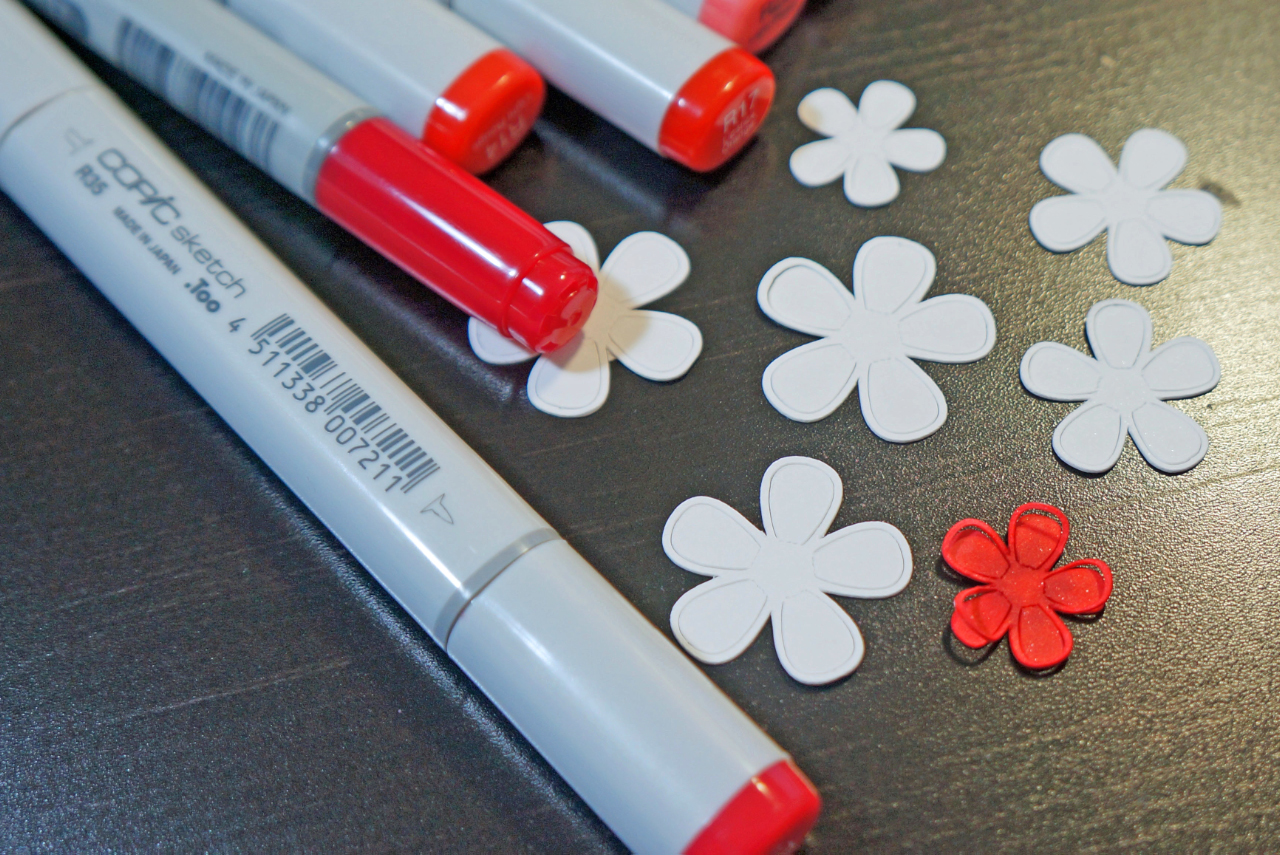
Alcohol based markers (Copic, Sharpie, Mark-it’s, etc) or watercolors if using white cardstock for your die cuts.

Glitter pen (optional)

Enamel dots, rhinestones, or something similar

Ephemera such as tickets, doilies, and paper items for layering

Small shipping tag

Stamp, sticker, or something that has your chosen sentiment. I used a tag sticker from My minds eye (caroline collection)

Ok to get started cut your card to 8 3/4 x 5 5/8 (score in the middle) and then cut your card base to 4 1/4 x 5 1/2. I chose to mist my cardstock and let dry before trimming my card base. It’s just a matter of preference. If you haven’t already mist your card base and let dry. Set your card aside until the end.

Tutorial @thecraftypickle-1

While your ink is drying go ahead and prep everything else. Cut out your flower of choice on your die cut machine. I took one flower that I liked and made a bunch of copies of that flower on my silhouette software workspace, I then resized them in three different sizes to add variation and interest. So go ahead and grab your markers, bring out your inner 10 year old and color away! I love coloring and having die cuts pre cut in white really speeds things up for me as I can make it any color I want. Be careful if you have chosen to use a water base marker as they can be streaky and can make your paper pill up. You could watercolor these as well for a soft beautiful look. I really wanted my flowers to pop and be the main focus so I chose shades of pink and red copic markers this time.

Once colored and dried (doesn’t take long) attach your enamel dot (or other bling if desired) in the center of each flower.

Tutorial @thecraftypickle 2-1

Next, take your length of the May Arts leaf ribbon trim and attach a glue dot or other dry adhesive of choice to the top leaf. and attach that to the top left corner of your card base. What I did from here was let the vine twist and turn in a natural fashion attaching a mini glue dot on every 3rd or 4th leaf. I did not want the leaves to all lay flat. Once finished trim off excess trim and make sure the ends are secure.

Tutorial @thecraftypickle 4-1

Tutorial @thecraftypickle 5-1

I chose to use pop dots on three of the flowers only. You can choose to have them all popped or not at all. I tucked them in back of, and in front of the vine and made one cluster of two (the large is with a pop dot, the smaller has a flat glue dot). Once that was finished I added in a few enamel dots along the vine and I took a glitter pen and added a little sparkle on the flowers. *** Taking a moment to tell you that the wink of stella glitter pens with the brush tip are AMAZING! I only have the clear right now but I plan on eventually investing in the rest someday***

Tutorial @thecraftypickle 7-1

Now that your vine is done dig in your stash of little bits of paper fun. Pull out things to layer that you love. Its a great time to see what kinds of scraps you have laying around. Cluster together in a way that looks good to you, tie your twine in a bow to your tag and add that in too. Fold over a doily on top, covering only half of your cluster and adjust if needed. Once you are happy with the look take the doily off and add adhesive to hold it together. I just added one small staple with my mini attacher. Go ahead then and attach your doily and sentiment on top. I took my doily and my sentiment and added a tiny bit of adhesive to just hold it in place. I took the card base to my sewing machine and just sewed the layers together. This step is completely optional.

Tutorial @thecraftypickle-1-1

Finally attach your card base to the card itself and admire your beautiful card and think of someone special you are going to send it to.

Here is another look at the finished card. I also stamped the envelope with a cute stamp set made with the envelope in mind. You can find that stamp set here.

Tutorial @thecraftypickle-1-6

How simple and fun was that? And the results are beautiful and look far more complicated than it really was. I hope you enjoyed this tutorial and if you decide to make a card of your own like the one shown, please link it in the comments, I would LOVE to see your work!

Happy Crafting!

Taniesa

Working with a monthly scrapbooking Kit: featuring ScrapbookCircle.com

Hi Friends!

This month I was fortunate enough to win a NSD contest for one of Scrapbook Circle’s May kits. I won on instagram with my friend, Toni, who is also sharing her ideas and inspiration using this amazing kit on her blog today. Please visit her at Lifescrapbookrepeat.blogspot.com. You have to see what wonderful things she has created!

Here is a photo of the beautiful kit that we won.

Scrapbookcircle.com

This kit had wonderful papers from Elle Studio, Maggie Holmes, Amy Tan, Fancy Pants, Lily Bee, and Basic Gray. It included some pretty adorable embellishments as well. Those bows designed by Maggie Holmes were one of my favorites and I love the Lily Bee labels for project life! Want one for yourself? There are still some available at Scrapbook Circle. Just click HERE. Hurry as supplies are limited! The company owner, Lisa, can also hook you up with a subscription if you wish. Check out even more inspiration and ideas on the Scrapbook Circle facebook page HERE.

When I sat down to work with this kit I tried to limit myself from using other things that I had on hand. the things that I did add were: 1 sheet of white sticker letters from Basic gray, some various washi tape, Gold Mister Huey’s spray, various pens, ink and markers, various clear stamps, some sequins, cardstock in a few different colors, and my silhouette cameo. This really helped me stay focused on the projects I wanted to complete and saved so much time. Normally it takes me more time “shopping” my stash for the supplies I think I will use than actually doing the project. My goal with this kit? To complete one layout, one project life spread, and one card. And so, I started out on my mission on a peaceful mothers day weekend!

My first project was some snapshots I had of my daughters first ballet class. I knew when I saw the TuTu trim in the kit that these photos would work perfectly. The layout came together surprisingly quick! The background paper was not pink at all, it had a slight mint distressing around the edge. I took some distress ink in a rose shade to make it fit just a little better. I used glue strips to adhere and pleat the tutu trim and I altered the gray sticker letters slightly by outlining them and then using a glitter pen to give some sparkle. The journaling is inside the cute little bag.

Taegan's First Ballet Class-1

For my second project I tackled my week 17 photos for my project life album. The colors in the photos matched pretty well with the colors in the kit. For my title card I used the 12×12 sheet of paper included from Elle Studio. The top left corner had the layering look that I thought was ideal for a title card. I took a pencil and my old school lettering templates and lightly traced the letters for week. I then erased the lines so that I could barely see them and took my black journal pens in three different sizes and started dotting everything outside the letter. I spread the dots more and more as I moved away from the letter. The “seventeen” was white sticker letters from basic gray that I colored with a copic marker.

TItle card week 17 thecraftypickle.com

All of the larger letter stickers are the gray ones that were included in the kit, and the small letter stickers were the white that I added in. I altered the color as I needed to with my copics or another alcohol based marker. The tab stickers were perfect for little bits of journaling here and there. Proof that one can complete a project life layout with normal sized scrapbooking supplies.

week 17-1weel 17 left TheCraftyPickle.comweek 17 right side TheCraftyPickle.com

Now remember when I said I wanted to complete one card as well as the layout and project life spread? I thought that I would be making a card with the last little bits of the kit but it turned out that I had so much more to work with still. I created 4 cards! I am not much of a card maker so this was big for me. All cards that I made I put on white cardstock card bases.

Card assortment TheCraftyPickle.com

My first card is simple and sweet. A nice little thank you using three pieces of the paper included in the kit. I colored in my stamped image with a copic and then cut it out of the white cardstock. I attached it using pop dots to give it a bit of dimension.

Thank you card-TheCraftyPickle.com

My second card is father’s day inspired!I loved the green & blue print of the background and thought it fit a more masculine card. I used my silhouette for the title, the world, and the dad image outline. Notice his clothing? Yep, all little scrap pieces of paper that were in the kit and nothing else. was like coloring with paper and the end result is a fun whimsical card for Dad.

Best Dad Card-TheCraftyPickle.com

My third card was inspired by the floral paper, the pattern almost made me think of wallpaper. I popped some woodgrain washi on the bottom to mimic a table and cut out a vase and some flowers (all out of white cardstock) with my silhouette. I then went in with copic markers in complimentary colors as the background and colored in the different elements then I built my paper floral arrangement to the back of the vase die cut. The bow embellishment was the perfect touch and I added pop dots to the back of the flowers and vase. This card would be great for a birthday, thank you, mothers day, get well, or a “just because” card.

Floral side view-TheCraftyPickle.comFloral arangement card-TheCraftyPickle.com

By my 4th card I was starting to have less to play with so keeping things simple I made this card with a scrap of the star print paper and one of the little paper bags I had still. I stamped “You Rock” on white cardstock and colored in with a purple copic. I shaded using a gray copic and then bordered the white with some of the black zig zag patterned paper I still had. Added a few of those adorable little metal stars to tie in the star theme and popped in a iTunes gift card. This would make a good birthday, graduation, or other gift type of card.

you rock gift card-TheCraftyPickle.com

You know what else? I STILL had more supplies left. I cut all remaining paper down to 3×4 and or 4×6 to use in future project life layouts. I also integrated the few embellishments I had left over in their proper spot in my scrapbook room. Mission complete!

This is the first kit that I have used start to finish and I have to say that it was simple, fun and has changed how I will continue to scrapbook. Kits are a fabulous way to go if you get overwhelmed by all sorts of supplies like me. Joining a monthly kit club like Scrapbook Circle is a great way to keep up on the latest trends, However if that is not in your budget right now, consider putting together some kits of your own from supplies you already have on hand. How do you begin to put together your own kit? Check out this video by Glitter Girl on 2peas in a bucket. This has to be one of my most favorite videos she has done. She even has a PDF to assist you further. I have already began to assemble some of my older supplies into my own kits.You can also look at past kits that appeal to you of various kit clubs and try to copy them as close as you can. If you are a paper crafter on the go, this is perfect for when you are packing up for crop night!

I hope you enjoyed my start to finish with this kit. Don’t forget to stop by Toni’s blog HERE to see more ways you can use this kit. Here is a little sneak peek of what you will see 😉

image1 (3)

Toni's layout 1