
Yes. I do know we are in week 21, I am a bit behind but you know what, I am completely ok with this. I even planned to show you my entire week 18, however life happens and summer vacation started. I decided to spend the day making a fun summer bucket list with my 6-year-old instead.
Last night after everyone was in bed and the house was quiet I was able to play a little and finished most of my week 18, including this title card that was SO much fun to make.
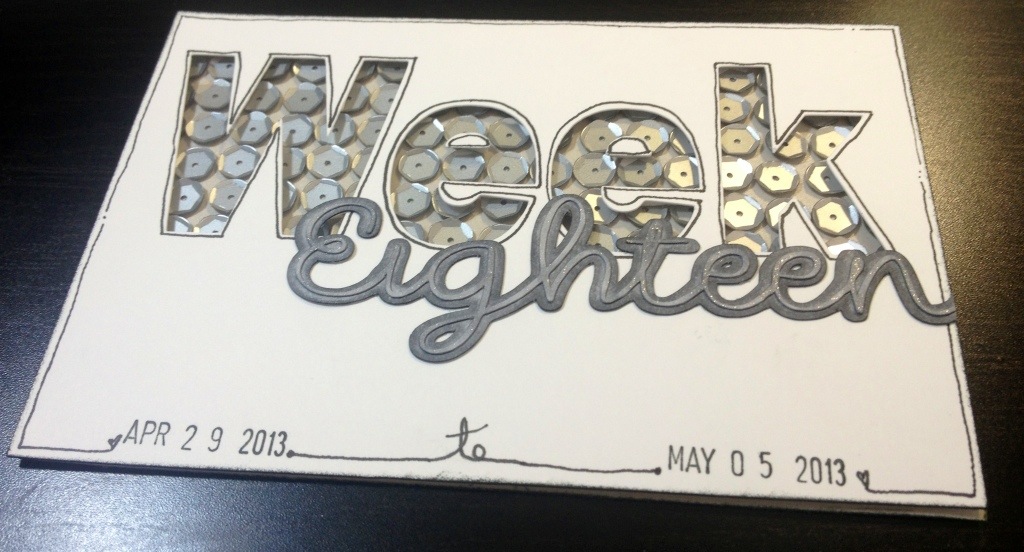
I was inspired by a layout I had seen using different colored sequins behind a word, and thought it would make the perfect project life title card. (I had forgotten where I saw it, instagram I think? If someone knows please do let me know so I can give proper credit to the inspiring scrapbooker.)

At first I started gluing each sequins down one by one with some liquid adhesive. after one row of that though I had dried glue on my fingers and the row didn’t end up as straight as I would have liked. So I thought about just putting down glue dots but that seemed time-consuming too. Then I had a fabulous idea. I ran my 4×6 card though my Xyron machine! I turned the adhesive side up and started sticking the sequins down. I was finished in about 10 minutes, now THAT was far more doable than how I started out. After I glued my sequins I cut another 4×6 card with WEEK cut out in the card. I also cut out eighteen from the same white cardstock. I used the card with the week negative space to layer on top with some pop dots. I colored the word eighteen in with some gray copic markers and added some shine with my glitter pen to the top layer. I finished everything off with some outlining and date stamping. I am pretty pleased with how it came out.
So not a full Project Life Tuesday from me today. I will have the full spread to show soon. For now I am linking up with TheMomCreative.com who has a TON of ideas and links to other talented project lifers. I hope you will enjoy what you see over there as much as I have.
Happy Crafting!

LOVE your title card! Who doesn’t love sparkles;) Did you use your Silhoutte to cut out week and eighteen? I’m going to have to play with my cricut and see if I can do this. Thanks for sharing!!
Thanks Wendy! I used the silhouette but you really could use any type of die cutting (electronic or manual) If you do one please link me up to a photo, I would love to see!
Really great idea! I just got a Cameo, I might have to try to make something like this.
Love this Taniesa and fabulous idea of running through the xyron.
Oh my goodness! That might be the best title card I’ve ever seen. It is so pretty and unique. Thanks for sharing the process. I think I might have to look into getting a Xyron machine…this concept has so many possibilities.
beautiful!! I aodre sequins, too 😉 what a fun way to use them~~
I had a question about the 18…did you cut a bold and a skinny? Or is all that dimension come from the copic coloring? LOVE IT! Great tip on adhering the sequins too! Thanks for sharing,
-Brooke
Hi Brook! It is actually two die cuts on the “eighteen”. What I did was welded the letters to make it one die cut, Then I went to the offset menu (icon is in the top right and looks like a box within a box next to the modify button) I highlighted the shape and clicked offset. You can adjust the offset to be as thick as you like. After that I separated the two pieces so I would have two die cuts. I shaded both of them differently with the copics for even more dimension. I hope I did a good job explaining this but if you need any more help just let me know!