What If I told you that you never had to buy colored letter stickers again? You would think I was crazy and continue to load up on a rainbow of colors, right? Well, while I was scrapbooking this weekend I realized that the only sticker letters I really ever needed to buy was white and black, and even black is optional.
I was looking for small orange letter stickers for a project life card title, and I was really frustrated when I couldn’t find any that was the right kinda orange. Then it dawned on me… why couldn’t I take white sticker letters and color them with my markers? So I gave it a whirl and it turned out perfect! For the letters below I used Jillibean soup: Alphabeans, I have also used the Basic Gray: micro letters on another layout and they turned out the same.

I used an orange and a yellow copic marker. I didn’t want them to be a flat orange but kinda blended looking. I also wanted one word darker than the other. I just colored right on the sticker sheet, easy peasy!
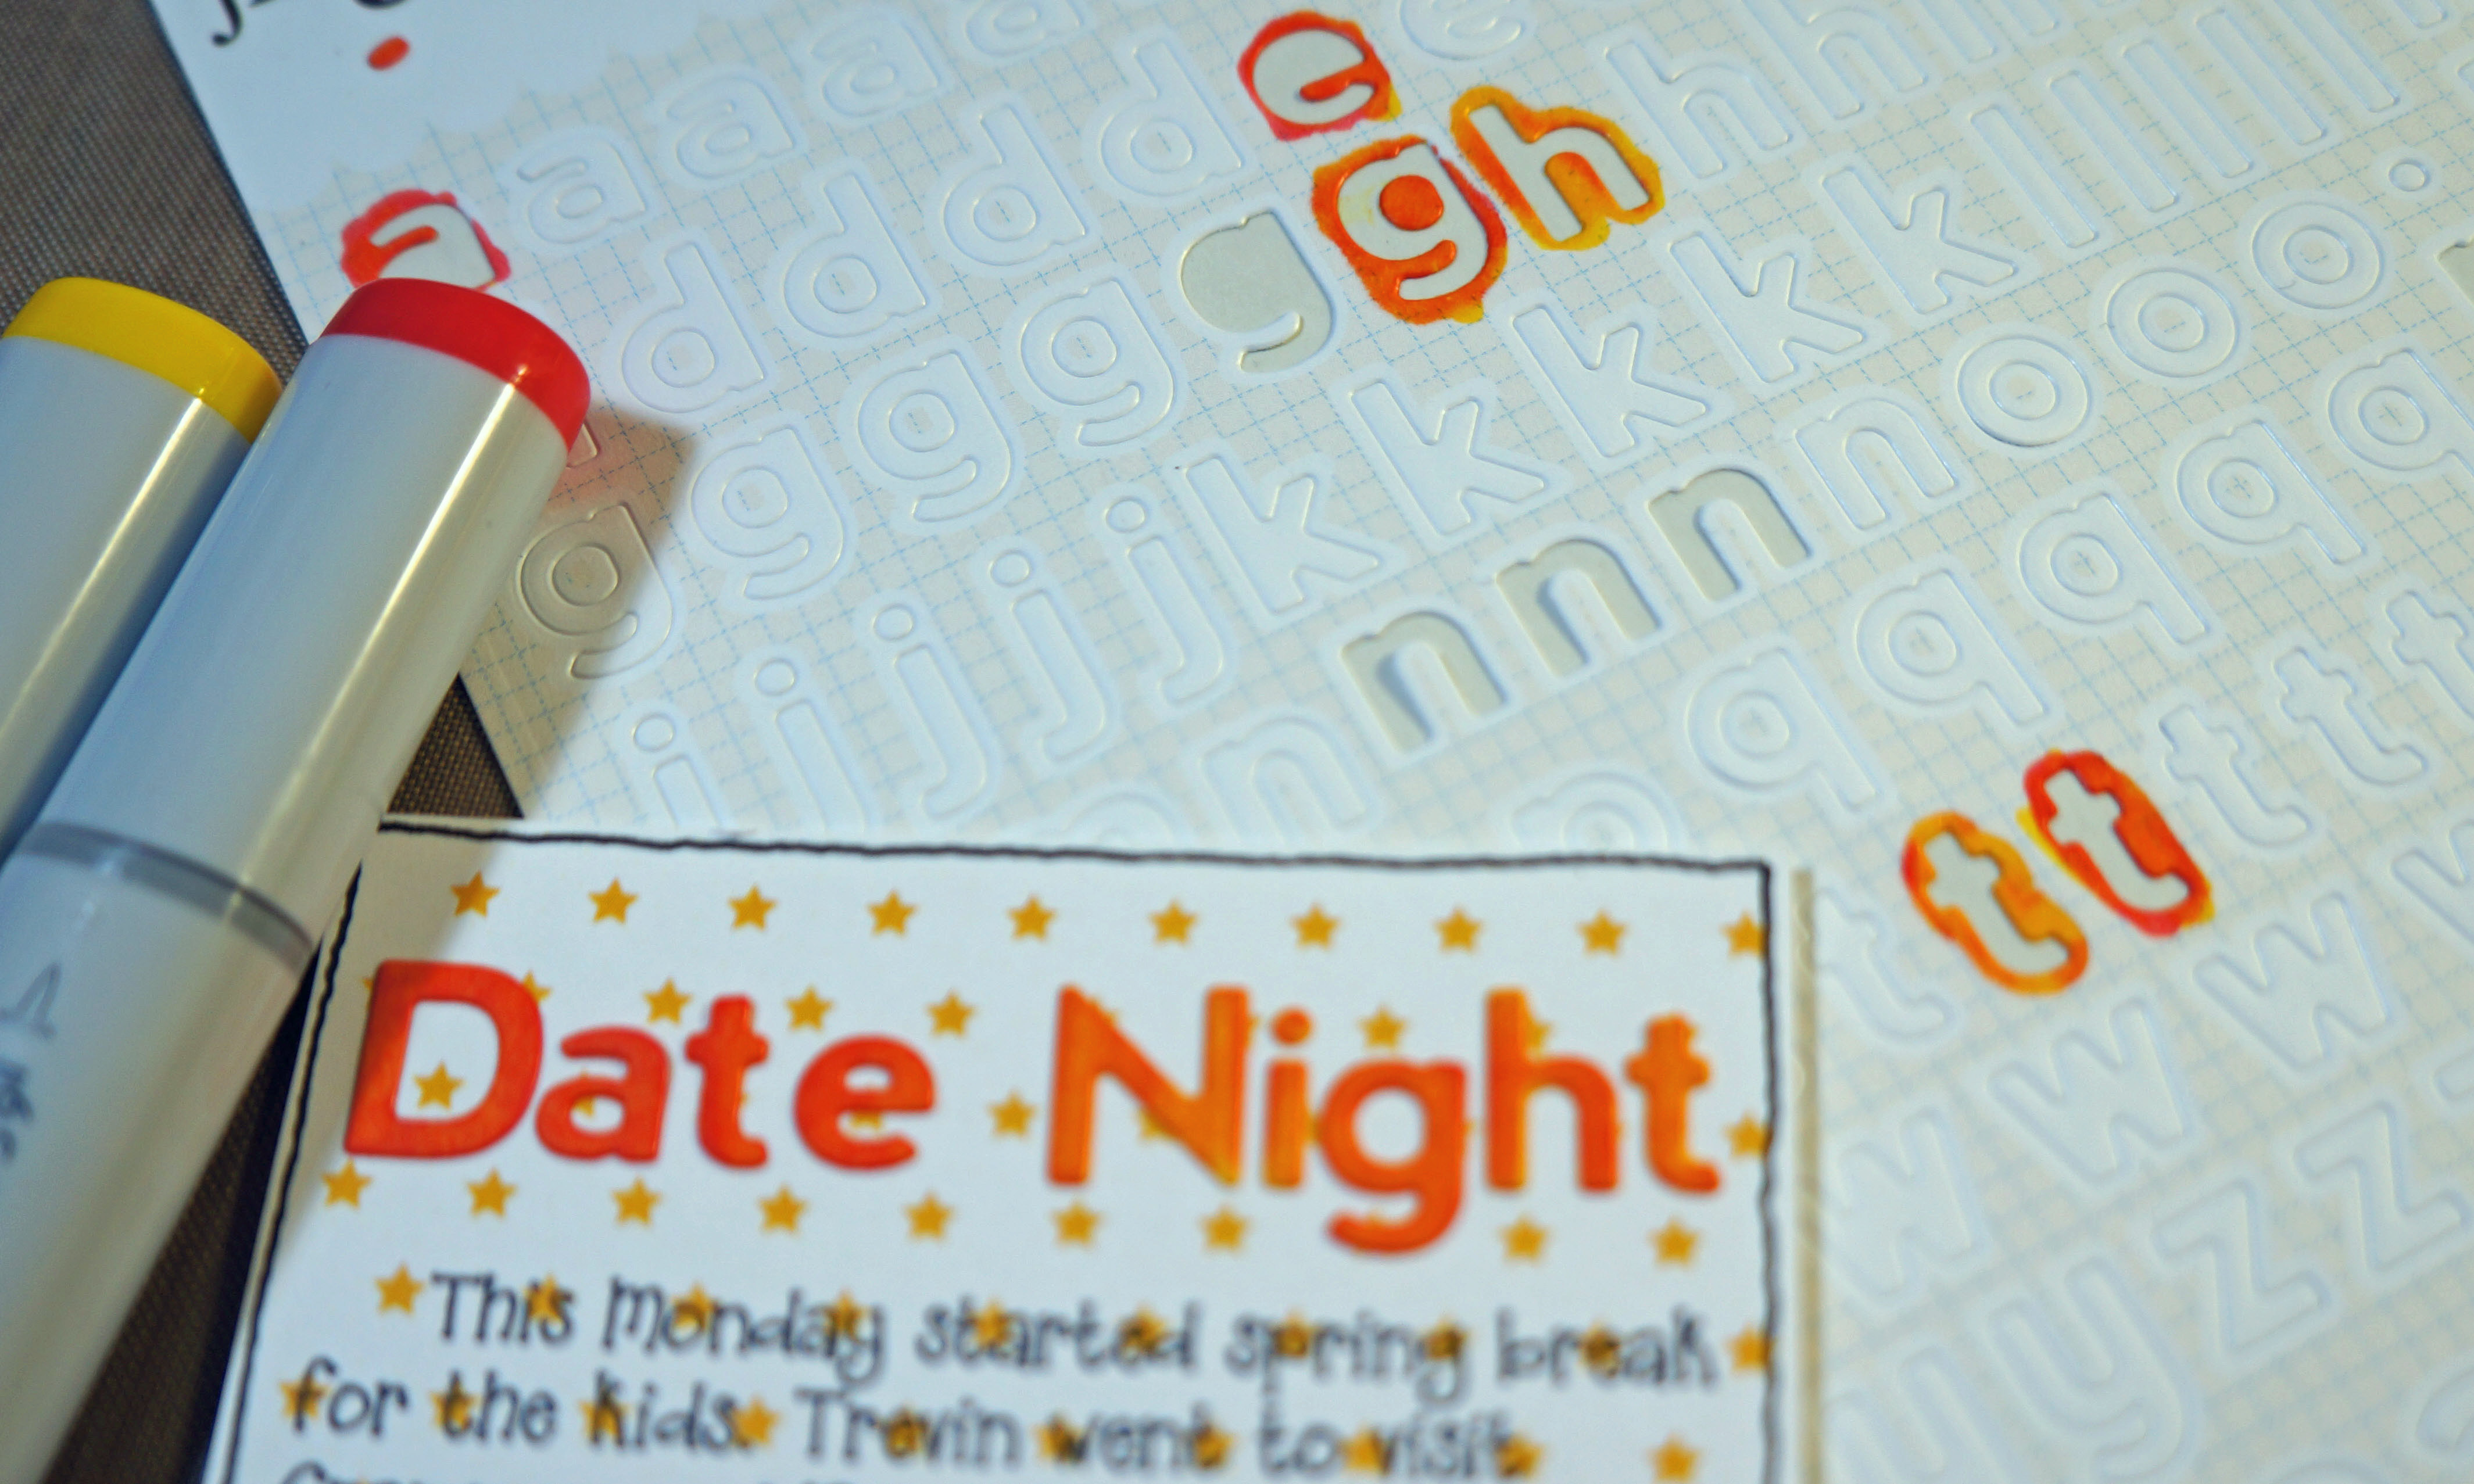
I loved how they turned out only I thought it needed just a little more pop for this particular journal card, so I took a thin black pen and outlined the letters so they would be just a little more defined and stand out from the card. (see photo below)

Now, you don’t have to use Copic markers for this. I am positive you can use your water based markers although they might not blend as well. If you do not own any copics or do not want to invest in copics what I would recommend is buying THIS bic permanent marker set. The colors are lovely and with the alcohol base it won’t leave streaks. You could even blend a ombre look to your letters by layering the same color or different colors if you wanted. The Bic markers come in 8, 12, 24 and 36 pens per set. You can also use sharpies, CTMH alcohol based markers, promarkers, etc… the bonus is you will have markers on hand to use for other projects. You won’t have to worry if you have the right color letters to match your layout. Just buy a bunch of white letter stickers in the font you love. Or mix up fonts and make them all the same color.
*Edited to include a sample of different markers*

Giveaway Time!!!!

I haven’t had a giveaway in a while and I would love to put these fun markers into the hands of some lucky papercrafter. Here is what you need to do to win.
1. Become a follower of this blog if you aren’t already (little gray button on the lower right hand side)
2. Leave a comment with your name and location. If you have any tips on how you stretch your crafting supplies I would love to hear that too.
3. Stop back by this Saturday May 11th when I will post the winner.
Good Luck and Happy Crafting!