Make-A-Card Monday!

Mondays are usually my least favorite day of the week. Nothing brightens someone’s day more than happy mail, especially on a Monday! So today I whipped up a few adorable cards that can be adapted to whatever sentiment you desire. they are simple, quick, and guaranteed to bring a smile to the recipient’s face. My challenge to you today is to make a card, simple or more elaborate, and send it to a special someone by good ol’ snail mail! Please feel free to post a link to your card project in the comments if you would like. I would love to see your card-creations!

My first card is a simple “Hello”:

Make a card Monday @thecraftypickle.com

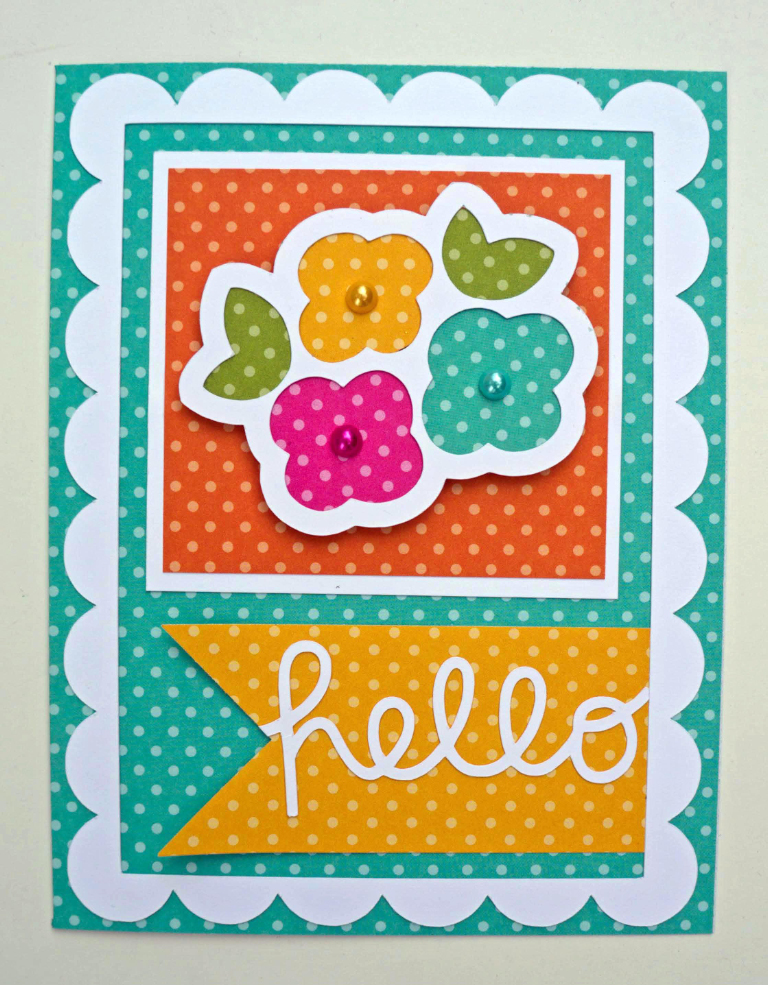
This card was made using the Pebbles Basics papers and some Pebbles / American Craft’s die cut shapes from the silhouette store. It came together super quick and I love the bright cheery colors. The Pebbles Basics really is a fabulous basic set every cardmaker, scrapbooker, project lifer, and papercrafter should have.

Here are the cut design ID numbers for the Silhouette Shop:

Design ID #20725

Design ID #19946

Design ID #42918

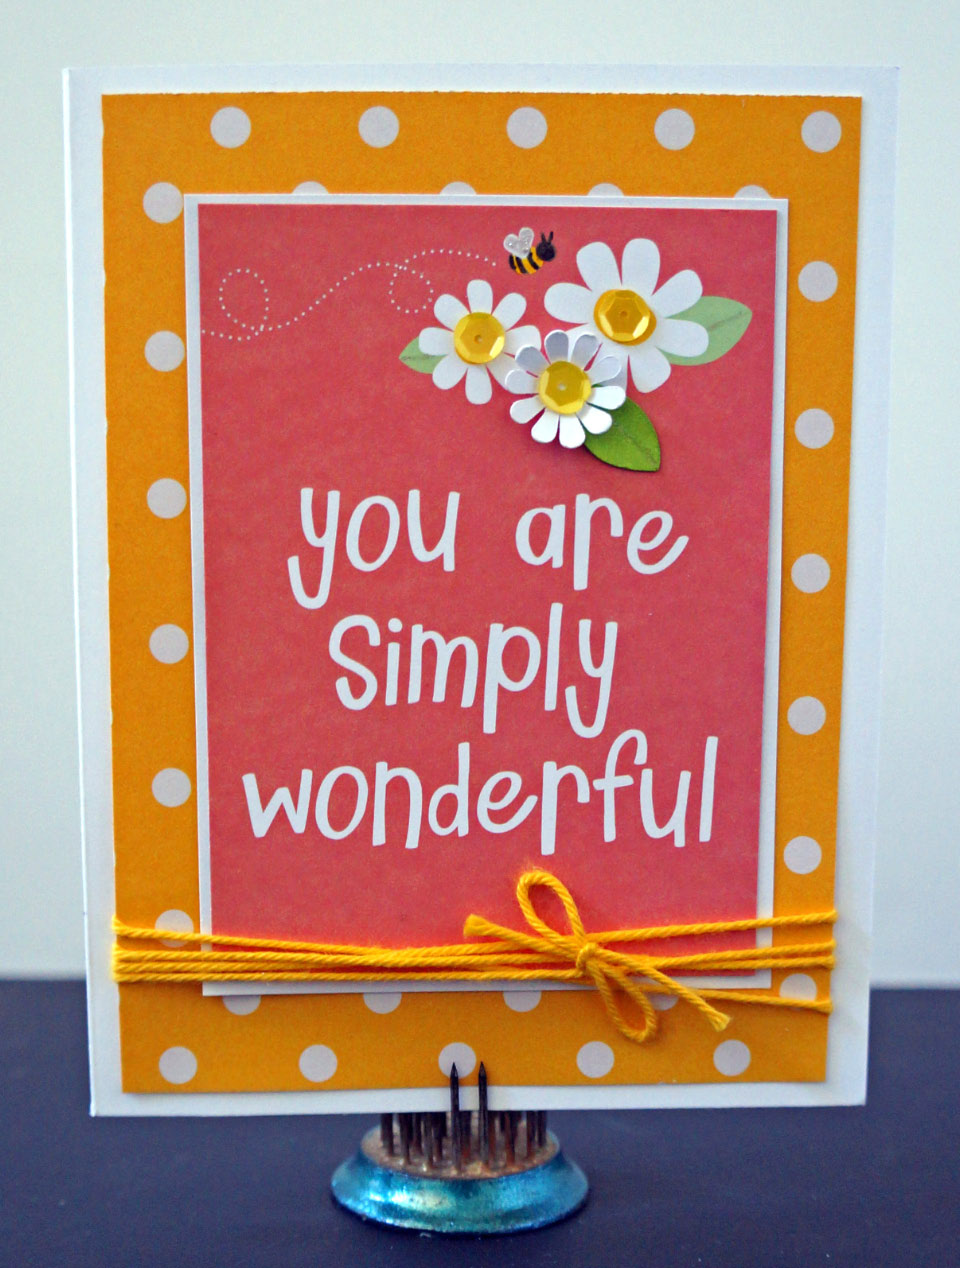
My next card was inspired by the new Pier slide frames. I adore them and thought they made the perfect frame for a shaker card!

Make-a-card Monday @thecraftypickle.com

The paper and the frame are from Crate Paper’s The Pier line and the floral die cut is from Crate Paper’s DIY shop. I added a touch of glitter to the yellow portion of the die cut and the stamp “celebrate” is from Technique Tuesday: AE studio. I added a bit of bakers twine and called it done. This is perfect for any type of celebration. You could even replace the flower die cut for a cupcake or birthday cake if you wanted a more birthday-like card.

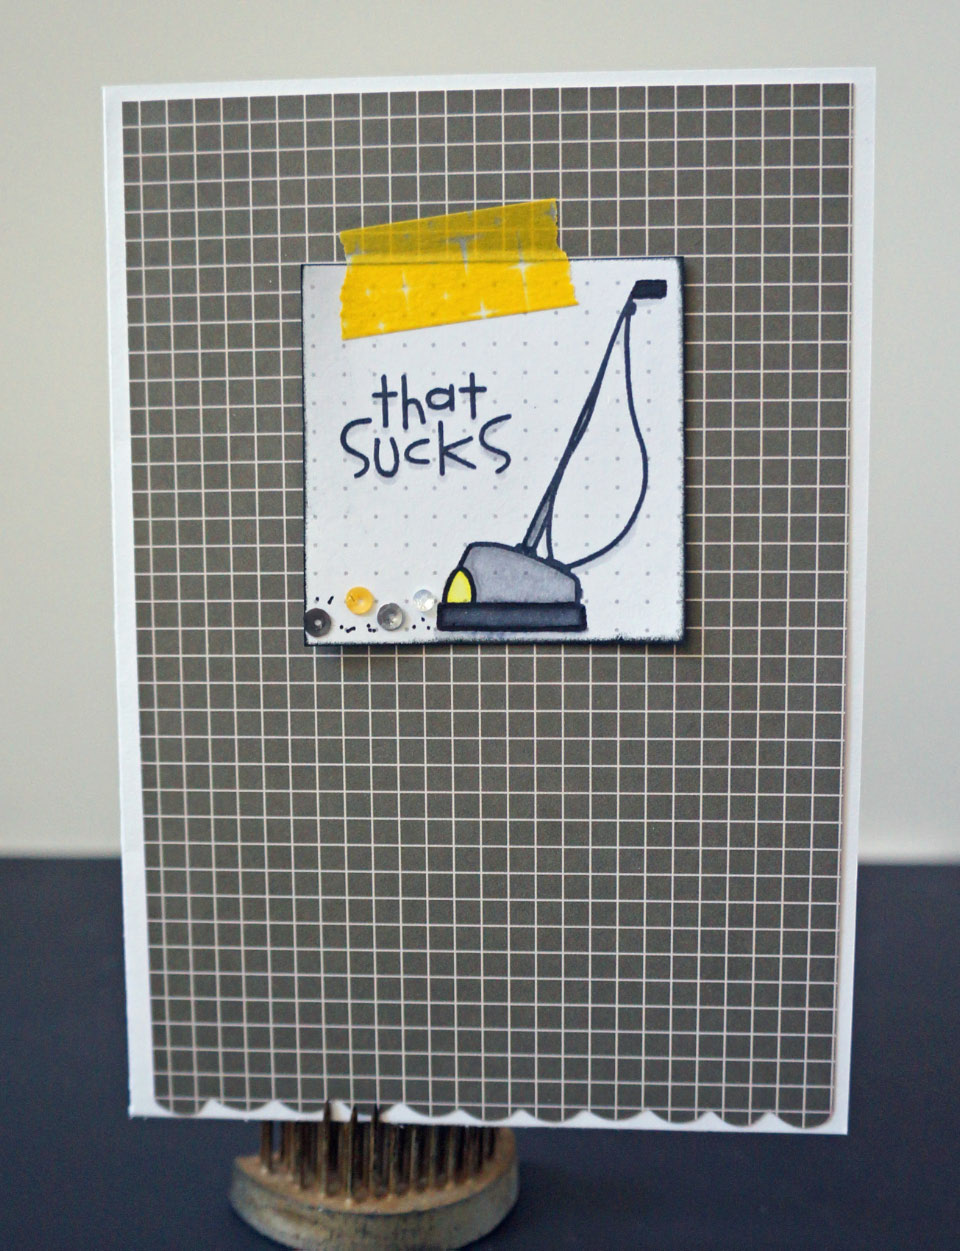
Finally for you today, I have a super simple, super quick gift card that is perfect size for a Starbucks, iTunes, or other gift card to tuck inside:

Make-a-card Monday @thecraftypickle.com

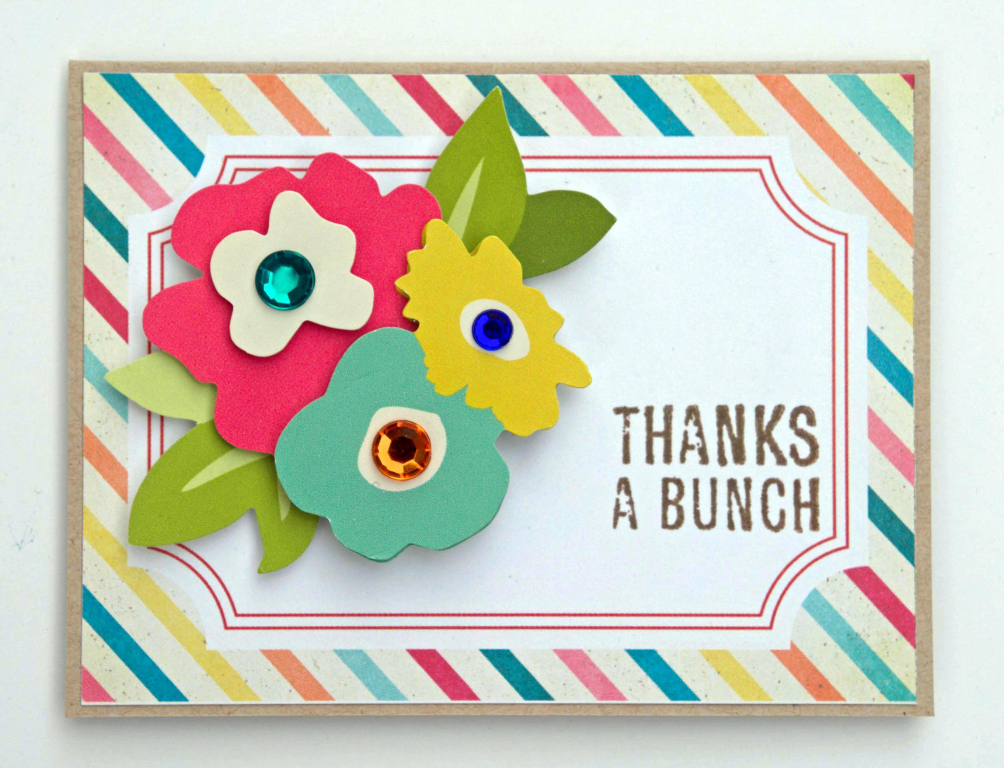
The frame was a project life style card cut from a 12×12 sheet from Crate Paper’s The Pier collection. I added a dimensional die cut from American crafts Pretty Party stand outs and simply stamped a “Thanks A Bunch” sentiment from Dear Lizzie that fit perfectly with this card.

Don’t be afraid to mix and match collections, especially from the same manufacture. The colors generally match perfectly and it gives you a chance to really stretch your supplies.

I hope you feel inspired to create a few cards of your own. Spread some smiles with some handmade card love!

Happy Crafting!

I have some pretty exciting news to share!

It’s been a quiet week on my blog but not around my house, we have been busy busy busy! But I do have a very exciting announcement I wanted to share with you all!

http://www.die-namitesblog.com/

I have been asked to join 5 other amazingly talented ladies on the Die-Namites Design Team! I am thrilled and honored to be apart of the team and hope you will help me in congratulating the other ladies that will be wowing you with their talent over the next 6 months. Take a hop to each of their blogs to see some beautiful projects, they really are quite talented!

Taniesa Vlasak – California *USA*  (you are here)

Peggie Lee Baker – New Hampshire *USA*

Susie Moore – Texas *USA*

Lynne Forsythe – New Hampshire *USA*

Lisa Tottle – *Canada*

Dunja Ducker *Germany*

Thank you for sharing in my excitement! I can’t wait to share some very fun DIE-NAMITE projects with you all! You can also visit the Die-Namites Blog HERE.
Happy Crafting!

Project Life: Week Nineteen, including bad days in your album.

Hi Project Lifers!

This week I bring you a pretty challenging layout for me. Not so much of how to embellish or what photos to include but for the first time I had to decide if I was going to include a bad/sad day that happened this week. I debated for a while… which is why I didn’t up posting yesterday like planned. More about that later. First, This is what the entire spread for week 19 looks like:

Project life week 19 @thecraftypickle.com

I knew I wanted my title card to be fun, it’s the one thing that I think I embellish most on my Project Life spreads. I remember back in the early days of scrapping , shaker boxes were really popular. So I thought, hey why not make a shaker card title for my week 19! That is exactly what I did. With the help of my silhouette I created this fun shaker title card filled with glitter, sequins, and buttons.

Project life week 19 @thecraftypickle.com

Here is a close up of the left side with the title card in the page protector.

Project life week 19 @thecraftypickle.com

If you are a iPhone user you might have had the chance to play with the new app “A Beautiful Mess” I love this app and its so fun to add a little bit of whimsy and journaling on your photos.

Project life week 19 @thecraftypickle.com

Here is a close up of the right side.

Project life week 19 @thecraftypickle.com

A couple of things about this side of the layout. First on the top left card that says OPEN House I used a stamp from studio calico that said OPENME. I took a piece of washi tape and covered the “me” before inking it up. It was a nice way to get more use out of this stamp and not have to cut apart my stamps.

Second, for the book fair card I used a page from an old dictionary on top of a white plain project life card. Sometimes the most effective embellishments can be very simple.

And lastly, the hardest part of my layout was the extremely sad day that I had this week. I decided that if I only document our lives in the wonderful everyday moments then I am not being completely truthful and authentic. Everyone has bad days and this was one of mine. I did however hide the journaling which is written on the back of the “A mommy sad day” card. I loved that this particular card from my studio calico monthly kit had journal lines on the back. So the journaling is there for me to reflect but not out there so whoever flips though our family album can read what is very personal to me. I included one of the filter transparencies over the sad selfie photo.

Project life week 19 @thecraftypickle.com

I hope you enjoyed my view of week 19. I promise next week is far more happy!

Project Life Tuesdays @TheMomCreative.com

Make sure you check out TheMomCreative.com for even more Project Life inspiration. There are some fabulously talented ladies that link up to the equally talented Jessica Turner.

Happy Crafting!

Turn your leftover project life cards into greeting cards!

Hi Everyone

Today I thought I would share a few greeting cards I made using leftover journal/filler project life style cards. I made these three cards in less than an hour! They were so simple to make and far more personal than store-bought. The added bonus was being able to use up some cards and supplies I had on hand. There are so many pocket filler cards out there both in 3×4 and 4×6. I gathered up some cards that I wasn’t using to see what I could create. The assortment I grabbed was from different companies. Pebbles, Becky Higgins, Me and My Big Ideas, and the Studio Calico monthly project life kit.

Turn your leftover project life cards into greeting cards @thecraftypickle.com


The first one that I made was this adorable “you are simply wonderful” card from Pebbles. It’s almost that this little filler card was made for a delightful greeting to brighten someones day! I added very little to this card. some background paper, a die cut flower that matched the flowers printed on the card, a few sequins, some yellow string, and some detail on the bee with my glitter pen.

Turn your leftover project life cards into greeting cards @thecraftypickle.com


The second card that I made, I used a card leftover from a Studio Calico pack. It was just a plain card that said “Together”. I stamped the “Let’s Get” with versafine smokey gray ink and colored in the “Together” with some copic markers. There was a lot of empty space on the card so I decided to trim it and use some colorful scrap pieces of pebbles basics paper behind for a fun look. to finish it off I sewed around the edges of the card, Popped the title up with foam dots and added a little car paperclip.

Turn your leftover project life cards into greeting cards @thecraftypickle.com


For my final card I actually used two project life style cards. The gray background card was from a Pebbles pack and the white square was just cut from a grid journaling card from Me and My Big Ideas. I did not alter the bigger card at all as I already loved the scalloped border. On the grid card square I used a paper smooches stamp set called Squeaky Clean and stamped the vacuum and the sentiment “that sucks”. I did a little coloring with my copic markers and added some sequins and pen detailing. I attached it to the bigger card with a bit of Queen and Co. Washi Tape.

Turn your leftover project life cards into greeting cards @thecraftypickle.com


I hope you enjoyed my little card tip for this Monday, and maybe you too can use up any leftover cards you might have in your scrappy stash. Tomorrow I promise I will use my Project Life cards in my actual Project life album!

Until then,

Happy Crafting!

Quick Tip for Friday: Removing the Stick from your Stickers.

Happy Friday Friends!

Quick tip for your scrappy weekend. Sometimes I want to use a sticker or other sticky embellishment but I want to layer it or have part of it NOT sticky. Easy fix! Simply brush on baby powder to the back and it will become un-sticky instantly (and it smells good as a bonus). You can purchase this handy dandy tool from EK Success below or simply have a little container of baby powder (I have a empty mini container that used to hold eyelets to hold my powder) and a paint brush. I keep it close by with my other scrapbooking tools.

Powder tool by EK success

Layering with stickers and labels is great with your project life layouts as it adds that dimensional look but a lot less bulk.

Hope you all have a wonderful Fathers Day weekend!

Happy Crafting!

Silhouette Sketching & The Pickle Product Pick-of-the-Week!

Hi fellow Silhouette users!

Have you fallen in love with the sketch option of your Silhouette like I have? I love that I can journal and draw nearly anything from my Silhouette. I first started “sketching” when I, like many others, was unable to get the famous Studio Calico “Lost Boys” add-on kit which had the over the moon stamp set. The had offered the digital stamp set and I imported it into my silhouette software. I definitely fell in love with the results (you can see where I had posted about it HERE)

After that, I was hooked, I bought every silhouette sketch pen that was on the market. The most popular being the sketch pen starter set.

Silhouette Sketch Pen starter pack

These pens run about $20. While they worked great for me for the first few times, the ink stopped flowing consistently and i ended up with skips in my design and journaling. I did love the free sketch shapes that came with the pens. I found, like gel pens, if you tap the top of the ball point on paper before using it works a little better. Unfortunately I still had the skipping problem so I purchased the ballpoint pen holder also from silhouette.

pen holder silhouette

While this is not a bad solution I was REALLY limited on what pens I could use in it. some ballpoint pens fit and some did not. It left me more frustrated than happy. I still really wanted to utilize the sketch designs I had. I began searching for another option or maybe an aftermarket pen that would fit and that’s when I stumbled upon the Chomas Creations website. She had pen holders of all types for different machines. Now I was skeptical and  hesitant to purchase one of these. I saw YouTube videos using the pen holder and it LOOKED like it would be a good option but I was nervous that I would have the same problems i had already experienced. I decided to give it a chance and purchase the pen holder first (she has a marker holder as well), this is what it looks like:

www.amychomas.com/

I was so pleased with how this little pen holder worked, and I put it to the test with several pens and every time I was very happy with how the sketches came out. Chomas Creations really knocked it out of the park on this one! The pen holder is not some cheap plastic thing but sturdy.

I emailed the owner of the Chomas Creations, Amy, and let her know how much I loved her product. she emailed me back within hours and thanked me for my email. She told me that she was a small home-based business (4 years old now) and they manufacture their product right here in the USA. You can really tell the quality when you hold one of these pen holders. While they could of saved money producing a cheaper product in china they produced a high quality product here in the states that will really last and not fall apart.

Now the only negative thing I could possibly say about this pen holder is that it does not hold ALL pens but it does hold most. My favorite pens to use for silhouette sketching and Amy’s holder is the Staedtler fineliner marker pens and the Signo uniball white gel pen. I got a small set of the Staedtlers at michaels in the art section of the store. You can also purchase them HERE at Jetpens.com (my favorite online pen source) Chomas Creations does carry a marker holder as well that I need to order. I am hoping the marker holder might fit some of the other pens that I have. Did you know you could even put a stylus in the holder and do some dry embossing?

Good stuff, my friends, good stuff! I love supporting small and home-based businesses when I can. Amy told me that there is a sale going on right now for 10% off your total purchase. Just use the code JUNE13 when you check out. I wholeheartedly recommend this “Pickle Product Pick”!

Happy Sketching!

Organization and Storage Solutions: The little “bits”

Hi Papercrafting friends!

Today I thought I would share my thoughts on organizing the little things that we use in our scrapbook and project life albums. The things that we get in kits for just one page or the little things that don’t seem to have a home in our scrapbook space.

I am a papercrafter that, if I don’t see it, I won’t use it. So I have been on the lookout for an idea or solution to fix this problem with the little things. Now this idea is really customizable to whatever your needs are. You could be looking for a way to store all your flair, or your sequins, even things like embossing powder or glitter! For me I wanted something where I could see all these little things. Little die cuts, wood veneer, Flair, sequins, even a roll of washi tape I know I want to use soon.

Want to know the best thing about this little storage idea? It’s really inexpensive! What started the idea, was when I was grocery shopping I saw these little disposable condiment cups by the foil and plastic bags.

Little Bits Storage @TheCraftyPickle.com


They were $2.99 for 50 cups. I wasn’t sure if it would work but I thought at worst I could use it for the kids lunch box when school starts back up. Then I wondered how I would store these in my scrapbook area. My first thought was a flat serving tray I got from Ikea a while back but really that would just take up too much space and not make it very visible.

So I went to wal-mart (target and other stores have these too or check online at places like amazon) and I found a K-cup holder that actually was JUST the right size to hold these little cups.

Little Bits Storage @TheCraftyPickle.com


I was surprised at how little space it took up and sits right on top of a half cube penholder/drawer unit I got at Michael’s a while back. It holds 25 of these little cups.

Little Bits Storage @TheCraftyPickle.com


I like the fact that I can take out the little cup and set it with a project I am working on. Once it’s empty i can fill it up with the next thing that comes in a scrapbook kit or that doesn’t have a designated place.

Little Bits Storage @TheCraftyPickle.com

Little Bits Storage @TheCraftyPickle.comLittle Bits Storage @TheCraftyPickle.com


I think its great that it’s completely clear so I can see completely through it without having to open the container and poke around. If I ever need to replace any of the containers then I can easily grab more because they are so inexpensive.

Little Bits Storage @TheCraftyPickle.com


So in total this project cost me under $30 and it is already helping me use the little things I might have overlooked if these little bits were tucked away somewhere else.

Happy (organized) crafting!


Project Life week 18: Yes you can incorporate 12×12 layouts in your PL Album!

Hi Project Lifers!

As promised, here is my week 18. This particular week was my oldest son’s birthday and I wanted to incorporate two 12×12 layouts in with my regular project life spread. I wasn’t too sure that I could pull it off and have it flow well but I think that it turned out really nice. Although most of my traditional layouts will go in a different album, occasionally it is nice to put one or two within the project life album.

So this week I have two 12×12 spreads. Here is a look at the first.

Week 18 Project life @thecraftypickle.com


I usually use a lot of color so this was a big change for me. I love that it draws your eye to the photos instead of the cards or embellishing. This entire week was actually fairly simple and quick (except for the title card that I talked about last week). I stamped various sayings on the “real life” card with black and gray ink. The “cuddle” and clock image was stamped using stazon ink. For the 12×12 layout on this side I wanted it to flow well opposite the project life page protector side, so I used project life cards to tie it in.

Week 18 Project life @thecraftypickle.comWeek 18 Project life @thecraftypickle.comThe journaling was done using my silhouette. I really love that I can journal anywhere on my 12×12 layout with my silhouette beings I don’t have a wide format printer.

Week 18 Project life @thecraftypickle.com


Here is the second half of my week 18:

Week 18 Project life @thecraftypickle.com

Week 18 Project life @thecraftypickle.com

week 18-1-8


Remember my post about white sticker letters and alcohol markers? Yep, Used a green copic for these letters here. went super fast and I love that they are slightly shaded rather than flat and solid.

Week 18 Project life @thecraftypickle.com


Week 18 Project life @thecraftypickle.com


National scrapbook day was a lot of fun…. the clean-up, not so much.

Week 18 Project life @thecraftypickle.com


We are still working on teaching the teenager how to smile on command.

Week 18 Project life @thecraftypickle.com


I love including quotes from my kids in our album. This one was from my 6-year-old daughter. She was talking about her student of the month award (which is a surprise to all the kids at the award assembly). Apparently when you see your mom in the audience you know you are the student of the month LOL.

There ya have it! Week 18 with 12×12 layouts. The best thing about Project life is that you can make it work any way YOU want to.

Looking for more project life inspiration? Check out The Mom Creative for her Project Life Tuesday post along with a bunch of talented ladies that link up every week.

Happy Crafting!

Make a ribbon pendant for your celebration layouts!

Hi fellow crafters!

Today I am showing you a simple layout that utilized some scraps of ribbon I had leftover from a different project. I was about to toss these little pieces and then thought that it might make a cute birthday flag banner for a layout that I needed to complete.

I don’t break out my sewing machine too much but I did for this. I took the ribbon pieces I had, Folded them in half and sewed a bit from the fold to make sure I could string the bakers twine though

Save your ribbon scraps @thecraftypickle.comSave your ribbon scraps @thecraftypickle.comTo make stringing the bakers twine easy, I tied the end to a tiny safety-pin and pushed the pin though all of the ribbon tabs.

20130610-175615.jpg

Then I took my scissors and trimmed the tabs into little flags.

Save your ribbon scraps @thecraftypickle.comNow I thought this was so simple that I think I might make a few for some birthday cakes. This one however I had plans for my daughter’s third birthday. I attached the wooden skewers and the ribbon flags with some mini glue dots.

Save your ribbon scraps @thecraftypickle.com

Behind the photos I attached a little bag to hold a journaling tag. I added some tissue paper in front and in back of the bag to look more like the gift bags in the photo.

Save your ribbon scraps @thecraftypickle.com

And here is the finished layout. I decided to keep it more on the simple side with little embellishments as I wanted the ribbon banner to really take center stage next to my photos.

Save your ribbon scraps @thecraftypickle.com

So there you have it. Pretty simple and a great use of scraps. I sure am glad I didn’t toss those extra pieces of ribbon!

Check back tomorrow for Project Life Tuesday! I will have my entire week eighteen up!

Happy Crafting!

Life is like a box of chocolates, and so is this great altered gift!

Hi Crafty Friends!

Today I bring you something different from a scrapbook page, card or project life layout. Fathers day is coming up and I know most dads will be wishing for power tools and sports tickets. My Dad likes all those things too, but my Dad also loves chocolate! I made a few of these gifts in the past, but for women. This time around I’m giving it a whirl with a fun masculine feel to it!

Simple, affordable, and far more adorable than any store-bought card. An altered box of chocolates is the perfect gift for anyone, even Dad!

For this gift I bought a box of chocolates from our local grocery store for about $10, but you could go more expensive or less expensive if you wanted. I would estimate the entire project cost me a total of $15. The box already had a white/red/gold color scheme to it so I decided to just run with what was already there and picked products that went along. Here is some quick shots I took on the iphone before I started (please forgive the glare and fuzzy “before” photos).

The top:

20130607-221622.jpg

The back:

20130607-221634.jpg

And the side:

20130607-221644.jpg

I felt I picked a really easy box to work with, it was already pretty on its own and the size was perfect for 8 1/2 x 11 paper.

Here is a photo of box top and side once I finished altering it.

Alter a box of chocolates for a gift! @thecraftypickle.com

Alter a box of chocolates for a gift! @thecraftypickle.com

I started with the side of the box. I added gold washi tape along the top lid side and again repeating on the bottom side of the box. I then added a frame of red metallic washi tape on the top of the lid. Once that was finished I began working on the lid cover.

Alter a box of chocolates for a gift! @thecraftypickle.com

For the script writing you see in red, that was all done using my silhouette, a red pigment journaling pen and a pen holder made by Amy Chomas.***I will be doing a product review this coming week on Amy’s pen holder, the silhouette sketch pen holder, and the silhouette sketch pens.*** Then I cut out the title in a gold cardstock and the chocolates in various brown shades. If you are wanting the numbers for the silhouette cut files I used they are: Design ID #12274 and Design ID #12223.

I added shading with both chalk and copic markers. I also added some glitter accents using the Copic Atyou Spica glitter pens.

The brown grosgrain ribbon was attached around the top lid only. I made a flat bow by making a “ring” of ribbon and folding that flat. I pinched the two ends to the center of the ring and added a staple. I added another piece of ribbon to cover the staple, securing it with a couple of glue dots.

That completed the top and side portion, and while you can stop there and it would be just adorable, I decided to add a little more fun to the box and cover the bottom as well.

Alter a box of chocolates for a gift! @thecraftypickle.com

The bottom was quickly completed by layering text boxes within a framed shape. It is my personal opinion that any chocolate gift should be calorie free so I made it so *wink*!  I added some more silly, fun text that should make my dad smile. Printed it out, trimmed it with my paper trimmer and stuck it to the bottom of the box. I then added one more chocolate die cut for some color.

Alter a box of chocolates for a gift! @thecraftypickle.comAlter a box of chocolates for a gift! @thecraftypickle.comAlter a box of chocolates for a gift! @thecraftypickle.com

You could make this for nearly any occasion and customize it so many different ways. I don’t think that I will ever give a “plain” box of chocolates again.

Happy Crafting!