Hi Crafty Friends!
Today I bring you something different from a scrapbook page, card or project life layout. Fathers day is coming up and I know most dads will be wishing for power tools and sports tickets. My Dad likes all those things too, but my Dad also loves chocolate! I made a few of these gifts in the past, but for women. This time around I’m giving it a whirl with a fun masculine feel to it!
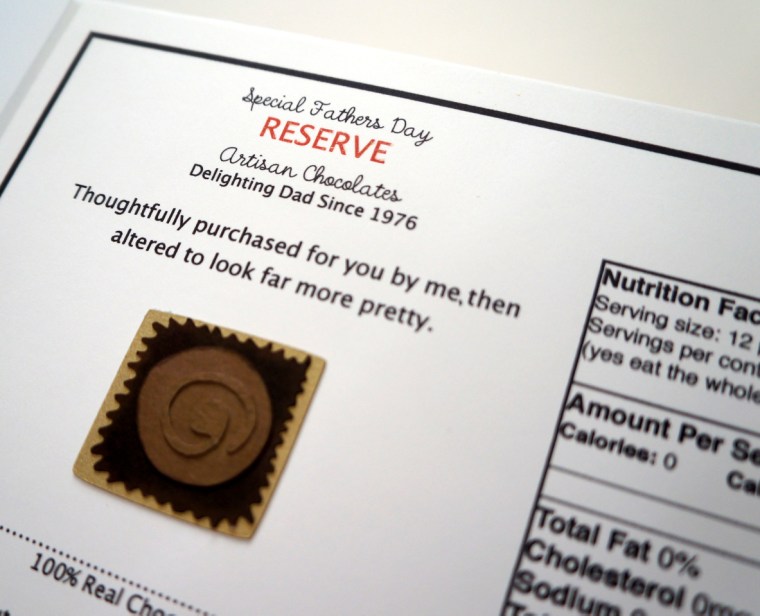
Simple, affordable, and far more adorable than any store-bought card. An altered box of chocolates is the perfect gift for anyone, even Dad!
For this gift I bought a box of chocolates from our local grocery store for about $10, but you could go more expensive or less expensive if you wanted. I would estimate the entire project cost me a total of $15. The box already had a white/red/gold color scheme to it so I decided to just run with what was already there and picked products that went along. Here is some quick shots I took on the iphone before I started (please forgive the glare and fuzzy “before” photos).
The top:
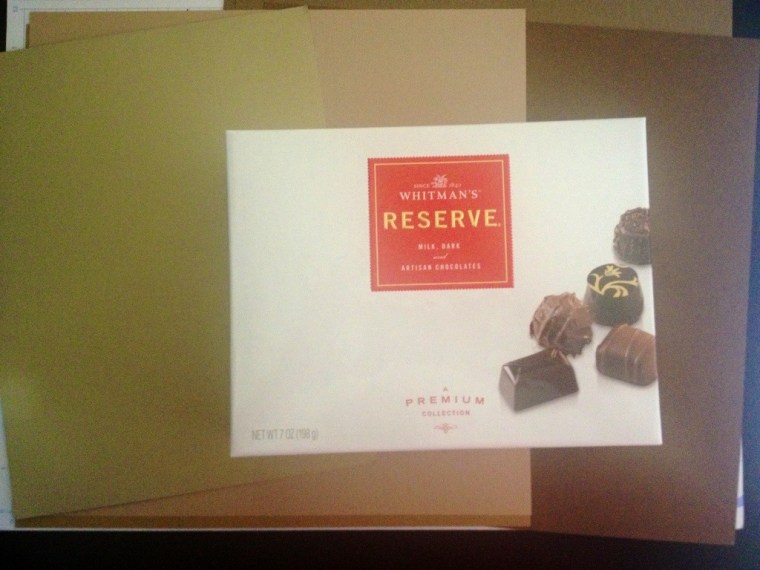
The back:

And the side:

I felt I picked a really easy box to work with, it was already pretty on its own and the size was perfect for 8 1/2 x 11 paper.
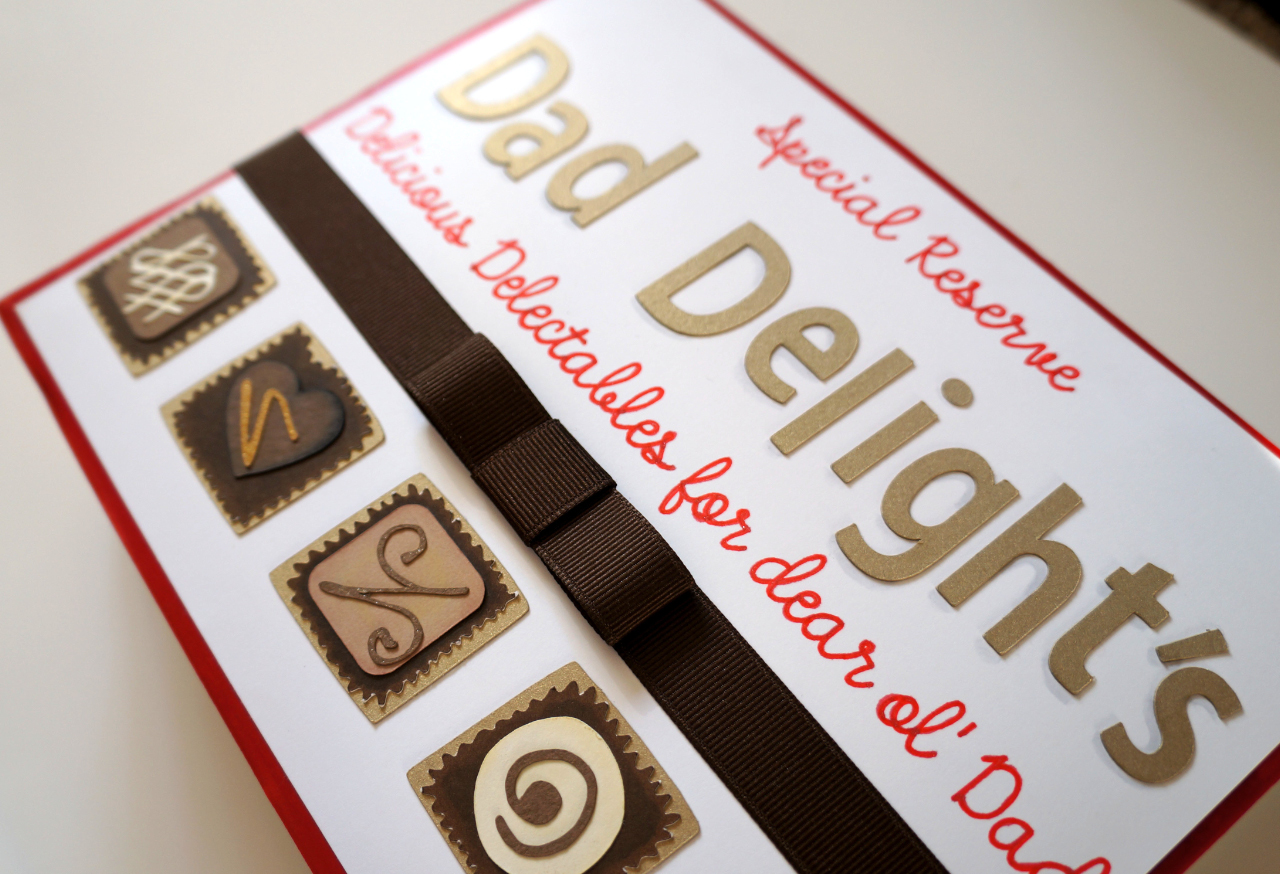
Here is a photo of box top and side once I finished altering it.


I started with the side of the box. I added gold washi tape along the top lid side and again repeating on the bottom side of the box. I then added a frame of red metallic washi tape on the top of the lid. Once that was finished I began working on the lid cover.

For the script writing you see in red, that was all done using my silhouette, a red pigment journaling pen and a pen holder made by Amy Chomas.***I will be doing a product review this coming week on Amy’s pen holder, the silhouette sketch pen holder, and the silhouette sketch pens.*** Then I cut out the title in a gold cardstock and the chocolates in various brown shades. If you are wanting the numbers for the silhouette cut files I used they are: Design ID #12274 and Design ID #12223.
I added shading with both chalk and copic markers. I also added some glitter accents using the Copic Atyou Spica glitter pens.
The brown grosgrain ribbon was attached around the top lid only. I made a flat bow by making a “ring” of ribbon and folding that flat. I pinched the two ends to the center of the ring and added a staple. I added another piece of ribbon to cover the staple, securing it with a couple of glue dots.
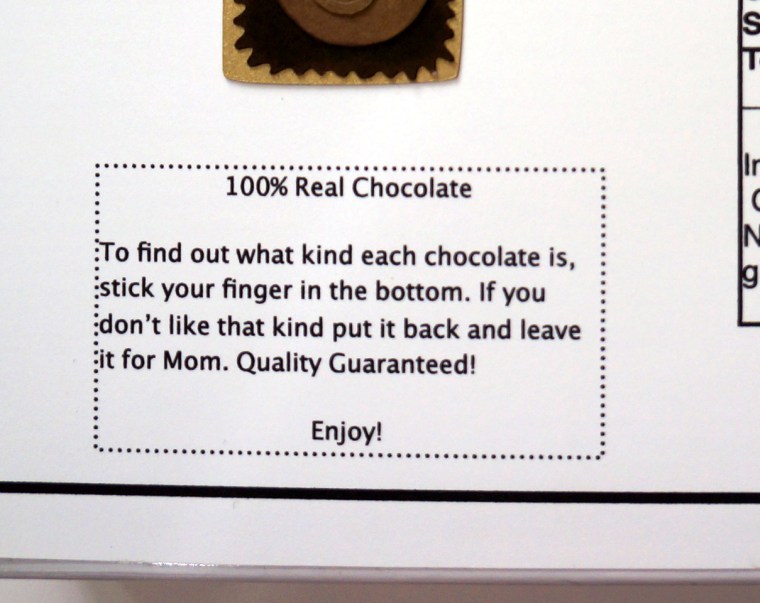
That completed the top and side portion, and while you can stop there and it would be just adorable, I decided to add a little more fun to the box and cover the bottom as well.

The bottom was quickly completed by layering text boxes within a framed shape. It is my personal opinion that any chocolate gift should be calorie free so I made it so *wink*! I added some more silly, fun text that should make my dad smile. Printed it out, trimmed it with my paper trimmer and stuck it to the bottom of the box. I then added one more chocolate die cut for some color.

You could make this for nearly any occasion and customize it so many different ways. I don’t think that I will ever give a “plain” box of chocolates again.
Happy Crafting!