Remembering Dad

Remembering Dad

This Father’s Day will be particularly hard for me and my family this year. We lost our Dad in February to a traumatic accident.
My Dad was an awesome guy and the life of the party. We know that he wouldn’t want us to be sad on this day, so I decided
we would celebrate him on Father’s Day. Taniesa created some special flair for me so that I could use them to create cards for my
PL album. I have to say when I first saw them , I cried and I couldn’t believe how perfect and how special these were.

First I wanted to create a card using this My Favorite Memory of my Dad flair so I could document that memory of my Dad.

favorite

His grandchildren called him Superman, they seen him as a strong man who could get through anything, so I wanted to create
a card to honor our ” Superman” using a custom flair of a photo of my Dad.

super

Lastly I wanted to share a lovely gift that Taniesa sent to me for my family and me to wear on Father’s Day, how special is this ribbon and its something we could wear every Father’s Day!!

father

I love how special these custom flair are and how they will help us celebrate and remember my Dad on this Father’s Day.

Taniesa can create custom flair for you no matter the subject, just send her a message in The Crafty Pickle shop and let
her know what you are looking for.

Treasa for ThecraftyPickle.com

Valentine’s Day Mason Jars

Hi Crafty Friends!

I can hardly believe it is February already!! Designer, Stephanie, has an adorable little Valentine project to share with you all today. Check it out!!

________________________________________________________________________

Hey y’all! Happy February, already!!
I am thinking about Valentine’s Day, which will be here before we know it! I wanted to do something small for the kids’ teachers, so I thought mason jars filled with candy would be perfect. Who doesn’t love chocolate?!

I bought these jars at the dollar spot at Target then pulled out a bunch of Valentine related embellishments to decorate them.

The flair buttons are from The Crafty Pickle from theWatercolor Hearts set. This set is great for Valentine’s Day & comes with six assorted 1″ buttons.
I filled the jars with a bunch of chocolate kisses, a chocolate heart & candy bar. I think their teachers will enjoy them-I know I would! Now I just need to make a few more before February 14th!!
Take care & keep crafty!
~Stephanie
______________________________________________________________________
What a great idea for a teacher gift (Or anyone on your Valentine list)! Thanks for sharing Stephanie!!
Happy Crafting!
The Crafty Pickle

Creative gift idea using flair.

Hi Friends!
Today we have a great gift idea from design team member, Joann!If you stopped by my blog a few days ago, I shared with you all that I participated in a couple of Christmas craft fairs! It was my first time, and let me tell you, it was an awesome experience. I met a lot of people and actually made a few friends!

So with that said, I am sharing with you my first The Crafty Pickle Design Team post! I had a few nugget tins left over from my fairs (8 to be exact, lol) and I thought that I could redesign them for a few Thanksgiving gifts for a few family members and friends!

I used both CTMH Cartridges (Artiste and Art Philosophy) to cut all of my leaves at 2 inches and used some watercolors to give them so color. I wrapped my nugget tin with some craft paper (cutting that at 2 inches) and tied some brown twine. I then glued all of my leaves down and added some TCP November Flair to the center where all of my leaves met and finished it off with some fabulous TCP Autumn Sequins Mix! Hope you enjoyed my gift idea!

Thanks for stopping by, and don’t forget to stop by the The Crafty Pickle Etsy Shop for some awesome goodies!

Supplies used:
Watercolor Paper
Brown Twine
Watercolors
Thanks, Joann. This is absolutely adorable!!!
Happy Gifting everyone!
The Crafty Pickle

Happy Halloween!

Happy Halloween Crafty Friends!

Today, design team member Carrie Bryant is sharing this cute little “Insta” Chipboard album she created for Halloween.

Here is how she did it!

First off, I cut down some unfinished chipboard to 4×4 and covered each page with some cute MME Halloween papers I had in my stash.

I love this cute Spider Web Flair from The Crafty Pickle

Each page is embellished and has room for a small photo or journal spot.

This may be my favorite page, I created a shaker box and fished it off with another adorable TCP flair

On this page I added a 3×4 PL card I created for a Halloween Swap.

This is a really easy way to preserve the memories from your Halloween fun.

This is that back of my album. I used Jump rings to bind my album and added fun ribbons to finish it off.

Thanks so much Carrie, for sharing your adorable project!

Check out more in the Crafty Pickle Etsy Shop for more fun flair!

Have a fun and safe Halloween!
The Crafty Pickle

Creating a Sequin Station for your craft space.

Happy Friday everyone!

Today I am revisiting a previously posted idea a few months ago that I used for small embellishment storage. Ever since I purchased the sequins in the whimsical Twist shop I have been HOOKED on sequins and use them on a lot of my projects. Getting in and out of the little baggies was getting to be a little bit of a pain so I thought back to that organization blog post I had done, You can see that original post HERE. I thought that it would be nice to have one set up just for sequins so that’s just what I did.

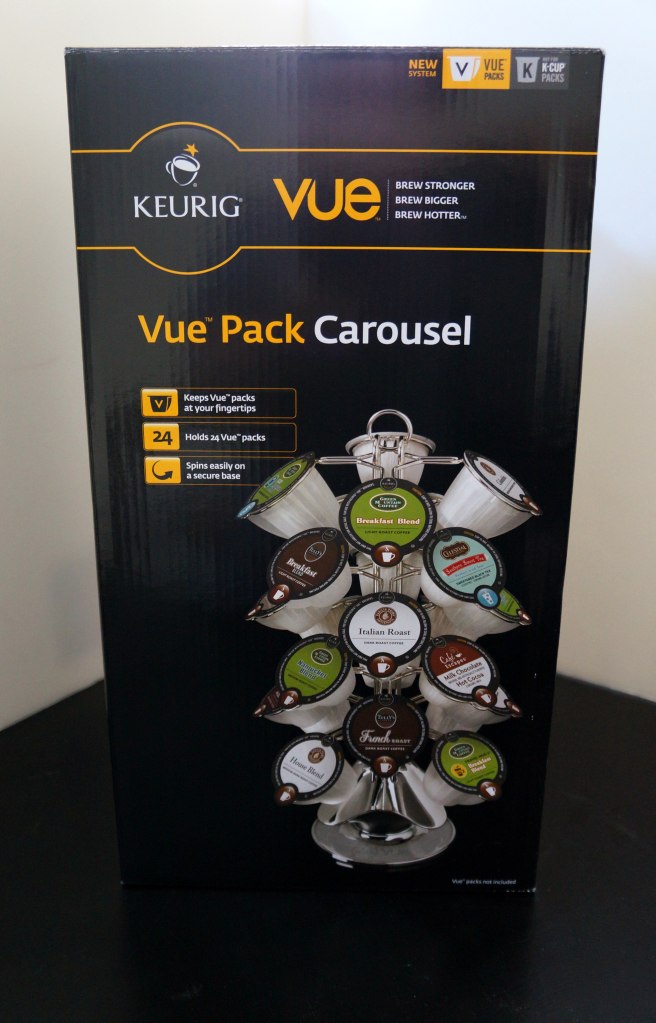
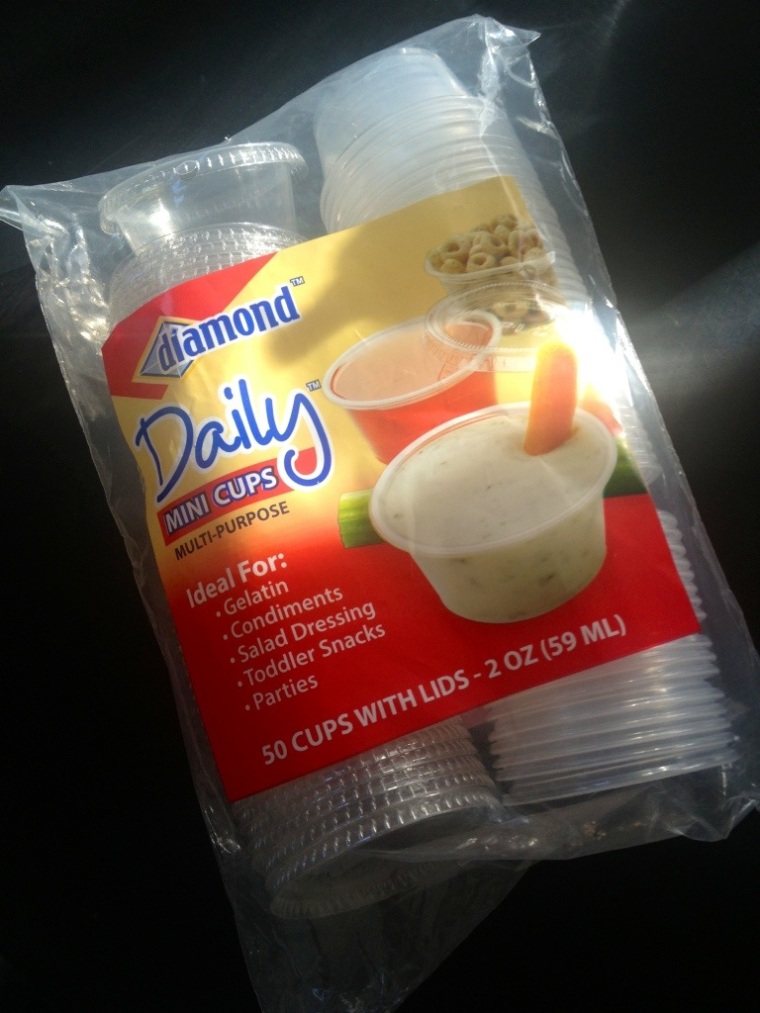
Here is what I used. First a K-Cup storage spinner (I got mine at walmart for about $24 but I have also found the same size on Amazon HERE) and a package of Diamond brand mini condiment cups and lids (I got mine at a grocery store in my area, safeway, for about $3)

Little Bits and Sequin Storage @TheCraftyPickle.com

Cups for storage @ thecraftypickle.com

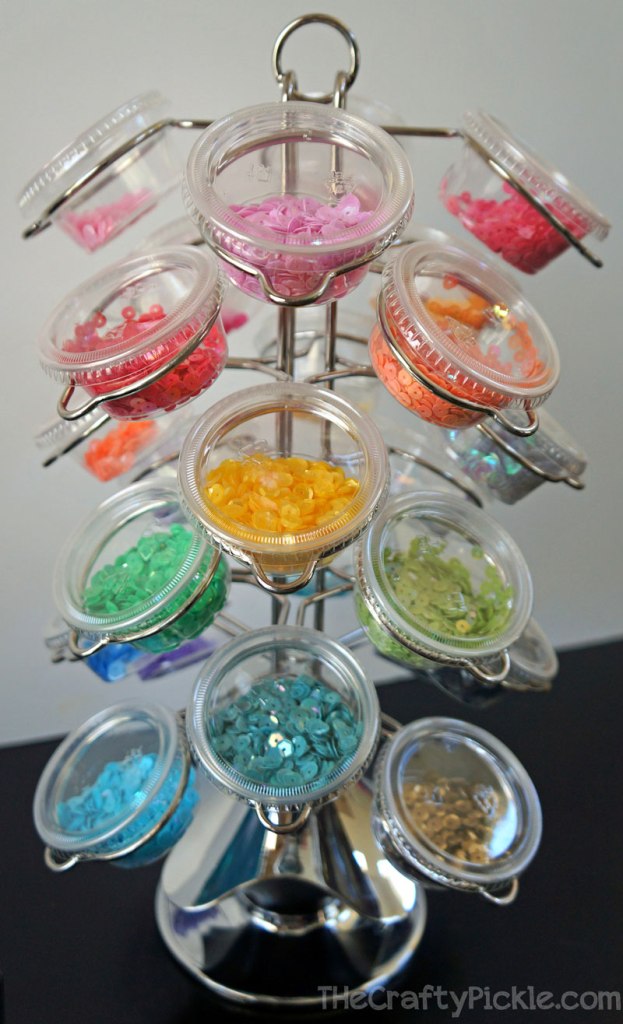
I emptied all of my sequins in each cup keeping the colors separated, depending on your collection you might want to combine certain colors or shades of the same color.

Sequins-Station @ thecraftypickle.com

sequins-station-close-up @ thecraftypickle.com

Super simple and inexpensive. It takes up very little space and makes using them and clean up a breeze because you’re not dumping the sequins out on your table. The added bonus it looks really pretty out and makes me happy when I look at all the fun color!

Suggestion for those that are going out shopping for your kcup holder, I took one of the mini cups with me to make sure it fit well. There are holders out there that are just a bit too small to hold the cup so to be sure, test it out before you buy it.

Don’t forget to stock up on all the great color sequins that is currently in the Whimsical Twist shop and check back for more fun sequins that will be in the shop soon! While your there don’t forget we have an awesome sale on all your Basic Gray favorites too!!

BasicGray sale @ Whimsical Twist!

I hope you enjoyed this organization inspiration!

Have a Whimsical Weekend!

The Crafty Pickle

Crafting with Kids: A fun little notebook project!

Hi Die-namite Friends!

This is our last week of summer vacation. Full of school shopping and last minute fun things before we get back to routine. Today was a at home day so my 7 year old daughter wanted to do crafts. We decided to decorate one of her new notebooks. We chose her favorite new Die-namites Die, the Funky Flower die. and some of her favorite colors of cardstock.

she picked out some bright washi tape, sequins, glitter, and thickers. We started with a primary grade notebook that I covered in two coats of gesso. We used a bright green and bright pink for the Funky Flower. I fussy cut the center flower part out of the die cut and layered onto the green flower.We took CTMH Liquid Glass and filled the inside of the flower and then added Tim Holtz new distress glitter in the flower. For the final touch we added three small flat yellow pearls for the flower center.

It is very bright and a little bit loud, but so very Taegan! Why not get your kids involved in dressing up their own school supplies to make them different from anyone elses in their class!

Wishing all of you a fabulous school year ahead!

Life is like a box of chocolates, and so is this great altered gift!

Hi Crafty Friends!

Today I bring you something different from a scrapbook page, card or project life layout. Fathers day is coming up and I know most dads will be wishing for power tools and sports tickets. My Dad likes all those things too, but my Dad also loves chocolate! I made a few of these gifts in the past, but for women. This time around I’m giving it a whirl with a fun masculine feel to it!

Simple, affordable, and far more adorable than any store-bought card. An altered box of chocolates is the perfect gift for anyone, even Dad!

For this gift I bought a box of chocolates from our local grocery store for about $10, but you could go more expensive or less expensive if you wanted. I would estimate the entire project cost me a total of $15. The box already had a white/red/gold color scheme to it so I decided to just run with what was already there and picked products that went along. Here is some quick shots I took on the iphone before I started (please forgive the glare and fuzzy “before” photos).

The top:

20130607-221622.jpg

The back:

20130607-221634.jpg

And the side:

20130607-221644.jpg

I felt I picked a really easy box to work with, it was already pretty on its own and the size was perfect for 8 1/2 x 11 paper.

Here is a photo of box top and side once I finished altering it.

Alter a box of chocolates for a gift! @thecraftypickle.com

Alter a box of chocolates for a gift! @thecraftypickle.com

I started with the side of the box. I added gold washi tape along the top lid side and again repeating on the bottom side of the box. I then added a frame of red metallic washi tape on the top of the lid. Once that was finished I began working on the lid cover.

Alter a box of chocolates for a gift! @thecraftypickle.com

For the script writing you see in red, that was all done using my silhouette, a red pigment journaling pen and a pen holder made by Amy Chomas.***I will be doing a product review this coming week on Amy’s pen holder, the silhouette sketch pen holder, and the silhouette sketch pens.*** Then I cut out the title in a gold cardstock and the chocolates in various brown shades. If you are wanting the numbers for the silhouette cut files I used they are: Design ID #12274 and Design ID #12223.

I added shading with both chalk and copic markers. I also added some glitter accents using the Copic Atyou Spica glitter pens.

The brown grosgrain ribbon was attached around the top lid only. I made a flat bow by making a “ring” of ribbon and folding that flat. I pinched the two ends to the center of the ring and added a staple. I added another piece of ribbon to cover the staple, securing it with a couple of glue dots.

That completed the top and side portion, and while you can stop there and it would be just adorable, I decided to add a little more fun to the box and cover the bottom as well.

Alter a box of chocolates for a gift! @thecraftypickle.com

The bottom was quickly completed by layering text boxes within a framed shape. It is my personal opinion that any chocolate gift should be calorie free so I made it so *wink*!  I added some more silly, fun text that should make my dad smile. Printed it out, trimmed it with my paper trimmer and stuck it to the bottom of the box. I then added one more chocolate die cut for some color.

Alter a box of chocolates for a gift! @thecraftypickle.comAlter a box of chocolates for a gift! @thecraftypickle.comAlter a box of chocolates for a gift! @thecraftypickle.com

You could make this for nearly any occasion and customize it so many different ways. I don’t think that I will ever give a “plain” box of chocolates again.

Happy Crafting!