I hope you are all having a FINTASTIC summer! Today we are kicking off the sneak peeks for the Under the Sea with Honey Bee new release!!! I am so excited for you all to see what an amazing collection of stamps, dies, and embellishments will be in the Honey Bee Stamps store this Friday 7/14!
Today fellow designer, Lisa, and I are sharing a look at one of my most favorite stamps in this whole release over on the Honey Bee Stamps blog today. The Under the Sea stamp set features two adorable mermaids, one of which is featured on my card today! You can see more at Honey Bee Stamps HERE.
Here is my Card for today featuring the Under the Sea stamp set! If you are wanting to know the products I have used for this card there will be a supply list at the bottom of this post.
I had a lot of fun making this textured background and of course coloring this sweet little mermaid! I plan on showing you more later this week, including how I did my background. Until then here is a few more photos of my sneak peek card for today.
Supplies Used:
(supplies are linked to a shopping source below where available. Some links may not work until release day. Affiliate links used where available)
My name is Taniesa and I am addicted to coffee. I am also addicted to papercrafting so how perfect is this challenge, right?! What Challenge you might ask? Why, it’s that time again, The Summer Coffee Lover’s blog hop! Projects, Prizes, and SO MUCH inspiration!!
Affiliate Links used at no cost to you. Thank you for supporting this blog!
Have you ever spilled your coffee when you’re walking out of Starbuck’s or tripped on a Lego in the am and your mug went flying? It sure starts the day off in a super crummy way. This is a great card for someone who has had that kinda day or just needs to know that you are there for them and you “got their back”. Both cards feature products from Honey Bee Stamps. There are source links in my post but you will also find a supply list at the end of the post.
So I started by drawing a floor. I drew a line where I knew I wanted the edge of the floor to be and then I drew in the vertical lines at an angle to give a perspective view. After I had that penciled in I stamped the bunny from Honey Bee Stamps Blah Bunny stamp set, I masked that part and stamped the little rug that goes underneath him. Before I got to the coloring of the bunny and rug, I colored the floor with Pumice Stone Distress Ink. I made sure to make the back and sides of the floor portion darker so that it highlighted the bunny in the center I added little nails with a copic marker (N6 + N0) The bunny and the rug are both colored using Copic Markers. For the rug I used YG67, YG63, YG61 and for the outside edge I used G28. For the Bunny I used E31, E33, E34, E35, and E37. I also used R20 and R21 for his ears, noses, and the bottom of the feet.
For the wall I used an Echo Park stencil that is older and blended on some Old Paper Distress ink. after I used the stencil I went over the top of the card again with more distress ink so it would soften the stark white the stencil left. I felt it needed something more so I took a small leaf from the Honey Bee Stamps Country Blooms Stamp Set and stamped it with Peeled Paint Distress Oxide ink in between the diamond shapes on the “Wall”.
I stamped, fussy cut, and then shaded the mug using some cool gray copic markers (C00, C1) and I drew in a little heart using a Copic AtYou Spica red pen. I took a craft knife and cut around the bunny’s paw, and then slid the handle of the mug underneath.
I attached the gift card with these removable Glue Dots. This is such a great way to stick gift cards and other removable things to your cards and gifts, It holds well until you want to pull it off, and the best part is the glue dot comes off your project cleanly too!
I have another card to share today too!
This card is super simple and easy to make. Here is the front of the card:
and here is the inside
Simple but Cute right? Such a fun way to give a coffee to a friend who needs a little pick-me-up. One thing I love *Almost* as much as coffee is gifting starbucks gift cards so I always have a small stash of gift cards on hand in case I need to give a last minute gift or Happy Mail to someone needing a smile.
For this card I just colored a cacti from the Honey Bee Stamps Stick with me stamp set. I stamped the planter then covered it with a post-it note so I could stamp the cacti coming out of the planter. I colored the Planter with Copic markers E31, E33, E35 and the Cacti with YG61, YG63, YG67, and a little G21 in the highlight portion. I stamped the sentiment under that and cut out the square using some stitched square dies.
I placed that square on a scrap of black cardstock and adhered the matted square to the card base with foam tape. I blended a little Vintage Photo Distress Oxide ink around the edges and then finished off the front with a few gold sequins.
For the inside of the card I did the same thing as the cacti but I stamped a coffee mug. This coffee mug I bought at one of my Local Scrapbook stores, Impress Cards and Crafts. If you ever are in Seattle this shop needs to be on your “To-Visit” List! It’s a stamper’s candy store! I stamped the Stay Strong from Honey Bee Stamps Prickly Sentiments stamp set. I drew in the little circle to make it sorta “Starbucks-ish” and colored the inside of that green, and then I shaded the cup with some Cool Grey copic markers and the sleeve with some warm grey markers.
I cut the square with the same stitched square dies and matted that on black. I did not add foam tape on this piece though. I just glued it in using the Nuvo liquid adhesive. To attach the gift card I decided to use the new Lawn Fawn simple gift card slot dies. I die cut the bottom portion of the card and then just popped the gift card right in, super easy
So that wraps up my projects for this year’s Summer Coffee Lovers Blog Hop. In addition to all the great prizes you can win by participating in the Coffee Lovers hop, I also decided to do a fun giveaway both here on my blog, and next week on Instagram! All you need to do to be entered in this giveaway here on my blog is comment below. For the second giveaway that will be going on next week, follow @Taniesa on Instagram.
Hurry, contest ends June 30th! This giveaway includes TWO stamp sets , a exclusive Free-Bee and matching die, and a bottle of Nuvo drops all donated by Honey Bee Stamps! The other items include a Hero arts INtense black ink pad, a set of watercolor pencils, a 3×4 etched grid stamp block, Crate paper embellishment pack, Bazzill Marathon adhesive runner, and a set of watercolor pencils are all items I have purchased for this giveaway. A prize package worth $80.00!!!
Honey Bee Stamps has graciously donated the Blah Bunny Stamp set, The Blah Blah Blah Sentiments stamp set, Free Bee stamp and die, and Nuvo drops. Thank you Honey Bee Stamps! I have also put in things I have purchase for this giveaway and in total the package is worth over $80! Enter by 6/30. Winners to be announced on Saturday, July 1 at noon PST.
*** Karen Ladd !!!! You are my winner! Please email me at Taniesa@thecraftypickle.com with your mailing information. Thank you to all that entered and for the kind comments! ***
Head on over to the Honey Bee Stamps Blog where there are even more prizes to be won AND there is a link to Honey Bee Stamps Designer, Lisa where you can win another prize!
Thank you so much for visiting. You will find the supplies I have used linked in the post but also listed below. I encourage you to modify these ideas and use your crafty stash as well!
It has been a very busy few months! Because I haven’t been able to post as much as I like, I am bringing you not one but THREE cards today! These three cards have been inspired by the Ellen Hutson Pin-Sights Challenge in the CLASSroom blog this month. I would love to know which is your favorite! Leave me a message in the comments with your thoughts! OH! Also, make sure you see the message at the bottom regarding a HUGE two day sale going on at Ellen Hutson!
(Affiliate links listed below where available at no cost to you. Thank you for supporting this blog!)
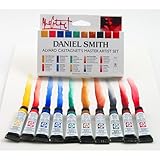
These beautiful delicious shades of Strawberry, Orange, and Lemon just scream SUMMER and inspired me to play with my Copic markers, Daniel Smith watercolor paints, and of course my Essentials by Ellen stamps and dies. Laurel did an AMAZING job of putting this month’s inspiration board together. I find when I am stuck in a creative rut, using a mood board and/or a sketch really gets me kick started and my creativity tends to flow from there.
My first card share is one you may have seen over in the Ellen Hutson Classroom if you came over from the Ellen Hutson CLASSroom blog (If you have never visited me before, Welcome!) I was inspired by the bright yellow pop of the lemons in the table floral arrangement. The lemons gave me the idea to use the Essentials by Ellen “Stay Golden” stamp set and matching dies. I loved the sentiment “when life hands you pineapples…” “make Pina Coladas” and when I thought about the whole Life handing you pineapples it made me think of actual hands coming up from the bottom of the card holding up pineapples. I reached for the Avery Elle Hats Off stamp set which ended up being the perfect stamp set to work with the pineapples.
I thought the sentiment looked best in a circle shape so I stamped it on a lighter painted scrap of watercolor paper and heat embossed that sentiment with WOW extra fine clear embossing powder. I gave the flowers different levels of dimension by gluing some down against the paper directly and others are on one layer or two layers of foam tape.
I stamped and colored the hands border stamp from the Avery Elle Hats off stamp set with my copic markers. I stamped or drew on some accents that reminded me of hawaiian print shirts. Some patterns I accented with my white signo gel pen. I added a little foam tape behind the hands and the pineapples to make it look more like these hands were actually holding a big pineapple. I took a little Black Soot Distress ink on a ink blending sponge and lightly brushed the edges of the panel to give a vingnet look.
I think this is a great encouragement card to give to a friend who has had a bad day.
The next card was inspired by the beautiful florals in the photo as well as the gorgeous “Bed of Flowers” Essentials by Ellen die. I had several pieces of watercolor paper that I was practicing watercolor washes with. Not wanting them to go to waste I thought I would cut them up with this beautiful die and piece them back together on a piece of cardstock that I covered with Be Creative tape.
I used the darker die cut negative pieces more to the center of each flowers and going lighter as you got to the edge of the flowers. I put green watercolor negative die pieces in between all the roses.
The background got a light wash of blue by using Daniel Smith manganese blue hue. I set the florals aside to dry and I painted another piece of watercolor paper with the colors on my palette. Once that was dry I cut it using the largest Lawn Fawn fancy scallop rectangle die. You might notice that you can’t really see a shine of embossing powder on my card. Once the florals were dry my piece was warped quite a bit so I took a piece of copy paper and folded it in half. I placed my card in the middle and down on top of a microfiber cloth. On a no steam setting I ironed the paper protected card until it was flat and quickly removed the paper. The scrap paper absorbed all of the embossing powder leaving me with a one layer card that kept those white lines that I stamped with.
I cut down my floral piece, matted it on gold mirror cardstock and foam mounted that piece on top of the scalloped watercolor panel. That was adhered to a heavy card base.
***There is also a HUGE 15% off everything sale going on at Ellen Hutson Today and tomorrow, June 15-16 2017! Use code SUMMERFUN to stock up on the amazing products I shared with you today and more! I am off to get some new items that has been on my wish list!***
If you are interested in any of the products that I used in my projects today I have listed them below as well as linked them within the post. You may also click HERE for multiple online sources of some items. I tried to make it as easy as possible if you are wanting to find something that I used.