Trinity Stamp’s Winter Release is here!

Trinity Stamps Blog Hop Banner

I am So excited to tell you that Trinity Stamps has finally released another fabulous line of Stamps, Dies, and LOTS of embellishments. There are also lots of new shop items added (plus more coming this week!).

If you don’t already know, we started the new release off with a blog hop on Friday and the fun is still happening! If you are coming to my blog for the first time be sure to click the links at the bottom of my post to go through both days of blog hop inspiration. Don’t forget to comment along the way because, friends…. there is prizes, FIVE of them. All of them are worth at least $25 (and some a lot more) Winner will be announced HERE on November 10th!

Now on with the show…

Today I am playing with our new Magical Wizards stamp set, a few stamps from the Wizard Friends set, Magical sentiment stamp set, magical sentiment die set, and the stars from the stand-alone castle builder die set. I am also incorporating some sentiments from Caffeinated Sentiments.

I was inspired by a Starbucks gift card I found. I thought it was absolutely perfect to pair with the Trinity Magical Wizards + Series.

So I started coloring the wizard’s head from Magical Wizards, and then one of the robes from wizard friends. I did some simple copic coloring and because I didn’t want white showing around my image, I opted to fussy cut instead of die cut. I cut the body off except for a piece that will glue behind the robe. I attached the two pieces with my Nuvo Smooth Precision glue and voila! Wizard is (almost) card ready!

Taniesa Vlasak for Trinity Stamps Winter Release9

I had made a green background by blending some various shades of Distress Oxide ink and then to make a floor to ground our character, I blended some ink into cardstock then ran it through a WRMK woodgrain embossing folder. I tried doing this with markers and drawing the floor in but it was taking away from my wizard scene too much so this was a much more subtle option.

Taniesa Vlasak for Trinity Stamps Winter Release10

I put some foam tape on the back of the wizard and set him and the floor piece aside.

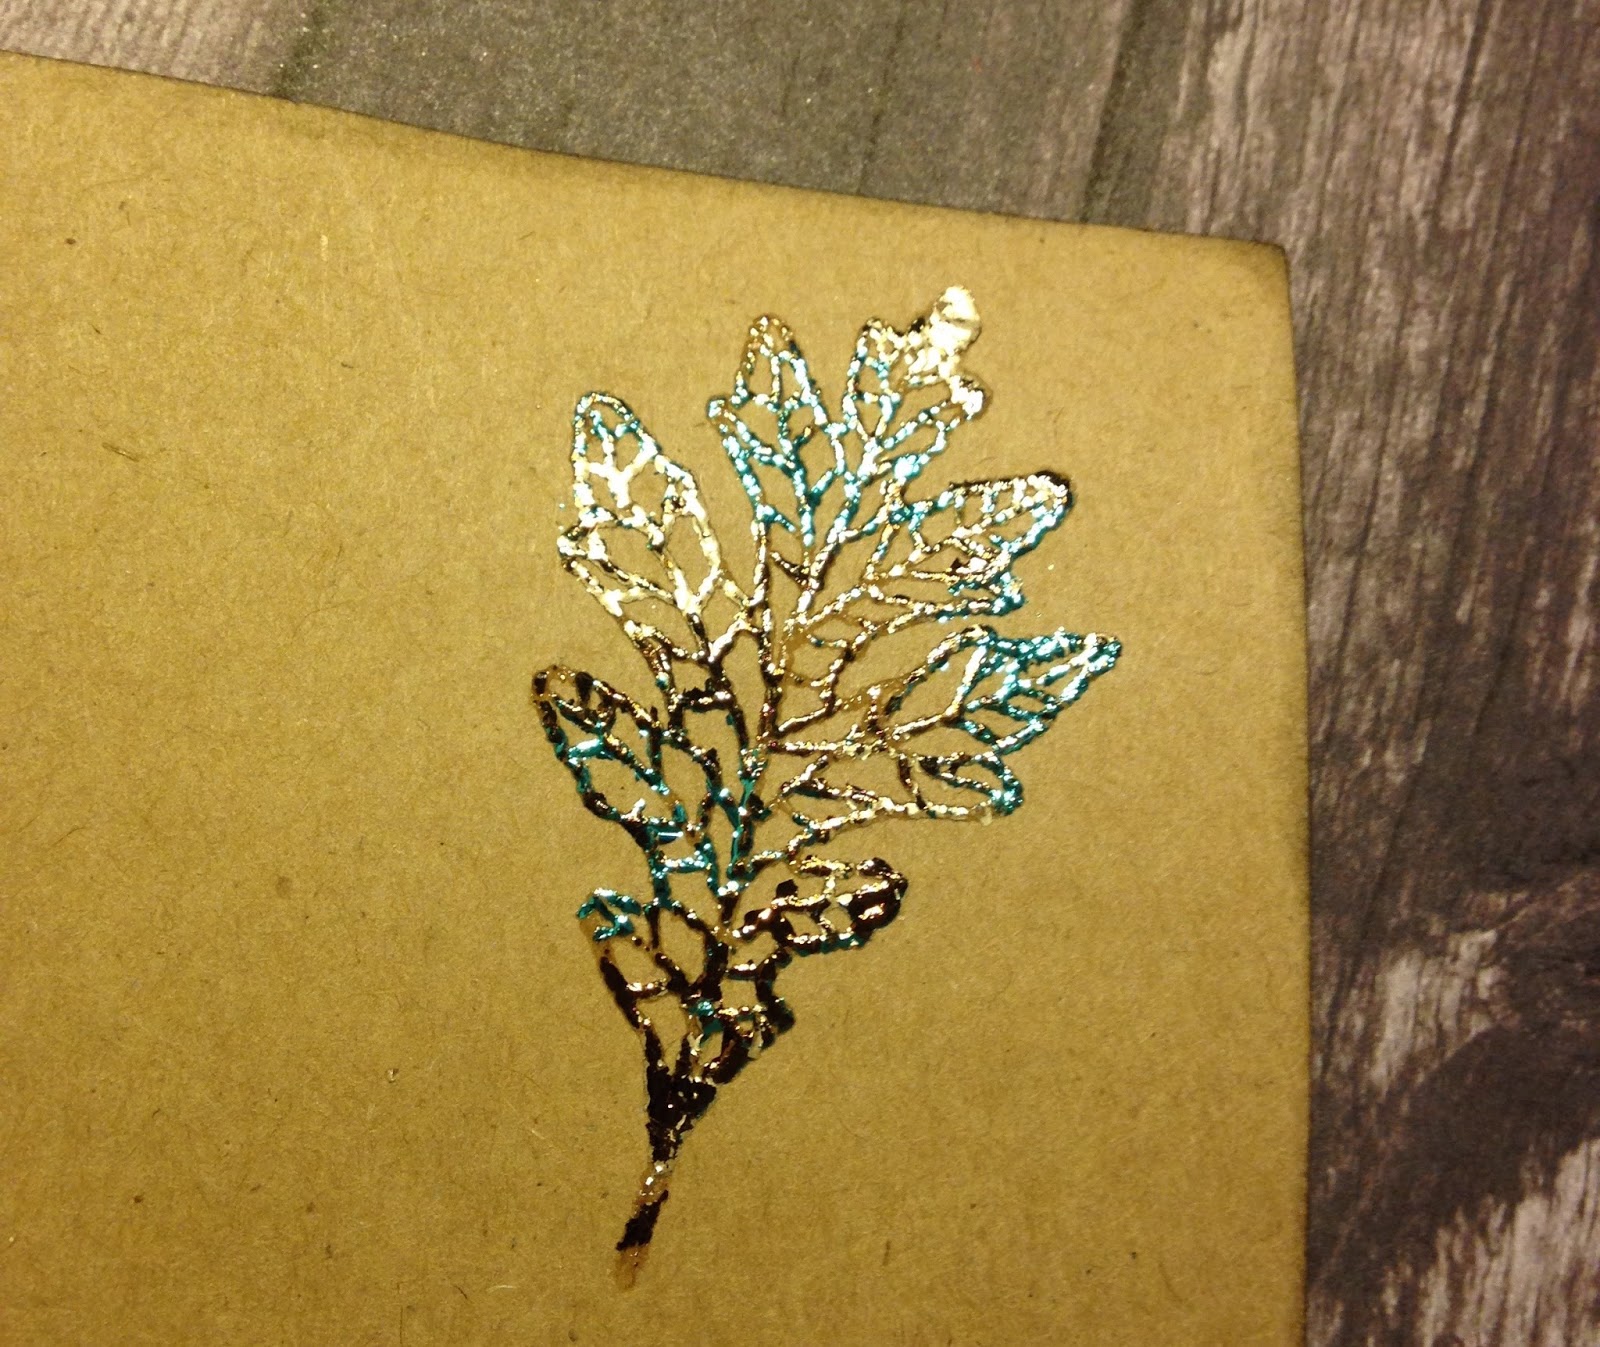
Then came the embossing. I took several colors of WOW embossing and embossed all of the star, sparkle, and shine images from all three sets (Magical Wizards, Wizard Friends, and Magical Sentiments). As I was making my way through the swirl of stars and swooshes, I die cut different sizes of hearts from the Castle Builder die set.

Taniesa Vlasak for Trinity Stamps Winter Release11

once all the stamping and embossing was done, I took a damp rag and went along the stary magic trail and gave it even more texture. There were a few spots that still needed something so I took my embossing pen and added some dots here and there.

Taniesa Vlasak for Trinity Stamps Winter Release2

I added a sentiment from Caffeinated Sentiments, one of my personal fave… it was so appropriate given the fact a gift card was going inside.

Taniesa Vlasak for Trinity Stamps Winter Release3

I added a little Midas Touch Aqua Shimmer pen by Nuvo to the red part of the robe the wizard is wearing and I even embossed his wand gold.

Taniesa Vlasak for Trinity Stamps Winter Release1

Such a fun card right. I made the card 3×6 to fit these gold envelops I picked up at my local stamping store. I like the fun size, a nice change from the A-2 cards I usually make… But wait, there’s MORE!

Taniesa Vlasak for Trinity Stamps Winter Release5

Remember about that gift card I was telling you about? Bam! you’re magical! how perfect is THAT! I did a little stamp surgery so that I could make the sentiment ” Coffee and friends make a magical blend) In the Caffeinated sentiments, there is one that says Coffee & Friends make the perfect blend. All I had to do was snip off the make and the blend.

Taniesa Vlasak for Trinity Stamps Winter Release7

I stamped the first part directly to the card and the make a & Blend was stamped on a strip of white cardstock and then cut. I die cut the two layers of the magical sentiment die set (you can also use the stamp set to stamp in that shadow layer die) I glued those pieces to a very simple gold glitter pocket I made to hold the card.

Taniesa Vlasak for Trinity Stamps Winter Release6

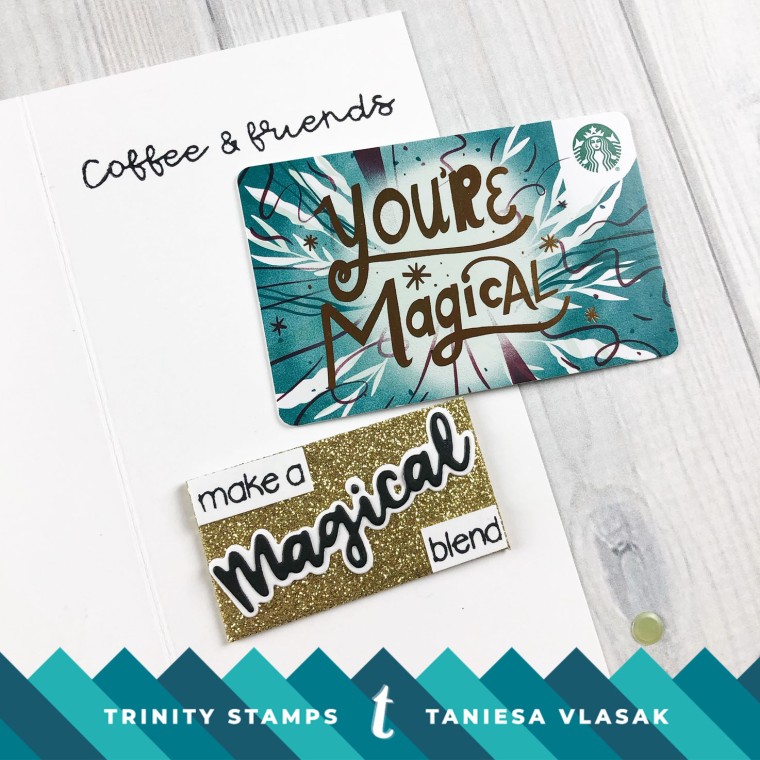
Starbucks usually has fun seasonal and celebratory gift cards and so does a lot of other places, especially this year. How much fun is it to receive a gift inside a handmade card (which is a gift also!) Now is a great time to make a few of these types of cards to have on hand when you need to gift a card to someone.

Taniesa Vlasak for Trinity Stamps Winter Release8

I hope you enjoyed my little card today AND this awesome blog hop! These girls blow me away with their talent and I couldn’t be more excited to work with them all!

I am the last stop on the hop today BUT if you haven’t stopped by every blog on the hop today I have included a list below. Don’t forget those Monday Blog Hop stops either, more chances to win, more inspiration to be had!

blog graphic for monday bloggers

Monday Blog hop List

Taniesa Vlasak

(aka ME, you are already here, MUAH!)

& because I don’t want you to miss a thing…
here is the list from Friday’s hop!

Trinity Stamps blog post can be found HERE and the winner announcement will be posted HERE on November 10th!

Thank you for stopping by today! When you comment below I would love to know what you thought of our blog hop AND as an added bonus for making it this far, I have a $15 Trinity Stamps Gift certificate especially for one of YOU! YAY, MORE PRIZES! So come on and say HI, I know I haven’t blogged in FOR EVER, but now that you see all our great stamps you know why 🙂

Taniesa Vlasak | TheCraftyPickle.com

HUGE Crafty Sale Going On NOW & other announcements!

Hey Crafty Friends!

Are you looking for the Blog Hop post from Friday 7/14/17 for Honey Bee Stamps new Under the Sea release? If so, Click HERE! If you haven’t seen my post for this release yet, check it out (after reading the announcements below of course). Here is a sneak Peek!

Okay Friends…Grab your pennies! It’s another super awesome crafty sale!

Affiliate links used where available at NO cost to you. Thank you for your support!

I just had to let you know of a crafty sale going on NOW thru 7/17. Ellen Hutson is having a BUY MORE SAVE MORE sale where your discount increases the more you spend. Your discount can be 10% up to 20% off. If you happen to be a frequent shopper at Ellen Hutson, then you can use your frequent shopper discount on top of this fantastic sale!

Want to shop but need some ideas on what to grab? I am listing a few of my top picks if you need suggestions:

Distress oxide ink pads…. first set of 12 and just in the warehouse yesterday is the NEW set of 12! Click HERE to see them all!

Newest Ellen Hutson release. I am so in love with that Mermaid Tail and I scooped up the new Crafty Lady already too. Look for card examples from me coming SOON! Click HERE to see all the Essentials by Ellen line of products.
Daniel Smith Watercolors. Hands down these are the best watercolors and Ellen has them at an unbeatable savings already, but the sale is on top of these low prices so scoop them up. If you are just starting out you may want to grab the Essentials Set, There are also some sample dot cards available from Sandy Allnock and Hero Arts, both great selections and this allows you to try a bit before buying a bunch!

Nuvo Gilding Flakes. I am absolutely in love with these lately and you can use a little or a lot. These jars go a very long way and I don’t see myself ever needing to buy more!

My Favorite Things “All about YOU” stamp set. This is such a versatile set and great for all occasions and sentiment needs. Click HERE to see the new MFT release including this stamp set.

Essentials by Ellen storage pockets. These are super thick and durable. They come in all the sizes one would need for stamps and dies. Now is a great time to stock up. Find them all HERE.

Hopefully that gives a few suggestions to go on but I am sure you will find SO many things on your wish list.

Just a couple of Announcements…

Honey Bee Stamps just released some amazing products. See that new release HERE and join the blog hop fun… you could win one of two $50 gift certificates! More info HERE!

Bella Blvd is having their first ever Illustrated Faith warehouse box sale THIS monday 7/17/17 at 9am CST. Learn more about that HERE!

Dayspring has also been running a huge sale and you can see more of the Bible Journaling products on sale HERE.

Are you participating in the Illustrated Faith 30 day Happy Mail challenge? It isn’t too late to join in. Learn more about it HERE.

Cricut Mystery Box Launch! These are known to sell out super fast but as of writing this there are still some available! See HERE for more details!

and Last but not least…

I am planning on doing some Facebook Live videos now that summer is here and I find more time. Make sure you check out and like my Facebook page HERE so that you are notified when I am going live! I am such a newbie at this so have some patience with me please while I figure it all out 🙂 I am excited to share tips and tricks with you and haul videos! If you have something you would like to see me show or share please let me know in the comments below!

I hope you found these announcements helpful! I will be back next week with some more projects to share.

Until then have a WONDERFUL weekend!

Honey Bee Stamps New Release Sneak Peek!

Ahoy there, friends!

I hope you are all having a FINTASTIC summer! Today we are kicking off the sneak peeks for the Under the Sea with Honey Bee new release!!! I am so excited for you all to see what an amazing collection of stamps, dies, and embellishments will be in the Honey Bee Stamps store this Friday 7/14!

Today fellow designer, Lisa, and I are sharing a look at one of my most favorite stamps in this whole release over on the Honey Bee Stamps blog today. The Under the Sea stamp set features two adorable mermaids, one of which is featured on my card today! You can see more at Honey Bee Stamps HERE.

Here is a little peek at these too-cute mermaids!

Here is my Card for today featuring the Under the Sea stamp set! If you are wanting to know the products I have used for this card there will be a supply list at the bottom of this post.

I had a lot of fun making this textured background and of course coloring this sweet little mermaid! I plan on showing you more later this week, including how I did my background. Until then here is a few more photos of my sneak peek card for today.

Join in the fun and SEA more new release photos all week-long on the HoneyBeeStamps.com Blog, Instagram, and Facebook page. Then on Friday 7/14 Join us in a huge release day blog hop celebration! This release is sure to make a SPLASH!

Have a wonderful week!


Supplies Used:
(supplies are linked to a shopping source below where available. Some links may not work until release day. Affiliate links used where available)

Under the Sea Stamp set by Honey Bee Stamps
Mermaid Song stamp set by Honey Bee Stamps
Watercolor Cardstock
Nuvo Mousse: Seaspray Green, Citrus Green, Pacific Teal, and Old Navy
Distress Oxide inks: Broken China, Faded Jeans, Cracked Pistachio, Peeled Paid, Iced Spruce, and Wilted Violet.
Ranger super fine detail white embossing powder
Versamark ink pad
Heat Tool
Fish Stencil
Watercolors by Daniel Smith (for under-painting)
Metallic and Pearl watercolors used on Mermaid

Misti and Honey Bee Stamps | A perfect match!

Hi Crafty Friends!

Welcome to the Honey Bee Stamps and Misti Blog hop!

You should have arrived here from the blog of the Amazing, Lydia Fideler!  If you are starting with my blog today, make sure you go back to check out Lydia’s post as she is the first person on the hop!

I was so excited when I found out that we would be working with the kind folks over at My Sweet Petunia. I have had my Misti since they first launched and It is the most used stamping tool in my craft room!

Today I have a fun little project for you. Instead of making a card I decided to make this cute little tissue box that holds those purse/pocket packs of tissue perfectly.  I took inspiration from the Honey Bee Logo and the My Sweet Petunia logo for my colors.

Today I will be featuring the Bless Your Heart stamp from Honey bee stamps ( and don’t tell Melissa…. but if you look closely, you might see a couple of stamps from our April release coming up VERY soon! I had to sneak something in 😉 Shhhhh! )

Making the tissue box is super simple if you have a paper trimmer, scoreboard, and scissors.

Cut a piece of Cardstock to 8 inches by 7 1/2 inches. I used a piece of Strathmore mixed media paper. Both because I planned on doing some watercoloring but also this is super sturdy for a tissue box.

Time to score! Start with the 8″ length at the top.


Then turn your paper 90 degrees and score again.

Once you did your scoring, take a bone folder and burnish / crease all of your score marks. Then grab your scissors for some trimming.

to make the cutting easy, I first cut along the score lines on the sides that had the double score line close to each other. then I trimmed away the pieces you see above.

Before I assemble the box I wanted to do my stamping and coloring. Because I am working on a textured surface, the misti tool is even more helpful. Let me show you….

I could have lined this up at the top of the misti but instead I decided to use my creative corners to give it a little push upwards.

You’ll see above that my first stamping didn’t go so great, which is normal for textured papers. I Just re inked and stamped again.

MUCH better!

Then I die cut a little hexagon for the tissue opening.

I have a handy little tip for you. Instead of taping your paper down to watercolor. Flip over your misti and attach your projects with magnets to the backside. This will hold your project down while you color or paint.

I sketched out some hexagons with a watercolor pencil by Prima.

Then I water colored the top of my tissue box. The watercolor honeycomb reminded me of the Honey Bee logo and website. I didn’t have a pink Petunia but I did have this cute little daisy (which may or may not be a stamp from a brand new stamp set coming soon) So I painted that pink. Of course my little bee is yellow and black. You can’t tell too well but there is a lot of glitter accents from my Wink of Stella glitter brush pen. And I even mixed a little Gold watercolor in my yellow for the honeycomb.

If I tilt it just right you can see just a bit.

After I was done watercoloring I cut two side pieces to 2 1/4″ x 1′ from yellow polka dot paper and two longer side pieces to 4 1/4″ x 1″. I inked the edges of the yellow paper with some Black ink and for the black & white paper I inked it a bit with some Fossilized amber distress oxide ink and then some black distress ink over that.

I adhered those down with some Scor tape and then glued the small long flap and one of the sides together. The other side of the box i left without adhesive so this box could be refilled.

How cute would this be to hand to someone who has some bad spring allergies or a seasonal cold. I think it would make just about anyone smile. I mean look at that cute bee!

I have one more fun “tip” to share with you all. I love my creative corners but I really wasn’t sure how to store them. I wanted to be able to keep them with my Misti and my mini misti and not have the pieces all over the place.

I had this stampin up box and it was just the perfect size. I took a cd sleeve and made a pocket for the inside to hold my mini misti grid paper, my grid transparency and a scrap piece of plastic I use to stamp on sometimes. On the other side my Creative corner pieces fit perfectly!

I cut my packaging to fit on the inside of the stampin up case.

If you don’t have a case like this you could do the same thing with a 5×7 photo case.

Here is a few photos of the final project. What do you think?

Thanks so much for stopping by!

Next stop on the hop is the talented Ilina! Buzz on over and show her some love!


Here is a list of everyone participating in today’s hop. Don’t forget to comment at each blog post for a chance to win!

Taniesa Vlasak <—-That’s me!

Hip Hip Hooray! It’s Honey Bee Stamps NEW RELEASE WEEK!

Hey Friends!

Today I am over at the Honey Bee Stamps blog, Kicking off the sneak peeks for new release week.

This new release is so much fun! Today we’re showing a sneak from two stamp and die sets, Celebration Box and Hooray! These might just be my new all time Honey bee stamp Faves!

Take a look at two cards that I made using some of the new stamps and dies.

First up is a Congratulations card.

Congratulations | Taniesa Vlasak for Honey Bee Stamps

Congratulations | Taniesa Vlasak for Honey Bee Stamps

Congratulations | Taniesa Vlasak for Honey Bee Stamps

My second card for today would be great for a birthday or any kind of celebration

Hip Hip HOORAY | Taniesa Vlasak for Honey Bee Stamps

Hip Hip HOORAY | Taniesa Vlasak for Honey Bee Stamps

Hip Hip HOORAY | Taniesa Vlasak for Honey Bee Stamps

I will be back soon with even more Honey Bee Stamps inspiration using the new products! Be sure to stop by www.honeybeestamps.com/blog all this week to see more sneaks. The entire release will be available for purchase THIS FRIDAY!

Thanks for stopping by!

Taniesa Vlasak | TheCraftyPickle.com

A winter card with Kat Scrappiness and Hero Arts!

Hi Friends!

Happy Thursday! Today I have a fun card that can be used for Christmas or any occasion. When I saw this Birch Background die at Kat Scrappiness.com I knew I wanted to create a card with this die taking center stage.

To pair with this fantastic Die I chose the beautiful Hero Arts color layering Deer stamp set. I love that you can layer different ink colors quickly and not have to worry where your shading will go.

Dear Friend Winter card for KatScrappiness.com | Taniesa Vlasak www.thecraftypickle.com

I knew that I wanted the trees to have some dimension to them so I took a piece of adhesive backed foam and a piece of adhesive backed cardstock and I stuck the cardstock on top of the foam. You could always use a product like stick-it to glue the cardstock to the foam, these were just in my supply stash. I find that it is easier to glue foam to a intricate die cut prior to cutting if at all possible. I cut the cardstock covered foam with the Birch Tree Background die in my big shot a couple of times to ensure everything cut though. This will smoosh your foam down a bit but it will puff back up.

Dear Friend Winter card for KatScrappiness.com | Taniesa Vlasak www.thecraftypickle.com

I carefully removed the waste from the die cut leaving just the background. I removed the adhesive backing on the foam and placed this on a piece of heavy weight cardstock that I have blended a bit of Broken China Distress ink on. I kept the ink darker at the top and lighter at the bottom.  After that was glued together, I took  W-01 and a W-03 Copic markers and added some shading to the trees. This added a bit more dimension and texture.

I stamped my deer using three shades of hero arts ink that I had on hand (Soft Sand, Latte, and Brown Bark) and then stamped the final detail stamps in Versafine Onyx black ink. I cut the deer out with the coordinating die set then popped the deer up with the leftover scraps of foam from my trees.

Dear Friend Winter card for KatScrappiness.com | Taniesa Vlasak www.thecraftypickle.com

I took some of my favorite sparkling snow sequins from Kat’s shop and glued them down on the blue panel with some Ranger Multi Medium Matte finish adhesive so that they looked like snow falling. To finish off the card I added a sentiment banner from the same Hero Arts stamp set.

I love the multiple layers on this card and it really came together quickly. I could see so many possibilities with this background die. It’s great for all seasons!

Dear Friend Winter card for KatScrappiness.com | Taniesa Vlasak www.thecraftypickle.com

I hope you enjoyed my card today. I appreciate you stopping by. Please check out the links below for supplies I used today.

Have a wonderful day!

Taniesa Vlasak | TheCraftyPickle.com


Products used today (Affiliate links used if available):

Mixing it up! Honey Bee Stamps and Essentials By Ellen!

Hi Crafty Friends!

Today I am mixing it up on the Ellen Hutson Blog as well as the Honey Bee Stamps Blog with some beautiful stamps and dies from both companies!

mix-it-up with Honey Bee Stamps and Ellen Hutson LLC

For this card I am using the Bokeh Dots and Thankful stamps by Essentials By Ellen and the Kindness stamps and Kindness dies from Honey Bee Stamps.

I wanted to do a one layer card and keep things pretty simple so I decided to do some masking and embossing. I will never get tired of the impressive results of masking and the elegant touch of some gold embossing powder.

Kindness by Taniesa Vlasak | TheCraftyPickle.com

When creating several masks of the same image I like to double up on my masking paper and cut once. I stamped all of my images out on Eclipse masking paper and then adhered that piece on top of another piece of masking paper and then cut out. This saves time and if your cutting masks anyway you could always cut some for the next time!

Kindness by Taniesa Vlasak | TheCraftyPickle.com

I started out with some Neenah Desert storm cardstock cut to 5.5″ x 4.25″(I later trimmed this down slightly smaller to show the polka dot pattern) I stamped and embossed the large kindness sentiment and then masked and stamped the various images from the Thankful stamp set and the smaller sentiments from the kindness stamp set. I used versamark ink for the embossed sentiment and I used Versafine Vintage Sepia for the small sentiments and other images. The dark brown ink goes so well with the Desert Storm cardstock and was less harsh of a line than the Versafine Onyx black that I usually use.  Finally I stamped the scattered dots from the Essentials by Ellen Bokeh stamp set with some Delicata Golden glitz ink.

Kindness by Taniesa Vlasak | TheCraftyPickle.com

After all that I was able to remove my layers of masking paper to reveal the finished stamped design! I love this part! I then colored all of the images in with my Faber-Castell Polychromos pencils. These blend beautifully on this cardstock! The only time that I used my gamsol blending medium was around the Kindness sentiment, to add a shadow. I found that after I colored the images the brown lines became lighter and darker in spots. If I stamped over the images again the ink would not cover evenly because of the oil based pencil. So I took a matching colored pencil and went over all of the brown lines. (see photo below for comparison) This gave the image a cohesive look and evened out the color all the way around.

Kindness by Taniesa Vlasak | TheCraftyPickle.com

What a big difference, right? The color I used to match up with the Vintage Sepia colored in was the 9201 Polychromos Burnt Umber. I think that doing this made the images feel like one big stamp instead of several little stamps.

I did find that the Kindness sentiment got a little lost after all was done. To fix this I die cut the Kindness sentiment out using the dies by Honey Bee stamps. The die and the stamp are exactly the same size so I embossed the die with the same pale rich gold embossing powder and then adhered the die cut on top of the stamped image with Ranger Multi Medium Matte. Before I glued the die cut down I did shade with the same burnt umber pencil I was using, around the kindness sentiment… I blended that out lightly with some gamsol and a paper blending stump.  I thought this gave just a bit more pop to the card.

Kindness by Taniesa Vlasak | TheCraftyPickle.com

I added the card panel to a piece of gold and brown polka dot paper from Echo Park and then glued that to a A-2 card base made from the same Neenah Desert Storm cardstock.

I really enjoyed coloring this card. I need to give my colored pencils some more love. I was pleasantly surprised how bright the colors showed on the kraft colored cardstock.

Head on over to the Honey Bee Stamps blog and the Ellen Hutson Blog for more inspiration and a chance to win a great prize!

For a list of products used and links please see my list below. (affiliate links used at no additional cost to you)

Supplies Used:

Faber Castell Polychromos Color Pencil Set – Tin of 120 Faber-Castell Polychromos Pencils  (at the time of linking this there is an AWESOME deal at Amazon for the whole set… works out to be less than $1.50 per pencil!)

I started out buying the pencils open stock, However if I had to do it all over again I would have got the full set because it saves in the long run, especially when on sale!


Thank you so much for stopping by! Check back next week for some fun new surprises!

Happy Crafting!

Taniesa Vlasak | TheCraftyPickle.com


Red, White, and Blue Week!

I’m so excited to share a bit of news and a challenge with you! This week over on the Honey Bee Stamps Blog is “Red, White, & Blue Week!” Designers will be sharing their project using this color palette.

RWB Color Palette

Of course it ties in with the 4th of July festivities but it does not have to be an Independence Day or Americana project, It can be anything using any types of products (not just Honey Bee Stamps)

This fun will run starting Today, Monday 6/27 Thru Monday 7/4. During this week, the Design Team will be posting their creations using the Red, White & Blue color theme and you will have a chance to participate in the fun (not to mention have a chance at winning a prize!)

THE CHALLENGE

We would love to challenge our customers, friends & crafty kids to play along with us. Share your creations on the Honey Bee Stamps Website, Honey Bee Stamps Facebook Page or on Instagram using the hashtag #HBSChallenge so that we can see everything you create!  We challenge you to share anything crafty (cards, scrapbook pages, mixed media). While we love to see you use Honey Bee Stamp products, they are not required to participate. The color palate above is just a starting off point. It can be ANY shades of red, white, and blue.

I will be playing along too! Both here on my blog and on my instagram account as well as on the Honey Bee Stamps blog. Look for a few fun projects from me and the rest of the Honey Bee design team!

Have a FANTASTIC week, my friends!

Happy Crafting!

Taniesa Vlasak for Honey Bee Stamps

Sweet Cute Fast Page!!!

IMG_20151021_141443330

So in love with these stamps from Close to my Heart …it made it so easy for me to complete this fast and easy page…i tried t keep it black and white with just a little pop of color from Ace’s cat bed!!! Ace is such a sweet cat and loves our family and we love him right back!!!

Here are a few close-ups of my page:

IMG_20151021_141458811

IMG_20151021_141450597Thanks for looking!!!

And here are the products that I used:

Close to my Heart- Hello Summer Everyday Life, Hopscotch Alphabet, Love My Cat Everyday Life

Flair Meow

Flair “I love you to the moon and back”

Fallen Leaves foil card by Carrie

I am super excited to share with you today a project I have been dying to try ever since I saw a demo video by the uber talented Tim Holtz.  I will post the link to his video along with a list of products I used at the bottom of this page. 


I really like this NEW “Fallen Leaves” stamp set by CTMH.  The outlines are perfect for this technique.   Follow the link to purchase one for yourself. 


 I stamped the leave images onto craft cardstock then stamped over a few with embossing ink and applied the Sticky embossing powder ( like liquid glue when heated ) 


then I applied the foil sheets in three different metallic colors. These foil colors are really pretty, the photo does not do them justice.


I fussy cut a few extra leaves after they were dry and adhered them to my card with 3D foam squares to add some dimension.

 This is my finished card. I added a cream color photo mat to the Kraft card stock.  I really love this technique and plan on foiling more in the future.

 Thanks for stopping by today.  Be sure to view Tim’s video to see his handy work.   Carrie for ThecraftyPickle.com

Products used for this project:

CTMH stamp set: Fallen Leaves 

Distress Embossing ink

Distress Inks in Vintage Photo, Rusty Hinge and Wild Honey

Ranger Sticky Embossing Powder

Ranger’s Transfer Foil Sheets : Vintage foils

Tim Holtz Ranger Demo – Sticky Embossing Powder with Foils – CHA 2015