HUGE Crafty Sale Going On NOW & other announcements!

Hey Crafty Friends!

Are you looking for the Blog Hop post from Friday 7/14/17 for Honey Bee Stamps new Under the Sea release? If so, Click HERE! If you haven’t seen my post for this release yet, check it out (after reading the announcements below of course). Here is a sneak Peek!

Okay Friends…Grab your pennies! It’s another super awesome crafty sale!

Affiliate links used where available at NO cost to you. Thank you for your support!

I just had to let you know of a crafty sale going on NOW thru 7/17. Ellen Hutson is having a BUY MORE SAVE MORE sale where your discount increases the more you spend. Your discount can be 10% up to 20% off. If you happen to be a frequent shopper at Ellen Hutson, then you can use your frequent shopper discount on top of this fantastic sale!

Want to shop but need some ideas on what to grab? I am listing a few of my top picks if you need suggestions:

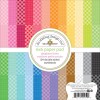
Distress oxide ink pads…. first set of 12 and just in the warehouse yesterday is the NEW set of 12! Click HERE to see them all!

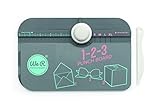
Newest Ellen Hutson release. I am so in love with that Mermaid Tail and I scooped up the new Crafty Lady already too. Look for card examples from me coming SOON! Click HERE to see all the Essentials by Ellen line of products.
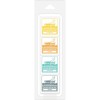
Daniel Smith Watercolors. Hands down these are the best watercolors and Ellen has them at an unbeatable savings already, but the sale is on top of these low prices so scoop them up. If you are just starting out you may want to grab the Essentials Set, There are also some sample dot cards available from Sandy Allnock and Hero Arts, both great selections and this allows you to try a bit before buying a bunch!

Nuvo Gilding Flakes. I am absolutely in love with these lately and you can use a little or a lot. These jars go a very long way and I don’t see myself ever needing to buy more!

My Favorite Things “All about YOU” stamp set. This is such a versatile set and great for all occasions and sentiment needs. Click HERE to see the new MFT release including this stamp set.

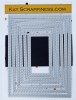
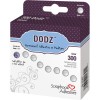
Essentials by Ellen storage pockets. These are super thick and durable. They come in all the sizes one would need for stamps and dies. Now is a great time to stock up. Find them all HERE.

Hopefully that gives a few suggestions to go on but I am sure you will find SO many things on your wish list.

Just a couple of Announcements…

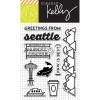
Honey Bee Stamps just released some amazing products. See that new release HERE and join the blog hop fun… you could win one of two $50 gift certificates! More info HERE!

Bella Blvd is having their first ever Illustrated Faith warehouse box sale THIS monday 7/17/17 at 9am CST. Learn more about that HERE!

Dayspring has also been running a huge sale and you can see more of the Bible Journaling products on sale HERE.

Are you participating in the Illustrated Faith 30 day Happy Mail challenge? It isn’t too late to join in. Learn more about it HERE.

Cricut Mystery Box Launch! These are known to sell out super fast but as of writing this there are still some available! See HERE for more details!

and Last but not least…

I am planning on doing some Facebook Live videos now that summer is here and I find more time. Make sure you check out and like my Facebook page HERE so that you are notified when I am going live! I am such a newbie at this so have some patience with me please while I figure it all out 🙂 I am excited to share tips and tricks with you and haul videos! If you have something you would like to see me show or share please let me know in the comments below!

I hope you found these announcements helpful! I will be back next week with some more projects to share.

Until then have a WONDERFUL weekend!

Dive in! Under the Sea with Honey Bee *Blog Hop*

Good Morning Crafty Friends!

It’s new release day over at Honey Bee stamps, and that means its Blog Hop SWIM time!!!

If you are already swimming along, then you should have arrived here from the blog of the kind and beautiful, Patricia! If not, don’t worry, you can always go to the Honey Bee Stamps blog<— and see all of the amazingly talented designers that are inspiring you today.

Swim along with our New ReleaseUnder The Sea with Honey Bee!

Limited quantities of the NEW July Under the Sea Stamp bundles are available. click the photo or see the end of the post for links.

Everything is available for purchase today in our shop HERE.
So let’s Shellabrate with some splashingly sweet prizes!!  We will have TWO winners that will each receive a $50 gift certificate to purchase new goodies in the Honey Bee Stamps Store.

Enter to win one of two $50 shopping sprees to HoneyBeeStamps.com for participating in our new release Blog Hop!

All you have to do to win is comment here on the Honey Bee Stamps blog and again at each one of our designer’s blog by Sunday, July 16th. Winners will be announced on Monday, July 17th at Noon PST.

So swim along and get ready to SEA some inspiration!

Affiliate links used where available at NO cost to you, Thank you so very much for your support!

Today I have two simple cards to share with you all highlighting some of the new stamps, dies and embellishments by Honey Bee Stamps, It’s another HUGE and amazing release so I will have lots more to share in the coming weeks!

First up is this classy neutral shaker card made with the new Seashell Card die.

I created this shaker card using all three large shell and shell card pieces. First I cut the card itself, then cut the inside of one of the shells using the smaller open shell. I set that aside. I took the detail die and cut that out of some Cricut holographic opal vinyl and then I used that same detail die to cut a seashell in the middle of my card panel as the opening for the shaker.

I cut the card in half at the score line and started assembling the two pieces with a double layer of foam tape. Once that was finished I added some of the new Seaside Treasures shaker kit as well as some glitter and sequins from various new embellishment kits. I covered the shaker with a piece of acetate and then again covered that up with the card panel. I took that vinyl detail piece (which already has adhesive on the back) and stuck it in the opening of the panel on top of the acetate. I put more foam tape around the Seashell shaker to cover the top panel and then glued all of that on an off white mat base, and then to a heavy weight beige cardstock card base.

On the inside of the card I stamped Let’s Shellabrate from the Mermaid song stamp set using Versamark ink, and heat embossed using WOW Rich pale gold embossing powder. I also stamped some cute little sand dollars from the Message in a bottle stamp set and heat embossed those with Nuvo White embossing powder. I think this would make a great masculine card or a wedding card for someone celebrating their wedding at the beach.

I am in love with this die and it can do a lot more than just a shaker card. It can be a stand alone card or used within a traditional card like my example. There is a lot of possibilities with this die and I am sure you will be seeing a lot of great ideas using this card die in the near future!

This is the card (closed) with two pieces layered on top . Just one of the options that you can create with this die set!

Here are the main die pieces of the Seashell card Die set. There are two small circle dies that are not pictured below that are great for making a pearl to go inside your shell!

The next card I have for you is one that features the new Sunburst A-2 cover plate die from Honey Bee Stamps. as well as the Ocean Borders stamp and die and the Swimming By die set.

I cut out the cover plate die in two shades of yellow cardstock and glued the pieces of the other color inside the cut panel. This will make two cards, so it’s a great timesaver too! I took the border stamp in the ocean borders and I stamped, heat embossed in clear and then masked the first border stamp at the bottom of some light blue cardstock, I repeated this process of stamping, embossing, then masking about 5 times. Once I had a about a half of a card panel worth of ocean borders I took the Ocean Borders Die that just cuts the top of that wave-like border and I cut the top of that masked border stack. I glued some foam behind that piece and set aside.

I stacked a couple of pieces of cardstock and glued those together, Then I cut that stacked cardstock piece with the Mermaid die from the Swimming by die set. I used the same die and with just using the bottom half of that die I cut some Cricut holographic Opal vinyl. I stuck that to the cardstock piece and cut off everything below the tail, I glued just the bottom portion of that tail to the card base just below the circle part of the sun, I then glued the waves on top of that, which completed the scene. I finished the card off by adding some new Bubbles Sequins and Bokeh lights confetti and a sentiment from the Mermaid song stamp set. I heat embossed that with the Nuvo white power and cut a little flag end to the left. I popped this up on foam tape and glued to my card. I really love how that Vinyl is shiny and iridescent like… perfect for under the sea and beach papercrafting!

I hope these cards inspired you. Make sure to check out all of the new releases in the Honey Bee Stamps shop available NOW!

Also, there is a limited number of new release stamp bundle sets! See that special deal

—> HERE <—  Grab them quick!  I noticed there wasn’t too many at this reduced rate.

Don’t forget to comment below for your chance at two $50 gift certificate giveaways going on during this Blog Swim!

Supplies used are listed below.

Thank you so much for stopping by. Your next stop in this swim-a-long is the fabulous and super-duper talented Tracy! Swim on over and see what amazing things she has to share with you today!

I’ll SEA you soon, with MORE ideas and inspiration using the new release items!


Supplies used:

Honey Bee Stamp Sets:

Honey Bee Dies:

Honey Bee Embellishments:

Toolbox supplies:

Honey Bee Stamps New Release Sneak Peek!

Ahoy there, friends!

I hope you are all having a FINTASTIC summer! Today we are kicking off the sneak peeks for the Under the Sea with Honey Bee new release!!! I am so excited for you all to see what an amazing collection of stamps, dies, and embellishments will be in the Honey Bee Stamps store this Friday 7/14!

Today fellow designer, Lisa, and I are sharing a look at one of my most favorite stamps in this whole release over on the Honey Bee Stamps blog today. The Under the Sea stamp set features two adorable mermaids, one of which is featured on my card today! You can see more at Honey Bee Stamps HERE.

Here is a little peek at these too-cute mermaids!

Here is my Card for today featuring the Under the Sea stamp set! If you are wanting to know the products I have used for this card there will be a supply list at the bottom of this post.

I had a lot of fun making this textured background and of course coloring this sweet little mermaid! I plan on showing you more later this week, including how I did my background. Until then here is a few more photos of my sneak peek card for today.

Join in the fun and SEA more new release photos all week-long on the HoneyBeeStamps.com Blog, Instagram, and Facebook page. Then on Friday 7/14 Join us in a huge release day blog hop celebration! This release is sure to make a SPLASH!

Have a wonderful week!


Supplies Used:
(supplies are linked to a shopping source below where available. Some links may not work until release day. Affiliate links used where available)

Under the Sea Stamp set by Honey Bee Stamps
Mermaid Song stamp set by Honey Bee Stamps
Watercolor Cardstock
Nuvo Mousse: Seaspray Green, Citrus Green, Pacific Teal, and Old Navy
Distress Oxide inks: Broken China, Faded Jeans, Cracked Pistachio, Peeled Paid, Iced Spruce, and Wilted Violet.
Ranger super fine detail white embossing powder
Versamark ink pad
Heat Tool
Fish Stencil
Watercolors by Daniel Smith (for under-painting)
Metallic and Pearl watercolors used on Mermaid

Greetings from Seattle! Creative Coffee Gift for the Coffee Lover’s Blog Hop

Hello Coffee (and Papercraft) Lovers!

I am excited to be participating in the Coffee Lovers Blog hop for the first time! Today I am creating a project on behalf of KatScrappiness.com. I was inspired by the Seattle stamp set that was designed by Kelly Purkey for Hero arts as well as a Seattle Starbucks gift card.

I have always been a coffee addict but when I moved to the Seattle area about a year and a half ago I REALLY came to love coffee any time of the day! I thought it would be fun to create a coffee gift card holder but I didn’t want to JUST give a gift card, So I created another little special gift using my Seattle stamp set.

This cute little matchbox was created using the WRMK envelope punch board. I used some Doodlebug printed papers from the Gingham collection and the cream and sugar collection.  I followed the tutorial for the matchbox HERE and then I added a card on top. Sort of an all-in-one gift!

For the inside of the card, I attached the coffee gift card using a glue dot. I cut a white panel for my message using the second smallest rectangle die in the Kat Scrappiness double stitched rectangle dies. I stamped a sentiment and coffee cup icon in a light grey (Hippo) ink from the Lawn Fawn mini ink pad set, Tropical Island. The stamp set I used here is an older set from Kelly Purkey.

I took the same size stitched rectangle die and die cut a piece of watercolor paper. I stamped a little Seattle scene using that Seattle stamp set pictured above. I then added some watercolor using my zig clean color real brush markers and a waterbrush. After it was dry I went over all of the water and space needle with a clear Spectrum Noir glitter brush marker.

For the inside of the matchbox I added some green sequins, real Starbucks coffee beans, some iridescent cellophane wrap, and a cute pair of coffee cup earrings I made using beads, stamps, and shrink plastic! I haven’t played with shrink plastic since I was a kid and I have to tell you, this was so fun and I am sure I will be making more stamped jewelry in the future!

The stamp set that I used today can be found at KatScrappiness.com. In honor of the Coffee Lovers Blog hop, Kat Scrappiness is giving you 15% off your purchase!!! Use code *SPRINGCOFFEE* at checkout. She even has a special section of the store dedicated to awesome coffee and tea papercrafting items!

How about a little blog candy? Simply subscribe to my blog, and follow me on Instagram HERE. Once you have done that please comment below and let me know your following as well as your favorite Coffee or Tea (I am also a Davids Tea fan!). One lucky winner will get a Starbucks gift card (a Seattle Exclusive card) two versafine ink cubes in Onyx black and Olympia Green, two bags of sequins in a sparkly Starbucks Green shade and a semi-transparent white, some sticky back gems, a new clear sparkle brush marker, and an awesome big Thanks stamp with a matching die set! I am ever so thankful for my followers!

Supplies that I have used in my project today are listed below. Affiliate links are used where available, at no cost to you. Thanks!!

Special Delivery | Gift Box Decoration

Hey Crafty Friends,

Lately it has been Birthday season for my daughter’s friends. At this age they are difficult to buy for so we have been going for the tween gift that always seems to win, a gift card to Claire’s.

Giving a gift card to someone older is no biggie, a cute card and voila, instant happiness! For a tween though it just needs a little more something something, Ya know what I mean?

You may have seen this photo I posted on Instagram over the weekend.

Dressing up your gift packaging | Taniesa Vlasak for Honey Bee Stamps

for the project above I used the new Hooray die set and Surprise Box stamp set and dies. I also used some silver glitter Nuvo drops and pink bakers twine.

We had some leftover gift boxes from Valentine’s day that we purchased at Michael’s (they have several colors in the gift wrapping section) so instead of making a handmade card, I decided to do a (semi) handmade gift box, similar to the one I created above.

Dressing up your gift packaging | Taniesa Vlasak for Honey Bee Stamps

In addition to the pink gift box I also grabbed some basket filler shred, and the gift card. (later on we decided to add some candy)

Dressing up your gift packaging | Taniesa Vlasak for Honey Bee Stamps

I grabbed some of my favorite Honey Bee Stamps and dies. Today I will be using Little Pickup stamp set and dies, Surprise box stamp set and dies, Welcome Baby stamp set.

First I chose a selection of patterned papers from Doodlebug. I used this 6×6 paper pad, and I pulled out a selection of colors that I thought would go well together. I die cut several of the traditional shape balloon from the Surprise box die set and then stamped all of the balloons using a shade of ink that matched the pattern paper used.

Dressing up your gift packaging | Taniesa Vlasak for Honey Bee Stamps

After the die cutting and stamping was all finished. I took some finger daubers and added a little of the same ink I stamped with to the edges of the balloon. It’s a simple step but it adds some dimension to your die cuts and a bit of pop to the overall design. I also took a white water-based sharpie marker and added a little shine mark to the balloons.

Dressing up your gift packaging | Taniesa Vlasak for Honey Bee Stamps

Dressing up your gift packaging | Taniesa Vlasak for Honey Bee Stamps

I stamped and cut out the truck and gifts from the Little Pickup stamp and die set and colored them in with my copic markers. I also added a little clear glaze gel pen to the windshield and window.

I arranged all of the balloons on the box, popping some of them on foam tape and a couple I added two layers of foam tape to get a varying amount of heights to the balloons. Using a black glaze gel pen I added the balloon strings. Then I added the truck with the gifts in the back to the box, also with foam tape.

Dressing up your gift packaging | Taniesa Vlasak for Honey Bee Stamps

There is a great sentiment set that coordinates with the little pickup stamp set called Sending You sentiments. I love that set but the words “sending you” were smaller and didn’t seem to fit well for my box. I grabbed the brand new Welcome Baby stamp set because it also includes the words “special delivery” in a great font. I curved the words slightly and I stamped those out with black versamark ink. I sprinkled on some clear embossing powder with glitter and heat set. I cut around both words and glued those to the handle of my box.

Dressing up your gift packaging | Taniesa Vlasak for Honey Bee Stamps

Dressing up your gift packaging | Taniesa Vlasak for Honey Bee Stamps

I think this will be fun for my daughter to gift to her best friend (we are also going to tie a few balloons to the handle before gifting) and I hope that the recipient loves it as much as I loved making it for her.

Dressing up your gift packaging | Taniesa Vlasak for Honey Bee Stamps

Dressing up your gift packaging | Taniesa Vlasak for Honey Bee Stamps

I hope you got a little inspiration for your gift-giving today. Thank you so much for stopping by!

Taniesa Vlasak | TheCraftyPickle.com

You are WONDERFUL!

Hi Crafty Friends!

Did you know that today is “Send a Card to a Friend Day”?  I didn’t even know it was a thing, but there is a holiday and occasion for just about anything now days and this is one I can completely get behind. I don’t know about my fellow card makers out there but I am horrible about actually getting my cards in the mail and in the mail on time. Today is the perfect push to grab some cards and send them to your friends… Just BEE-cause!

You are WONDERFUL | Taniesa Vlasak for HoneyBeeStamps.com

Today’s card features the Honey Bee stamp sets “Zen Bouquet”, “Camera Love”, and “Beautiful Life”. I also used the Stand alone “Wonderful” die and the matching die set for “Beautiful Life”.

So I had a general idea of the card design in my head and I knew I wanted a striped border at the bottom of my card. Problem was I didn’t have a background stamp or border stamp that was a stripe. So I got a little creative and pulled the little label stamp from the Camera Love stamp set and with the help of my Misti, I made my own border using versafine onyx black ink.

You are WONDERFUL | Taniesa Vlasak for HoneyBeeStamps.com

Next I pulled a piece of text like patterned paper that I had in my scrap pile and stamped this large flower from the Zen Bouquet stamp set with the same versafine onyx black ink in a random pattern.

You are WONDERFUL | Taniesa Vlasak for HoneyBeeStamps.com

I colored the flowers and leaves with these chalk pastel pencils that I have been playing around with. These are from Stabilo and they are called CarbOthello. They really are great for adding color and shading die cuts! I simply scribbled on the color, super easy and quick!

You are WONDERFUL | Taniesa Vlasak for HoneyBeeStamps.com

After I was done scribbling in that color, I just smudged the color around with a Fantastix blending tool. You can use a qtip, makeup applicator, or even just your finger is fine.

You are WONDERFUL | Taniesa Vlasak for HoneyBeeStamps.com

I wasn’t careful about staying in the lines. In fact I like the glow like effect when I didn’t stay in the lines.

You are WONDERFUL | Taniesa Vlasak for HoneyBeeStamps.com

After all the coloring was done I lightly misted my paper with a fixative as you see above. If you don’t have a fixative like this you could use something as simple as hairspray.

You are WONDERFUL | Taniesa Vlasak for HoneyBeeStamps.com

I trimmed the floral panel to size and glued it to a piece of yellow cardstock that was slightly longer than my floral panel. I added a thin piece of glossy black cardstock as an accent piece. From that same glossy black cardstock I die cut the word “wonderful” and set aside. I stamped and die cut the “you are loved” stamp from the “beautiful life” stamp set out of yellow cardstock and black foam. I cut away the word “loved” and replaced with “Wonderful” instead.

You are WONDERFUL | Taniesa Vlasak for HoneyBeeStamps.com

Time to put it all together. I put a piece of foam behind the floral panel and then adhered that to the white striped edge cardstock panel which was cut to 5 1/2 x 4 1/4. I glued down the wonderful so that it hung off the edge of the top panel just a bit and then glued the foam backed “you are” piece above the main sentiment.

You are WONDERFUL | Taniesa Vlasak for HoneyBeeStamps.com

Once all that was done I placed the completed panel on a A-2 size card base. I think this is a great card to send for any occasion but especially to a friend, just because, to let them know you are thinking of them.

You are WONDERFUL | Taniesa Vlasak for HoneyBeeStamps.com

I hope that you are encouraged to brighten someone’s day with a little happy mail today!

Listed below are the supplies I used today. Affiliate links are used where available (at NO cost to you, they help me with the cost of running my blog and I am so thankful for your support!)


It’s *NEW* Release day at Honey Bee Stamps!

Welcome to the Honey Bee Stamps November Release Honey Hop!!!

All this week we have been showing you little sneaks of our awesome new embellishments, stamp sets and dies! Well, here they all are! Everything will be available for purchase today in our shop HERE.

Honey Bee Stamps New Release for November!

 For my project today I am using the “Little Pickup” stamp set and the “Sending You” Sentiment set along with their coordinating die sets.

I just love this cute little truck! I knew that I wanted this cute stamp to be center stage so I gathered some scene building dies (Mountain range & stitched hills) and started assembling!

sending-you-card-3

You might have seen this lil sneak on instagram when I was putting my “Little Pickup” together.

Honey Bee Stamps Little Pickup | Taniesa Vlasak www.thecraftypickle.com

Now you don’t have to cut out all the pieces you see in this photo but it sure makes it fun. I love that the die set includes the tires and the window dies so you can make layered and interactive cards with this set. I fussy cut the fenders and popped them up with a bit of foam tape. I covered the wheels in glossy accents after die cutting them from another truck stamped image.

sending-you-card-8

I had this Daniel Smith watercolor I have been wanting to use for a long time called Autumn Mystery Duochrome. I thought it gave the truck a rusty type of look while still looking oh so sparkly and pretty, The color changes slightly depending on the angle you are looking at it from.

sending-you-card-7

Neat, Huh?!?!

After I got my truck assembled I glued the tree to the bed of the truck and added just a bit of the new Honey Bee Stamps exclusive glitter glass. I thought it gave the perfect icy-snowy texture. I also added the same glitter glass to the top of the mountains, and all the snowy hills. I used some Ranger Multi Medium in the Matte finish to glue on the glitter and gently pushed the glitter into the glue so it would stick very well. Once it was all dry I dusted off the excess.

I attached the truck to my scene with some foam tape. I stamped and die cut the sentiment on the front hill and attached that below the truck with a double layer of foam tape.

sending-you-card-6

To finish it off I added some dots of glue and sprinkled on some glitter glass that I hand-dyed a soft blue color. *Video Coming Soon on embellishment dyeing process*

Sending you ... Little Pickup Christmas Card| Created for Honey Bee Stamps by Taniesa Vlasak

This was SO much fun to piece together. You all are going to love playing with this stamp set and all of the wonderful new releases from Honey Bee Stamps.

What’s a Honey Hop without some sweet prizes, right? One winner will win a gift certificate to purchase new goodies in the Honey Bee Stamps Store.
All you have to do to win is comment here (on my blog), on the Honey Bee Stamps blog, and again at each one of our designer’s blog by Sunday, November 13th. Winner will be announced on Monday, November 14th at Noon PST.

I am the last stop on this blog hop… but if you started with me you can just hop to the beginning, which starts with the lovely and Oh-So-Stinkin’ Talented Laura Bassin right       —>HERE <—

Thank you so much for Honey Hoppin’ to my blog! I hope I inspired you to buzz on over to your crafty workspace and create something sweet! Check back on Tuesday when I will have some AH-MAZE-ING inspiration using Honey Bee Stamps with Essentials By Ellen products!

Have a BEEutiful day!

Taniesa Vlasak | TheCraftyPickle.com

A winter card with Kat Scrappiness and Hero Arts!

Hi Friends!

Happy Thursday! Today I have a fun card that can be used for Christmas or any occasion. When I saw this Birch Background die at Kat Scrappiness.com I knew I wanted to create a card with this die taking center stage.

To pair with this fantastic Die I chose the beautiful Hero Arts color layering Deer stamp set. I love that you can layer different ink colors quickly and not have to worry where your shading will go.

Dear Friend Winter card for KatScrappiness.com | Taniesa Vlasak www.thecraftypickle.com

I knew that I wanted the trees to have some dimension to them so I took a piece of adhesive backed foam and a piece of adhesive backed cardstock and I stuck the cardstock on top of the foam. You could always use a product like stick-it to glue the cardstock to the foam, these were just in my supply stash. I find that it is easier to glue foam to a intricate die cut prior to cutting if at all possible. I cut the cardstock covered foam with the Birch Tree Background die in my big shot a couple of times to ensure everything cut though. This will smoosh your foam down a bit but it will puff back up.

Dear Friend Winter card for KatScrappiness.com | Taniesa Vlasak www.thecraftypickle.com

I carefully removed the waste from the die cut leaving just the background. I removed the adhesive backing on the foam and placed this on a piece of heavy weight cardstock that I have blended a bit of Broken China Distress ink on. I kept the ink darker at the top and lighter at the bottom.  After that was glued together, I took  W-01 and a W-03 Copic markers and added some shading to the trees. This added a bit more dimension and texture.

I stamped my deer using three shades of hero arts ink that I had on hand (Soft Sand, Latte, and Brown Bark) and then stamped the final detail stamps in Versafine Onyx black ink. I cut the deer out with the coordinating die set then popped the deer up with the leftover scraps of foam from my trees.

Dear Friend Winter card for KatScrappiness.com | Taniesa Vlasak www.thecraftypickle.com

I took some of my favorite sparkling snow sequins from Kat’s shop and glued them down on the blue panel with some Ranger Multi Medium Matte finish adhesive so that they looked like snow falling. To finish off the card I added a sentiment banner from the same Hero Arts stamp set.

I love the multiple layers on this card and it really came together quickly. I could see so many possibilities with this background die. It’s great for all seasons!

Dear Friend Winter card for KatScrappiness.com | Taniesa Vlasak www.thecraftypickle.com

I hope you enjoyed my card today. I appreciate you stopping by. Please check out the links below for supplies I used today.

Have a wonderful day!

Taniesa Vlasak | TheCraftyPickle.com


Products used today (Affiliate links used if available):

Review coming SOON!

Hi Friends!

I have a review coming soon but I know some of you have been asking me about some organizing ideas for your craft space.

I am in love with the new Desk Maid products from Totally-Tiffany!

Here is a quick picture of a cubby I am working on. We still need to do some painting in my new room but I was too anxious to see how all these organizers would fit.

Craft Supplies Shelving Organization | TotallyTiffany.com

To some of you that might just look like a hot mess but for me that is organization bliss and bonus color candy for my eyes!

Look for a video review coming to my blog SOON! In the meantime check out some of my favorite products from Totally Tiffany by clicking —> HERE <—
Happy Organizing!

Taniesa Vlasak | TheCraftyPickle.com

Happy STAMPtember

Hi Crafty Friends!

Just a quick little sneak post to let you know that I have a fun video and post over on the Simon Says Stamp blog today! I am highlighting some amazing products from both Honey Bee Stamps as well as Simon Says Stamps exclusive products! I will be posting more on my blog tomorrow, but for now check out the post and video by clicking HERE!

Crafty hugs!

Taniesa Vlasak | TheCraftyPickle.com