It is one of my favorite companies anniversary, Ellen Hutson is celebrating 11 years in business (YAY! Congrat’s to Ellen and her wonderful and kind staff!) and to celebrate there is a week-long blog hop! If you are already hopping along you will find the next person in the hop at the bottom of the post (as well as the rest of the talented ladies inspiring you today!)
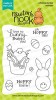
So for our project we are all picking our favorite Essentials by Ellen product and sharing that with you. Let me tell you, Picking my favorite product is like picking a favorite child it simply cannot be done. So, I am cheating a little and sharing one of my favorite stamp sets (and all the cute additions that have come to the essentials by Ellen line that expand it’s use!) All Inside! It all started with my love of this stamp set (and matching die that has cut outs for his hands!):
And here is my first project using this cute bear!
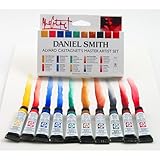
I kept this card fairly simple. I stamped the floral bunch and added extra flowers to make the bouquet even bigger. Then I inked up the bear, wiped off the excess ink where the flowers were in the way (you could mask this instead if you wanted) and stamped him down. I used versafine sepia ink for the stamping but for the coloring of all the images, I used my Daniel Smith watercolors. The sentiment came from another Essentials by Ellen stamp set called “Lovely“.
I also grabbed a couple of stamps and dies from the Leading Ladies: Cozy Lady stamp and die set (coffee cup and leaves). You can find those by clicking HERE.
Here is the Autumn project I did using these fun stamps and dies:
If that wasn’t bear-cuteness-overload for you, here is the new Bear Hugs die. The same adorable bear as “All Inside” but made bigger and with stitching holes so you can make your own felt plushie or other adorable projects!
and here is a couple of plush ornaments I made with the die.
These cute bears were all made with scraps of fabric and felt that I had. Don’t limit yourself just to felt with this guy, That white fuzzy fabric was perfect for a white polar bear! I gave her a little MFT Snowflake to hold while the cozy little brown bear got dressed up with a scarf and a Starbucks gift card that I found in the shape of a leaf. How perfect was that! This die has started a felt stitching addiction in my house and I am hoping that Ellen carries more in the future!
Thanks so much for stopping by! I hope you were inspired to create some fun Bear projects! Next on the blog hop is the talented Nichol!
Here is the entire blog hop line up for Sunday 11/19/17
The Honey Bee Stamps Holiday Release is now available in the store. To celebrate the new release, we are having the Season’s Tweetings Blog Hop. So please get comfy and hop along with us!
Forgive me for the short blog post today as I just had surgery on my right hand (makes typing a bit more difficult than I thought it would). I do have a few projects I completed using the new Honey Bee Stamps Holiday release that I hope will inspire you.
I hope you found these projects inspiring! All new products are available in the Honey Bee Stamps shop —–> Here! (affiliate links used at no cost to you. Thank you for supporting this blog!)
Be sure to visit each blog & leave a comment to be entered to win!!! We will be giving away a $50 gift card to the Honey Bee Stamps store. The winner will be posted on our blog Monday, November 13th.
Stopping in to share a super fast Halloween card that is sure to get a few giggles!
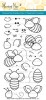
The Honey Bee Stamp set that I am using today is the Busy Bee’s Stamp set. Disclaimer: Affiliate links are used in this post at no additional cost to you, Thank you for supporting my blog!
I also used the Bee stamp from the Bee-YOU-Tiful sentiment set and the “boo” letters came from the older Hand Lettered alpha alphabet which is now retired (but as I am writing this, it is still available in the honey bee stamps shop, HERE!)
Here is a close up look at today’s card.
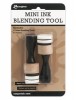
This is a one layer card. To get the speech bubbles on either side of the card as well as the eyes, I used paper punches and masking paper. First I masked off the bee’s side and pressed the masks down where I would want them. Then I took Black Soot Distress Oxide ink and with a blending tool covered that section of the card completely. I did one full layer (then had to run one of the kids to their activity) then did a second layer. I noticed I got a really nice coverage this way.
I removed the existing masking paper and then stuck a strip of post it tape down the black side so that I could work on the light yellow shading of the bee’s side. I stamped three of the Busy Bees along with some bee-trail dots with Versafine onyx black ink (I forgot I was copic coloring at this point so if you color with alcohol ink you will want to use an alcohol safe black ink pad like Memento Tuxedo Black ink. If you color with watercolor or any other medium versafine is my go-to black ink)
I found that I got a few spots of stray embossing powder and a ink smudge. Rather than start the card over again I lightly sanded those spots using this Tombow Sanding Eraser and then if there were any marks leftover I covered it with my white gel pen.
That’s it. This card is super simple and comes together in less than 10 minutes! I think it would be a fun card to use for breast cancer awareness month as well! I hope I was able to inspire you and give you a little giggle with my Boo Bees card today!
Happy first day of October! It’s time for cozy sweaters and all things Pumpkin…. but also it is time for breast cancer awareness.
As you may have seen before, Ellen Hutson has an exclusive Courage stamp and die set that helps in the fundraising efforts to find a cure for breast cancer. Aside from the stamp set being absolutely beautiful, $25 of every stamp/die set combo purchased gets donated to the Breast Cancer Research Foundation. If you don’t already have this gorgeous set I encourage you to get one before they are gone for good.
(affiliate links used where available at no cost to you. Thank you for supporting my blog)
Today the Ellen Hutson design team and friends are gathering together as a little surprise for the wonderful women who have committed so much time and effort into this stamp and die set and who have personally been affected by this horrible disease. I am honored to be among some of the most talented designers in today’s blog hop. If you have missed any of their post you can find the blog hop list at the bottom of this post Or start from the beginning at the Ellen Hutson Classroom.
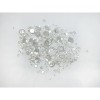
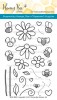
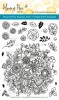
I Stamped various flowers from both stamp sets using different colors of Distress Oxide inks. Then I misted the entire panel with water and let dry. I repeated this about 4 times with different layers. Once the florals were done I added a bit of texture with a script stamp from Penny Black.
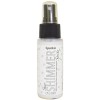
I stamped the Courage sentiment from the stamp set in versafine onyx black ink and once dry I misted the card with sheer shimmer spray which you can sort of see in the photo but in person, it’s just the right amount of shimmer. I added some sparkling clear sequins and then mounted on a piece of pink cardstock then to my white card base. This card was inspired by a video I watched by Julie Ebersol using the Courage stamp set. you can see that Video HERE.
I cut the rose panel out of some shiny shimmery pink cardstock and mounted that on a piece of dark pink cardstock. I took the ribbon die and cut that out of some DCWV pink glitter paper and attached that to the rose panel with some foam tape.
For the vellum sentiment strip I used some Essentials by Ellen heavyweight vellum and stamped the sentiment with versafine Onyx black ink. I sprinkled some clear embossing powder on top and heat set. The torn vellum strip is folded and glued down on the back side of the card base. Once completed I added the panel to a white card base.
I hope you enjoyed my cards for today and got plenty of inspiration from everyone participating in the blog hop! For a closer look at the Courage stamp set, click HERE to take you to the Ellen Hutson store.
I am the last stop on the Hop for Hope but if you missed anyone you can see the full list of participants below.
If you are already swimming along, then you should have arrived here from the blog of the kind and beautiful, Patricia! If not, don’t worry, you can always go to the Honey Bee Stamps blog<— and see all of the amazingly talented designers that are inspiring you today.
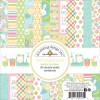
Limited quantities of the NEW July Under the Sea Stamp bundles are available. click the photo or see the end of the post for links.
Everything is available for purchase today in our shop HERE.
So let’s Shellabrate with some splashingly sweet prizes!! We will have TWO winners that will each receive a $50 gift certificate to purchase new goodies in the Honey Bee Stamps Store.
Enter to win one of two $50 shopping sprees to HoneyBeeStamps.com for participating in our new release Blog Hop!
All you have to do to win is comment here on the Honey Bee Stamps blog and again at each one of our designer’s blog by Sunday, July 16th. Winners will be announced on Monday, July 17th at Noon PST.
So swim along and get ready to SEA some inspiration!
Affiliate links used where available at NO cost to you, Thank you so very much for your support!
I cut the card in half at the score line and started assembling the two pieces with a double layer of foam tape. Once that was finished I added some of the new Seaside Treasures shaker kit as well as some glitter and sequins from various new embellishment kits. I covered the shaker with a piece of acetate and then again covered that up with the card panel. I took that vinyl detail piece (which already has adhesive on the back) and stuck it in the opening of the panel on top of the acetate. I put more foam tape around the Seashell shaker to cover the top panel and then glued all of that on an off white mat base, and then to a heavy weight beige cardstock card base.
I am in love with this die and it can do a lot more than just a shaker card. It can be a stand alone card or used within a traditional card like my example. There is a lot of possibilities with this die and I am sure you will be seeing a lot of great ideas using this card die in the near future!
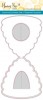
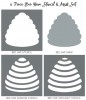
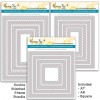
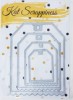
This is the card (closed) with two pieces layered on top . Just one of the options that you can create with this die set!
Here are the main die pieces of the Seashell card Die set. There are two small circle dies that are not pictured below that are great for making a pearl to go inside your shell!
I cut out the cover plate die in two shades of yellow cardstock and glued the pieces of the other color inside the cut panel. This will make two cards, so it’s a great timesaver too! I took the border stamp in the ocean borders and I stamped, heat embossed in clear and then masked the first border stamp at the bottom of some light blue cardstock, I repeated this process of stamping, embossing, then masking about 5 times. Once I had a about a half of a card panel worth of ocean borders I took the Ocean Borders Die that just cuts the top of that wave-like border and I cut the top of that masked border stack. I glued some foam behind that piece and set aside.
I stacked a couple of pieces of cardstock and glued those together, Then I cut that stacked cardstock piece with the Mermaid die from the Swimming by die set. I used the same die and with just using the bottom half of that die I cut some Cricut holographic Opal vinyl. I stuck that to the cardstock piece and cut off everything below the tail, I glued just the bottom portion of that tail to the card base just below the circle part of the sun, I then glued the waves on top of that, which completed the scene. I finished the card off by adding some new Bubbles Sequins and Bokeh lights confetti and a sentiment from the Mermaid song stamp set. I heat embossed that with the Nuvo white power and cut a little flag end to the left. I popped this up on foam tape and glued to my card. I really love how that Vinyl is shiny and iridescent like… perfect for under the sea and beach papercrafting!
Thank you so much for stopping by. Your next stop in this swim-a-long is the fabulous and super-duper talented Tracy! Swim on over and see what amazing things she has to share with you today!
I’ll SEA you soon, with MORE ideas and inspiration using the new release items!
My name is Taniesa and I am addicted to coffee. I am also addicted to papercrafting so how perfect is this challenge, right?! What Challenge you might ask? Why, it’s that time again, The Summer Coffee Lover’s blog hop! Projects, Prizes, and SO MUCH inspiration!!
Affiliate Links used at no cost to you. Thank you for supporting this blog!
Have you ever spilled your coffee when you’re walking out of Starbuck’s or tripped on a Lego in the am and your mug went flying? It sure starts the day off in a super crummy way. This is a great card for someone who has had that kinda day or just needs to know that you are there for them and you “got their back”. Both cards feature products from Honey Bee Stamps. There are source links in my post but you will also find a supply list at the end of the post.
So I started by drawing a floor. I drew a line where I knew I wanted the edge of the floor to be and then I drew in the vertical lines at an angle to give a perspective view. After I had that penciled in I stamped the bunny from Honey Bee Stamps Blah Bunny stamp set, I masked that part and stamped the little rug that goes underneath him. Before I got to the coloring of the bunny and rug, I colored the floor with Pumice Stone Distress Ink. I made sure to make the back and sides of the floor portion darker so that it highlighted the bunny in the center I added little nails with a copic marker (N6 + N0) The bunny and the rug are both colored using Copic Markers. For the rug I used YG67, YG63, YG61 and for the outside edge I used G28. For the Bunny I used E31, E33, E34, E35, and E37. I also used R20 and R21 for his ears, noses, and the bottom of the feet.
For the wall I used an Echo Park stencil that is older and blended on some Old Paper Distress ink. after I used the stencil I went over the top of the card again with more distress ink so it would soften the stark white the stencil left. I felt it needed something more so I took a small leaf from the Honey Bee Stamps Country Blooms Stamp Set and stamped it with Peeled Paint Distress Oxide ink in between the diamond shapes on the “Wall”.
I stamped, fussy cut, and then shaded the mug using some cool gray copic markers (C00, C1) and I drew in a little heart using a Copic AtYou Spica red pen. I took a craft knife and cut around the bunny’s paw, and then slid the handle of the mug underneath.
I attached the gift card with these removable Glue Dots. This is such a great way to stick gift cards and other removable things to your cards and gifts, It holds well until you want to pull it off, and the best part is the glue dot comes off your project cleanly too!
I have another card to share today too!
This card is super simple and easy to make. Here is the front of the card:
and here is the inside
Simple but Cute right? Such a fun way to give a coffee to a friend who needs a little pick-me-up. One thing I love *Almost* as much as coffee is gifting starbucks gift cards so I always have a small stash of gift cards on hand in case I need to give a last minute gift or Happy Mail to someone needing a smile.
For this card I just colored a cacti from the Honey Bee Stamps Stick with me stamp set. I stamped the planter then covered it with a post-it note so I could stamp the cacti coming out of the planter. I colored the Planter with Copic markers E31, E33, E35 and the Cacti with YG61, YG63, YG67, and a little G21 in the highlight portion. I stamped the sentiment under that and cut out the square using some stitched square dies.
I placed that square on a scrap of black cardstock and adhered the matted square to the card base with foam tape. I blended a little Vintage Photo Distress Oxide ink around the edges and then finished off the front with a few gold sequins.
For the inside of the card I did the same thing as the cacti but I stamped a coffee mug. This coffee mug I bought at one of my Local Scrapbook stores, Impress Cards and Crafts. If you ever are in Seattle this shop needs to be on your “To-Visit” List! It’s a stamper’s candy store! I stamped the Stay Strong from Honey Bee Stamps Prickly Sentiments stamp set. I drew in the little circle to make it sorta “Starbucks-ish” and colored the inside of that green, and then I shaded the cup with some Cool Grey copic markers and the sleeve with some warm grey markers.
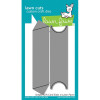
I cut the square with the same stitched square dies and matted that on black. I did not add foam tape on this piece though. I just glued it in using the Nuvo liquid adhesive. To attach the gift card I decided to use the new Lawn Fawn simple gift card slot dies. I die cut the bottom portion of the card and then just popped the gift card right in, super easy
So that wraps up my projects for this year’s Summer Coffee Lovers Blog Hop. In addition to all the great prizes you can win by participating in the Coffee Lovers hop, I also decided to do a fun giveaway both here on my blog, and next week on Instagram! All you need to do to be entered in this giveaway here on my blog is comment below. For the second giveaway that will be going on next week, follow @Taniesa on Instagram.
Hurry, contest ends June 30th! This giveaway includes TWO stamp sets , a exclusive Free-Bee and matching die, and a bottle of Nuvo drops all donated by Honey Bee Stamps! The other items include a Hero arts INtense black ink pad, a set of watercolor pencils, a 3×4 etched grid stamp block, Crate paper embellishment pack, Bazzill Marathon adhesive runner, and a set of watercolor pencils are all items I have purchased for this giveaway. A prize package worth $80.00!!!
Honey Bee Stamps has graciously donated the Blah Bunny Stamp set, The Blah Blah Blah Sentiments stamp set, Free Bee stamp and die, and Nuvo drops. Thank you Honey Bee Stamps! I have also put in things I have purchase for this giveaway and in total the package is worth over $80! Enter by 6/30. Winners to be announced on Saturday, July 1 at noon PST.
*** Karen Ladd !!!! You are my winner! Please email me at Taniesa@thecraftypickle.com with your mailing information. Thank you to all that entered and for the kind comments! ***
Head on over to the Honey Bee Stamps Blog where there are even more prizes to be won AND there is a link to Honey Bee Stamps Designer, Lisa where you can win another prize!
Thank you so much for visiting. You will find the supplies I have used linked in the post but also listed below. I encourage you to modify these ideas and use your crafty stash as well!
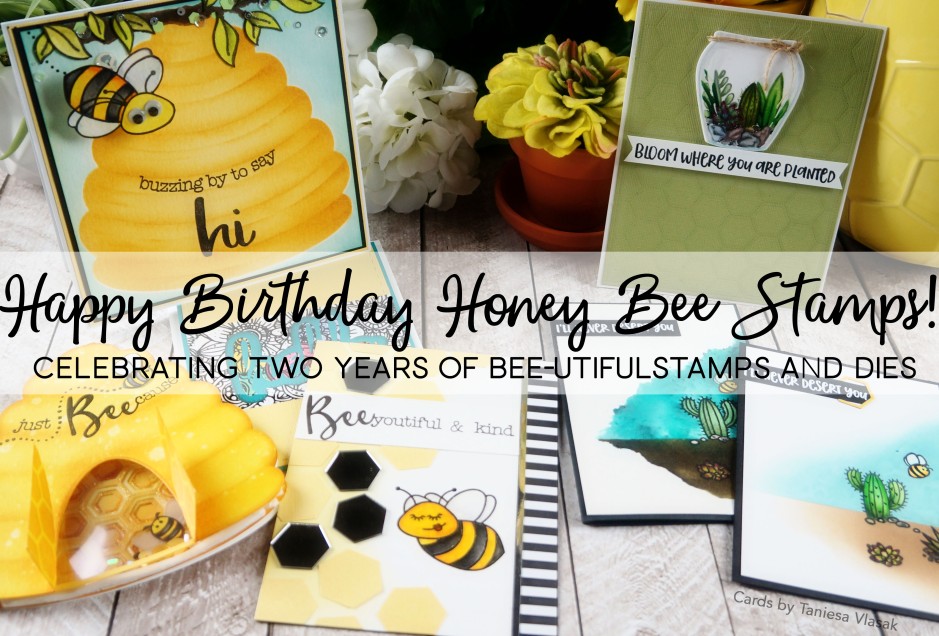
We have enlisted some very talented designers to help Surprise Melissa (the owner of Honey Bee Stamps) for her 2nd Honey Bee Stamps Birthday. Be sure to hop along for all the fun & prizes!! Each stop on the hop will have a drawing for a FREE stamp set of their choice from the Honey Bee Stamps store. Be sure to comment at each stop to enter all of the drawings. The winners will be announced on the Honey Bee Stamps Blog on May 3rd at Noon PST.
I have to say this month’s new release is my favorite so far. I sat down to make one card and ended up making a few more. I’m telling ya, my mind was buzzing with ideas for these new products.
My first card is this cute bee hive card which is a shaker card.
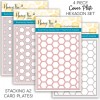
I love that the stencils make shading the hive super easy. I used my distress inks and finger daubers to do the shading. the inside of the shaker has the new layered hexagon die cover plates cut apart, and I used Nuvo Drops to add Honey like accents. I filled the shaker with the special birthday Honey Jar sequins mix and of course that cute little busy bee!
Next card is another hive, but this time I used only the stencils. All 4 of them actually. I used the hive cut out to lay down color, the two shading stencils to give detail, and then when I was all done with that I used the hive cut out piece as a mask and applied the blue distress ink background.
The leaves are from the Busy bees stamp set. I just made a branch with a zig clean color real brush brown marker. The hexagon confetti / sequins is in the spring sequins pack. The cute little bee is from the Build a Bee stamp set. The bee is actually on a little action wobbler and, with the addition of the google eyes, it makes for a very fun interactive element.
This next card was totally inspired by a pack of acrylic mirrored hexagons I have been hoarding. You could achieve a similar look with mirror cardstock that I used as an accent strip along the side of the card.
I colored my little build a bee with my zig markers and added some hexagons that I cut out using the new stack hexagon dies. I also added those awesome hexagon mirrors. I think the patterned paper along the side added the perfect final touch. I love this sentiment from the Bee You Tiful sentiment set. I think it’s the perfect card to remind someone how bee-you-tiful they are, inside and out.
Okay, now a super quick card that is great for any of our new buzz words…
This card was super quick to make! I had a piece of cardstock that was already stamped and embossed using the Zen Bouquet stamp set. I trimmed it down to A-2 size and used the new Hello Buzz word dies to do a fun inlay look. This could work with your favorite patterned paper too.
You can keep it simple and leave it just black and white, Or you could color it in to make the word stand out even more! The main panel was cut using the Honey Bee Stamps Double stitched A-2 dies.
These next cards were so much fun to make. I did one card with Color burst watercolor powers and the other with distress oxide inks.
I couldn’t decide which I liked better so I thought I would show you both!
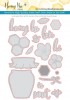
Last but not least is my first real attempt at no line coloring. I took the jar from the sweet as honey stamp and die set (which was a part of Honey Bee Stamps very first release, and one of my most used stamp sets!) and I decided to turn it into a mini Terrarium with the help of the new stick with me stamp set.
I colored the cacti, plants, and rocks with my Copic markers and then added a bit more detail with my colored pencils. For the background I used the hexagon stipple plate die. On the little banner, I used a sentiment from the prickly sentiments stamp set.
The jar is layered with 4 pieces of cardstock instead of using foam, (I had scrap paper I needed to use up). The sentiment is popped up with one layer of foam tape. I finished the card off with a bit of twine around the top of the jar. This was probably my most challenging card but I had a lot of fun. I will be practicing those no line coloring skills more often now!
Here is a photo of all the cards created today. Supplies are listed below.
I hope I inspired you with ways to use these awesome new products (and some of your older ones too). Come back soon BEE-cause I will have lots more projects to share!
Don’t forget to leave a comment for your chance to win your choice of stamp set from Honey Bee Stamps!
Next up on the Hop is the kind & talented, Yana Smakula! Buzz on over and see what beautiful creation she has to share with you today.
Here is the lineup for the Hop in case you get lost:
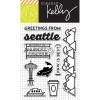
I am excited to be participating in the Coffee Lovers Blog hop for the first time! Today I am creating a project on behalf of KatScrappiness.com. I was inspired by the Seattle stamp set that was designed by Kelly Purkey for Hero arts as well as a Seattle Starbucks gift card.
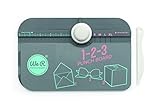
I have always been a coffee addict but when I moved to the Seattle area about a year and a half ago I REALLY came to love coffee any time of the day! I thought it would be fun to create a coffee gift card holder but I didn’t want to JUST give a gift card, So I created another little special gift using my Seattle stamp set.
For the inside of the matchbox I added some green sequins, real Starbucks coffee beans, some iridescent cellophane wrap, and a cute pair of coffee cup earrings I made using beads, stamps, and shrink plastic! I haven’t played with shrink plastic since I was a kid and I have to tell you, this was so fun and I am sure I will be making more stamped jewelry in the future!
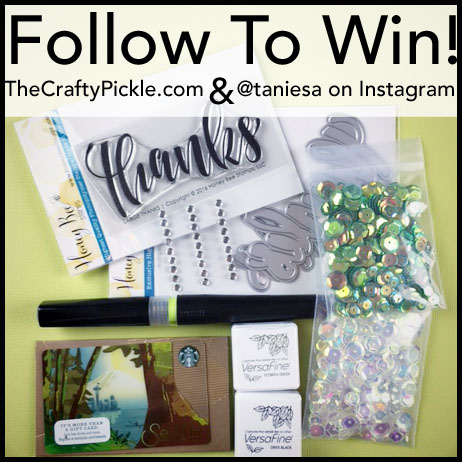
How about a little blog candy? Simply subscribe to my blog, and follow me on Instagram HERE. Once you have done that please comment below and let me know your following as well as your favorite Coffee or Tea (I am also a Davids Tea fan!). One lucky winner will get a Starbucks gift card (a Seattle Exclusive card) two versafine ink cubes in Onyx black and Olympia Green, two bags of sequins in a sparkly Starbucks Green shade and a semi-transparent white, some sticky back gems, a new clear sparkle brush marker, and an awesome big Thanks stamp with a matching die set! I am ever so thankful for my followers!
Supplies that I have used in my project today are listed below. Affiliate links are used where available, at no cost to you. Thanks!!
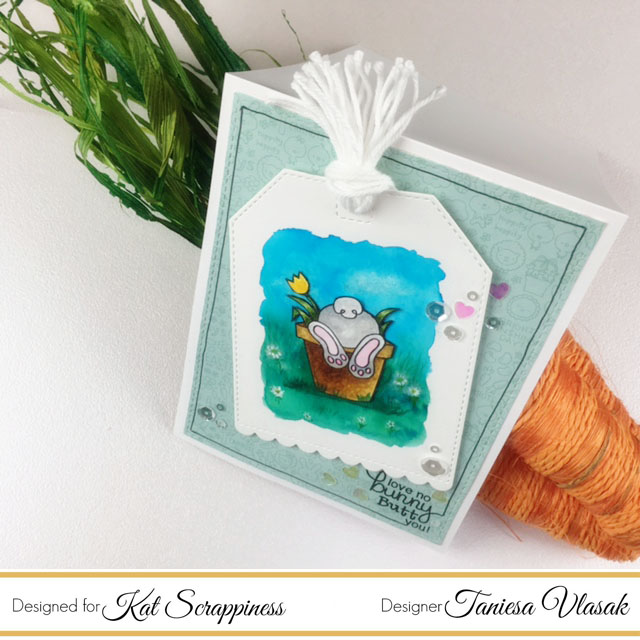
While the background was drying, I painted my little bunny with some Daniel Smith watercolors. I did three layers of color on the terra-cotta pot to add shading and depth.
Once everything was dry, I fussy cut the image and went over the image with a black marker. This hides any imperfections I had when cutting.
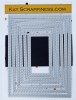
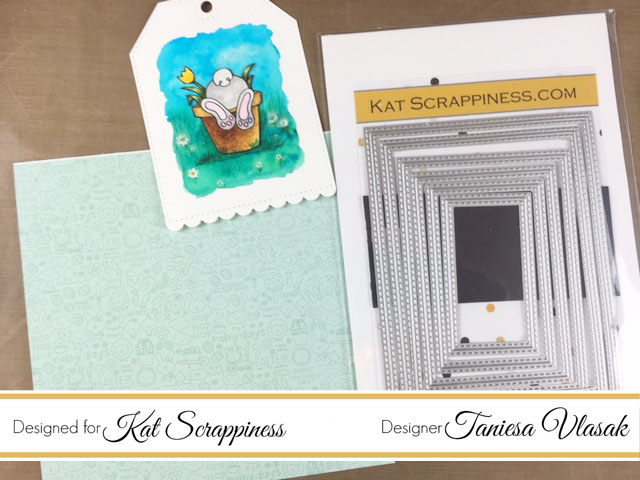
I cut out the watercolor background paper with the second largest of the Stitched Scallop nesting dies and assembled my little bunny scene. I added some suggested flowers here and there as I felt it needed just a bit more “something” and this felt like it completed the scene.
So I will be honest, I couldn’t find my stamping press in my craft room (I think it’s time for some crafty spring cleaning) So I dug out my old stamp positioner. Remember those? It worked great for stamping my sentiment in the corner of the card.
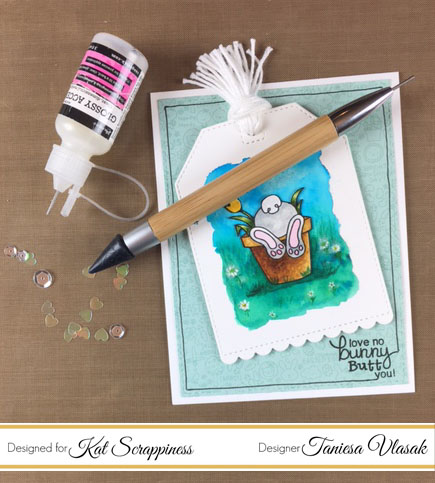
Then I took a .35 drawing pen and drew a border around my panel. on the inside of the stitching. I attached the tag to the printed panel with some foam tape and then glued the finished panel to a top fold card base. As a final touch I added some Clear sequins and some 6mm Heart confetti with Glossy Accents with up from my sequins and gem pick up tool.
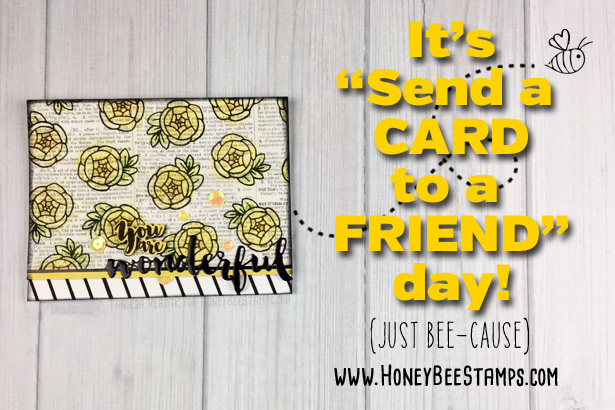
Did you know that today is “Send a Card to a Friend Day”? I didn’t even know it was a thing, but there is a holiday and occasion for just about anything now days and this is one I can completely get behind. I don’t know about my fellow card makers out there but I am horrible about actually getting my cards in the mail and in the mail on time. Today is the perfect push to grab some cards and send them to your friends… Just BEE-cause!
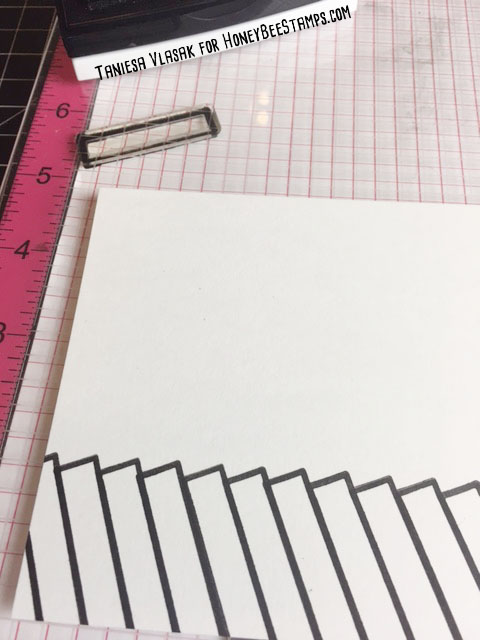
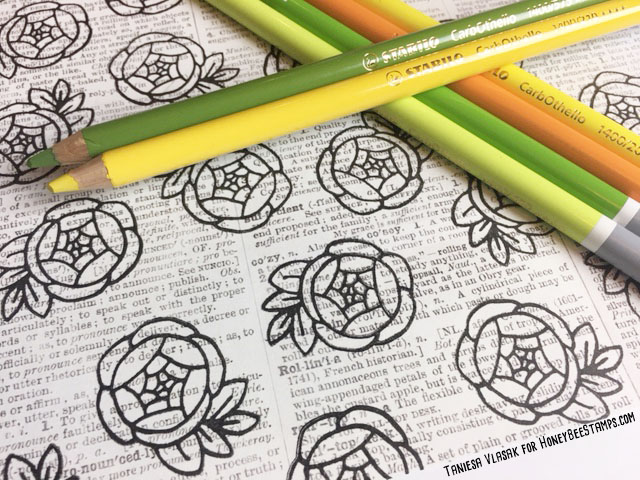
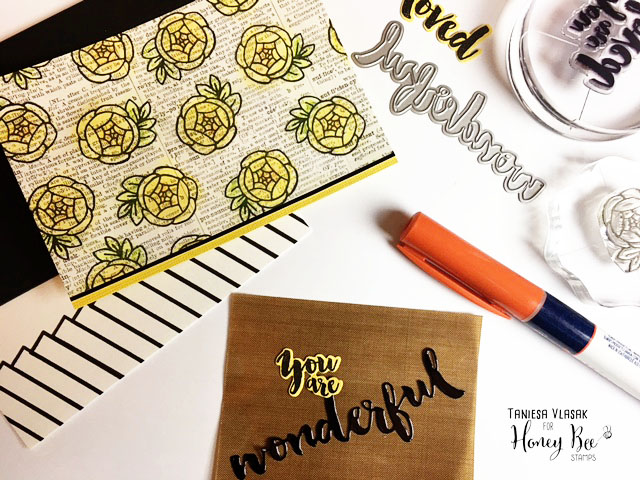
So I had a general idea of the card design in my head and I knew I wanted a striped border at the bottom of my card. Problem was I didn’t have a background stamp or border stamp that was a stripe. So I got a little creative and pulled the little label stamp from the Camera Love stamp set and with the help of my Misti, I made my own border using versafine onyx black ink.
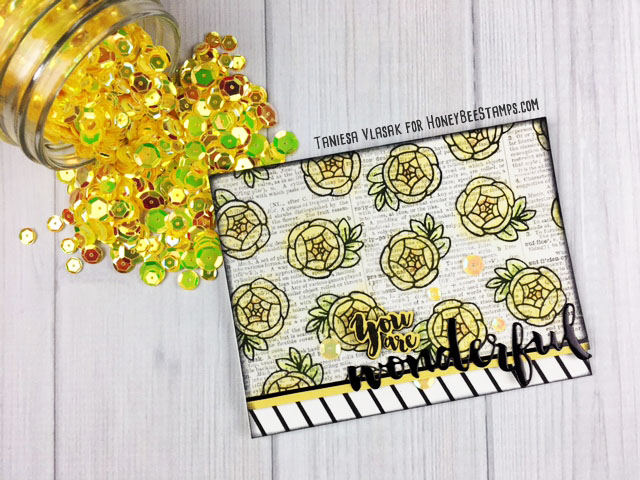
Next I pulled a piece of text like patterned paper that I had in my scrap pile and stamped this large flower from the Zen Bouquet stamp set with the same versafine onyx black ink in a random pattern.
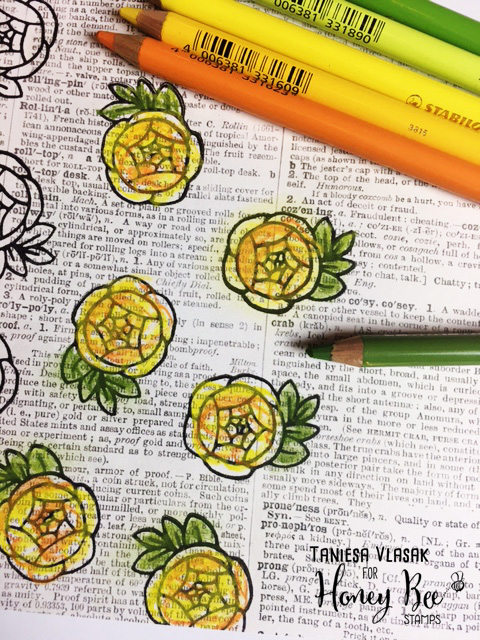
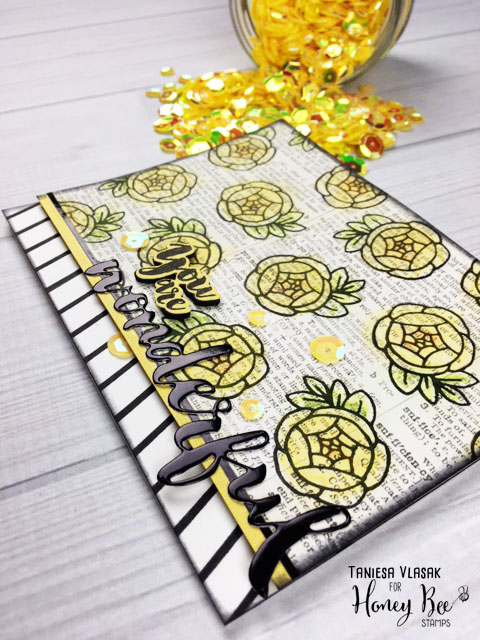
I colored the flowers and leaves with these chalk pastel pencils that I have been playing around with. These are from Stabilo and they are called CarbOthello. They really are great for adding color and shading die cuts! I simply scribbled on the color, super easy and quick!
After I was done scribbling in that color, I just smudged the color around with a Fantastix blending tool. You can use a qtip, makeup applicator, or even just your finger is fine.
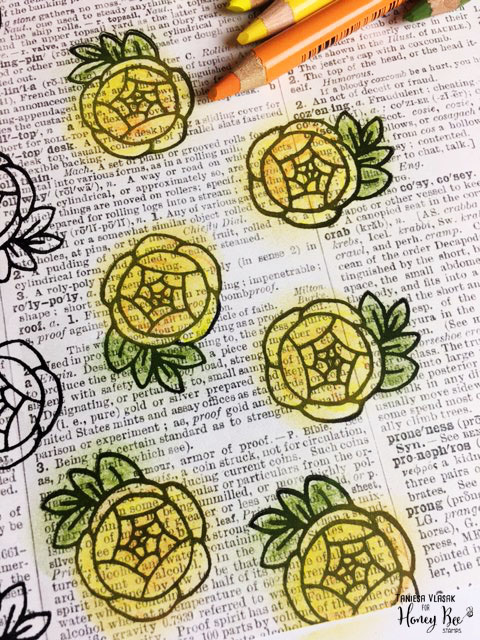
I wasn’t careful about staying in the lines. In fact I like the glow like effect when I didn’t stay in the lines.
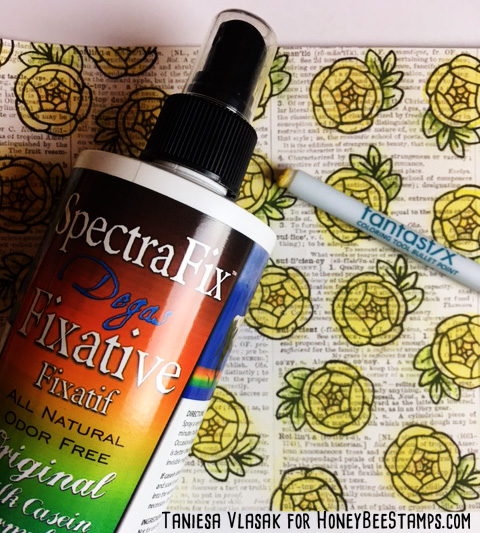
After all the coloring was done I lightly misted my paper with a fixative as you see above. If you don’t have a fixative like this you could use something as simple as hairspray.
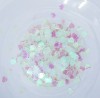
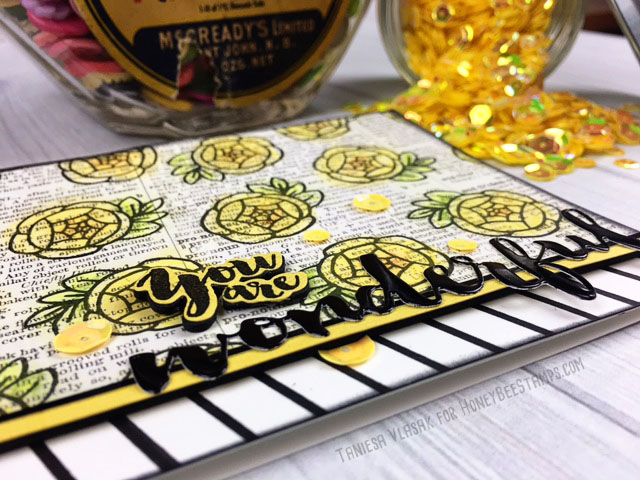
I trimmed the floral panel to size and glued it to a piece of yellow cardstock that was slightly longer than my floral panel. I added a thin piece of glossy black cardstock as an accent piece. From that same glossy black cardstock I die cut the word “wonderful” and set aside. I stamped and die cut the “you are loved” stamp from the “beautiful life” stamp set out of yellow cardstock and black foam. I cut away the word “loved” and replaced with “Wonderful” instead.
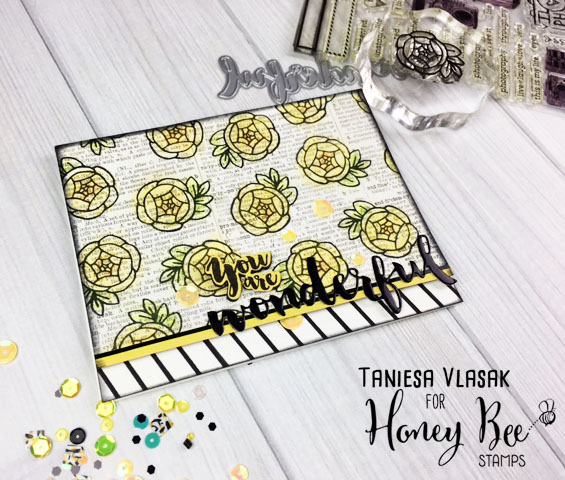
Time to put it all together. I put a piece of foam behind the floral panel and then adhered that to the white striped edge cardstock panel which was cut to 5 1/2 x 4 1/4. I glued down the wonderful so that it hung off the edge of the top panel just a bit and then glued the foam backed “you are” piece above the main sentiment.
Once all that was done I placed the completed panel on a A-2 size card base. I think this is a great card to send for any occasion but especially to a friend, just because, to let them know you are thinking of them.
I hope that you are encouraged to brighten someone’s day with a little happy mail today!
Listed below are the supplies I used today. Affiliate links are used where available (at NO cost to you, they help me with the cost of running my blog and I am so thankful for your support!)


 I have to say