If you are looking for the Blog Hop post that features Chibitronics and Honey Bee Stamps click —>HERE<—
Thank you so much for joining in on the World Cardmaking Day fun with KatScrappiness.com!
Today all of the designers are participating in a fun blog hop with their take on the first Kat Scrappiness Mood Board Challenge! There will be lots of prizes to be won and several chances to win. Make sure you comment on all the designers blog posts today for several chances to win and then make a card (or any project) inspired from our mood board and link up to the Kat Scrappiness blog before Monday October 9th for a chance at winning one of several prizes! Winners will be announced on that blog post Tuesday October 10th by Noon PST. Don’t forget you can get 15% off in the KatScrappiness.com shop today only! Use Code “IMAKECARDS” at checkout!
Here is the Mood Board that is apart of the challenge and what has inspired my project today!
I added some Distress oxide ink for added dimension as well as some eyebrows with a black marker. I also darkened the center of the eyes with a black glitter pen. Then I pieced everything together for the little owl.
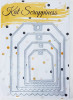
I took several pieces of patterned paper and a piece of vellum and cut different size Ovals from the Kat Scrappiness Never ending Oval die set and layered them together with a mix of doubled up thick cardstock spacers or foam tape in between. This allowed room to place little leaves and sequins in between the layers as well as a hand cut branch that I colored with Distress oxide ink.
I hope you have been inspired by my little owl card today! Below is the list of all the designers participating in the blog hop, Make sure you stop by and see what project(s) they have to inspire you today!
To go to the Kat Scrappiness Shop Click HERE and save 15% off your total purchase today (10/7/17) only! To go to the Mood Board Challenge blog post click HERE and enter your card for a chance to win fabulous prizes!
Thanks for stopping by… Happy World CARDMAKING Day!
Happy first day of October! It’s time for cozy sweaters and all things Pumpkin…. but also it is time for breast cancer awareness.
As you may have seen before, Ellen Hutson has an exclusive Courage stamp and die set that helps in the fundraising efforts to find a cure for breast cancer. Aside from the stamp set being absolutely beautiful, $25 of every stamp/die set combo purchased gets donated to the Breast Cancer Research Foundation. If you don’t already have this gorgeous set I encourage you to get one before they are gone for good.
(affiliate links used where available at no cost to you. Thank you for supporting my blog)
Today the Ellen Hutson design team and friends are gathering together as a little surprise for the wonderful women who have committed so much time and effort into this stamp and die set and who have personally been affected by this horrible disease. I am honored to be among some of the most talented designers in today’s blog hop. If you have missed any of their post you can find the blog hop list at the bottom of this post Or start from the beginning at the Ellen Hutson Classroom.
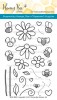
I Stamped various flowers from both stamp sets using different colors of Distress Oxide inks. Then I misted the entire panel with water and let dry. I repeated this about 4 times with different layers. Once the florals were done I added a bit of texture with a script stamp from Penny Black.
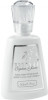
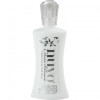
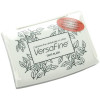
I stamped the Courage sentiment from the stamp set in versafine onyx black ink and once dry I misted the card with sheer shimmer spray which you can sort of see in the photo but in person, it’s just the right amount of shimmer. I added some sparkling clear sequins and then mounted on a piece of pink cardstock then to my white card base. This card was inspired by a video I watched by Julie Ebersol using the Courage stamp set. you can see that Video HERE.
I cut the rose panel out of some shiny shimmery pink cardstock and mounted that on a piece of dark pink cardstock. I took the ribbon die and cut that out of some DCWV pink glitter paper and attached that to the rose panel with some foam tape.
For the vellum sentiment strip I used some Essentials by Ellen heavyweight vellum and stamped the sentiment with versafine Onyx black ink. I sprinkled some clear embossing powder on top and heat set. The torn vellum strip is folded and glued down on the back side of the card base. Once completed I added the panel to a white card base.
I hope you enjoyed my cards for today and got plenty of inspiration from everyone participating in the blog hop! For a closer look at the Courage stamp set, click HERE to take you to the Ellen Hutson store.
I am the last stop on the Hop for Hope but if you missed anyone you can see the full list of participants below.
The Honey Bee Stamps Fall Release is finally here and available in the Honey Bee Stamps shop HERE. There is a wonderful selection of products to celebrate the fall season.
I have just a couple of cards to share today but I will be sharing more throughout the season!
I have been spending a lot of time away from home lately, and while it is hard to carry lots of supplies I stamped a bunch of impressions from the Gather together stamp set onto a bunch of patterned papers I had in my supply stash. I love this cute bunch of critters.
Sometimes I am in the mood to just cut paper… fussy cutting is not always my favorite but perfect for on the go. Instead of coloring the images I “colored” all of the bits and pieces by using different patterns of paper. This adds a lot of texture and interest to the card I think. After I cut these pieces I would glue them to a piece of cardstock I did some ink blending with and I used the stamped impression as a guide to lay the pieces in place.
Next card is so super simple and quick.
I found this cute piece of paper in one of my 6×6 patterned paper pads. I cut it down to an A-2 size and stamped HELLO (from the Gather Together stamp set) in the right hand corner. I added more patterned paper behind and a little sparkle too by using my glitter pen and some brand new sequins in the Honey Bee shop that you can find HERE.
Thank you so much for stopping by my blog. To see ALL of the new products from Honey Bee Stamps, Click HERE (affiliate link used at no additional cost to you, thank you for supporting this blog!)
Be sure to visit each blog & leave a comment… Honey Bee Stamps is giving away TWO $50 gift cards to the Honey Bee Stamps store!
Winners will be posted on the Honey Bee Stamps blog Monday, September 25th!
If you are already swimming along, then you should have arrived here from the blog of the kind and beautiful, Patricia! If not, don’t worry, you can always go to the Honey Bee Stamps blog<— and see all of the amazingly talented designers that are inspiring you today.
Limited quantities of the NEW July Under the Sea Stamp bundles are available. click the photo or see the end of the post for links.
Everything is available for purchase today in our shop HERE.
So let’s Shellabrate with some splashingly sweet prizes!! We will have TWO winners that will each receive a $50 gift certificate to purchase new goodies in the Honey Bee Stamps Store.
Enter to win one of two $50 shopping sprees to HoneyBeeStamps.com for participating in our new release Blog Hop!
All you have to do to win is comment here on the Honey Bee Stamps blog and again at each one of our designer’s blog by Sunday, July 16th. Winners will be announced on Monday, July 17th at Noon PST.
So swim along and get ready to SEA some inspiration!
Affiliate links used where available at NO cost to you, Thank you so very much for your support!
I cut the card in half at the score line and started assembling the two pieces with a double layer of foam tape. Once that was finished I added some of the new Seaside Treasures shaker kit as well as some glitter and sequins from various new embellishment kits. I covered the shaker with a piece of acetate and then again covered that up with the card panel. I took that vinyl detail piece (which already has adhesive on the back) and stuck it in the opening of the panel on top of the acetate. I put more foam tape around the Seashell shaker to cover the top panel and then glued all of that on an off white mat base, and then to a heavy weight beige cardstock card base.
I am in love with this die and it can do a lot more than just a shaker card. It can be a stand alone card or used within a traditional card like my example. There is a lot of possibilities with this die and I am sure you will be seeing a lot of great ideas using this card die in the near future!
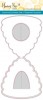
This is the card (closed) with two pieces layered on top . Just one of the options that you can create with this die set!
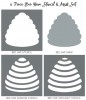
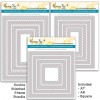
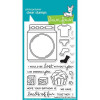
Here are the main die pieces of the Seashell card Die set. There are two small circle dies that are not pictured below that are great for making a pearl to go inside your shell!
I cut out the cover plate die in two shades of yellow cardstock and glued the pieces of the other color inside the cut panel. This will make two cards, so it’s a great timesaver too! I took the border stamp in the ocean borders and I stamped, heat embossed in clear and then masked the first border stamp at the bottom of some light blue cardstock, I repeated this process of stamping, embossing, then masking about 5 times. Once I had a about a half of a card panel worth of ocean borders I took the Ocean Borders Die that just cuts the top of that wave-like border and I cut the top of that masked border stack. I glued some foam behind that piece and set aside.
I stacked a couple of pieces of cardstock and glued those together, Then I cut that stacked cardstock piece with the Mermaid die from the Swimming by die set. I used the same die and with just using the bottom half of that die I cut some Cricut holographic Opal vinyl. I stuck that to the cardstock piece and cut off everything below the tail, I glued just the bottom portion of that tail to the card base just below the circle part of the sun, I then glued the waves on top of that, which completed the scene. I finished the card off by adding some new Bubbles Sequins and Bokeh lights confetti and a sentiment from the Mermaid song stamp set. I heat embossed that with the Nuvo white power and cut a little flag end to the left. I popped this up on foam tape and glued to my card. I really love how that Vinyl is shiny and iridescent like… perfect for under the sea and beach papercrafting!
Thank you so much for stopping by. Your next stop in this swim-a-long is the fabulous and super-duper talented Tracy! Swim on over and see what amazing things she has to share with you today!
I’ll SEA you soon, with MORE ideas and inspiration using the new release items!
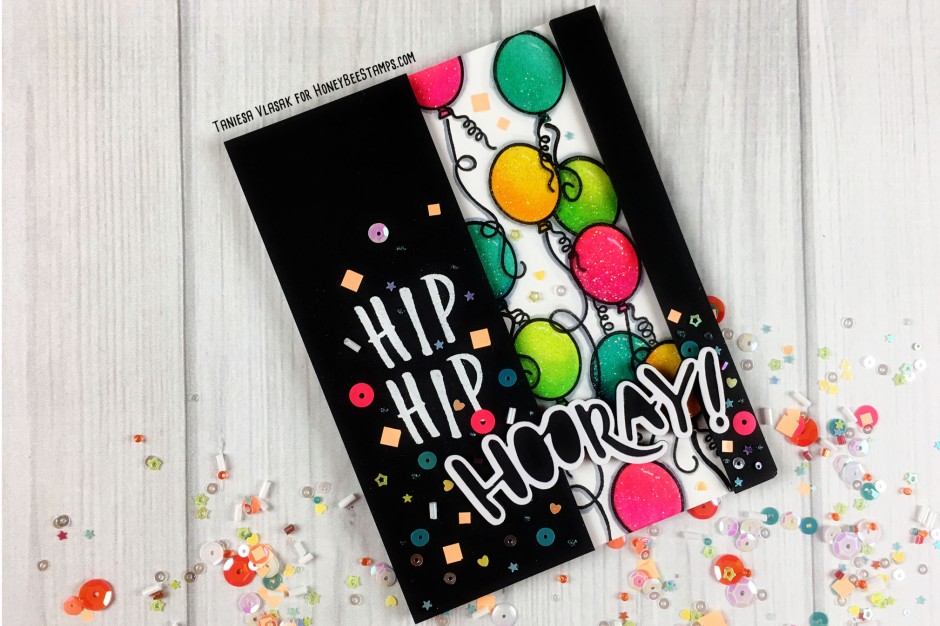
My name is Taniesa and I am addicted to coffee. I am also addicted to papercrafting so how perfect is this challenge, right?! What Challenge you might ask? Why, it’s that time again, The Summer Coffee Lover’s blog hop! Projects, Prizes, and SO MUCH inspiration!!
Affiliate Links used at no cost to you. Thank you for supporting this blog!
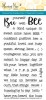
Have you ever spilled your coffee when you’re walking out of Starbuck’s or tripped on a Lego in the am and your mug went flying? It sure starts the day off in a super crummy way. This is a great card for someone who has had that kinda day or just needs to know that you are there for them and you “got their back”. Both cards feature products from Honey Bee Stamps. There are source links in my post but you will also find a supply list at the end of the post.
So I started by drawing a floor. I drew a line where I knew I wanted the edge of the floor to be and then I drew in the vertical lines at an angle to give a perspective view. After I had that penciled in I stamped the bunny from Honey Bee Stamps Blah Bunny stamp set, I masked that part and stamped the little rug that goes underneath him. Before I got to the coloring of the bunny and rug, I colored the floor with Pumice Stone Distress Ink. I made sure to make the back and sides of the floor portion darker so that it highlighted the bunny in the center I added little nails with a copic marker (N6 + N0) The bunny and the rug are both colored using Copic Markers. For the rug I used YG67, YG63, YG61 and for the outside edge I used G28. For the Bunny I used E31, E33, E34, E35, and E37. I also used R20 and R21 for his ears, noses, and the bottom of the feet.
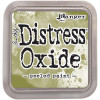
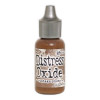
For the wall I used an Echo Park stencil that is older and blended on some Old Paper Distress ink. after I used the stencil I went over the top of the card again with more distress ink so it would soften the stark white the stencil left. I felt it needed something more so I took a small leaf from the Honey Bee Stamps Country Blooms Stamp Set and stamped it with Peeled Paint Distress Oxide ink in between the diamond shapes on the “Wall”.
I stamped, fussy cut, and then shaded the mug using some cool gray copic markers (C00, C1) and I drew in a little heart using a Copic AtYou Spica red pen. I took a craft knife and cut around the bunny’s paw, and then slid the handle of the mug underneath.
I attached the gift card with these removable Glue Dots. This is such a great way to stick gift cards and other removable things to your cards and gifts, It holds well until you want to pull it off, and the best part is the glue dot comes off your project cleanly too!
I have another card to share today too!
This card is super simple and easy to make. Here is the front of the card:
and here is the inside
Simple but Cute right? Such a fun way to give a coffee to a friend who needs a little pick-me-up. One thing I love *Almost* as much as coffee is gifting starbucks gift cards so I always have a small stash of gift cards on hand in case I need to give a last minute gift or Happy Mail to someone needing a smile.
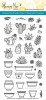
For this card I just colored a cacti from the Honey Bee Stamps Stick with me stamp set. I stamped the planter then covered it with a post-it note so I could stamp the cacti coming out of the planter. I colored the Planter with Copic markers E31, E33, E35 and the Cacti with YG61, YG63, YG67, and a little G21 in the highlight portion. I stamped the sentiment under that and cut out the square using some stitched square dies.
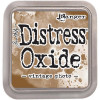
I placed that square on a scrap of black cardstock and adhered the matted square to the card base with foam tape. I blended a little Vintage Photo Distress Oxide ink around the edges and then finished off the front with a few gold sequins.
For the inside of the card I did the same thing as the cacti but I stamped a coffee mug. This coffee mug I bought at one of my Local Scrapbook stores, Impress Cards and Crafts. If you ever are in Seattle this shop needs to be on your “To-Visit” List! It’s a stamper’s candy store! I stamped the Stay Strong from Honey Bee Stamps Prickly Sentiments stamp set. I drew in the little circle to make it sorta “Starbucks-ish” and colored the inside of that green, and then I shaded the cup with some Cool Grey copic markers and the sleeve with some warm grey markers.
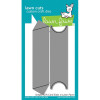
I cut the square with the same stitched square dies and matted that on black. I did not add foam tape on this piece though. I just glued it in using the Nuvo liquid adhesive. To attach the gift card I decided to use the new Lawn Fawn simple gift card slot dies. I die cut the bottom portion of the card and then just popped the gift card right in, super easy
So that wraps up my projects for this year’s Summer Coffee Lovers Blog Hop. In addition to all the great prizes you can win by participating in the Coffee Lovers hop, I also decided to do a fun giveaway both here on my blog, and next week on Instagram! All you need to do to be entered in this giveaway here on my blog is comment below. For the second giveaway that will be going on next week, follow @Taniesa on Instagram.
Hurry, contest ends June 30th! This giveaway includes TWO stamp sets , a exclusive Free-Bee and matching die, and a bottle of Nuvo drops all donated by Honey Bee Stamps! The other items include a Hero arts INtense black ink pad, a set of watercolor pencils, a 3×4 etched grid stamp block, Crate paper embellishment pack, Bazzill Marathon adhesive runner, and a set of watercolor pencils are all items I have purchased for this giveaway. A prize package worth $80.00!!!
Honey Bee Stamps has graciously donated the Blah Bunny Stamp set, The Blah Blah Blah Sentiments stamp set, Free Bee stamp and die, and Nuvo drops. Thank you Honey Bee Stamps! I have also put in things I have purchase for this giveaway and in total the package is worth over $80! Enter by 6/30. Winners to be announced on Saturday, July 1 at noon PST.
*** Karen Ladd !!!! You are my winner! Please email me at Taniesa@thecraftypickle.com with your mailing information. Thank you to all that entered and for the kind comments! ***
Head on over to the Honey Bee Stamps Blog where there are even more prizes to be won AND there is a link to Honey Bee Stamps Designer, Lisa where you can win another prize!
Thank you so much for visiting. You will find the supplies I have used linked in the post but also listed below. I encourage you to modify these ideas and use your crafty stash as well!
Thank you so much for visiting my blog on todays 1st Celebration Blog hop for KatScrappiness.com. Today is so exciting! Not only will you be inspired by the designers projects along this hop, there is a lot of fantastic prizes to be won! You should have arrived here from the Kat Scrappiness blog where it all starts! If you happen to get lost along the hop you can find the full link-up list at the end of this post or on Katscrappinessblog.com.
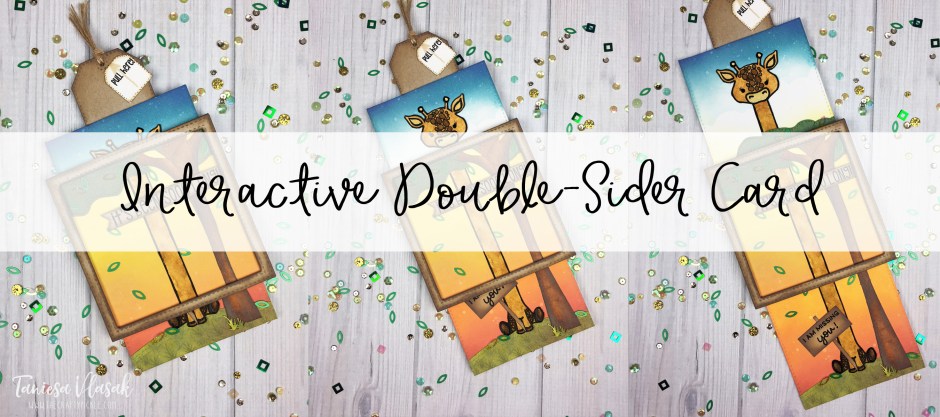
For my project I wanted to create a missing you card with Lola the Giraffe. and I wanted a chance to use the interactive stamp set so I decided to do a double slider. Here is a picture of the card closed.
and here is one with it completely open.
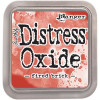
There are many variations on how to make a double slider card, I watched a bunch of videos and took bits and pieces of advice from various sources. To see the basic construction of the double slider click HERE to watch a video. The video shows a version that is similar to how I put this one together. The differences with the one I made were that I did not fold one long piece of cardstock, Instead I layered die cut panels and a card base together with foam tape, this allowed for the 4″ square card. I cut the squares with the Kat Scrappiness Double stitched square dies. The largest was for the main card panel and the second largest was for the two panels that slide out. After I cut the stitched square pieces, I blended on some distress oxide ink in Fired Brick, Spiced Marmalade, Fossilized Amber , Broken China, and Faded Jeans. I layered the two dies together and cut a frame for the top panel out of Neenah desert storm cardstock, and then blended on a little Vintage Photo Distress oxide ink as well.
I stamped the Giraffe head and half the body on watercolor paper and did the same with his lower half using versafine onyx black ink (Favorite ink for using on watercolor paper). Then I freehand drew a long neck off each piece. I watercolored the giraffe with a combo of Zig Clean Color real brush markers and Vintage Photo distress ink (re-inker). I cut a tree trunk out of scrap watercolor paper and did the same watercolor process but this time darker.
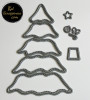
I took some dark green cardstock and cut the Kat Scrappiness Christmas Tree die several times. I applied some Peeled paint Distress Oxide ink on the green cut out pieces and pieced together a tree that looked more like one you would see on Safari rather than Christmas pine. I misted the pieces lightly with water and blotted right away. Here is a photo when I was piecing the tree together. It’s a nice way to stretch a christmas die and use it year-round.
I cut a small hill from the Lawn Fawn stitched Hillside borders for underneath the giraffe and a sentiment banner and sign. The “It’s been sooo long” sentiment is from the same Giraffe stamp set and the “I am missing you” is from the Lawn Fawn Loads of love stamp set. Once everything was painted, fussy cut, and glued down I assembled the card.I cut the smallest of the scalloped tags from the die set and glued that to the back of the top slide out panel. I freehand cut a tag and stamped “pull here” and an arrow pointing up both from the interactive card instructions stamp set. I glued that to the tag to make a good handle to pull the slider.
To finish things off I added on some sequins from the Lucky Charm and Spring Leaves sequins mixes. I also added eyelashes to the giraffe and darkened the eyes with a glaze gel pen. I think it came out pretty cute. I love this interactive design. I plan on making more cards following the same design because it was so much fun. Pre making the card base is fairly easy and with it being square you can use it vertically like I have here or horizontally like the video I linked. below is a clip of the card in action!
I hope you have been inspired by my double slider card. In order for your chance to win one of the brand new stamp sets, or one of the three GRAND prizes, you must comment on all the designers blogs and the Kat Scrappiness blog. That is 10 chances to win! Winners will announced at 12 noon pst on 6/25/17, you have until 12:00 midnight pst Saturday 6/24/17 to enter!
If you are reading this post between 6/19 and 6/25 2017 Kat is having a 15% sale. She already has lower prices on most of her items so this is like getting 20% to 35% off retail! Stock up on your favorites HERE. Remember to use code SUMMERVACAY at checkout.
Next person in the hop is the ever so talented, Maria! Hop on over and see what’s next! Thank you for participating in the very first blog hop for KatScrappiness.com. Below you will find the blog hop line up as well as a list of products I used today.
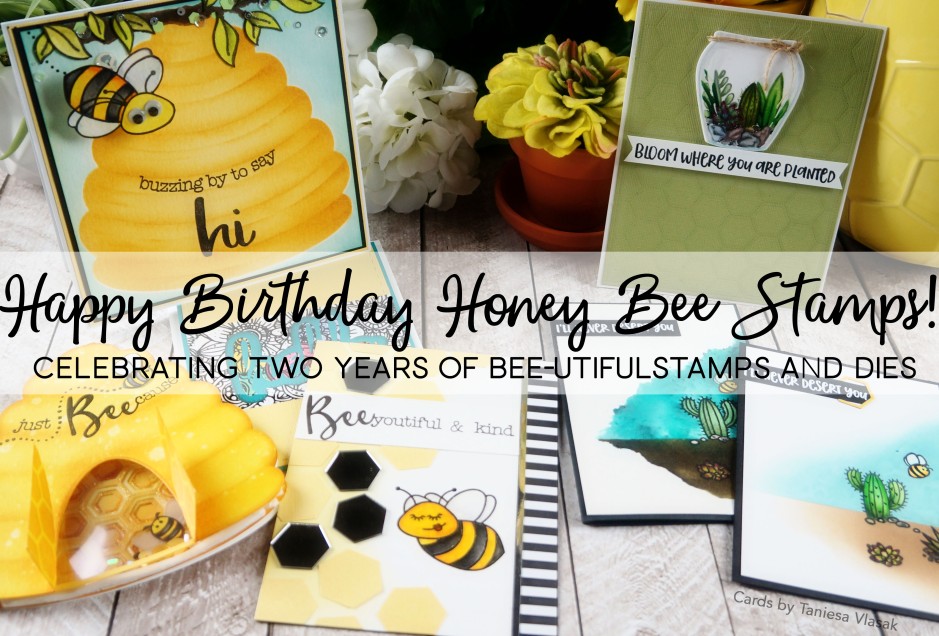
We have enlisted some very talented designers to help Surprise Melissa (the owner of Honey Bee Stamps) for her 2nd Honey Bee Stamps Birthday. Be sure to hop along for all the fun & prizes!! Each stop on the hop will have a drawing for a FREE stamp set of their choice from the Honey Bee Stamps store. Be sure to comment at each stop to enter all of the drawings. The winners will be announced on the Honey Bee Stamps Blog on May 3rd at Noon PST.
I have to say this month’s new release is my favorite so far. I sat down to make one card and ended up making a few more. I’m telling ya, my mind was buzzing with ideas for these new products.
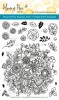
My first card is this cute bee hive card which is a shaker card.
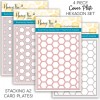
I love that the stencils make shading the hive super easy. I used my distress inks and finger daubers to do the shading. the inside of the shaker has the new layered hexagon die cover plates cut apart, and I used Nuvo Drops to add Honey like accents. I filled the shaker with the special birthday Honey Jar sequins mix and of course that cute little busy bee!
Next card is another hive, but this time I used only the stencils. All 4 of them actually. I used the hive cut out to lay down color, the two shading stencils to give detail, and then when I was all done with that I used the hive cut out piece as a mask and applied the blue distress ink background.
The leaves are from the Busy bees stamp set. I just made a branch with a zig clean color real brush brown marker. The hexagon confetti / sequins is in the spring sequins pack. The cute little bee is from the Build a Bee stamp set. The bee is actually on a little action wobbler and, with the addition of the google eyes, it makes for a very fun interactive element.
This next card was totally inspired by a pack of acrylic mirrored hexagons I have been hoarding. You could achieve a similar look with mirror cardstock that I used as an accent strip along the side of the card.
I colored my little build a bee with my zig markers and added some hexagons that I cut out using the new stack hexagon dies. I also added those awesome hexagon mirrors. I think the patterned paper along the side added the perfect final touch. I love this sentiment from the Bee You Tiful sentiment set. I think it’s the perfect card to remind someone how bee-you-tiful they are, inside and out.
Okay, now a super quick card that is great for any of our new buzz words…
This card was super quick to make! I had a piece of cardstock that was already stamped and embossed using the Zen Bouquet stamp set. I trimmed it down to A-2 size and used the new Hello Buzz word dies to do a fun inlay look. This could work with your favorite patterned paper too.
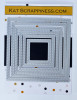
You can keep it simple and leave it just black and white, Or you could color it in to make the word stand out even more! The main panel was cut using the Honey Bee Stamps Double stitched A-2 dies.
These next cards were so much fun to make. I did one card with Color burst watercolor powers and the other with distress oxide inks.
I couldn’t decide which I liked better so I thought I would show you both!
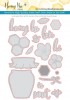
Last but not least is my first real attempt at no line coloring. I took the jar from the sweet as honey stamp and die set (which was a part of Honey Bee Stamps very first release, and one of my most used stamp sets!) and I decided to turn it into a mini Terrarium with the help of the new stick with me stamp set.
I colored the cacti, plants, and rocks with my Copic markers and then added a bit more detail with my colored pencils. For the background I used the hexagon stipple plate die. On the little banner, I used a sentiment from the prickly sentiments stamp set.
The jar is layered with 4 pieces of cardstock instead of using foam, (I had scrap paper I needed to use up). The sentiment is popped up with one layer of foam tape. I finished the card off with a bit of twine around the top of the jar. This was probably my most challenging card but I had a lot of fun. I will be practicing those no line coloring skills more often now!
Here is a photo of all the cards created today. Supplies are listed below.
I hope I inspired you with ways to use these awesome new products (and some of your older ones too). Come back soon BEE-cause I will have lots more projects to share!
Don’t forget to leave a comment for your chance to win your choice of stamp set from Honey Bee Stamps!
Next up on the Hop is the kind & talented, Yana Smakula! Buzz on over and see what beautiful creation she has to share with you today.
Here is the lineup for the Hop in case you get lost:
Happy (almost) Easter! Today I have a fun project for you using supplies you probably have on hand with the exception of one or two items.
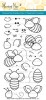
When I was a little girl my Gram had these ornaments that were made from sequins and beads. I LOVED them…. How they sparkled and shimmered. It is one of my childhood memories that I treasure. She also had these beautiful eggs she would put out at Easter time that were real eggs that she blew out. She painted and decorated them and they were beautiful (and fragile). So I let that inspire me for the project I will show you today.
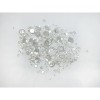
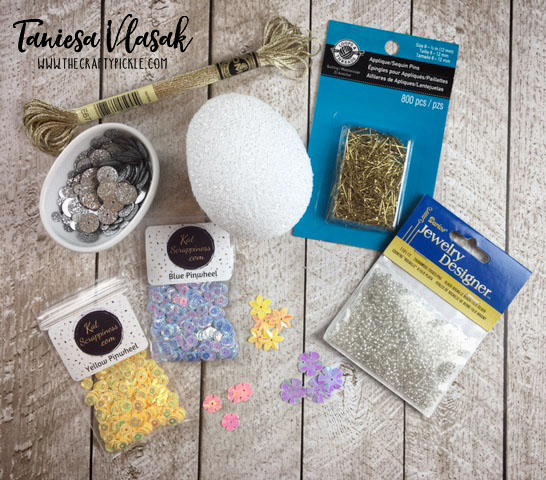
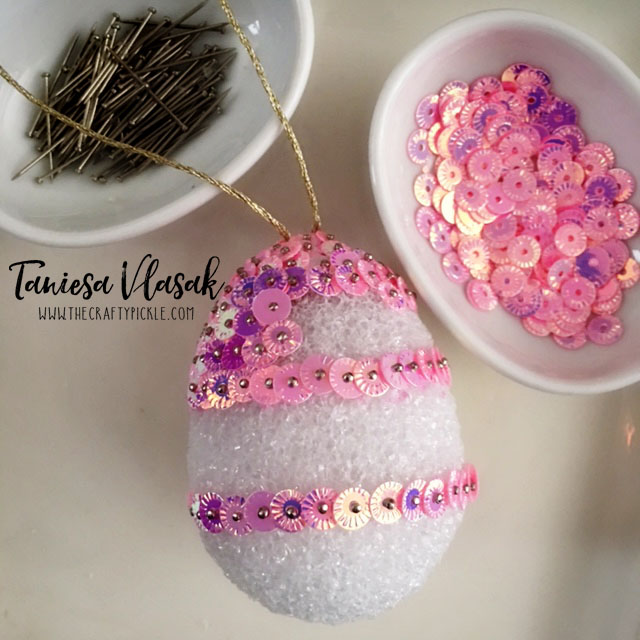
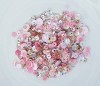
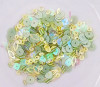
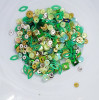
The sequins eggs are the perfect holiday project If you happen to be a sequins hoarder like me. I received some brand new Kat Scrappiness spring sequins and thought this would be a perfect way to use up some of them. Here is what you will need…
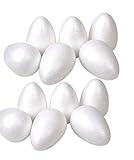
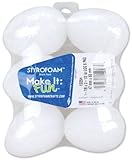
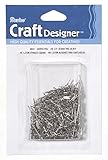
You will need a styrofoam egg, I couldn’t find the smooth foam, but if you can, get that one! the smoother foam holds up a little better. When grabbing your foam eggs from the store, you will also need to pick up sequins pins (if you do not already have them). You can find them by the sequins in your craft store. Stash items to grab is: sequins, string or embroidery floss (if you want them to hang), and something to work on like a plate or bowl. I used a small salad plate with a lip and a few condiment bowls.
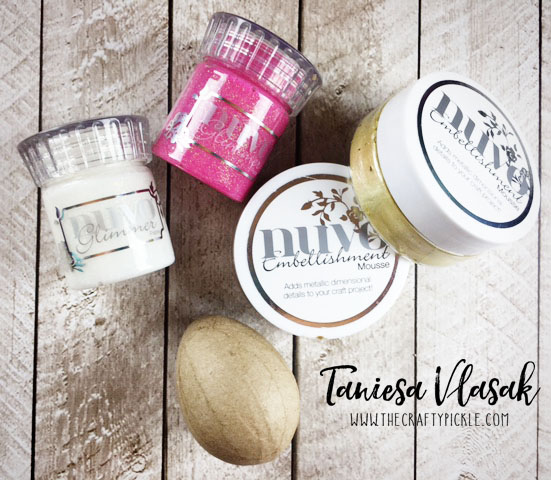
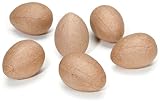
In addition to the foam eggs, I also picked up some paper mache eggs and decorated these with Nuvo mousse and Nuvo glimmer paste. I rubbed the Mousse on the egg with a paper towel and once dry painted a thin layer of the glimmer paste over. Another great way to use your Nuvo Products. You could even make polka dots with your Nuvo drops!
All you need to do is put a pin through your sequins and push it into the foam. If you are using small seed beads in addition to the sequins you will place this on your pin first and then the sequin.
I placed mt sequins in random or in a simple pattern, but really you can do any pattern you wish with these. I went with simple so that I could do this while I watched TV with the family. You can search for more tutorials and videos on YouTube. There is some magnificent ornaments by some very talented people out there. I found this relaxing and fun, and in the end I have a bunch of pretty decorations.
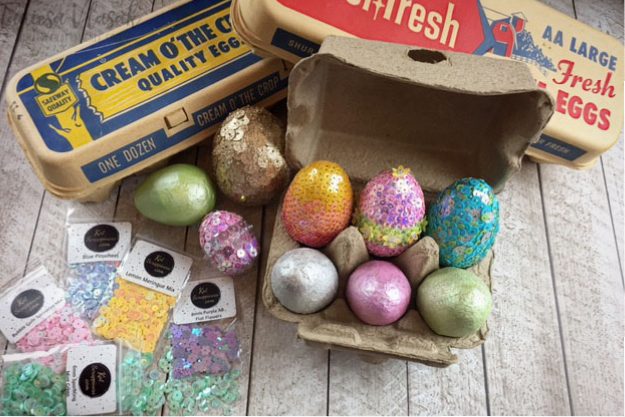
For the smallest sequin egg I decided to use sequins that would be slightly transparent, So I covered the foam egg with some pink nuvo mousse and let dry overnight.
One egg that I completed had colors that blended into the next…
and another egg where I just made the three different sequins colors completely random, although I did have more blue compared to the other two.
This egg below I made so that it could be hung on a branch or an Easter “tree” by just adding some floss before I started pinning the sequins. Just poke the twine or string into the foam and fill the hole with hot glue on Low Temp, or pin it into the egg.
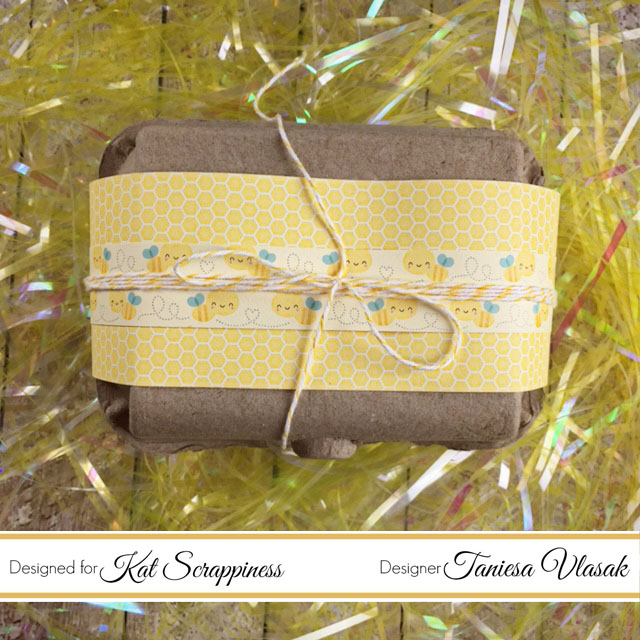
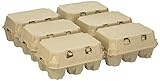
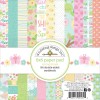
I thought it might be fun to pack up in a small egg carton and gift some of these eggs. This one I got at the Target dollar spot and I decorated it with a bit of Doodlebug Spring paper and some twine. you can also find the egg cartons on Amazon.
Or you could even put eggs in a basket with some chocolates to give as a gift to the host(ess) of Easter brunch or dinner.
Thank you so much for visiting. I hope you were inspired to break out your papercrafting supplies and make them work for your holiday decor too! Supplies are listed below.
Happy Spring!
Supplies used *Affiliate links where available at no cost to you, Thank you for your support!*
Today I am over at the Honey Bee Stamps blog, Kicking off the sneak peeks for new release week.
This new release is so much fun! Today we’re showing a sneak from two stamp and die sets, Celebration Box and Hooray! These might just be my new all time Honey bee stamp Faves!
Take a look at two cards that I made using some of the new stamps and dies.
First up is a Congratulations card.
My second card for today would be great for a birthday or any kind of celebration
I will be back soon with even more Honey Bee Stamps inspiration using the new products! Be sure to stop by www.honeybeestamps.com/blog all this week to see more sneaks. The entire release will be available for purchase THIS FRIDAY!
I am super excited and honored to be apart of the 12 designers of christmas celebration over at the Honey Bee Stamps blog! Today I will be working with the Zen Florals stamp set, The brand new Thanks die set, the Fresh Lilac sequins mix and the brand new Be Mine sequins mix! All of these items are on sale for TODAY ONLY (Saturday December 10th 2016) you can shop for these items and lots more on the honey bee stamps shop HERE
I challenged myself to make two simple cards for this project. Both cards use only one stamp from the zen florals stamp set! You can make this same type of card with any small stamp and a sentiment die cut.
The first card I stamped out the little leaf stamp all over the card base. I then colored using shades of green copic markers. It doesn’t matter what greens you choose your just going to want 3-4 markers that blend fairly well.
I colored the entire panel with my lightest color. I wasn’t too careful because I really only needed to get the leaves. After that was done I took my darkest marker and outlined each of the leaves… this took a little time but I was watching a movie with the family so it went by quick. I went around the darkest line with the next lightest marker and then filled in any gaps with the marker slightly lighter than the last.
Once the coloring was done I positioned the shadow die directly on my card base and cut it out. I adhered this piece to a heavyweight card base. I colored in some white cardstock with my matching copic marker and then die cut the “Thanks”. I glued that into the gap of the card base with some Ranger multi medium matte. I then went over the sentiment and leaves with a wink of stella clear glitter pen. I finished off the card with some sequins from the Fresh Lilac mix and some Nuvo Crystal drops. That’s it. Super simple and can be done with any stamp and die combo that you wish.
For the next card I die cut a heart from some masking paper and placed this over a heavy weight card base. I Blended in some Spun Sugar distress ink to the inside of the heart and darkened the edges with Worn Lipstick Distress ink. I then stamped the little floral cluster stamp over and over to make a pattern inside the heart with some versamark ink. I sprinkled on some white embossing powder (you want to make sure the distress ink is VERY dry before this step) and I heat set it all. I colored in the flowers and leaves with a couple of Zig clean color real brush markers. I added some sequins from the Be Mine sequins mix and placed a few nuvo drops like I did with the other card.
Once that was all dry I cut out the thanks shadow from some pink vellum that matched the spun sugar distress ink and I cut the “Thanks” from glossy white cardstock. I glued the two pieces together using the Ranger multi medium matte and then glued that to the card base.
These were “Almost” one layer cards. They are perfect for those who enjoy coloring! I could see making a note card set like this to give as a gift.
I hope you enjoyed my cards. I am so thankful to Honey Bee Stamps for having me apart of this event and for YOU all as well! This has been an amazing year for Honey Bee Stamps! I hope you all have a very merry christmas and a blessed new year!


 I have to say