Trinity Stamp’s GRAND OPENING blog hop!

Hi Friends!
Whew, It has been a very LONG time since I last posted here on the Crafty Pickle blog! Some of you might have been wondering where I went off to? Am I still crafting? Am I still BREATHING? LOL well, I assure you I am in fact breathing, however, I haven’t been crafting near as much as I would like but all for a really good reason! I have been busy preparing to launch a brand new company…

New Release! New Stamp Company! www.trinitystamps.com

Trinity Stamps has been on my heart for years and finally… today is the BIG day! It’s our official grand opening! We are launching with 9 new stamps and 8 matching dies! If you haven’t already seen the entire release you have to check it out at http://www.TrinityStamps.com.

Lady Liberty: A 3x4 stamp set from www.Trinitystamps.com

Hello Sweet Friend: a 4x6 stamp set by www.trinitystamps.com

Affiliate links used where applicable at no cost to you. Thank you for supporting this blog!

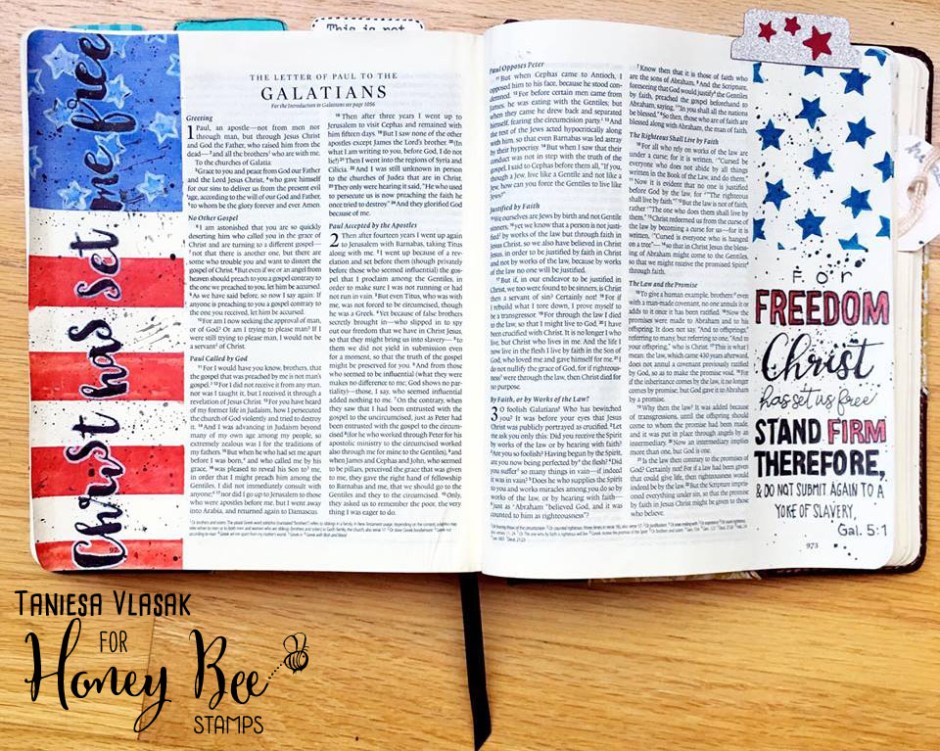
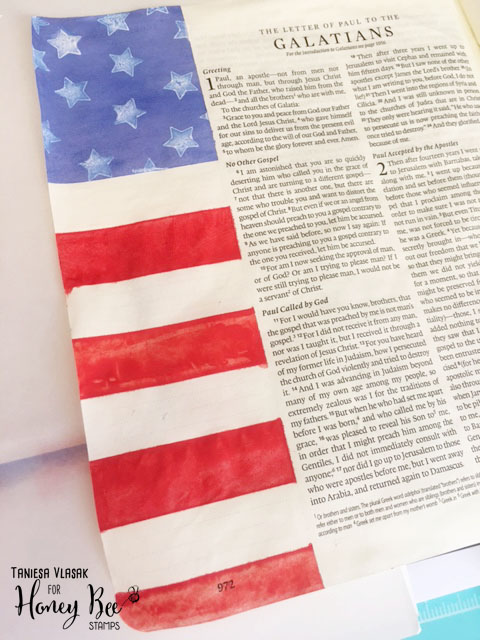
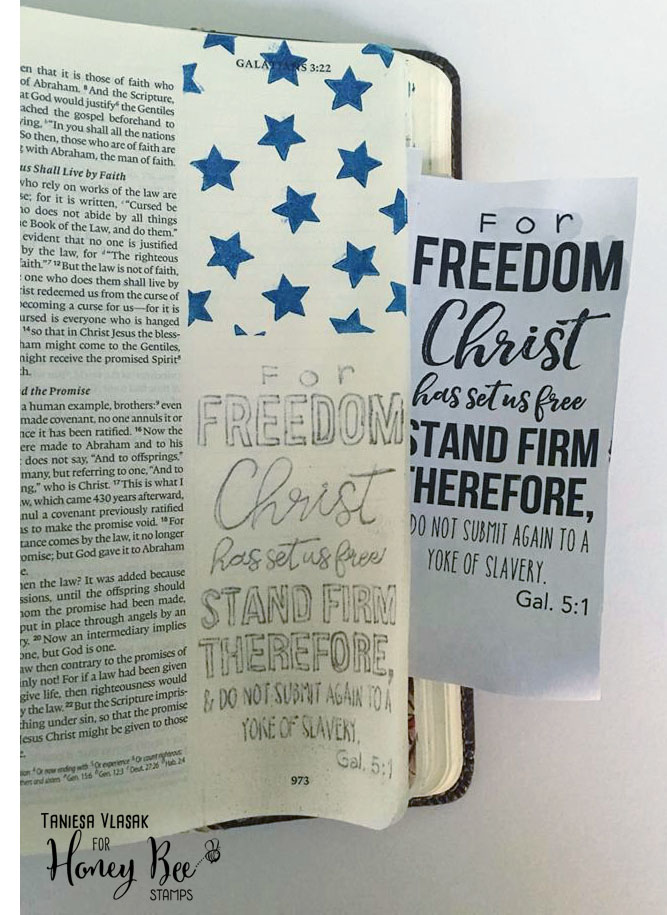
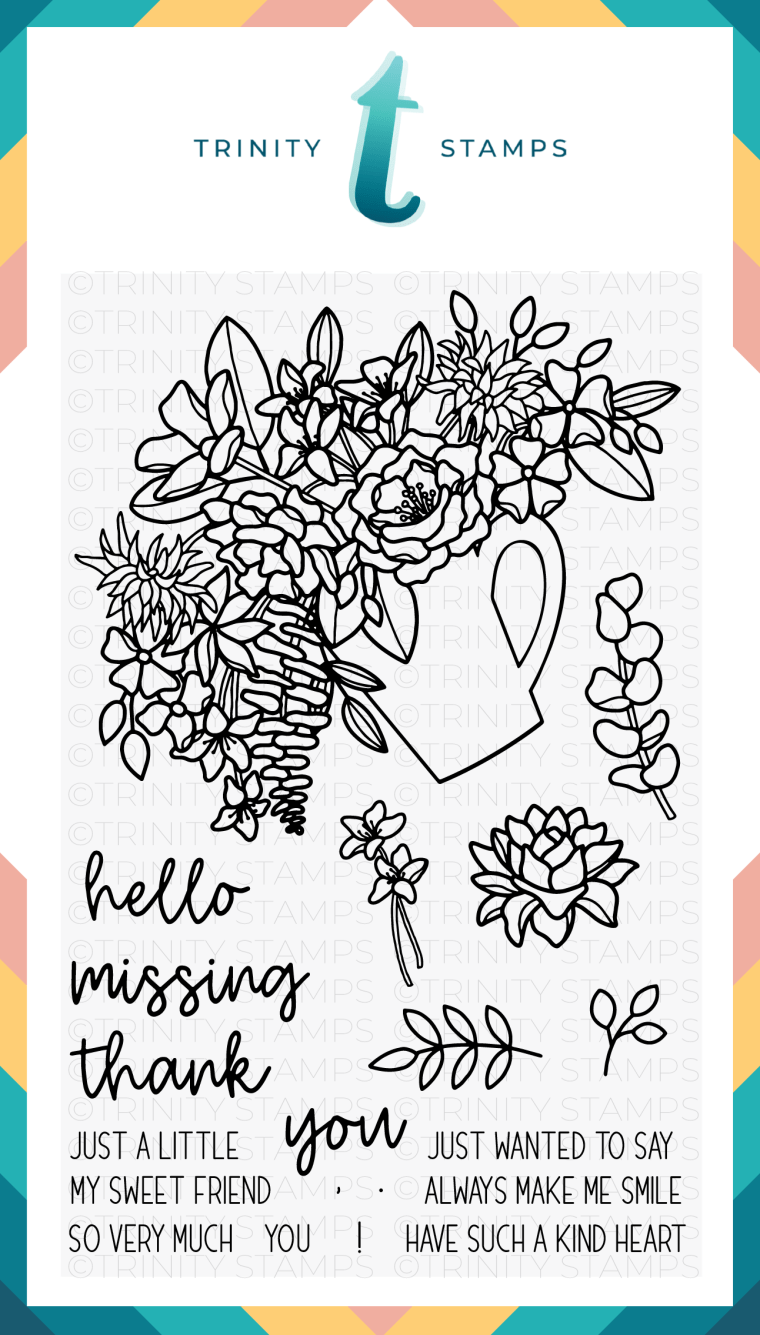
 For today’s blog hop I created a project with the adorable 3×4 Lady Liberty stamp set. I also snuck in a sentiment from the Hello Sweet Friend stamp set. I thought the scripty font fit well with this little lady!

Taniesa Vlasak for Trinity Stamps 5

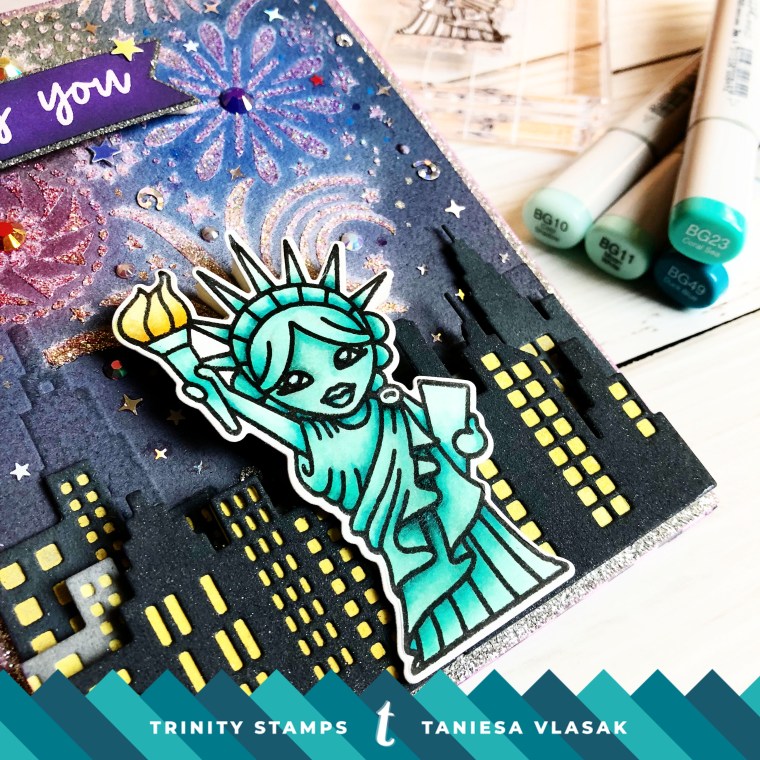
I colored her with some aqua copics, I thought it was fitting with it being Trinity Stamps Signature color! I used BG10, BG11, BG23, and a little bit of BG49 in the darkest shadows. Coloring this image was a breeze! Davina, the artist behind this particular stamp has made it very easy to color, She has drawn all of the folds and pleats for you. It made this very enjoyable to color! I can’t wait for the 30 day coloring challenge (which starts tomorrow! YAY!) so I can color the rest of the Trinity Stamp’s new release!

Taniesa Vlasak for Trinity Stamps

After I colored Lady Liberty and cut her out using the matching Die… I created a background scene by cutting some cityscape dies I had on hand and I used distress oxide inks plus a stencil to do some fun fireworks in the background. After coloring the background of where the fireworks were going to be, I laid down the stencil and used some Bo Bunny glitter paste. I love how sparkly everything is!

Taniesa Vlasak for Trinity Stamps 3

Once the background was dry, I added some rhinestones as well as some stars and other confetti from the Trinity Stamps Lady Liberty confetti mix. I love all the cute tiny stars, especially the 4 point ones!

Taniesa Vlasak for Trinity Stamps 11

To finish it all up I stamped the Missing You sentiment in Versamark ink and heat embossed in white. Everything was accented by a little silver glitter paper. I think it tied it all in nicely, don’t you?

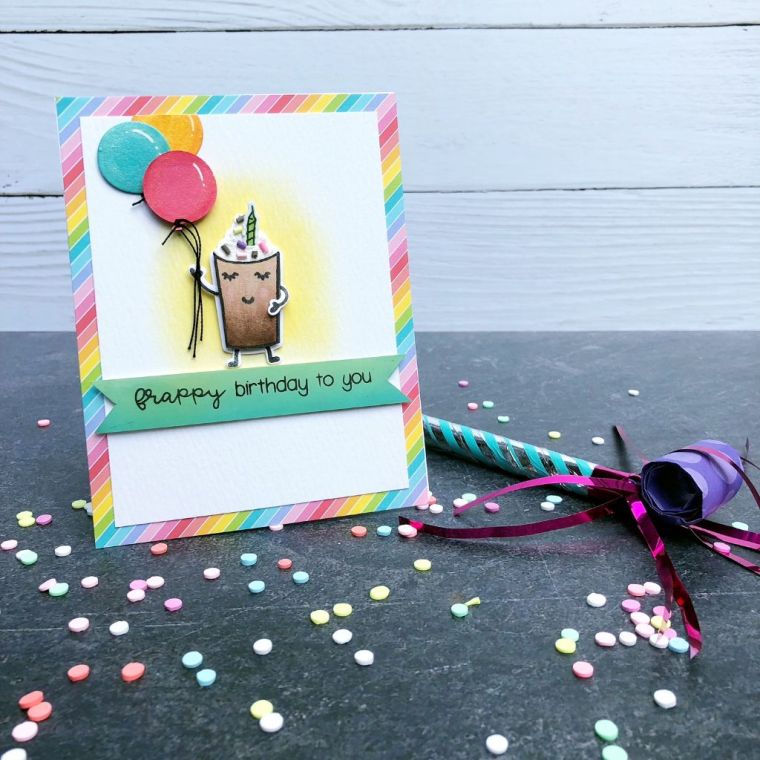
I also created a fun birthday coffee card using the Coffee with Character stamp set and dies  as well as the caffeinated sentiments stamp set for the Coffee Lovers Blog hop. That post can be found on the Trinity Stamps blog HERE but here is a photo of the card project.

Frappy Birthday to you by Taniesa Vlasak for Trinity Stamps www.trinitystamps.com

Frappy Birthday to you by Taniesa for Trinity Stamps www.trinitystamps.com


To celebrate the Trinity Stamps grand opening, we are having a fantastic blog hop packed with amazing talent & inspiration. So please hop along with us to be inspired! If you began with my blog today you can start at the beginning HERE! Otherwise, head on over to the blog of the very Talented Thi Lam!

Be sure to visit each blog & leave a comment to be entered to win!!! We are giving away a $50 gift card to the Trinity Stamps store, a $20 gift card to Therm-o-web, $25 Ellen Hutson Gift Card, $25 Simon Says Stamp Gift Card, 2 ink pad bundles from Imagine Crafts, and a $25 gift card to WOW Embossing. There are plenty of chances to win one of these fantastic prizes. Thank you so much to all the Sponsors!!  The winners will be posted on our blog on June 5th.

Here is our fantastic lineup:

Trinity Stamps

Amy Tsuruta

Carly Minner

Jo Ann Danchik 

Jodi Collins 

Kelly Latevola 

Lisa Cisneros

Melissa Bickford 

Shanna Slater

Taniesa Vlasak *you are here*

Thi Lam

Thank you so much for stopping by to see our fantastic release & inspiring blog hop. Be sure to visit the store to pick up the items on your wishlist!


Thank you so much for stopping by. I really hope you love our new company and new release as much as I do. I look forward to seeing what all of you create with Trinity Stamps!

Happy Hopping!

Taniesa Vlasak | TheCraftyPickle.com

Christ has set me FREE |Journaling bible entry.

Hi Crafty Friends!

Happy 4th of July to all of my American friends out there. Today I am wrapping up red, white, and blue week with my final project for Honey Bee Stamps. Today, rather than do a card, I thought I would share with you an entry I did in my journaling bible. Maybe even give you a few tips that might help you in your bible/art journaling. I also want to mention that there is a sale at Honey Bee Stamps today 7/4/16. 15% off your total purchase by using the code 15FREEDOM (this is on top of the sale prices listed).

Here is a close up view of my finished entry. I kept it pretty simple with just journaling the verse on the right and text along the left margin. (this is before I added the tab to the right hand page)

Freedom bible journaling by Taniesa Vlasak. Get your free printable too at www.thecraftypickle.com!

To begin I prepped the pages with a thin coat of clear gesso. I used the Ranger Dina Wakley Clear Gesso brand but I also love the Clear gesso by prima and use both interchangeably.

After the gesso was fully dry I masked off sections for the flag using post-it tape. I did some ink blending for the square and the stripes with Blueprint sketch distress ink and Candied Apple distress ink. After the ink dried the red wasn’t as vibrant as I would have liked so I added a bit of red acrylic paint. I also took the star stamp from the Brush Grunge Alphabet set and stamped  that in the blue section with Hero Arts Unicorn white pigment ink.

Freedom bible journaling by Taniesa Vlasak. Get your free printable too at www.thecraftypickle.com!

After I let the pigment ink dry I stamped the stars on the other side but this time in blue chalk ink, and stamped “Christ has set me free” in Ranger archival black ink. I used the Brush Grunge Alphabet stamp set. (Can you tell I really love this alpha set?) Because the page was prepped with gesso the ink does not bleed through.

Freedom bible journaling by Taniesa Vlasak. Get your free printable too at www.thecraftypickle.com!

I didn’t think that the text popped out enough so I took a white paint pen (Derwent Graphik Line Painter ) and went around the stamping.

Freedom bible journaling by Taniesa Vlasak. Get your free printable too at www.thecraftypickle.com!

Next it was time to highlight the verse I wanted. Because I had a different plan for the page the actual verse was on I chose to use the first chapter of Galatians. Now I am really bad at hand lettering. I wish I could letter like lots of the beautiful and talented ladies and gentleman I see on Pinterest but I know my strengths and I know my weaknesses. Thankfully, I do know Photoshop! I have a love for different fonts and so I played around with the verse and came up with something I liked. (you could also use Microsoft word for something as simple as this)

Freedom bible journaling by Taniesa Vlasak. Get your free printable too at www.thecraftypickle.com!

After I printed out my verse I coated the back of the copy paper with Derivan liquid pencil . This stuff is AH-MAZE-ING! I saw a review on YouTube for a completely different purpose and thought it would be great for bible journaling. The rewetable version of this watercolor type paint is completely erasable! You can also wet it and blot it off that way if you prefer. I think this is much cleaner than using graphite paper, but I have used that as well with fairly good results. I do like that this paint makes a light mark when traced over. I chose the lightest grey shade that they make (Grey #3).

Freedom bible journaling by Taniesa Vlasak. Get your free printable too at www.thecraftypickle.com!

I applied the paint to the back side of the paper just where the text was.

Freedom bible journaling by Taniesa Vlasak. Get your free printable too at www.thecraftypickle.com!

You can see the paper I used to print on was cheap thin copy paper. I found this works the best so that you do not over apply the paint.

Freedom bible journaling by Taniesa Vlasak. Get your free printable too at www.thecraftypickle.com!

Now you can use a ballpoint pen to trace your text, but if you press to hard you run the risk of tearing through the paper. I like to use a small ended stylist to go over all of the text. You may have one in your stash if you are a card maker. These were meant to be used for dry embossing. I also love using these tools to add small white dots on my projects with acrylic paint.

Once in place go over all of the text with your tool, you can outline the text or just trace over the center depending on your font. For the bold text I chose to outline and for the thinner text i just went over it once. you can lift up your paper as you go to make sure you are getting the transfer you prefer. If you mess up, just erase and go over again.

Freedom bible journaling by Taniesa Vlasak. Get your free printable too at www.thecraftypickle.com!

Below is what it looks like after I was all done tracing.

Freedom bible journaling by Taniesa Vlasak. Get your free printable too at www.thecraftypickle.com!

Simple right? Now I don’t have to worry about straight lines, mis-spelling (provided I used spellcheck LOL) and style of text.

Freedom bible journaling by Taniesa Vlasak. Get your free printable too at www.thecraftypickle.com!

Now it is time to go over the text in a waterproof bleedproof pen. The pens above are all of my favorites for bible journaling. The Faber Castell Pitt artist pen (I also love the large brush markers in this same line). The Pigma Micron pens have been my go to pens for YEARS and I love that they come in a wide range of sizes. My new favorite is the Illustrated faith pens. They now come in three different sizes which I love and used all three for my outlining on this project.

Freedom bible journaling by Taniesa Vlasak. Get your free printable too at www.thecraftypickle.com!

I used the .25 for the thin text, the .35 for outlining the bold text, and the .65 for filling in the text and making the bolder downstroke lines in “Christ”.

I decided to fill in the words Freedom and firm with a Copic Atyou Spica red glitter pen. I thought this tied the red from the other page over to this side well. After I was done with the text, I let dry and then went around the letters carefully with a Tombow Mono Zero eraser (Ultra fine 2.3mm) I just LOVE this eraser any time I am working in my bible.

I did add some black splatter with some diluted black acrylic paint. Unfortunately it smudged just a little but I went with it. I used my WRMK Tab punch and some star dies to make the tab on the upper right that you see for a final touch. I also added a thin coat of Distress Glaze as I do on most of my finished journaling entries as this seals the paint and ink. you only need a very little bit and buff lightly with a paper towel. One jar will last you a very very long time.

Freedom bible journaling by Taniesa Vlasak. Get your free printable too at www.thecraftypickle.com!

There you have it, my completed two page entry. All in all I am happy with how it came out. I love our country and the freedom so many have fought for. It also made me reflect on the freedom I have in Christ.

As a little freebie gift and a way for you to practice using the text transfer method I shared (or graphite paper), I created a little printable for you all. You could even use this as a tip in for your bible. Print it out on a laser printer and you can run it through your foiling machine too! Lots of possibilities.

Freedom bible journaling by Taniesa Vlasak. Get your free printable too at www.thecraftypickle.com!

Download your free printable here.

Listed below (and within my blog post) are the links to the products I have used for this project. Affiliate links may be used, this means if you make a purchase I receive a small commission at no additional cost to you. I really appreciate your support toward the costs of running this blog.

Stamps used:

Honey Bee Stamps Brush Grunge Alphabet set (on sale as I type this 7/4/16)

Other products used:

Glitter paper
Blueprint sketch distress ink
Hero Arts Unicorn white pigment ink
post-it tape
Candied Apple distress ink
Ranger Dina Wakley Clear Gesso
Clear gesso by prima
Ranger archival black ink
Derwent Graphik Line Painter
Derivan liquid pencil
small ended stylist
Faber Castell Pitt artist pen
Pigma Micron pens
Illustrated faith pens
Copic Atyou Spica Glitter Pen
Tombow Mono Zero eraser (Ultra fine 2.3mm)
WRMK Tab punch
star dies
graphite paper
Distress Glaze

 Thanks so much for stopping by! I hope you have a Fabulous and safe Independence day celebration!

Happy crafting!

Taniesa Vlasak for Honey Bee Stamps