Trinity Stamp’s Winter Release is here!

Trinity Stamps Blog Hop Banner

I am So excited to tell you that Trinity Stamps has finally released another fabulous line of Stamps, Dies, and LOTS of embellishments. There are also lots of new shop items added (plus more coming this week!).

If you don’t already know, we started the new release off with a blog hop on Friday and the fun is still happening! If you are coming to my blog for the first time be sure to click the links at the bottom of my post to go through both days of blog hop inspiration. Don’t forget to comment along the way because, friends…. there is prizes, FIVE of them. All of them are worth at least $25 (and some a lot more) Winner will be announced HERE on November 10th!

Now on with the show…

Today I am playing with our new Magical Wizards stamp set, a few stamps from the Wizard Friends set, Magical sentiment stamp set, magical sentiment die set, and the stars from the stand-alone castle builder die set. I am also incorporating some sentiments from Caffeinated Sentiments.

I was inspired by a Starbucks gift card I found. I thought it was absolutely perfect to pair with the Trinity Magical Wizards + Series.

So I started coloring the wizard’s head from Magical Wizards, and then one of the robes from wizard friends. I did some simple copic coloring and because I didn’t want white showing around my image, I opted to fussy cut instead of die cut. I cut the body off except for a piece that will glue behind the robe. I attached the two pieces with my Nuvo Smooth Precision glue and voila! Wizard is (almost) card ready!

Taniesa Vlasak for Trinity Stamps Winter Release9

I had made a green background by blending some various shades of Distress Oxide ink and then to make a floor to ground our character, I blended some ink into cardstock then ran it through a WRMK woodgrain embossing folder. I tried doing this with markers and drawing the floor in but it was taking away from my wizard scene too much so this was a much more subtle option.

Taniesa Vlasak for Trinity Stamps Winter Release10

I put some foam tape on the back of the wizard and set him and the floor piece aside.

Then came the embossing. I took several colors of WOW embossing and embossed all of the star, sparkle, and shine images from all three sets (Magical Wizards, Wizard Friends, and Magical Sentiments). As I was making my way through the swirl of stars and swooshes, I die cut different sizes of hearts from the Castle Builder die set.

Taniesa Vlasak for Trinity Stamps Winter Release11

once all the stamping and embossing was done, I took a damp rag and went along the stary magic trail and gave it even more texture. There were a few spots that still needed something so I took my embossing pen and added some dots here and there.

Taniesa Vlasak for Trinity Stamps Winter Release2

I added a sentiment from Caffeinated Sentiments, one of my personal fave… it was so appropriate given the fact a gift card was going inside.

Taniesa Vlasak for Trinity Stamps Winter Release3

I added a little Midas Touch Aqua Shimmer pen by Nuvo to the red part of the robe the wizard is wearing and I even embossed his wand gold.

Taniesa Vlasak for Trinity Stamps Winter Release1

Such a fun card right. I made the card 3×6 to fit these gold envelops I picked up at my local stamping store. I like the fun size, a nice change from the A-2 cards I usually make… But wait, there’s MORE!

Taniesa Vlasak for Trinity Stamps Winter Release5

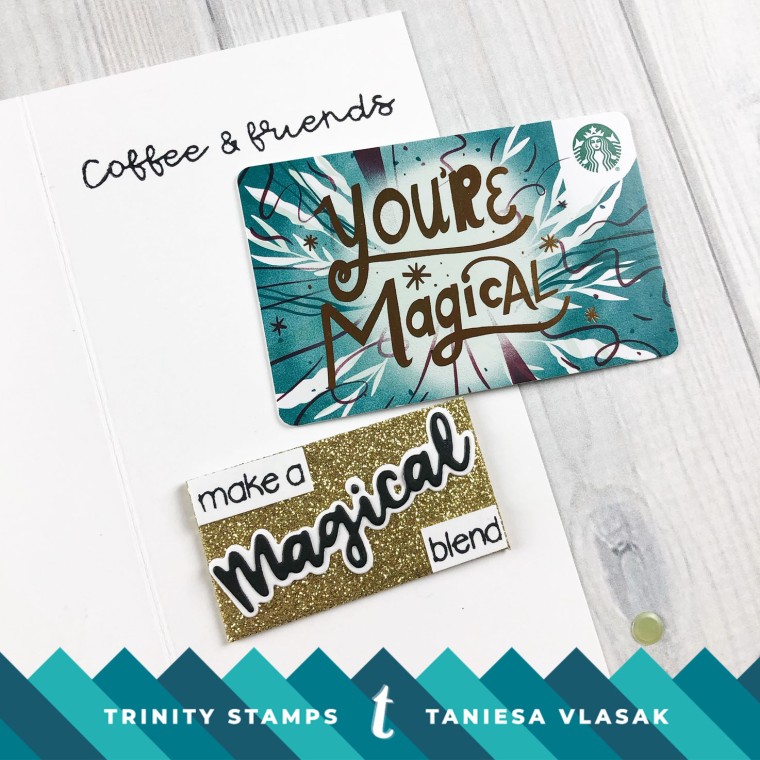
Remember about that gift card I was telling you about? Bam! you’re magical! how perfect is THAT! I did a little stamp surgery so that I could make the sentiment ” Coffee and friends make a magical blend) In the Caffeinated sentiments, there is one that says Coffee & Friends make the perfect blend. All I had to do was snip off the make and the blend.

Taniesa Vlasak for Trinity Stamps Winter Release7

I stamped the first part directly to the card and the make a & Blend was stamped on a strip of white cardstock and then cut. I die cut the two layers of the magical sentiment die set (you can also use the stamp set to stamp in that shadow layer die) I glued those pieces to a very simple gold glitter pocket I made to hold the card.
Taniesa Vlasak for Trinity Stamps Winter Release6

Starbucks usually has fun seasonal and celebratory gift cards and so does a lot of other places, especially this year. How much fun is it to receive a gift inside a handmade card (which is a gift also!) Now is a great time to make a few of these types of cards to have on hand when you need to gift a card to someone.

Taniesa Vlasak for Trinity Stamps Winter Release8

I hope you enjoyed my little card today AND this awesome blog hop! These girls blow me away with their talent and I couldn’t be more excited to work with them all!

I am the last stop on the hop today BUT if you haven’t stopped by every blog on the hop today I have included a list below. Don’t forget those Monday Blog Hop stops either, more chances to win, more inspiration to be had!

blog graphic for monday bloggers

Monday Blog hop List

Taniesa Vlasak

(aka ME, you are already here, MUAH!)

& because I don’t want you to miss a thing…
here is the list from Friday’s hop!

Trinity Stamps blog post can be found HERE and the winner announcement will be posted HERE on November 10th!

Thank you for stopping by today! When you comment below I would love to know what you thought of our blog hop AND as an added bonus for making it this far, I have a $15 Trinity Stamps Gift certificate especially for one of YOU! YAY, MORE PRIZES! So come on and say HI, I know I haven’t blogged in FOR EVER, but now that you see all our great stamps you know why 🙂

Taniesa Vlasak | TheCraftyPickle.com

Trinity Stamp’s GRAND OPENING blog hop!

Hi Friends!
Whew, It has been a very LONG time since I last posted here on the Crafty Pickle blog! Some of you might have been wondering where I went off to? Am I still crafting? Am I still BREATHING? LOL well, I assure you I am in fact breathing, however, I haven’t been crafting near as much as I would like but all for a really good reason! I have been busy preparing to launch a brand new company…

New Release! New Stamp Company! www.trinitystamps.com

Trinity Stamps has been on my heart for years and finally… today is the BIG day! It’s our official grand opening! We are launching with 9 new stamps and 8 matching dies! If you haven’t already seen the entire release you have to check it out at http://www.TrinityStamps.com.

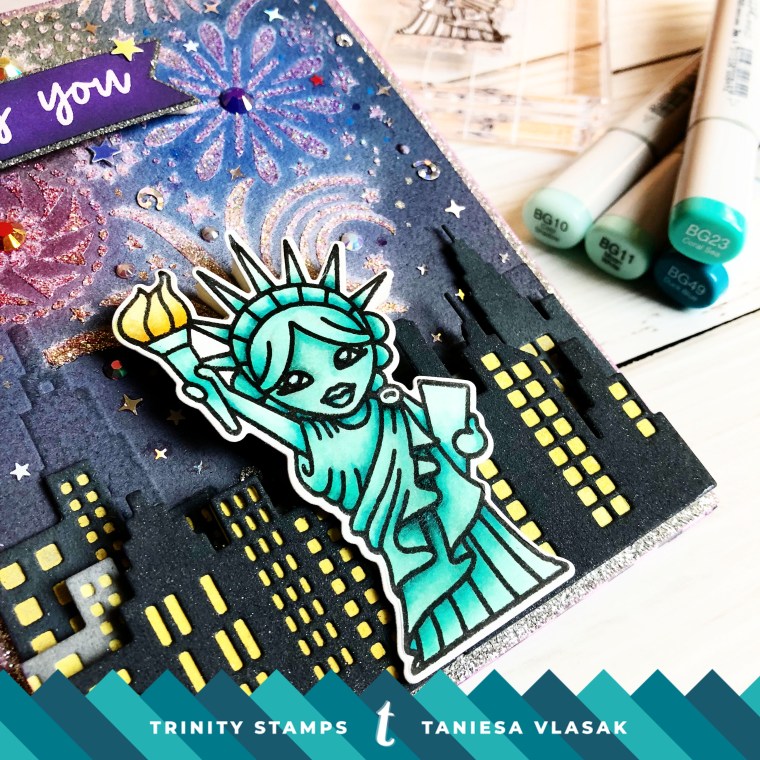
Lady Liberty: A 3x4 stamp set from www.Trinitystamps.com

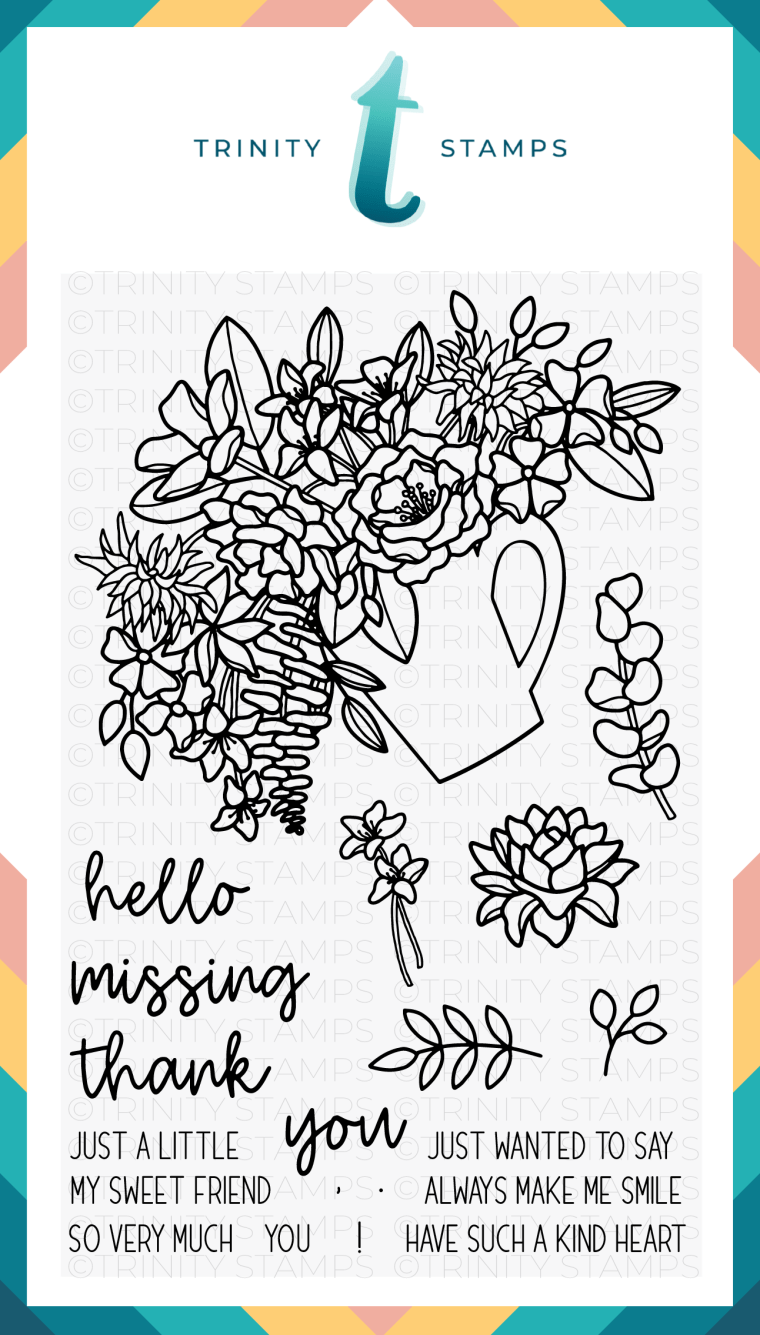
Hello Sweet Friend: a 4x6 stamp set by www.trinitystamps.com

Affiliate links used where applicable at no cost to you. Thank you for supporting this blog!

 For today’s blog hop I created a project with the adorable 3×4 Lady Liberty stamp set. I also snuck in a sentiment from the Hello Sweet Friend stamp set. I thought the scripty font fit well with this little lady!

Taniesa Vlasak for Trinity Stamps 5

I colored her with some aqua copics, I thought it was fitting with it being Trinity Stamps Signature color! I used BG10, BG11, BG23, and a little bit of BG49 in the darkest shadows. Coloring this image was a breeze! Davina, the artist behind this particular stamp has made it very easy to color, She has drawn all of the folds and pleats for you. It made this very enjoyable to color! I can’t wait for the 30 day coloring challenge (which starts tomorrow! YAY!) so I can color the rest of the Trinity Stamp’s new release!

Taniesa Vlasak for Trinity Stamps

After I colored Lady Liberty and cut her out using the matching Die… I created a background scene by cutting some cityscape dies I had on hand and I used distress oxide inks plus a stencil to do some fun fireworks in the background. After coloring the background of where the fireworks were going to be, I laid down the stencil and used some Bo Bunny glitter paste. I love how sparkly everything is!

Taniesa Vlasak for Trinity Stamps 3

Once the background was dry, I added some rhinestones as well as some stars and other confetti from the Trinity Stamps Lady Liberty confetti mix. I love all the cute tiny stars, especially the 4 point ones!

Taniesa Vlasak for Trinity Stamps 11

To finish it all up I stamped the Missing You sentiment in Versamark ink and heat embossed in white. Everything was accented by a little silver glitter paper. I think it tied it all in nicely, don’t you?

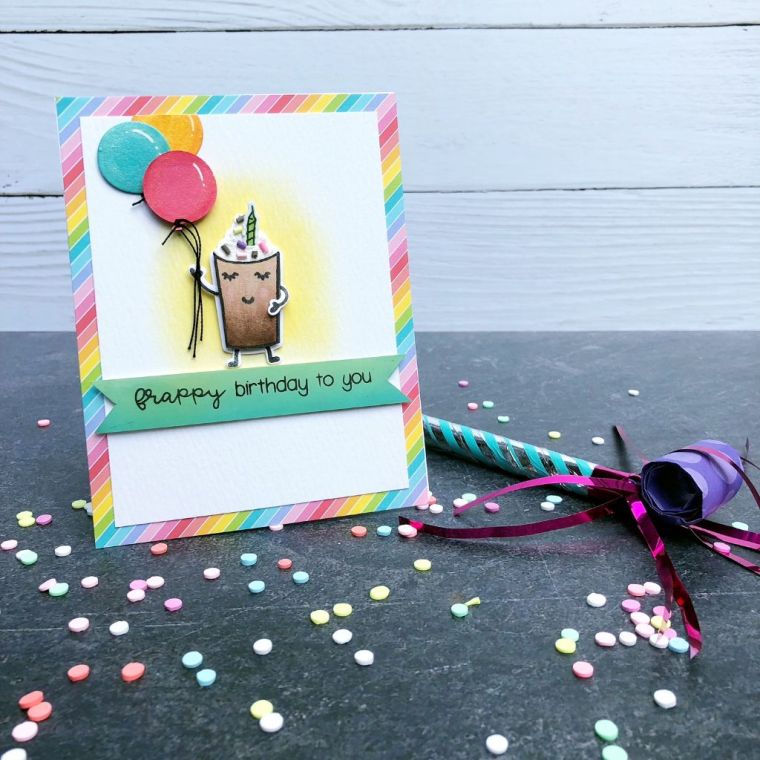
I also created a fun birthday coffee card using the Coffee with Character stamp set and dies  as well as the caffeinated sentiments stamp set for the Coffee Lovers Blog hop. That post can be found on the Trinity Stamps blog HERE but here is a photo of the card project.

Frappy Birthday to you by Taniesa Vlasak for Trinity Stamps www.trinitystamps.com

Frappy Birthday to you by Taniesa for Trinity Stamps www.trinitystamps.com


To celebrate the Trinity Stamps grand opening, we are having a fantastic blog hop packed with amazing talent & inspiration. So please hop along with us to be inspired! If you began with my blog today you can start at the beginning HERE! Otherwise, head on over to the blog of the very Talented Thi Lam!

Be sure to visit each blog & leave a comment to be entered to win!!! We are giving away a $50 gift card to the Trinity Stamps store, a $20 gift card to Therm-o-web, $25 Ellen Hutson Gift Card, $25 Simon Says Stamp Gift Card, 2 ink pad bundles from Imagine Crafts, and a $25 gift card to WOW Embossing. There are plenty of chances to win one of these fantastic prizes. Thank you so much to all the Sponsors!!  The winners will be posted on our blog on June 5th.

Here is our fantastic lineup:

Trinity Stamps

Amy Tsuruta

Carly Minner

Jo Ann Danchik 

Jodi Collins 

Kelly Latevola 

Lisa Cisneros

Melissa Bickford 

Shanna Slater

Taniesa Vlasak *you are here*

Thi Lam

Thank you so much for stopping by to see our fantastic release & inspiring blog hop. Be sure to visit the store to pick up the items on your wishlist!


Thank you so much for stopping by. I really hope you love our new company and new release as much as I do. I look forward to seeing what all of you create with Trinity Stamps!

Happy Hopping!

Taniesa Vlasak | TheCraftyPickle.com

It’s been soooooooo long! *Blog Hop for Kat Scrappiness*

Happy Monday, Friends!

Thank you so much for visiting my blog on todays 1st Celebration Blog hop for KatScrappiness.com. Today is so exciting! Not only will you be inspired by the designers projects along this hop, there is a lot of fantastic prizes to be won! You should have arrived here from the Kat Scrappiness blog where it all starts! If you happen to get lost along the hop you can find the full link-up list at the end of this post or on Katscrappinessblog.com.
We are so excited to announce the addition of our first ever exclusive clear stamp sets! One that is perfect for interactive papercraft designs and one that is an adorable Giraffe! You will also catch a glimpse of some brand new dies and sequins embellishment mixes that are also exclusives. Check out all of the exclusive products at KatScrapiness.com  affiliate links used at NO cost to you, Thank you for helping me keep this blog going!

Today I am using both of the new stamp sets you see above you along with some other Kat Scrappiness and Lawn Fawn supplies

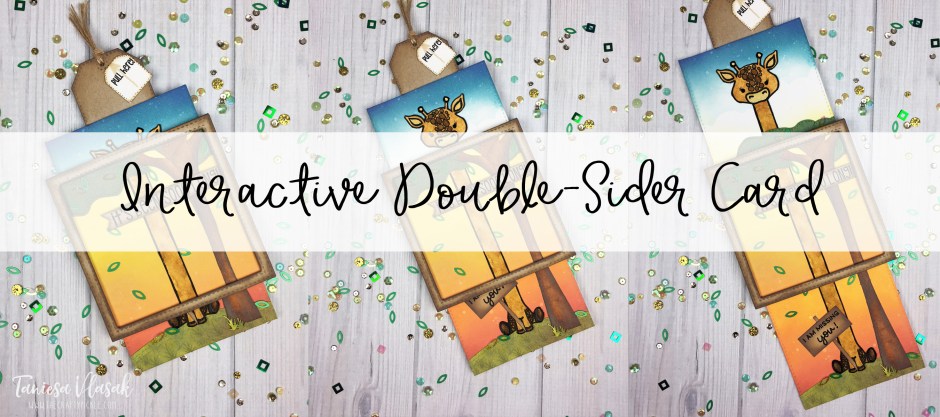
For my project I wanted to create a missing you card with Lola the Giraffe. and I wanted a chance to use the interactive stamp set so I decided to do a double slider. Here is a picture of the card closed.
and here is one with it completely open.
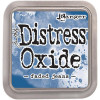
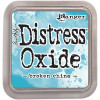
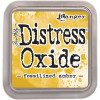
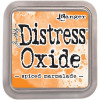
There are many variations on how to make a double slider card, I watched a bunch of videos and took bits and pieces of advice from various sources. To see the basic construction of the double slider click HERE to watch a video. The video shows a version that is similar to how I put this one together. The differences with the one I made were that I did not fold one long piece of cardstock, Instead I layered die cut panels and a card base together with foam tape, this allowed for the 4″ square card. I cut the squares with the Kat Scrappiness Double stitched square dies. The largest was for the main card panel and the second largest was for the two panels that slide out. After I cut the stitched square pieces, I blended on some distress oxide ink in Fired Brick, Spiced Marmalade, Fossilized Amber , Broken China, and Faded Jeans. I layered the two dies together and cut a frame for the top panel out of Neenah desert storm cardstock, and then blended on a little Vintage Photo Distress oxide ink as well.
I stamped the Giraffe head and half the body on watercolor paper and did the same with his lower half using versafine onyx black ink (Favorite ink for using on watercolor paper). Then I freehand drew a long neck off each piece. I watercolored the giraffe with a combo of Zig Clean Color real brush markers and Vintage Photo distress ink (re-inker). I cut a tree trunk out of scrap watercolor paper and did the same watercolor process but this time darker.
I took some dark green cardstock and cut the Kat Scrappiness Christmas Tree die several times. I applied some Peeled paint Distress Oxide ink on the green cut out pieces and pieced together a tree that looked more like one you would see on Safari rather than Christmas pine. I misted the pieces lightly with water and blotted right away. Here is a photo when I was piecing the tree together. It’s a nice way to stretch a christmas die and use it year-round.
 I cut a small hill from the Lawn Fawn stitched Hillside borders for underneath the giraffe and a sentiment banner and sign. The “It’s been sooo long” sentiment is from the same Giraffe stamp set and the “I am missing you” is from the Lawn Fawn Loads of love stamp set. Once everything was painted, fussy cut, and glued down I assembled the card.I cut the smallest of the scalloped tags from the die set and glued that to the back of the top slide out panel. I freehand cut a tag and stamped “pull here” and an arrow pointing up both from the interactive card instructions stamp set. I glued that to the tag to make a good handle to pull the slider.
 To finish things off I added on some sequins from the Lucky Charm and Spring Leaves sequins mixes. I also added eyelashes to the giraffe and darkened the eyes with a glaze gel pen. I think it came out pretty cute. I love this interactive design. I plan on making more cards following the same design because it was so much fun. Pre making the card base is fairly easy and with it being square you can use it vertically like I have here or horizontally like the video I linked. below is a clip of the card in action!

I hope you have been inspired by my double slider card. In order for your chance to win one of the brand new stamp sets, or one of the three GRAND prizes, you must comment on all the designers blogs and the Kat Scrappiness blog. That is 10 chances to win! Winners will announced at 12 noon pst on 6/25/17, you have until 12:00 midnight pst Saturday 6/24/17 to enter!
 If you are reading this post between 6/19 and 6/25 2017 Kat is having a 15% sale. She already has lower prices on most of her items so this is like getting 20% to 35% off retail! Stock up on your favorites HERE. Remember to use code SUMMERVACAY at checkout.
Next person in the hop is the ever so talented, Maria! Hop on over and see what’s next! Thank you for participating in the very first blog hop for KatScrappiness.com. Below you will find the blog hop line up as well as a list of products I used today.

Blog Hop Lineup:

Taniesa

Maria

Cheryl

Mona

Angeline

Katty

Kelley

Supplies Used:

Misti and Honey Bee Stamps | A perfect match!

Hi Crafty Friends!

Welcome to the Honey Bee Stamps and Misti Blog hop!

You should have arrived here from the blog of the Amazing, Lydia Fideler!  If you are starting with my blog today, make sure you go back to check out Lydia’s post as she is the first person on the hop!

I was so excited when I found out that we would be working with the kind folks over at My Sweet Petunia. I have had my Misti since they first launched and It is the most used stamping tool in my craft room!

Today I have a fun little project for you. Instead of making a card I decided to make this cute little tissue box that holds those purse/pocket packs of tissue perfectly.  I took inspiration from the Honey Bee Logo and the My Sweet Petunia logo for my colors.

Today I will be featuring the Bless Your Heart stamp from Honey bee stamps ( and don’t tell Melissa…. but if you look closely, you might see a couple of stamps from our April release coming up VERY soon! I had to sneak something in 😉 Shhhhh! )

Making the tissue box is super simple if you have a paper trimmer, scoreboard, and scissors.

Cut a piece of Cardstock to 8 inches by 7 1/2 inches. I used a piece of Strathmore mixed media paper. Both because I planned on doing some watercoloring but also this is super sturdy for a tissue box.

Time to score! Start with the 8″ length at the top.


Then turn your paper 90 degrees and score again.

Once you did your scoring, take a bone folder and burnish / crease all of your score marks. Then grab your scissors for some trimming.

to make the cutting easy, I first cut along the score lines on the sides that had the double score line close to each other. then I trimmed away the pieces you see above.

Before I assemble the box I wanted to do my stamping and coloring. Because I am working on a textured surface, the misti tool is even more helpful. Let me show you….

I could have lined this up at the top of the misti but instead I decided to use my creative corners to give it a little push upwards.

You’ll see above that my first stamping didn’t go so great, which is normal for textured papers. I Just re inked and stamped again.

MUCH better!

Then I die cut a little hexagon for the tissue opening.

I have a handy little tip for you. Instead of taping your paper down to watercolor. Flip over your misti and attach your projects with magnets to the backside. This will hold your project down while you color or paint.

I sketched out some hexagons with a watercolor pencil by Prima.

Then I water colored the top of my tissue box. The watercolor honeycomb reminded me of the Honey Bee logo and website. I didn’t have a pink Petunia but I did have this cute little daisy (which may or may not be a stamp from a brand new stamp set coming soon) So I painted that pink. Of course my little bee is yellow and black. You can’t tell too well but there is a lot of glitter accents from my Wink of Stella glitter brush pen. And I even mixed a little Gold watercolor in my yellow for the honeycomb.

If I tilt it just right you can see just a bit.

After I was done watercoloring I cut two side pieces to 2 1/4″ x 1′ from yellow polka dot paper and two longer side pieces to 4 1/4″ x 1″. I inked the edges of the yellow paper with some Black ink and for the black & white paper I inked it a bit with some Fossilized amber distress oxide ink and then some black distress ink over that.

I adhered those down with some Scor tape and then glued the small long flap and one of the sides together. The other side of the box i left without adhesive so this box could be refilled.

How cute would this be to hand to someone who has some bad spring allergies or a seasonal cold. I think it would make just about anyone smile. I mean look at that cute bee!

I have one more fun “tip” to share with you all. I love my creative corners but I really wasn’t sure how to store them. I wanted to be able to keep them with my Misti and my mini misti and not have the pieces all over the place.

I had this stampin up box and it was just the perfect size. I took a cd sleeve and made a pocket for the inside to hold my mini misti grid paper, my grid transparency and a scrap piece of plastic I use to stamp on sometimes. On the other side my Creative corner pieces fit perfectly!

I cut my packaging to fit on the inside of the stampin up case.

If you don’t have a case like this you could do the same thing with a 5×7 photo case.

Here is a few photos of the final project. What do you think?

Thanks so much for stopping by!

Next stop on the hop is the talented Ilina! Buzz on over and show her some love!


Here is a list of everyone participating in today’s hop. Don’t forget to comment at each blog post for a chance to win!

Taniesa Vlasak <—-That’s me!

Greetings from Seattle! Creative Coffee Gift for the Coffee Lover’s Blog Hop

Hello Coffee (and Papercraft) Lovers!

I am excited to be participating in the Coffee Lovers Blog hop for the first time! Today I am creating a project on behalf of KatScrappiness.com. I was inspired by the Seattle stamp set that was designed by Kelly Purkey for Hero arts as well as a Seattle Starbucks gift card.

I have always been a coffee addict but when I moved to the Seattle area about a year and a half ago I REALLY came to love coffee any time of the day! I thought it would be fun to create a coffee gift card holder but I didn’t want to JUST give a gift card, So I created another little special gift using my Seattle stamp set.

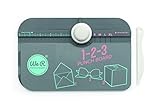
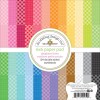
This cute little matchbox was created using the WRMK envelope punch board. I used some Doodlebug printed papers from the Gingham collection and the cream and sugar collection.  I followed the tutorial for the matchbox HERE and then I added a card on top. Sort of an all-in-one gift!

For the inside of the card, I attached the coffee gift card using a glue dot. I cut a white panel for my message using the second smallest rectangle die in the Kat Scrappiness double stitched rectangle dies. I stamped a sentiment and coffee cup icon in a light grey (Hippo) ink from the Lawn Fawn mini ink pad set, Tropical Island. The stamp set I used here is an older set from Kelly Purkey.

I took the same size stitched rectangle die and die cut a piece of watercolor paper. I stamped a little Seattle scene using that Seattle stamp set pictured above. I then added some watercolor using my zig clean color real brush markers and a waterbrush. After it was dry I went over all of the water and space needle with a clear Spectrum Noir glitter brush marker.

For the inside of the matchbox I added some green sequins, real Starbucks coffee beans, some iridescent cellophane wrap, and a cute pair of coffee cup earrings I made using beads, stamps, and shrink plastic! I haven’t played with shrink plastic since I was a kid and I have to tell you, this was so fun and I am sure I will be making more stamped jewelry in the future!

The stamp set that I used today can be found at KatScrappiness.com. In honor of the Coffee Lovers Blog hop, Kat Scrappiness is giving you 15% off your purchase!!! Use code *SPRINGCOFFEE* at checkout. She even has a special section of the store dedicated to awesome coffee and tea papercrafting items!

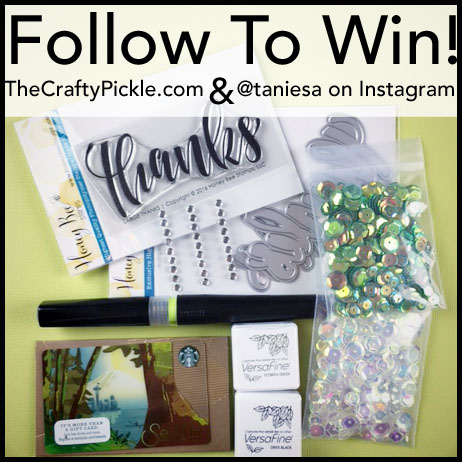
How about a little blog candy? Simply subscribe to my blog, and follow me on Instagram HERE. Once you have done that please comment below and let me know your following as well as your favorite Coffee or Tea (I am also a Davids Tea fan!). One lucky winner will get a Starbucks gift card (a Seattle Exclusive card) two versafine ink cubes in Onyx black and Olympia Green, two bags of sequins in a sparkly Starbucks Green shade and a semi-transparent white, some sticky back gems, a new clear sparkle brush marker, and an awesome big Thanks stamp with a matching die set! I am ever so thankful for my followers!

Supplies that I have used in my project today are listed below. Affiliate links are used where available, at no cost to you. Thanks!!

Honey Hop! Honey Bee Stamps | August NEW release!!!

www.honeybeestamps.com August Honey Hop!

Good Morning Honey Bees! Welcome to our August release Honey Hop!!!

You should have arrived from Melissa’s blog. If you got lost you can always start at the beginning HERE.

All this week we have been showing you little sneaks of our awesome new stamp sets and dies! TOMORROW our new release goes live and to celebrate we are showing you some beautiful projects, TODAY!!!
What’s a Honey Hop without some sweet prizes, right? This time we not only have one awesome prize pack but TWO!! One winner will win our zen florals pack (Zen florals, Zen Bouquet, and each of their matching die sets) and our second winner will win our Alpha prize pack! (Color me alpha stamp set, sentiment alpha stamp set, and color me alpha die set). All you have to do to win is comment here on the Honey Bee Stamps blog and again at each one of our designer’s blogs by Sunday August 28th. Winner will be announced on Monday August 29th at Noon PST.

So Hop along and get ready to BEE inspired!

During our preview days this week I shared two videos. One for each new Alphabet stamp set that Honey Bee Stamps is releasing this friday. I love them both and I am sure you will too.

Brand new Sentiment Alpha!

And the oh so fun Color-Me-Alpha!

and now I have two cards to share! The first one you may of saw this week on social media….

Honey Bee Stamps Aug 2016 release | Taniesa Vlasak

For this card I used the main floral border in the new Zen Florals stamp set. I also used the Smile stamp set and die as well as the Sweet as honey stamp set.

Honey Bee Stamps Aug 2016 release | Taniesa Vlasak

First I used distress ink to blend a light blue background (Tumbled Glass). Then I water colored the floral images. After the watercolor was dry I went over with a clear Spectrum sparkle pen.

Honey Bee Stamps Aug 2016 release | Taniesa Vlasak

I heat embossed a dot pattern on black cardstock and adhered just below the floral border strip. I also embossed the smile die cut and the sentiment that was made up from the smile stamp set as well as the sweet as honey stamp set. Everything was heat embossed using the WOW rich pale gold embossing powder. I popped the smile die cut up on some black adhesive backed foam.

Honey Bee Stamps Aug 2016 release | Taniesa Vlasak | Customize the back of your card with your signature and a stamp from the main stamp set you used on your card!

As an added touch, and something I have been doing a lot lately, is taking a coordinating image from the stamp set that I used for the card and stamping it on top of my custom signature stamp.  I love how this just ties the entire card together and makes it just a little more special.

Honey Bee Stamps Aug 2016 release | Taniesa Vlasak

I also really like to stamp the envelope to match too.

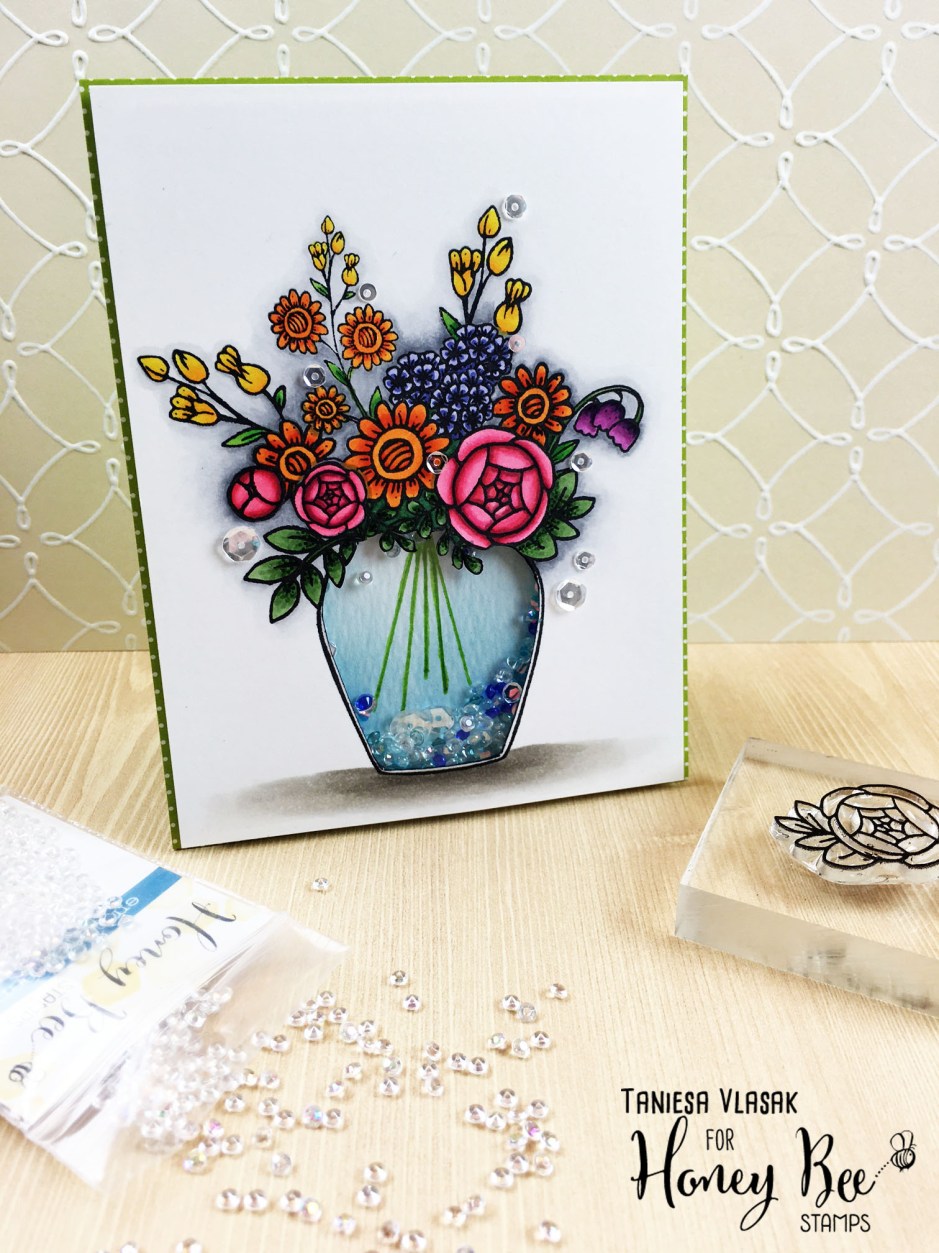
For my next card I decided to shake things up…. well, Literally. I made a fun shaker card with Honey bee stamps new Zen Bouquet set, Zen Florals set, new gems embellishment pack, and I also added in the jar from the sweet as honey stamp and die set.

Honey Bee Stamps Aug 2016 release | Taniesa Vlasak

I stamped out the various flowers from both zen sets into an arrangement on scratch paper first. Once I was happy with the layout I traced around the jar from the sweet as honey die set. I cut some masks for each of the florals using Simon Says Stamp masking paper. Then I stamped my arrangement using Simon Says Stamp intense black ink.

Honey Bee Stamps Aug 2016 release | Taniesa Vlasak

After everything was stamped. I took my Tim Holtz craft knife (best craft knife I have ever owned, I love this thing!) and I cut around the inside of the honey jar and around the overlapping florals and leaves. This leaves the window for my shaker card. I took a piece of craft foam slightly smaller than my card panel and I cut out the Honey jar from the foam in the same place as the card panel. This leaves the opening a bit larger so that my panel covers the foam completely.

Honey Bee Stamps Aug 2016 release | Taniesa Vlasak

Then I began coloring. I used 3 to 4 shades per color family of copics to color in my images. I used warm grays at the bottom of the jar to ground the image. Once I was finished coloring I adhered a piece of acetate to the back of the front panel to act as my window.

Honey Bee Stamps Aug 2016 release | Taniesa Vlasak

Now the fun part …. Wait, it’s all fun, ok ANOTHER fun part…. filling the shaker! If you have seen the sneaks, Honey Bee Stamps came out with these cute little clear gemstones to use in your shakers. I needed shaker bits to look a little bluish like water so I pulled out a tip my dear friend and fellow design team member taught me a year or so ago. You can dye your clear plastic embellishments any color you want with alcohol ink! So I thought why not these cute little gems. I  took two shades of Ranger alcohol ink and a couple of plastic baggies and put some gems in each. I then put two drops of the ink in the bag and smooshed it around…. after they were coated well I poured them out on a paper towel and let them dry. here is a closer look at them….

Honey Bee Stamps Aug 2016 release | Taniesa Vlasak

Of course I need to buy more so I can dye these lil babies in every color of the rainbow!! I added some of these to my shaker window along with some clear sequins and some blue confetti. I covered up the opening in the back with a scrap piece of distress cardstock that I used a bit of ink blending on ( Broken china distress ink ) and that I drew in some stems with a green marker.  I placed the shaker panel on a piece of Doodlebug green polka dot patterned paper and attached the completed panel to a top fold A-2 cardbase.

Create an adorable "shaker vase" using Honey Bee Stamps new Zen florals series and new gems that you can hand dye to match any project! More info at www.thecraftypickle.com

And that pretty much does it for my cards today. Thank you so much for hanging in there with my very long post today. I hope you were inspired.

There is lots more fun to be had. Keep on Honey Hoppin to our awesome Guest Designer’s blog, Deepti Stephens!!
Listed below are the links to the products I have used for these projects as well as postcard projects I have done in the past, and planning on doing. Affiliate links may be used, which means if you make a purchase, I receive a small commission at no additional cost to you. I really appreciate your support toward the costs of running this blog.

https://static.inlinkz.com/ppr.js

Taniesa Vlasak | TheCraftyPickle.com

Inklipse Blog hop!

Hey Crafty Friends!

If you have never visited TheCraftyPickle before, Welcome! I was so happy to help Simon out in his first Inklipse blog hop! He has a great hop planned with lots of talent (and of course prizes!) I hope you will follow along with us!

If you have started at my blog first you can start at the beginning HERE

You should have arrived from Jess Gerstner’s blog.

Inklipse Blog Hop | August 2016

So I have to tell you, I had this big video planned. I recorded my whole process and when I went to edit my video last night…. nada … nope not any footage. Darn it! So I apologize. I will have some more YouTube videos coming VERY soon! You can find my youtube HERE. Subscribe so you don’t miss out on the content I have coming in September!  ….. On to today’s card!

I recently got some of Concord and 9th’s new release products from a Simon Says Stamp haul and I was super excited to get to play with them. I just loved the Hugs die that they came out with earlier in the year so of course I got the Thanks die too!

Concord and 9th Heart full of thanks | TheCraftyPickle.com

This die is so great for making a card extra special!

Concord and 9th Heart full of thanks | TheCraftyPickle.com

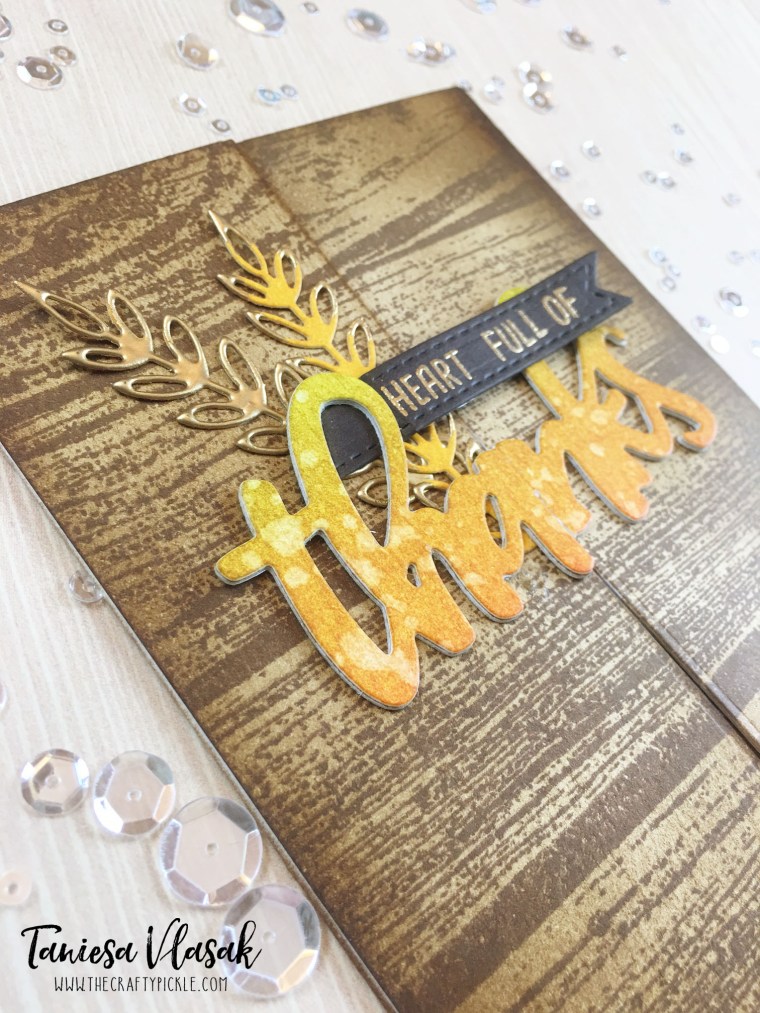
Now I have done the hugs die just how Concord & 9ths YouTube video instructed but this time I thought I would cheat a bit with the thanks die… I cut my paper to 8 1/2 x 5 1/2 and scored at 2 1/8 on either side. This was my base. I set that aside and took two pieces of distress precut cardstock and stamped them both with the Barnwood background stamp from Concord and 9th in Versafine Vintage Sepia ink. I then took an ink blending tool and some gathered twigs Distress ink and blended both card bases.

Concord and 9th Heart full of thanks | TheCraftyPickle.com

I set those panels aside for a bit to dry. Then I blended some distress inks on some scrap watercolor paper ( Ripe Persimmon, Wild Honey, and Crushed Olive) I cut the thanks word out of this scrap of blended cardstock. I then scored each piece of Barnwood stamped Distress paper down the middle. The thanks dies fit right in the grove of my score line and I ran them through my big shot just like that. This left me with two side panels to overlay on the card base side panels. I glued them both down securely using Bee Creative tape.  Once that was finished I glued the extra thanks pieces over the base layer of the thanks die cuts.  I stamped the heart full of…. sentiment from Honey Bee Stamps Sentiment builder stamp set in versamark ink and embossed with Pale Gold embossing powder by WOW. Once cool I cut out using a Simon Says Stamp stitched banner die. Finally I cut out some wheat and a leaf from Concord & 9th’s Layering Leaves dies. I colored the die cuts with some wild honey Distress ink and added some pale gold embossing powder to them as well. I glued all the pieces to the front using Multi Medium Matte from Ranger.

Concord and 9th Heart full of thanks | TheCraftyPickle.com

I wanted the inside to be special too so I turned it into a gift card holder! First I used my clarity stencil brushes and a Dina Wakley stencil to create a layered leaf background ( Crushed olive and Twisted citron distress inks) Then I stamped my sentiment from the Honey Bee Stamps Kindness stamp set in the middle of the card base using the Hero Arts Autumn ombre ink pad.

Concord and 9th Heart full of thanks | TheCraftyPickle.com

Finally I cut out a little gift card envelope from Mama Elephant’s Venice die set. I had the inside flap match the leaf background of the card base inside and the rest I used an ink blending tool and some wild honey Distress ink. For a finishing touch I added one of the layering leaves to the envelope flap. The envelope was glued down to the base using Bee Creative tape.

I hope you enjoyed my card today! Your next stop in the blog hop is Crafty Max!

Listed below are the links to the products I have used for this project. Affiliate links may be used, this means if you make a purchase I receive a small commission at no additional cost to you. I really appreciate your support toward the costs of running this blog.


https://static.inlinkz.com/ppr.js

Thank you again for stopping by. Check back here next week for Honey Bee Stamps Honey Hop on Thursday Aug 25th!

Honey Bee Stamps Honey Hop Aug 25th! Brand new release and of course PRIZES!!!

Have a fabulous weekend!

Taniesa Vlasak | TheCraftyPickle.com

Happy Birthday Honey Bee Stamps!!!

Hi and welcome to Honey Bee Stamps 1st birthday blog hop!!!

12994413_10100195422994386_9040328030175265407_n

Thanks for joining us on our week-long birthday celebration! Today the designers are featuring the brand new stamp set “Happy Everything” with a sweet little kit put together by designer Lisa Cisneros. We have lots planned for you this week and of course lots of prizes! Just leave a comment on our designer’s blogs along your hop for your chance to win!
You should have arrived here from Holly’s Blog, but if not click HERE to start at the beginning!

Here is a photo of the kit we got to work with along with the Happy Everything stamp set:

13035410_10100195286947026_1188573436_o

For my project I wanted to do a little something different with the stamping. Did you know that if you own a foiling machine or laminator, you can actually foil your stamping work?

All you need to do is do your stamping with a very good black ink. Using a stamp positioner like the MISTI tool can really help. If you miss any spots in your stamping be sure to go over it with a marker or a fine tip pen.

Then take your stamped paper and photocopy onto cardstock using a toner based printer or photocopier. Your image is ready for foiling! Note: This should ONLY be for personal use due to copyright, do not share your photocopy images with others.

That is exactly what I did in my project below. You can see the aqua colored foil in the close up photo. I love how it shimmers right along with all the sequins in the shaker card.

TheCraftyPickle.com for Honey Bee Stamps

TheCraftyPickle.com for Honey Bee Stamps

I hope my little tip got your creative wheels-a-turnin’! I know that I want to foil ALL THE THINGS now! LOL.

I sure hope you had fun hopping along with us today for Honey Bee Stamps very first birthday blog hop. Make sure you have left a comment below as well as one on every designer’s page and of course the honey bee blog as well. Keep checking back  on the Honey Bee Blog all week long for more inspiration and new products…. better yet join the Facebook party HERE for your chance to win lots of awesome prizes.

Happy Hopping!

Taniesa for ThecraftyPickle.com

TCP’s Sketchy Blog Hop


Welcome to another TCP blog hop!

Today our creative team will be sharing with you their take on a sketch created by our very own designer, Treasa!

This is the fantastic sketch she created for us:

Treasa's sketch for TCP

How would you like to win a “Year of Flair?” There are two ways to win! Enter both ways to improve your chances! First, Leave a little love on each of the designer’s blogs as you hop along. Every comment gets you an entry into the drawing for the flair. Second, Participate by creating your own take on our sketch and link us in the comments to your photo (Can be posted on your blog, Flickr, Photobucket, Etc…) It can be any type of project, however the sketch inspires YOU. International friends are welcome to participate as well! You have until Wednesday Feb. 25th to enter. Winner will be announced on TCP’s blog on Friday Feb.27th

Winner will receive 12 monthly sets of TCP flair valued at over $50.00

On with the hop!

First up is Alicia!

If you get lost along the way here is the order of the hop.

Alicia

Carrie

Catherine

Elodie

Joann

Julia

Kristen

Monika

Stephanie

Treasa

Don’t forget to comment on the TCP blog too!

Happy Hopping!!

The Crafty Pickle

Blog Hop Winners!

Thank you all for taking part in The Crafty Pickle Blog hop! Here are our lucky winners!

First Place goes to Kim A!

Second Place goes to Jenn C!

Third place goes to Shari D!

Winners, Please contact me at TaniesaCTMH@gmail.com and let me know which products you would like with your gift certificates!

Thanks so much!
The Crafty Pickle