I’ve got Sunshine on a Cloudy Day…. Honey Bee Stamps and Ellen Hutson BLOG HOP!

Hi Everyone!

Welcome to the Honey Bee Stamps and Ellen Hutson SUNSHINE blog hop! You should have arrived here from the blog of the lovely, Nichol. If you are starting the hop on my blog be sure to go to the Honey Bee Stamps blog or Ellen Hutson Classroom to hop along from the beginning!

Make sure you read all the way through for details on how you could win one of two $30 gift certificates to Ellen Hutson!

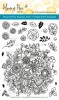
I have absolutely fallen in love with the Sending Sunshine stamp and die set designed by Honey Bee Stamps for Ellen Hutson, as well as some coordinating items from Honey Bee stamps! I created quite a few cards using this new release in no time at all. Let me show you a few.

First is a fun ” You are my sunshine” this card features a shaker sun center using the Honey Bee Stamps Partly Cloudy die set and the new Sunny Day sequins mix. The small frame around the sun circle made this shaker come together quickly. (Affiliate links used where available at no cost to you, thank you for supporting this blog)

The fun thing about this card is that the sun rays actually spin!

I assembled the layers using a paper fastener (aka brad) which allows the top two layers to spin around. My daughter who loves her fidget spinner, loved playing with this card and I think it would be great for any tween or teen!

Stamps are from Sending Sunshine stamp set as well as the Ray of sunshine stamp.

Next card is a simple ink blended rainbow for an inspirational ray of sunshine!

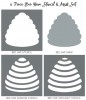
First, I created a shaker card using foam and the a-2 sunburst cover plate die. I added my Sunny day sequins to the center and then covered with acetate. I cut the A-2 cover plate from glitter and white cardstock. For the white piece I taped off sections and used my distress inks to build a rainbow from the center of the sun. once that was done I layered that over the shaker foam layer and then pieced in the glitter rays. I stamped and embossed the sentiment from the Ray of sunshine stamp set. I did some simple die cut inlay for the “sunshine” word. both from glitter cardstock. To finish it off I added some Bokeh lights confetti with my Silver Moondust Nuvo glitter drops. I love how you can see a bit of sparkle though the confetti.

The last card I have for you is one that takes a bit of time but can be well worth the time spent. This is a pop up box card with a little handmade gift included too!

To make the box I followed THIS tutorial which was super easy! I covered the front flap with strips of colored cardstock and then trimmed away any excess. I took some Nuvo Moonstone glimmer paste and spread a thin layer over all the cardstock strips and let try. Once the glitter was dry I cut a cloud border using the Honey Bee Stamps cloud border dies and glued to the bottom of the rainbow. I cut this from white glitter cardstock and I also cut pieces to go around the outside of the box. the inside of the box has 4 layers and in between the front flap and the first layer I attached a bit of cotton to give a fluffy cloud look.

The back panel of the box card is the sunburst cover plate die cut pieces together and glued on that back piece. This gave the box extra stability too. I set the almost finished box aside and went to work on some cute planner clips for a friend who loves to decorate in her planner.

I cut felt pieces from the partly cloudy die set… the sun as well as the largest cloud in the set. I cut three pieces of each. I glued the ribbon on one layer and then once dry I sandwiched the other two pieces around the ribbon covered pieces and hand stitched them together. I am not the best when it comes to stitching and sewing but it was a lot of fun to make. I did sew the large paper clip to the middle layers before stitching all the way closed.

I added a row of sequins along the bottom of the cloud, each by hand, from the Honey Bee Stamps cloudy day sequins mix.
once finished I clipped these both into the layers of the box card.

Because this can be quite bulky I thought about making a band of sorts to go around the closed box for mailing. I took a piece of 12×12 cardstock and wrapped it around the box to make sure it fit ok and then using a heavy-duty tape I glued the two ends together.

To decorate the band I stamped a sentiment using the Sending Sunshine stamp set, Ray of sunshine stamp, The happiness stamp set and the simple sentiments stamp set. I also cut a cloud using the stitched cloud border dies and The sun is just from a circle die cut.

It was a really fun gift to put together. I am already thinking of more things I can do with the box card idea not to mention more fun felt paper clips!

That is all for today. Thank you so much for stopping by to view my projects. I hope you found them inspiring. To win one of two $30 gift certificates to Ellen Hutson, simply just comment below on this post and the other designers in the blog hop as well. I am the last stop in the blog hop but if you missed anyone don’t worry, you can head HERE to the honey bee stamps blog and get the entire line up.

If you missed my video highlighting all of the great new Sending Sunshine products you can check out that post HERE and watch my video showing all the products mentioned today and more.

Supplies used are listed below (affiliate links where available at no cost to you)

Shop All the products mentioned in this post at:

Honey Bee Stamps or Ellen Hutson LLC

Sending Sunshine Stamp set

HBS|EH

Ray of Sunshine

HBS|EH

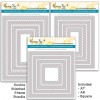
Sunburst A-2 Coverplate die and Stencils

HBS|EH

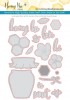
Stitched Cloud Border dies and Partly Cloudy die set

HBS|EH

NEW Buzz word dies (Sparkle, Ampersand, Shine, and Bright)

HBS|EH

Honey Bee Stamps SUNSHINE bundle

Ellen Hutson exclusive bundle only

Sunny Day and Cloudy Day sequin mix

HBS exclusive only

Other Supplies:

Paper clips
Felt
Ribbon 
Foam Sheets
Foam Tape

Surprise 2nd BEE-day Blog hop (and a swarm of awesome new releases!)

Hap-BEE Friday, Friends!

We have enlisted some very talented designers to help Surprise Melissa (the owner of Honey Bee Stamps) for her 2nd Honey Bee Stamps Birthday. Be sure to hop along for all the fun & prizes!! Each stop on the hop will have a drawing for a FREE stamp set of their choice from the Honey Bee Stamps store. Be sure to comment at each stop to enter all of the drawings. The winners will be announced on the Honey Bee Stamps Blog on May 3rd at Noon PST.

 I have to say this month’s new release is my favorite so far. I sat down to make one card and ended up making a few more. I’m telling ya, my mind was buzzing with ideas for these new products.

My first card is this cute bee hive card which is a shaker card.

I made this card using the new Hive card die and Hive stencil set. I also used two of the bees from Busy Bees and the Bee-You-Tiful sentiment set.

I love that the stencils make shading the hive super easy. I used my distress inks and finger daubers to do the shading. the inside of the shaker has the new layered hexagon die cover plates cut apart, and I used Nuvo Drops to add Honey like accents. I filled the shaker with the special birthday Honey Jar sequins mix and of course that cute little busy bee!

Next card is another hive, but this time I used only the stencils. All 4 of them actually. I used the hive cut out to lay down color, the two shading stencils to give detail, and then when I was all done with that I used the hive cut out piece as a mask and applied the blue distress ink background.

The leaves are from the Busy bees stamp set. I just made a branch with a zig clean color real brush brown marker. The hexagon confetti / sequins is in the spring sequins pack. The cute little bee is from the Build a Bee stamp set.  The bee is actually on a little action wobbler and, with the addition of the google eyes, it makes for a very fun interactive element.

This next card was totally inspired by a pack of acrylic mirrored hexagons I have been hoarding. You could achieve a similar look with mirror cardstock that I used as an accent strip along the side of the card.

I colored my little build a bee with my zig markers and added some hexagons that I cut out using the new stack hexagon dies. I also added those awesome hexagon mirrors. I think the patterned paper along the side added the perfect final touch. I love this sentiment from the Bee You Tiful sentiment set. I think it’s the perfect card to remind someone how bee-you-tiful they are, inside and out.

Okay, now a super quick card that is great for any of our new buzz words

This card was super quick to make! I had a piece of cardstock that was already stamped and embossed using the Zen Bouquet stamp set. I trimmed it down to A-2 size and used the new Hello Buzz word dies to do a fun inlay look. This could work with your favorite patterned paper too.

You can keep it simple and leave it just black and white, Or you could color it in to make the word stand out even more! The main panel was cut using the Honey Bee Stamps Double stitched A-2 dies.

These next cards were so much fun to make. I did one card with Color burst watercolor powers and the other with distress oxide inks.

I couldn’t decide which I liked better so I thought I would show you both!

I used the Stick with me stamp set and the prickly sentiments stamp set for the sentiment. The bee is from the Busy Bee stamp set.  I had one little hexagon outline cut out left over from another project so I stuck it on one of the sentiment strips. I thought it was a fun little touch. Which one do you like better?

Last but not least is my first real attempt at no line coloring. I took the jar from the sweet as honey stamp and die set (which was a part of Honey Bee Stamps very first release, and one of my most used stamp sets!) and I decided to turn it into a mini Terrarium with the help of the new stick with me stamp set.

I colored the cacti, plants, and rocks with my Copic markers and then added a bit more detail with my colored pencils. For the background I used the hexagon stipple plate die. On the little banner, I used a sentiment from the prickly sentiments stamp set.

The jar is layered with 4 pieces of cardstock instead of using foam, (I had scrap paper I needed to use up). The sentiment is popped up with one layer of foam tape. I finished the card off with a bit of twine around the top of the jar. This was probably my most challenging card but I had a lot of fun. I will be practicing those no line coloring skills more often now!

Here is a photo of all the cards created today. Supplies are listed below.

I hope I inspired you with ways to use these awesome new products (and some of your older ones too). Come back soon BEE-cause I will have lots more projects to share!

Don’t forget to leave a comment for your chance to win your choice of stamp set from Honey Bee Stamps!

Next up on the Hop is the kind & talented, Yana Smakula! Buzz on over and see what beautiful creation she has to share with you today.

Here is the lineup for the Hop in case you get lost:

Honey Bee Stamps

Jennifer McGuire

Stephanie Klauck

Amy Rysavy

Lisa Cisneros

Sandy Allnock

Taniesa Vlasak (Thats me!)

Yana Smakula

Nichol Spohr

Supplies used (Affiliate links where available, thank you for your support!)

Misti and Honey Bee Stamps | A perfect match!

Hi Crafty Friends!

Welcome to the Honey Bee Stamps and Misti Blog hop!

You should have arrived here from the blog of the Amazing, Lydia Fideler!  If you are starting with my blog today, make sure you go back to check out Lydia’s post as she is the first person on the hop!

I was so excited when I found out that we would be working with the kind folks over at My Sweet Petunia. I have had my Misti since they first launched and It is the most used stamping tool in my craft room!

Today I have a fun little project for you. Instead of making a card I decided to make this cute little tissue box that holds those purse/pocket packs of tissue perfectly.  I took inspiration from the Honey Bee Logo and the My Sweet Petunia logo for my colors.

Today I will be featuring the Bless Your Heart stamp from Honey bee stamps ( and don’t tell Melissa…. but if you look closely, you might see a couple of stamps from our April release coming up VERY soon! I had to sneak something in 😉 Shhhhh! )

Making the tissue box is super simple if you have a paper trimmer, scoreboard, and scissors.

Cut a piece of Cardstock to 8 inches by 7 1/2 inches. I used a piece of Strathmore mixed media paper. Both because I planned on doing some watercoloring but also this is super sturdy for a tissue box.

Time to score! Start with the 8″ length at the top.


Then turn your paper 90 degrees and score again.

Once you did your scoring, take a bone folder and burnish / crease all of your score marks. Then grab your scissors for some trimming.

to make the cutting easy, I first cut along the score lines on the sides that had the double score line close to each other. then I trimmed away the pieces you see above.

Before I assemble the box I wanted to do my stamping and coloring. Because I am working on a textured surface, the misti tool is even more helpful. Let me show you….

I could have lined this up at the top of the misti but instead I decided to use my creative corners to give it a little push upwards.

You’ll see above that my first stamping didn’t go so great, which is normal for textured papers. I Just re inked and stamped again.

MUCH better!

Then I die cut a little hexagon for the tissue opening.

I have a handy little tip for you. Instead of taping your paper down to watercolor. Flip over your misti and attach your projects with magnets to the backside. This will hold your project down while you color or paint.

I sketched out some hexagons with a watercolor pencil by Prima.

Then I water colored the top of my tissue box. The watercolor honeycomb reminded me of the Honey Bee logo and website. I didn’t have a pink Petunia but I did have this cute little daisy (which may or may not be a stamp from a brand new stamp set coming soon) So I painted that pink. Of course my little bee is yellow and black. You can’t tell too well but there is a lot of glitter accents from my Wink of Stella glitter brush pen. And I even mixed a little Gold watercolor in my yellow for the honeycomb.

If I tilt it just right you can see just a bit.

After I was done watercoloring I cut two side pieces to 2 1/4″ x 1′ from yellow polka dot paper and two longer side pieces to 4 1/4″ x 1″. I inked the edges of the yellow paper with some Black ink and for the black & white paper I inked it a bit with some Fossilized amber distress oxide ink and then some black distress ink over that.

I adhered those down with some Scor tape and then glued the small long flap and one of the sides together. The other side of the box i left without adhesive so this box could be refilled.

How cute would this be to hand to someone who has some bad spring allergies or a seasonal cold. I think it would make just about anyone smile. I mean look at that cute bee!

I have one more fun “tip” to share with you all. I love my creative corners but I really wasn’t sure how to store them. I wanted to be able to keep them with my Misti and my mini misti and not have the pieces all over the place.

I had this stampin up box and it was just the perfect size. I took a cd sleeve and made a pocket for the inside to hold my mini misti grid paper, my grid transparency and a scrap piece of plastic I use to stamp on sometimes. On the other side my Creative corner pieces fit perfectly!

I cut my packaging to fit on the inside of the stampin up case.

If you don’t have a case like this you could do the same thing with a 5×7 photo case.

Here is a few photos of the final project. What do you think?

Thanks so much for stopping by!

Next stop on the hop is the talented Ilina! Buzz on over and show her some love!


Here is a list of everyone participating in today’s hop. Don’t forget to comment at each blog post for a chance to win!

Taniesa Vlasak <—-That’s me!

Thanks SNOW much | Thank you card using Honey Bee Stamps

Hi Crafty Friends,

If December is the month to send out Christmas Cards than January has to be the month to send out lots of Thank you cards! Today I have a card that turns a cute little honey jar into a snow globe!

Thanks SNOW much | Taniesa Vlasak for Honey Bee Stamps

One of my most favorite and most used stamps is the Honey Bee Stamps “Sweet as Honey” stamp set. I especially love using the honey jar for lots of things like a vase, and today, as a snow globe by just turning it upside down.

I started by stamping the jar on white cardstock using a light blue ink. This was mostly so I knew where to put my little scene. I used a cute little house and tree die cut from the Essentials by Ellen and colored the windows and tree as well as a little heart with copic markers. Then I cut out the Thanks word from the Honey Bee Stamps Thanks and giving die set.

Thanks SNOW much | Taniesa Vlasak for Honey Bee Stamps

After my little house and tree were glued down I applied a coat of white Neon Abilify. This stuff is so fun for snow. I let the first coat dry and then dotted on a bit more for a layered effect. I also dotted on some of the paint to the top of the thanks die cut to look like it was dusted with snow. After all was dry I used my heat gun to puff it all up. I love the dimension it adds.

Thanks SNOW much | Taniesa Vlasak for Honey Bee Stamps

On the same color grey cardstock as I cut out the THANKS sentiment I cut a small strip and stamped Snow and Much from the Honey Bee Stamps Flakey Sentiments stamp set. I then heat embossed it using bright white embossing powder. I added the ! in with a white gel pen.

The cute jar topper was stamped using Versafine Onyx black ink on some Lawn Fawn Perfectly Plaid winter paper and cut out using the coordinating die. I added a bit of May Arts natural twine.

Thanks SNOW much | Taniesa Vlasak for Honey Bee Stamps

For my card base I took a piece of white cardstock and blended a gradient blue from light to dark using distress ink. I ran the dried piece of cardstock through my big shot with a small dot embossing folder. I cut out a piece of the same blue and gray plaid patterned paper using a stitched 4 bar card die and adhered that piece to a white 4 bar card.

Thanks SNOW much | Taniesa Vlasak for Honey Bee Stamps

I cut out the jar upside down from the blue panel where I wanted the snow globe to be visible and then covered the (backside) opening with some snowfall acetate I got at my local craft store (Urban Scrapbooker). I covered the back of that panel with foam tape and lined the opening with my snow globe “insides” that i cut down.

Thanks SNOW much | Taniesa Vlasak for Honey Bee Stamps

I placed the main piece on top of the covered card base and then glued on the sentiment and sentiment strip on top using matte medium. I finished it off by lightly coating the die cut and sentiment strip with my Spectrum Noir clear glitter pen.

Thanks SNOW much | Taniesa Vlasak for Honey Bee Stamps

That’s it for my card today. I hope you were inspired to use your own stamps in a unique unexpected way!

All supplies used today are listed below (Affiliate links where available)

Thanks SNOW much for joining me today!


Taniesa Vlasak | TheCraftyPickle.com


Essentials by Ellen and Honey Bee Stamps!

Hi Friends!

Today I am combining some of my favorite stamps and dies from Honey Bee Stamps and Ellen Hutson!

Taniesa Vlasak | TheCraftyPickle.com

I might have gone on a bit of a crafting spree lately, I was having so much fun with the new releases from both companies (and some of their older releases as well) and, well, tis the season for crafting!

The first project I have for you today is a fun card using Chibitronics lights! This card features the Merry and Bright stamp set from Honey Bee Stamps as well as the Essentials by Ellen Fat Pants stamp and dies (ornaments), Poinsettia and pine dies(Pine branch), Mistletoe and Holly stamp set(pine branch), Merry and bright stamp set (lightbulb), and the Bokeh dots stamp set for the background. (All products linked at the end of the post)

Here is the card with the lights off:

Taniesa Vlasak | TheCraftyPickle.com

and the card with the lights on (you just remove the little paper that says “pull” and they turn on)

Taniesa Vlasak | TheCraftyPickle.com

Using the Chibitronics was a lot easier than I had expected and it was so much fun making a card that lit up!

Next I have a couple of DIY Gifts that would be great for your holiday gift giving.

Taniesa Vlasak | TheCraftyPickle.com

These were both SO simple and so quick to make. For the wine basket I purchased the decorative basket from Michael’s craft store for under $5. I heat embossed the Essentials by Ellen Fat Pants sentiment from the Fat Pants stamp set and tied the tag around the top of the basket with some red twine. Popped in a bottle of wine with some tissue and now its all set for a quick holiday gift.

Know someone with a sweet tooth? Try filling a mason jar with candy like I did with my snowman jar here. I just took a piece of cardstock and did some simple ink blending around some snowy hills. I stamped some snowflakes from the Honey Bee Stamps Flakey Friends stamp set. From the same stamp set I stamped out the snowman and die cut him with the coordinating dies. For the tag I heat embossed the sentiment from the Essentials by Ellen Holly Jolly stamp set and tied the tag around the jar with some Doodlebug twine. I think this would make a great gift for a teacher or coworker.

Next up is a fun way to present a coffee gift card. This cute little bear is from the Essentials by Ellen All inside stamp set (and matching die). I gave him a big cup of coffee from the Oh Frappe set and popped him on an action wobbler so he bounces inside the MFT decorative circle cut out. I stamped the background with the same stamp set and the sentiment is a combination from this stamp set and the new Honey Bee Stamps Sending You sentiments.

Here is the outside and the inside of the card:

Taniesa Vlasak | TheCraftyPickle.com

For the inside, I stamped the”just for you” and hearts from the Sending you stamp set and heat embossed with WOW rich pale gold embossing powder. I cut the largest heart from the Essentials by Ellen Folk heart die set and put a bit of temporary adhesive on the gift card and stuck it to the stamped heart. I Glued that to the back of the card and with adhesive on either ends of the strip I laid that over the gift card. I think these are great to have on hand, especially around the holidays for quick gifts!

Another great thing to have on hand is some gift bags. I Love the WRMK Gift bag punch board and I thought that the Essentials by Ellen leaping deer die would make the perfect window for a gift bag.

Taniesa Vlasak | TheCraftyPickle.com

This was another very easy to make project. I cut the bag according to the punch board directions and before I adhered anything I die cut the front of the bag with the leaping deer die. I stamped and heat embossed the JOY sentiment from the Honey Bee Stamps Merry and Joy sentiment builder stamp set. I took a piece of vellum and glued it to the inside of the bag, creating a little window. I finished off the bag with some sequins and that ribbon you see was a gift in my last Ellen Hutson order! They are just so sweet!

I made about 20 versions of the card you will see below. Normally I would shy away from making cards that need masking for a mass-produced card but I discovered a great way to make masks last which made the whole project easy peasy! Want to learn more about this tip and how I made this card? Check out the post in the Ellen Hutson Classroom HERE

Taniesa Vlasak | TheCraftyPickle.com

I also created a fun die cut inlay card with the new Honey Bee Stamps Thanks and giving die set. You can see that card and more on the Honey Bee Stamps blog HERE, but below is a sneak peek!

Taniesa Vlasak | TheCraftyPickle.com

Whew! That was a lot of projects to share! I am so glad you kept on reading because one lucky reader is going to win a $50 gift certificate to EllenHutson.com! How do you win? Easy Peasy! Leave a comment here, then pop on over to the Ellen Hutson classroom and leave a comment there too and another stop to HoneyBeeStamps.com and leave a comment there and you are entered to win!

eh-store-credit-graphic

Supplies used are found below. (affiliate links provided where available).

To shop the Honey Bee Stamps store, visit this link: HERE


Thank you all so much for stopping by!

Taniesa Vlasak | TheCraftyPickle.com


Make your own coloring book with products from Honey Bee Stamps and Simon Says Stamp!

Happy STAMPtember!

I am super excited to be representing Honey Bee Stamps on the Simon Says Stamp blog this week. I have three projects to share with you, and a video that walks through all three of them.

DIY Coloring Book for crafters | Taniesa Vlasak for Honey Bee Stamps and Simon Says Stamp

I will be listing all of the supplies used in my projects at the end of this post. Today I will be highlighting some of the brand new products from Honey Bee Stamps!

Zen Floral and Zen Bouquet were inspired from the popular adult coloring book trend. Both sets have matching dies and the large bouquet is almost 6 inches around. I thought that these would be perfect to show off today’s project share.

zen-sets

You can make a diy coloring book so many different ways, so I didn’t want to bore you with a step by step tutorial. Instead, I will walk through this project on camera and talk about several possible ways you can make your own custom coloring book with supplies you may have on hand already.

This coloring book measures approx. 5×7. To make this particular cover size, you will need two pieces of 5×7 chipboard, two pieces of cover paper measured at 5 ½ x 7 ½ , and two pieces of patterned paper that will go on the inside. Cut these slightly smaller than the chipboard. Mine measured 4 ¾ x 6 ¾.  I adhered all of the pieces together with Scor tape but you can use your favorite adhesive. You can even skip covering the chipboard or paint it with acrylic paint.

DIY Coloring Book for crafters | Taniesa Vlasak for Honey Bee Stamps and Simon Says Stamp

I chose to decorate my cover with the Honey Bee Stamps Zen floral border stamp and die. I also used the Simon Says Stamp STAMPtember stitched scallop die and the Honey Bee Stamps Color my world stamp set and die. I did some simple ink blending with distress inks then went over the letters with my  Sakura black Glaze pen. I even added a little shimmer inside the letters with my spectrum noir glitter marker.

I made the inside pages slightly bigger than a standard A2 card base with a bit extra at the top for binding. The inside pages are 4 ½ x 6 ½ . I have pre stamped some card bases for my recipient to color. Pages/ bases are all on Tim Holtz watercolor cardstock, Neenah solar white, or Strathmore bristol paper.  This is a great way to get more use out of your stamp collection. Consider stamping several pages in one session to make multiple books or card bases ready to color.

DIY Coloring Book for crafters | Taniesa Vlasak for Honey Bee Stamps and Simon Says Stamp

Another fun product that I have included is the Simon Says Stamp exclusive Suzy’s doodles. These are printed on Tim Holtz watercolor paper. I adhered each to a page in the book with temporary adhesive. This way they stay put in the book for coloring but when you’re ready to take it out and make a card it comes off easily.

I stamped each of the Honey Bee pages twice for each design. The top piece being the watercolor cardstock and then using temporary adhesive I glued that to the other stamped panel on Neenah solar white. The Bristol paper is embossed and is a separate sheet.

DIY Coloring Book for crafters | Taniesa Vlasak for Honey Bee Stamps and Simon Says Stamp

As a finishing touch to the coloring book I made a cute removable pallet that can go in and out of the book. I used a pack of Peerless watercolor sheets and although you can just cut these in small squares or rectangles I thought it would be fun to use the hexagon die from Simon Says Stamp perfect shapes dies to arrange the paint in a fun “Honey Bee Stamps” sort of feel. I arranged the little paint hexagons in a gate fold pallet. The pallet base is created by using a 6×9 piece of Tim Holtz watercolor paper, 6×9 piece of printed paper and a piece of heavy acetate. The acetate protects the watercolors from running into each other should the pallet be put away damp, it can also be used as a mixing surface. Each end of the paper was scored at approx. 2 ¼ inches. I created a simple belly band to keep the pallet closed using a strip of the same patterned paper using the opposite side. I die cut a circle and stamped a floral from the Zen Bouquet stamp set to tie it all together.

cinch

I bound my coloring book using the We R Memory Keepers CINCH binding machine. There are other binding machines out there  but I have only used this one. You could also punch some holes with a and bind using mini album rings, or tie together with ribbon or twine. You could even use an old planner or traveler’s notebook… SO many possibilities to create a coloring book for friends or for yourself to color on the go.

I am giving this coloring book as a gift, so I placed my coloring book in a mesh bag along with a waterbrush and chamois that I picked up from my local craft store.

DIY Coloring Book for crafters | Taniesa Vlasak for Honey Bee Stamps and Simon Says Stamp

I also made a card that coordinates with the album. I used the huge Zen Bouquet stamp which I have cut down partially, I used my Zig Clean Color Real Brush markers to do the coloring and added little touches here and there with my glitter marker and glossy accents. I used the Simon Says Stamp A2 curved card edge die and layered striped patterned paper behind it. For the sentiment I cut apart a sentiment from Honey Bee Stamps Happy everything (You Make Me) and added the new SSS Inspire die cut in the middle instead of “make”. For the final little accent I added the bee stamp from Honey Bee Stamps Sweet as Honey stamp set and die.

DIY Coloring Book for crafters | Taniesa Vlasak for Honey Bee Stamps and Simon Says Stamp

Here is a bonus idea if you wanted to give coloring pens instead or in addition to the watercolors with your coloring book. These are the Kaiser craft gel pens. I am not a huge gel pen girl but these are pretty darn amazing. Especially the glitter ones. They have a really fine tip to get into small places and the ink flows really well.  I just removed the sticker and took the same patterned paper I used in my coloring book to make a belly band for the case. I die cut the word create which is a new Simon Says Stamp STAMPtember release, and glued that on the belly band. I finished it off with coloring one of the white hearts red, adding two thin strips of cardstock to the top and bottom and coating the die cut with my  Sakura clear Glaze gel pen.

DIY Coloring Book for crafters | Taniesa Vlasak for Honey Bee Stamps and Simon Says StampListed below are the links to the products (or comparable products) I have used for these projects.

I hope you found today’s project share inspiring and can think of ways to make your own personalized coloring book. Thank you to Simon Says Stamp for inviting Honey Bee Stamps and myself to share in the STAMPtember celebration!

Thank you for stopping by!
Taniesa Vlasak for Honey Bee Stamps

Happy STAMPtember

Hi Crafty Friends!

Just a quick little sneak post to let you know that I have a fun video and post over on the Simon Says Stamp blog today! I am highlighting some amazing products from both Honey Bee Stamps as well as Simon Says Stamps exclusive products! I will be posting more on my blog tomorrow, but for now check out the post and video by clicking HERE!

Crafty hugs!

Taniesa Vlasak | TheCraftyPickle.com

Honey Hop! Honey Bee Stamps | August NEW release!!!

www.honeybeestamps.com August Honey Hop!

Good Morning Honey Bees! Welcome to our August release Honey Hop!!!

You should have arrived from Melissa’s blog. If you got lost you can always start at the beginning HERE.

All this week we have been showing you little sneaks of our awesome new stamp sets and dies! TOMORROW our new release goes live and to celebrate we are showing you some beautiful projects, TODAY!!!
What’s a Honey Hop without some sweet prizes, right? This time we not only have one awesome prize pack but TWO!! One winner will win our zen florals pack (Zen florals, Zen Bouquet, and each of their matching die sets) and our second winner will win our Alpha prize pack! (Color me alpha stamp set, sentiment alpha stamp set, and color me alpha die set). All you have to do to win is comment here on the Honey Bee Stamps blog and again at each one of our designer’s blogs by Sunday August 28th. Winner will be announced on Monday August 29th at Noon PST.

So Hop along and get ready to BEE inspired!

During our preview days this week I shared two videos. One for each new Alphabet stamp set that Honey Bee Stamps is releasing this friday. I love them both and I am sure you will too.

Brand new Sentiment Alpha!

And the oh so fun Color-Me-Alpha!

and now I have two cards to share! The first one you may of saw this week on social media….

Honey Bee Stamps Aug 2016 release | Taniesa Vlasak

For this card I used the main floral border in the new Zen Florals stamp set. I also used the Smile stamp set and die as well as the Sweet as honey stamp set.

Honey Bee Stamps Aug 2016 release | Taniesa Vlasak

First I used distress ink to blend a light blue background (Tumbled Glass). Then I water colored the floral images. After the watercolor was dry I went over with a clear Spectrum sparkle pen.

Honey Bee Stamps Aug 2016 release | Taniesa Vlasak

I heat embossed a dot pattern on black cardstock and adhered just below the floral border strip. I also embossed the smile die cut and the sentiment that was made up from the smile stamp set as well as the sweet as honey stamp set. Everything was heat embossed using the WOW rich pale gold embossing powder. I popped the smile die cut up on some black adhesive backed foam.

Honey Bee Stamps Aug 2016 release | Taniesa Vlasak | Customize the back of your card with your signature and a stamp from the main stamp set you used on your card!

As an added touch, and something I have been doing a lot lately, is taking a coordinating image from the stamp set that I used for the card and stamping it on top of my custom signature stamp.  I love how this just ties the entire card together and makes it just a little more special.

Honey Bee Stamps Aug 2016 release | Taniesa Vlasak

I also really like to stamp the envelope to match too.

For my next card I decided to shake things up…. well, Literally. I made a fun shaker card with Honey bee stamps new Zen Bouquet set, Zen Florals set, new gems embellishment pack, and I also added in the jar from the sweet as honey stamp and die set.

Honey Bee Stamps Aug 2016 release | Taniesa Vlasak

I stamped out the various flowers from both zen sets into an arrangement on scratch paper first. Once I was happy with the layout I traced around the jar from the sweet as honey die set. I cut some masks for each of the florals using Simon Says Stamp masking paper. Then I stamped my arrangement using Simon Says Stamp intense black ink.

Honey Bee Stamps Aug 2016 release | Taniesa Vlasak

After everything was stamped. I took my Tim Holtz craft knife (best craft knife I have ever owned, I love this thing!) and I cut around the inside of the honey jar and around the overlapping florals and leaves. This leaves the window for my shaker card. I took a piece of craft foam slightly smaller than my card panel and I cut out the Honey jar from the foam in the same place as the card panel. This leaves the opening a bit larger so that my panel covers the foam completely.

Honey Bee Stamps Aug 2016 release | Taniesa Vlasak

Then I began coloring. I used 3 to 4 shades per color family of copics to color in my images. I used warm grays at the bottom of the jar to ground the image. Once I was finished coloring I adhered a piece of acetate to the back of the front panel to act as my window.

Honey Bee Stamps Aug 2016 release | Taniesa Vlasak

Now the fun part …. Wait, it’s all fun, ok ANOTHER fun part…. filling the shaker! If you have seen the sneaks, Honey Bee Stamps came out with these cute little clear gemstones to use in your shakers. I needed shaker bits to look a little bluish like water so I pulled out a tip my dear friend and fellow design team member taught me a year or so ago. You can dye your clear plastic embellishments any color you want with alcohol ink! So I thought why not these cute little gems. I  took two shades of Ranger alcohol ink and a couple of plastic baggies and put some gems in each. I then put two drops of the ink in the bag and smooshed it around…. after they were coated well I poured them out on a paper towel and let them dry. here is a closer look at them….

Honey Bee Stamps Aug 2016 release | Taniesa Vlasak

Of course I need to buy more so I can dye these lil babies in every color of the rainbow!! I added some of these to my shaker window along with some clear sequins and some blue confetti. I covered up the opening in the back with a scrap piece of distress cardstock that I used a bit of ink blending on ( Broken china distress ink ) and that I drew in some stems with a green marker.  I placed the shaker panel on a piece of Doodlebug green polka dot patterned paper and attached the completed panel to a top fold A-2 cardbase.

Create an adorable "shaker vase" using Honey Bee Stamps new Zen florals series and new gems that you can hand dye to match any project! More info at www.thecraftypickle.com

And that pretty much does it for my cards today. Thank you so much for hanging in there with my very long post today. I hope you were inspired.

There is lots more fun to be had. Keep on Honey Hoppin to our awesome Guest Designer’s blog, Deepti Stephens!!
Listed below are the links to the products I have used for these projects as well as postcard projects I have done in the past, and planning on doing. Affiliate links may be used, which means if you make a purchase, I receive a small commission at no additional cost to you. I really appreciate your support toward the costs of running this blog.

https://static.inlinkz.com/ppr.js

Taniesa Vlasak | TheCraftyPickle.com

Create your own Handmade Postcards!

Hi there friends!

I know lots of you out there love to make handmade cards. One thing I don’t see too often is handmade postcards. They are super easy to send, and very inexpensive. I had the idea during TheDailyMarker.com’s 30 day coloring challenge to take my daily coloring and put it on a postcard and just send it to make someone smile. Not all my projects made it on a postcard but I did do a few and I really loved the result. Postcards can be something simple as a Hello friend! or a notification to your friends and family that you have moved.

There are some great products for making your own postcards. First product that I LOVE is the Strathmore watercolor postcards. These are preprinted 140 lb cards on watercolor paper making it so easy to color and send your postcard. I got mine at my local craft store with a coupon making them very inexpensive.

Create your own postcards | TheCraftyPickle.com

Here is a fun stamp from Amy Tangerine. This comes from her Better Together collection.

Create your own postcards | TheCraftyPickle.com

A side note about the stamp above. This stamp is Acrylic and not Photopolymer. I recommend using a stamp positioner tool or a misti to make sure you get a good impression.

There are also other great stamps out there that you can use to build your own postcard backing.

Create your own postcards | TheCraftyPickle.com


Create your own postcards | TheCraftyPickle.comCreate your own postcards | TheCraftyPickle.comCreate your own postcards | TheCraftyPickle.com

First up is a simple hello friend postcard made with Mama Elephant brushstroke florals stamps and Sunday Sentiments stamps. I stamped these florals in various shades of distress ink and softened edges with a waterbrush. I also splattered some black ink afterwards. Sentiment was stamped in Simon Says Stamp intense black ink and then I ran the card though a dotted die. This card is a standard A2 card size and not the traditional 4×6 postcard. Postcards can be a range of sizes and does not have to stick to the 4×6 but double-check if you make it larger, that you do not need extra postage.

Create your own postcards | TheCraftyPickle.com

Next we have another Hello postcard, this time with Honey Bee Stamps “Say What” stamp set as well as their “brush stroke alphabet” stamps. I did some spotlight coloring on this one with copic markers. Using grays for the outside and colors for the center circle. After I was done coloring I adhered my postcard back with multi medium matte. If you want the postcard to look seamless make sure to take some ink around the edges.

Create your own postcards | TheCraftyPickle.com

Here we have a thank you postcard that I made for my daughter’s Aunt. Small Talk Stamp set by Mama Elephant with alphabet stamps from Illustrated Faith and Studio Calico. Mostly distress ink blending on this one and zig clean color real brush markers to color in “Aunt”. I also went over the letters with a Spectrum Noir clear sparkle pen once dry.

Create your own postcards | TheCraftyPickle.com

This is a soft thank you postcard using the Not too shabby and kindness stamp sets from Honey Bee Stamps as well as the Kindness die.  I die cut the white panel from Bristol cardstock and sandwiched a piece of Simon Says Stamp Audrey Blue cardstock between that panel and the postcard side. I used my Clarity Stencil Brush to apply Peacock Feathers Distress ink around the postcard. After stamping with Simon Says Stamp intense black ink, I colored the images with Zig Clean Color Real Brush Markers.

Create your own postcards | TheCraftyPickle.com

Finally we have a postcard I made for my friends and family announcing our move which is happening this September. This was made with two fabulous stamp sets, “I heart books” and “Moving Sentiments” by Three Room Studio. They were colored using Zig Clean Color real brush markers on Canson bristol cardstock. I printed off custom postcard backs that I created in Photoshop.

Create your own postcards | TheCraftyPickle.com

Create your own postcards | TheCraftyPickle.com

Another great idea is to take your premade postcards and stamp outlined sentiments like this “Thank you”. This is a great idea for kids to personalize a thank you note to family and friends when needed.

Create your own postcards | TheCraftyPickle.com

Create your own postcards | TheCraftyPickle.com

Because I made a postcard in Photoshop for my projects I thought you might enjoy using it too. Click the link below to download your copy. Print out on your favorite cardstock and cut to 4×6. You can color directly on the back or if you do it separately then adhere together with your favorite adhesive.

Download your FREE postcard printable here!

Free postcard printable | TheCraftyPickle.com


Thank you so much for stopping by. I sure hope you got some postcard creating inspiration today. I would love to see what you create! Please leave me a link to your project via your blog, Instagram, Flickr, or other so I can check it out!

Listed below are the links to the products I have used for these projects as well as postcard projects I have done in the past, and planning on doing. Affiliate links may be used, which means if you make a purchase, I receive a small commission at no additional cost to you. I really appreciate your support toward the costs of running this blog.

https://static.inlinkz.com/ppr.js

Thank you so much for stopping by today! I will be back this Thursday with the Honey Bee Stamps HONEY HOP celebrating the new release! For now, I am back to packing!

Have a wonderful week!
Taniesa Vlasak | TheCraftyPickle.com

Ellen Hutson LLC PIN-SIGHTS Challenge | Hidden Gift Shaker Card

Hi there Crafty Friends!

I hope your weekend is off to a fabulous start! I thought I would kick off my weekend by participating in the Pin-Sights challenge over at Ellen Hutson.com.

EllenHutson.com Pin-Sights Challenge

You can find out more by clicking the link HERE (and see some AMAZING project entries!)

The challenge was to take Essentials by Ellen product(s) and pair them with one of your favorite companies products. I have really been enjoying the latest Honey Bee Stamps release and decided to pick something from my Honey Bee stash!

I LOVE the essentials by Ellen stamps, dies, and other papercrafting items so this was a great challenge to hop into and jumpstart my creativity. Today I will be working with the Essentials by Ellen Bohemian Garden stamps and Zipper Panel die.

Essentials-by-Ellen-Clear-Stamps-Bohemian-Garden-by-Julie-EbersoleEssentials-by-Ellen-Designer-Dies-Zipper-Panel-by-Julie-Ebersole

I will also be using the Kindness stamp set by Honey bee stamps.

Honey-Bee-Clear-Stamps-Kindness

Today I wanted to mix things up a bit and I thought… “What if I used the zipper panel in the back of the card rather than the front?” This way the recipient could see the gift when they opened the card but take the gift card out when they were ready.

For the front panel I did all my stamping in Versamark ink and heat embossed with Hero Arts white embossing powder. I did ink blending at the top and at the bottom with distress ink (colors listed at the bottom of the post) and mixed some Daniel Smith watercolors to color my floral images. I did add a vellum flag out of Essentials by Ellen 40 lb vellum and heat embossed the same as the card. For the final touch on the panel I added some Sparkling clear sequins with some Ranger Multi Medium Matte.

Hidden Gift Shaker Card | TheCraftyPickle.com

I set the front panel aside and went to work on the rest of the card. I made the shaker pocket from an Essentials by Ellen small stamp storage pocket and Be Creative tape. (I probably would have used my fuse but we are moving and it is packed up in a box at the moment). I printed my message on the same 40 lb vellum from Essentials by Ellen using my laser printer and cut it to fit inside the stamp storage pocket. I added the die cut “Enjoy” which is also apart of the zipper panel die set. Once that was dry, I added the pretty pink posh sequins, Prima beads, and Distress glitter.

Hidden Gift Shaker Card | TheCraftyPickle.com

I reinforced the center part of the zipper panel as Julie Ebersole has shown in her YouTube video (See bottom of post for video) with a piece of Neenah cardstock that I blended some distress ink on. I added be creative tape all around the back panel edges being careful not to cover the zipper stitched marks. I then added my gift card in the middle and placed the finished shaker pocket down on top of the tape. To hide the rough adhesive edges I made a frame from the large stitched rectangle dies from Lawn fawn and adhered that to the top of the shaker pocket.


Hidden Gift Shaker Card | TheCraftyPickle.com

I love that you can see the gift card through the vellum but the message still stands out. The shaker adds a fun playful confetti party like feel.

Hidden Gift Shaker Card | TheCraftyPickle.com

Here is the view of the back . I started lifting the bottom up……

Hidden Gift Shaker Card | TheCraftyPickle.com

But then I decided I wanted to show you all how cool it looks when it is opened up all the way!

Hidden Gift Shaker Card | TheCraftyPickle.com

What I love about putting the zipper in the back is that the front stays pretty and intact so you can still display as normal if you like.

Hidden Gift Shaker Card | TheCraftyPickle.com

This card was a lot of fun to make. Let me know in the comments below if you would like to see a video tutorial on how to assemble a gift card like the one shown today.

If you have never seen the zipper panel from Ellen Hutson yet. Check out this how-to video that Julie Ebersole (the designer) made. The die is just genius!

Links to the items I have used are listed below.

https://static.inlinkz.com/ppr.js
Thank you for stopping by. I hope you found my card project inspiring. I love giving gifts, but making gift packaging pretty is extra special!

Have an extra fun and crafty weekend!

Taniesa Vlasak | TheCraftyPickle.com