Fun October contests & Challenges going on now!

Hi there Pickle-Pals!

I thought I would drop a quick little post telling you about two awesome challenges that are going on for the month of October!

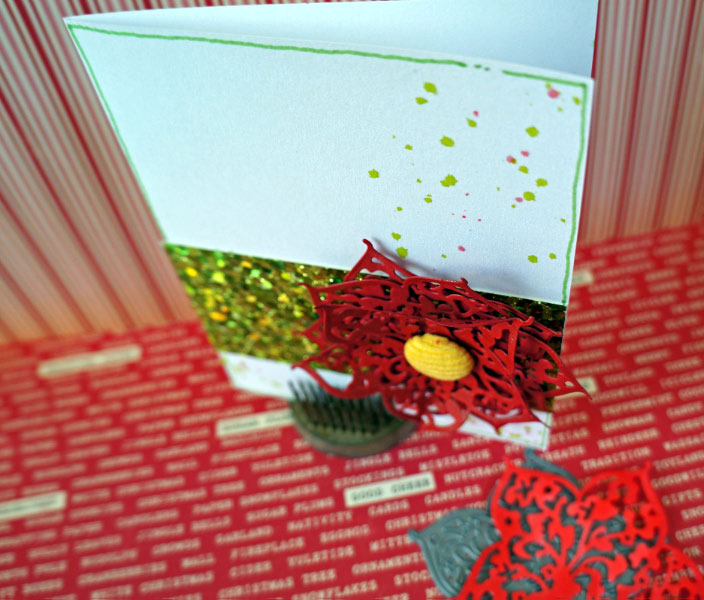
First up is the Whimsical Twist Fall Texture challenge ***Runs 9/30 through 10/11*** You could win a gift certificate to the Whimsical Twist shop! Check out the inspirational layouts posted by some of our design team on the blog post HERE.

fall texture challenge at Whimsical Twist

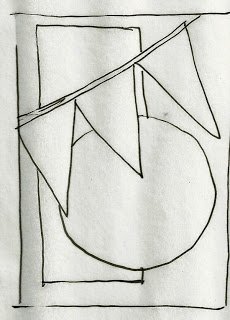
Also, Die-Namites is sponsoring Creative Scrappers Sketch challenges for the month of October! you could win some awesome Die-namites dies of your own! Make sure to check out their site HERE!

Creative scrappers challenges

Lots of fun for the month of October (and there is more to come too!)

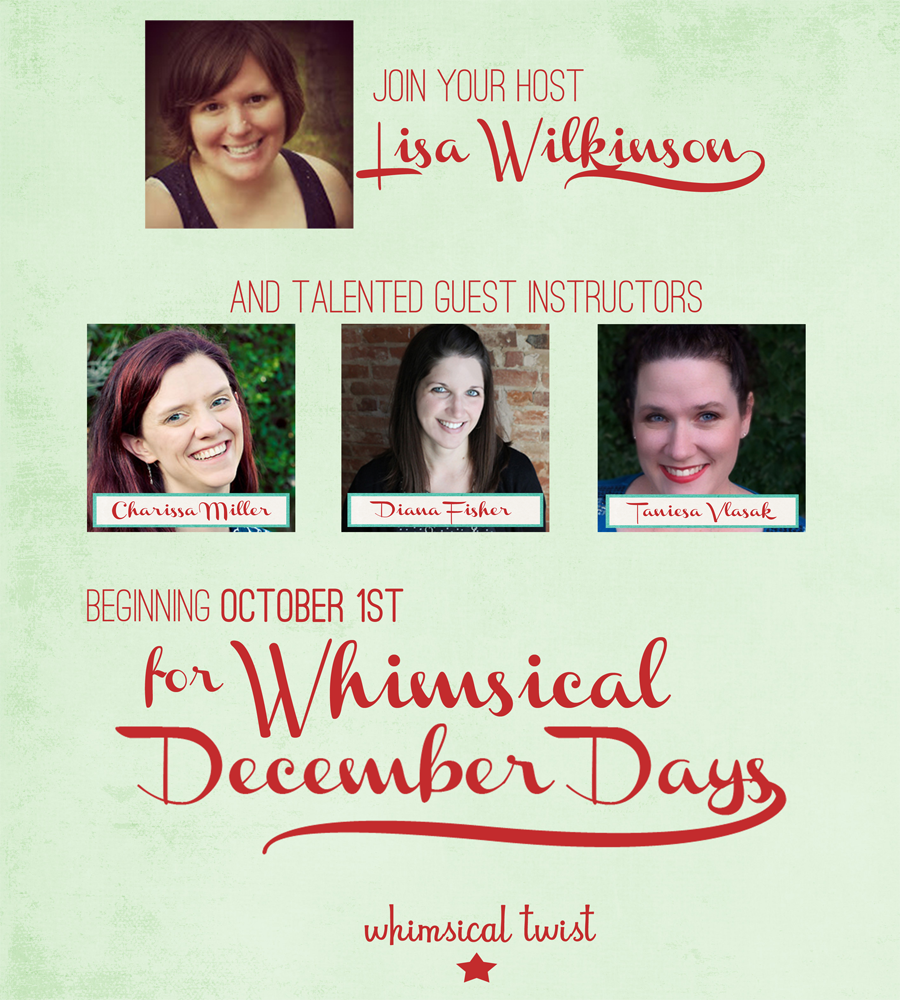
Dont forget that the Whimsical Twist December Days class starts TODAY! 3 months of festive fun that you will definitely not want to miss! If you purchase one of the 4 december days kits offered in the shop you can get your class fee reduced to only $10! I am super excited to share the kit I have designed (Merry & Bright) very soon! Stay tuned to my blog, Instagram, and facebook for some sneak peeks! I have some really fab ideas for all you christmas crafters out there!!

December Days class at www.whimsicaltwist.com

Happy October everyone! I am so excited for this Fall season! I hope you are too

Happy Crafting!

The Crafty Pickle

Merry Everything!

Happy Friday crafty friends!

Today I am excited to share with you two of the newest release Die-Namites dies in action! I am using the Beautiful Bow die and the Pine Bough die.

These both are so fun to work with and I can think of lots more projects that I want to use them in but I am still working on making my 2013 christmas cards. Here is the photo of the card I put together using these two fabulous dies.

I used a brown glitter glue for the pine cones as well as sprinkled on some additional gold glitter on some of them. I took two colors of red cardstock for the bow cuts and layered the darker color on the bottom to give a shadow effect. I also used some foam dot adhesive to pop the bow up from the pine bough’s. I love the added dimension of the wood grain cardstock.

I have to say this latest release is by far my favorite. I just love Christmas paper crafting! I hope this inspires you to try some of  the beautiful christmas dies we have in the View the new arrivals! now!

Happy Crafting!

It’s beginning to look a lot like CHRISTMAS!!!

Welcome to our
NEW RELEASE BLOG HOP Die~Namites Dies has just released 32 new Fall and Christmas themed dies!

Dienamites Bloghop september
We are sooo HAPPY that you have chosen to join us for the event, September 20-22, 2013
Our theme is…
“It’s beginning to look A LOT LIKE CHRISTMAS!”
As you are hopping along be sure to
leave a little love on each of the Design Team blogs.
Make sure to leave a comment on the Die~Namites Blog for an entry to win the Grand Prize of a
$50 Gift Certificate to Die~Namites Dies along with
5 ~ $10 Gift Certificates.
You will receive additional entries for Liking us on Facebook,
Signing up for Email Notifications.
So Let the HOP Begin!

I have been working on my christmas cards since July, but I am nowhere near finished which was good because I absolutely fell in love with the new holiday release from Die-namites! For today’s card I am using the Pine Wreath die. I love the intricate details of the pine, something I definitely could not achieve with a digital cut or punch.

Pine Wreath Die

I began by cutting 6 shapes out of two different colors

Dienamites-Christmas-1

I started with the full cut on the bottom and layered pieces of the die that I had cut apart on top filling in the empty spaces to add more fullness to the die. I used a Zig ball point tip glue pen. I chose this adhesive because its not too messy but easy to get into fine lines and not dry too fast.

Dienamites-Christmas-2

Dienamites-Christmas-3

After layering all the greenery I made another cut out of red cardstock and cut the birds from the shape.

Dienamites-Christmas-4

I attached them using the same glue on top of the green cut that I started with.

Dienamites-Christmas-5

I glued the wreath to a white card (A2) and rounded the corners of the card. I attached some red gem dots (Recollections from Michaels)  to make the berries around the wreath.

Dienamites-Christmas-6

Then I added some silver polka-dot washi tape around a stamped sentiment on the bottom. It was super simple but I love the results!

Dienamites-Christmas-7

Dienamites-Christmas-8

What new release dies are your favorites? Be sure to keep an eye out on the die-namites blog for lots more holiday inspiration!

Now for more Holiday Crafting fun! Hop on over to Dunja Dücker’s blog! If you got lost along the hop the order is:

Lisa Tottle

Taniesa Vlasak  *you are here*

Dunja Dücker

Susie Moore

Peggy Lee Baker

Lynne Forsythe

Die~Namites Dies

Don’t forget to comment along your way to win one of 6 awesome prizes!!!

Happy Crafting!

The Crafty Pickle

Sketch challenge accepted!

Happy Wednesday everyone!

On Monday you might of seen the sketch Lynne Forsythe posted on the Die-Namites blog. If you haven’t please hop over there and check out the beautiful creations that are already up from Lynne and Peggy!

Here is my take on the sketch. I changed it up just a little to work for me.

Today I am working with one of the latest die releases by Die-namites. The Summer Basket.

I was a little challenged by this die. Not exactly sure how I was going to use it even though I love it and think its beautiful. The detail in it was so pretty that I didn’t want it to get lost in the project. I decided to layer and add color with copics. Here is a couple of shots where I sketched some lines separating the flowers from each other and the basket, and where I cut it out.

Here is when I assembled the background cardstock, the die cut, and the cut-apart floral portion of the die cut.

I cut the background paper in a circle shape and adhered that to a pretty aqua doily. Lynne’s dare was to use fabric in your project. I don’t really have any fabric laying around so I did the next best thing and got some thin yarn and added that around my circle, in a button bow, and the string for the pendant.

The pendant was made using a punch by EK Success. Background paper is from Studio Calico.

I love playing with a sketch when I am lacking my own creative inspiration. Sometimes its just enough to get my creativity flowing. I also love it when it helps me get out of my comfort zone and try new things. Make sure you check back here every 1st Monday of the month for that month’s sketch and dare!

Happy Crafting!


Back to school: Lunchbox notes with a bit of Die-namite Die cut flair!

Have your children returned to school yet? My little one did yesterday, started the second grade. One of the things she looks forward to the most at lunchtime is seeing what note or treat I have packed in her lunchbox. Today this cute little tag was Tied around some celery sticks and I hope it makes her smile!

Here is a look at the little tag:

The Die-namites die I used was the Die-namites wide vase.

I cut the wide vase die out of white cardstock (120lb) and colored in with bright copics. I then stuck strips of washi tape on white cardstock and glued the washi covered cardstock to the back of different sections in the flower and vase. I attached foam dots to the back to pop the flower up from the washi covered tag.

Then to finish off the tag I added some doodlebug adhesive rhinestones inside the flowers. I stamped a “happy” phrase and added some black lines around the tag and a little message.

Its a really simple use of such a fun die, Try dressing up little notes with a fun Die-namite die cut for whoever you might pack a lunch for!

Happy Crafting!

TheCraftyPickle.com

Die-Namites Premier Blog Hop!

Welcome to the “Premiere” Die~Namites Dies Blog Hop.

Die-namites Blog Hop

We are so happy that you have chosen to join us!!!

Our blog hop will be from August 9th ~ August 11th.

Along the way, you will see creations by our Die~Namite Design Team using the LATEST release of Die~Namites Dies.

The Die~Namites Design Team Members will be sharing with you

how they made their pieces through video and picture tutorials.

Each of the Die~Namites Design Team Members

will have a secret word…..on their blogs.

Collect all the words, make sure to leave a little love,

to find the secret phrase this will give you one entry into our prize drawing. You will receive additional entries for Liking us on Facebook Signing up for Email Notifications.

 We will be awarding one Grand Prize of a $50 Gift Certificate to Die~Namites Dies and 5 ~ $10 Gift Certificates to Die~Namites Dies.

So enough about the logistics…. LET THE HOP BEGIN….

If you have arrived here from Lisa Tottle’s blog you are in the right place. If you have just arrived in the midst of our Blog Hop please head to the Die~Namites Blog.

Hope you enjoy the “Premiere” Die~Namites Dies Blog Hop!!!

Today I am sharing a quick Project Life weekly title card tutorial using the Flowering Branch Die as well as showing a few of the NEW Die-namites dies! Be sure you collect my secret word at the bottom of my post and leave a comment, I would also love if you would follow TheCraftyPickle as well so I can share even more Die-namite inspiration with you!

My secret word is:  IN

Thank you so much for stopping by TheCraftyPickle!

TheCraftyPickle.com

Now head on over to Dunja Dücker’s blog to continue the “Premiere” Die~Namites Blog Hop!!

A simple card for the upcoming holidays

Hi Friends,

Today I have a quick card for you that will take no time at all to make and easy to mass produce for your christmas card list. I am using the Berry Flower Die-namites die for this card. This die on its own has a beautiful spring/summer look to it and I have used it in a previous card project. Today, however, I thought I would take this die and see if I could put a holiday spin on it. Here is the Berry Flower Die:

Berry Flower die from Die-Namites

And here is my finished card:

berry flower Poinsettia  @thecraftypickle.com

What’s Christmas without a little sparkle? I took my red glitter copic pen and added some sparkle to the flower die cuts and the green glitter copic pen around the edge of the white iridescent card. I stacked the three floral die cuts together and secured with a brad and then fanned them out. I put a large glue dot on the back of the cluster and stuck it to a band of green glitter cardstock.

berry flower Poinsettia  @thecraftypickle.comberry flower Poinsettia  @thecraftypickle.com

To finish of the design I added a few ink splatters at the top right corner and at the bottom corners.

berry flower Poinsettia  @thecraftypickle.com

The card probably took less time to make than picking out a store-bought card. I hope this inspires you to hand make some cards this holiday season!

Have a very fairy Christmas: My first Christmas card for 2013

Ho Ho Ho, It’s hot outside here in sunny california but I am feeling the Christmas spirit in my craft room that’s for sure.

Today I have a card project for you! I am starting on my christmas cards now so that when November rolls around I will have them all finished and ready to go. I also like making a bunch of different cards instead of mass producing the same ones.

I found this Penny Black Holly Fairy stamp for 50% off when I was shopping months ago and I knew I wanted to use it in my holiday crafting. I think she makes the perfect christmas greeting! Here is the stamp I purchased:

Holly Fairy by Penny Black

So adorable, right? I stamped this image using my Momento black ink pad because I planned on using copic markers to color the image. I am VERY new to actually coloring with copic’s, up until now I have only done the most basic of things. I am looking forward to taking some classes in the future and learning shading technique. Copic markers really are so much fun to use.

Here is the finished card:

Wishing you a very fairy Christmas card @thecraftypickle.com

I started with layering the colors on the stamped image until I was happy with the shading and color. I took my wink of stella clear glitter brush marker and added some glitter here and there as well as my Copic Spica Atyou clear glitter pen for finer details. After all the glitter was done I took some Close to my Heart Liquid Glass and added a layer of that to the snowglobe, the holly wings, the hair holly and berries and the bells hanging from her waist. I did add one additional layer of the liquid glass on the snow globe so it would give more dimension.

fairy christmas card @thecraftypickle.com

For the card base I took a piece of shimmer white cardstock and rubbed it gently with some broken china distress ink. I layered some snowflake lace paper from KI on top of that. I used foam pop dots to attach the fairy to the card and added my sentiment flag at the bottom. a few rhinestones gave the final touch.

fairy christmas card @ thecraftypickle.com

One card down and about 54 more to go 🙂

Have a fairy awesome day!

Thinking of you….. A dry embossed look using die cuts!

Hi Friends!

I missed my Make-A-Card Monday post as I was celebrating my little girls birthday so I thought I would share a card I made for a special person in my life (hoping it brings a little smile to her face)

For this card I mimiced the dry embossing look with some intricate Die-Namites die cuts. The two dies I am using for this card are  the Berry Flower die and the Birds on a Branch die. I am using this teqnique on a card today but this same look would be great on a scrapbook page, altered project or project life card.

Berry Flower die from Die-Namites

Birds on a Branch Die-Namites Die

I love that you can achieve the look of dry embossing with die cuts on cardstock in the same color. I went with white for my card but you could do this easily with any color cardstock. The effect looks better with smooth cardstock rather than textured cardstock. Here is a look at just the background of the card:

Thinking of you background portion of card @thecraftypickle.com


I used a total of 5 die cut shapes to do the entire card front. The key thing is to make sure that the die cuts are adhered down completely. I ran the die cuts through my xyron machine, but working with a glue pen would also work well as long as you are careful not to apply too much glue. Once I had my dies arranged, trimmed and adhered I took a rubber cement eraser and cleaned up any extra adhesive from in between the flower detail. I also took a nail file and lightly sanded the cut parts of the die cuts around the edge of the card to soften the edges and blend them into the card. This technique would also look beautiful as a scrapbook page background.

Thinking of you card @thecraftypickle.com


After the background was done I began working on the sentiment strip. I took a Close To My Heart ink pad in the Lagoon color and stamped some of the ink on a clear acrylic block I use for stamping. I removed a little of the ink at a time with a water brush and beginning at the edges of the white cardstock I added color working my way in towards the center. I love the watercolor look this achieved. I stamped the “Thinking of you” sentiment in the same color ink and then went back in with my water brush to add a little more color in between the letters.

Thinking of you card @thecraftypickle.com

To complete the card I took the Birds on a Branch die and cut it in the same color cardstock as the border strip. I fussy cut a few of the pieces apart and attached them to the left of the sentiment. I finished by adding some glitter detail on the butterflies using a clear wink of stella glitter pen.

I hope you enjoyed this fun little tip! The intricate designs of the Die-Namites dies are perfect for this look. Experiment with any of the Die-Namites dies for a bit of POP in your next project! Check out more Die-Namite die cut tips and projects on the company blog!

Happy (almost) embossing!


Make-A-Card Monday: Stamping on Patterned paper.

Hi Friends!

Today for Make-A-Card Monday I am working with a technique used in the “Inked” class I am taking at Studio Calico. I am so excited for this class because I always love to learn new ways to use my ever-growing stamp collection.

Today the talented Nichole Magouirk shared how to effectively stamp on patterned paper. It reminded me of my old school scrapping paper-piecing days and I had so much fun with this. I can’t believe I haven’t thought about using stamping and patterned paper together like this before. It’s really very simple and I adore the results. Sort of like coloring with paper instead of markers, crayons, or paint.

For my own take on this challenge I chose a kite in the clouds stamp by Paper Smooches along with a sentiment from a Studio Calico kit stamp. This card is great for someone who needs a little encouragement. Could also be great as a graduation or promotion card.

Stamping on Patterned paper @thecraftypickle.com

For my patterned paper I used scraps of the seen and noted collection by Pebbles. I love the bright colors  with the primary aqua and red focus colors. The card came together quickly (about 30 minutes total). This particular stamp fits inside a 3×4 project life card perfectly as well so I am thinking of repeating the same stamp with patterned papers I use in my Project life spread  for a great filler card.

I hope your week is off to a great start!

Happy Crafting!
Taniesa