My *Favorite* Essentials by Ellen brand product!

Hi Friends!

It is one of my favorite companies anniversary, Ellen Hutson is celebrating 11 years in business (YAY! Congrat’s to Ellen and her wonderful and kind staff!) and to celebrate there is a week-long blog hop! If you are already hopping along you will find the next person in the hop at the bottom of the post (as well as the rest of the talented ladies inspiring you today!)

So for our project we are all picking our favorite Essentials by Ellen product and sharing that with you. Let me tell you, Picking my favorite product is like picking a favorite child it simply cannot be done. So, I am cheating a little and sharing one of my favorite stamp sets (and all the cute additions that have come to the essentials by Ellen line that expand it’s use!) All Inside! It all started with my love of this stamp set (and matching die that has cut outs for his hands!):

Here is a look at the All inside stamp set and it’s matching die:

I also used the Bear Ware Stamp set (flowers) which you can see here:

There is also a matching die set to Bear Ware:

And here is my first project using this cute bear!

I kept this card fairly simple. I stamped the floral bunch and added extra flowers to make the bouquet even bigger. Then I inked up the bear, wiped off the excess ink where the flowers were in the way (you could mask this instead if you wanted) and stamped him down. I used versafine sepia ink for the stamping but for the coloring of all the images, I used my Daniel Smith watercolors. The sentiment came from another Essentials by Ellen stamp set called “Lovely“.

Next card I did uses the same All Inside stamp and die set but this time I incorporated the Bear Ware 2 stamp and die set as well as the Warm Fuzzies stamp set:


I also grabbed a couple of stamps and dies from the Leading Ladies: Cozy Lady stamp and die set (coffee cup and leaves). You can find those by clicking HERE.

Here is the Autumn project I did using these fun stamps and dies:

All my stamping and coloring was done with Distress Oxide inks, Versafine Sepia ink, and the scarf and coffee cup were painted with Daniel Smith watercolor paints. I stamped the Happy Fall lightly in the upper corner using the Delicata Golden Glitz ink. and accented everything with some Gold Stickles.

If that wasn’t bear-cuteness-overload for you, here is the new Bear Hugs die. The same adorable bear as “All Inside” but made bigger and with stitching holes so you can make your own felt plushie or other adorable projects!

Here is this new Favorite die of mine!

and here is a couple of plush ornaments I made with the die.

These cute bears were all made with scraps of fabric and felt that I had. Don’t limit yourself just to felt with this guy, That white fuzzy fabric was perfect for a white polar bear! I gave her a little MFT Snowflake to hold while the cozy little brown bear got dressed up with a scarf and a Starbucks gift card that I found in the shape of a leaf. How perfect was that! This die has started a felt stitching addiction in my house and I am hoping that Ellen carries more in the future!

Thanks so much for stopping by! I hope you were inspired to create some fun Bear projects! Next on the blog hop is the talented Nichol!

Here is the entire blog hop line up for Sunday 11/19/17

Karolyn Loncon
Brandi Kincaid
Sandy Allnock
Taniesa Vlasak <— You are here 🙂
Nichol Spohr

See you all again Soon!


Essentials by Ellen and Honey Bee Stamps!

Hi Friends!

Today I am combining some of my favorite stamps and dies from Honey Bee Stamps and Ellen Hutson!

Taniesa Vlasak | TheCraftyPickle.com

I might have gone on a bit of a crafting spree lately, I was having so much fun with the new releases from both companies (and some of their older releases as well) and, well, tis the season for crafting!

The first project I have for you today is a fun card using Chibitronics lights! This card features the Merry and Bright stamp set from Honey Bee Stamps as well as the Essentials by Ellen Fat Pants stamp and dies (ornaments), Poinsettia and pine dies(Pine branch), Mistletoe and Holly stamp set(pine branch), Merry and bright stamp set (lightbulb), and the Bokeh dots stamp set for the background. (All products linked at the end of the post)

Here is the card with the lights off:

Taniesa Vlasak | TheCraftyPickle.com

and the card with the lights on (you just remove the little paper that says “pull” and they turn on)

Taniesa Vlasak | TheCraftyPickle.com

Using the Chibitronics was a lot easier than I had expected and it was so much fun making a card that lit up!

Next I have a couple of DIY Gifts that would be great for your holiday gift giving.

Taniesa Vlasak | TheCraftyPickle.com

These were both SO simple and so quick to make. For the wine basket I purchased the decorative basket from Michael’s craft store for under $5. I heat embossed the Essentials by Ellen Fat Pants sentiment from the Fat Pants stamp set and tied the tag around the top of the basket with some red twine. Popped in a bottle of wine with some tissue and now its all set for a quick holiday gift.

Know someone with a sweet tooth? Try filling a mason jar with candy like I did with my snowman jar here. I just took a piece of cardstock and did some simple ink blending around some snowy hills. I stamped some snowflakes from the Honey Bee Stamps Flakey Friends stamp set. From the same stamp set I stamped out the snowman and die cut him with the coordinating dies. For the tag I heat embossed the sentiment from the Essentials by Ellen Holly Jolly stamp set and tied the tag around the jar with some Doodlebug twine. I think this would make a great gift for a teacher or coworker.

Next up is a fun way to present a coffee gift card. This cute little bear is from the Essentials by Ellen All inside stamp set (and matching die). I gave him a big cup of coffee from the Oh Frappe set and popped him on an action wobbler so he bounces inside the MFT decorative circle cut out. I stamped the background with the same stamp set and the sentiment is a combination from this stamp set and the new Honey Bee Stamps Sending You sentiments.

Here is the outside and the inside of the card:

Taniesa Vlasak | TheCraftyPickle.com

For the inside, I stamped the”just for you” and hearts from the Sending you stamp set and heat embossed with WOW rich pale gold embossing powder. I cut the largest heart from the Essentials by Ellen Folk heart die set and put a bit of temporary adhesive on the gift card and stuck it to the stamped heart. I Glued that to the back of the card and with adhesive on either ends of the strip I laid that over the gift card. I think these are great to have on hand, especially around the holidays for quick gifts!

Another great thing to have on hand is some gift bags. I Love the WRMK Gift bag punch board and I thought that the Essentials by Ellen leaping deer die would make the perfect window for a gift bag.

Taniesa Vlasak | TheCraftyPickle.com

This was another very easy to make project. I cut the bag according to the punch board directions and before I adhered anything I die cut the front of the bag with the leaping deer die. I stamped and heat embossed the JOY sentiment from the Honey Bee Stamps Merry and Joy sentiment builder stamp set. I took a piece of vellum and glued it to the inside of the bag, creating a little window. I finished off the bag with some sequins and that ribbon you see was a gift in my last Ellen Hutson order! They are just so sweet!

I made about 20 versions of the card you will see below. Normally I would shy away from making cards that need masking for a mass-produced card but I discovered a great way to make masks last which made the whole project easy peasy! Want to learn more about this tip and how I made this card? Check out the post in the Ellen Hutson Classroom HERE

Taniesa Vlasak | TheCraftyPickle.com

I also created a fun die cut inlay card with the new Honey Bee Stamps Thanks and giving die set. You can see that card and more on the Honey Bee Stamps blog HERE, but below is a sneak peek!

Taniesa Vlasak | TheCraftyPickle.com

Whew! That was a lot of projects to share! I am so glad you kept on reading because one lucky reader is going to win a $50 gift certificate to EllenHutson.com! How do you win? Easy Peasy! Leave a comment here, then pop on over to the Ellen Hutson classroom and leave a comment there too and another stop to HoneyBeeStamps.com and leave a comment there and you are entered to win!

eh-store-credit-graphic

Supplies used are found below. (affiliate links provided where available).

To shop the Honey Bee Stamps store, visit this link: HERE


Thank you all so much for stopping by!

Taniesa Vlasak | TheCraftyPickle.com


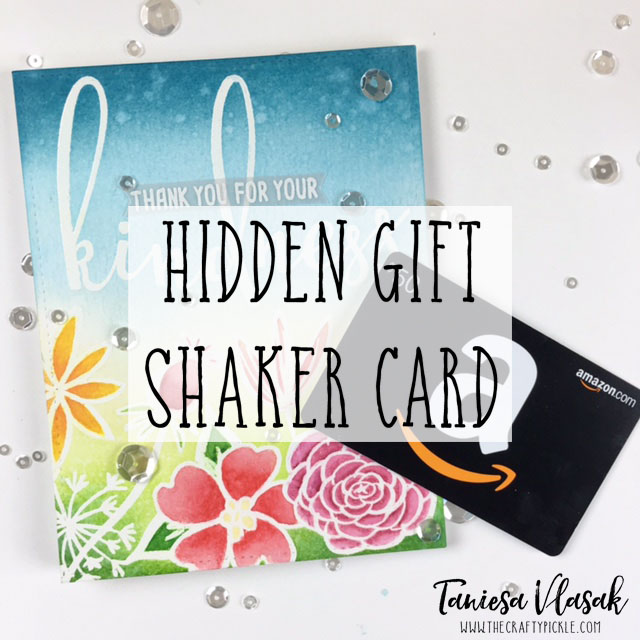
Ellen Hutson LLC PIN-SIGHTS Challenge | Hidden Gift Shaker Card

Hi there Crafty Friends!

I hope your weekend is off to a fabulous start! I thought I would kick off my weekend by participating in the Pin-Sights challenge over at Ellen Hutson.com.

EllenHutson.com Pin-Sights Challenge

You can find out more by clicking the link HERE (and see some AMAZING project entries!)

The challenge was to take Essentials by Ellen product(s) and pair them with one of your favorite companies products. I have really been enjoying the latest Honey Bee Stamps release and decided to pick something from my Honey Bee stash!

I LOVE the essentials by Ellen stamps, dies, and other papercrafting items so this was a great challenge to hop into and jumpstart my creativity. Today I will be working with the Essentials by Ellen Bohemian Garden stamps and Zipper Panel die.

Essentials-by-Ellen-Clear-Stamps-Bohemian-Garden-by-Julie-EbersoleEssentials-by-Ellen-Designer-Dies-Zipper-Panel-by-Julie-Ebersole

I will also be using the Kindness stamp set by Honey bee stamps.

Honey-Bee-Clear-Stamps-Kindness

Today I wanted to mix things up a bit and I thought… “What if I used the zipper panel in the back of the card rather than the front?” This way the recipient could see the gift when they opened the card but take the gift card out when they were ready.

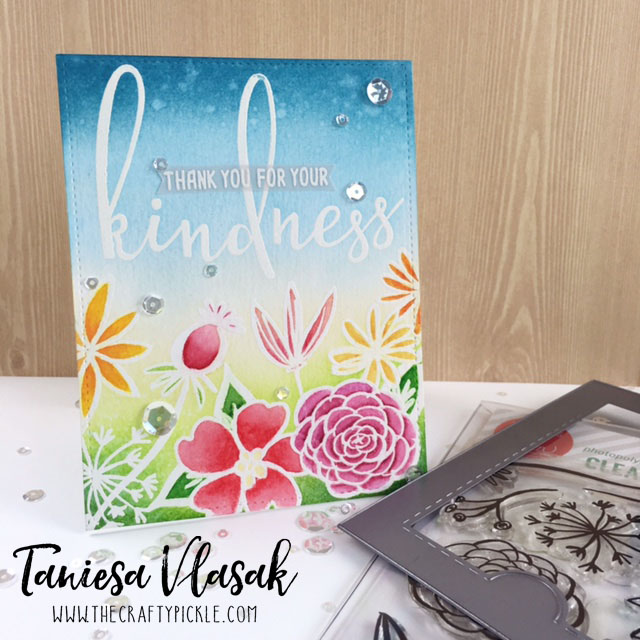
For the front panel I did all my stamping in Versamark ink and heat embossed with Hero Arts white embossing powder. I did ink blending at the top and at the bottom with distress ink (colors listed at the bottom of the post) and mixed some Daniel Smith watercolors to color my floral images. I did add a vellum flag out of Essentials by Ellen 40 lb vellum and heat embossed the same as the card. For the final touch on the panel I added some Sparkling clear sequins with some Ranger Multi Medium Matte.

Hidden Gift Shaker Card | TheCraftyPickle.com

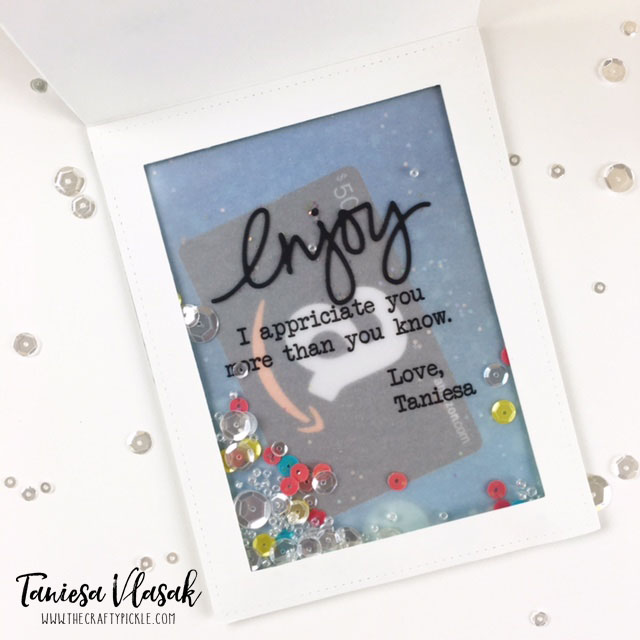
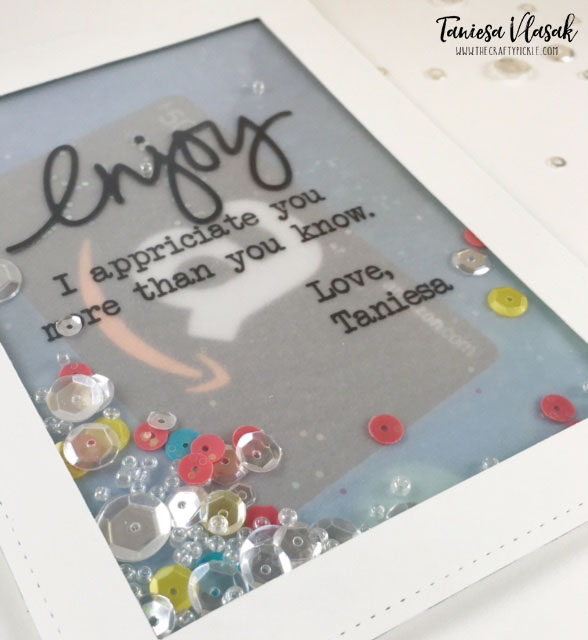
I set the front panel aside and went to work on the rest of the card. I made the shaker pocket from an Essentials by Ellen small stamp storage pocket and Be Creative tape. (I probably would have used my fuse but we are moving and it is packed up in a box at the moment). I printed my message on the same 40 lb vellum from Essentials by Ellen using my laser printer and cut it to fit inside the stamp storage pocket. I added the die cut “Enjoy” which is also apart of the zipper panel die set. Once that was dry, I added the pretty pink posh sequins, Prima beads, and Distress glitter.

Hidden Gift Shaker Card | TheCraftyPickle.com

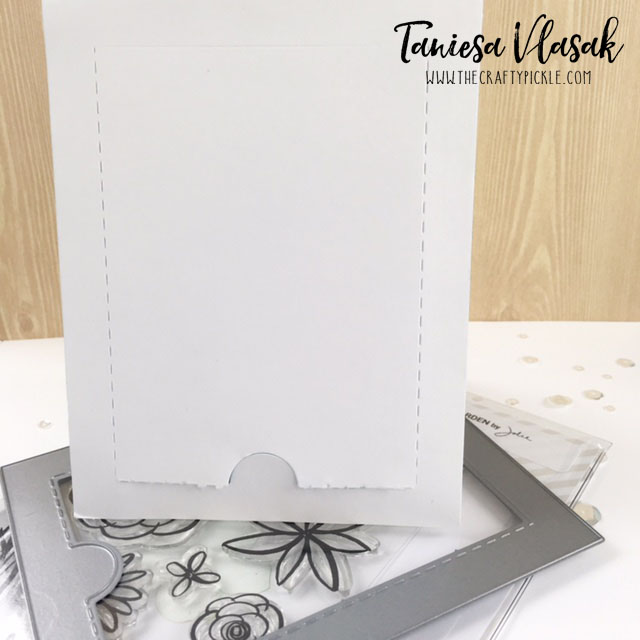
I reinforced the center part of the zipper panel as Julie Ebersole has shown in her YouTube video (See bottom of post for video) with a piece of Neenah cardstock that I blended some distress ink on. I added be creative tape all around the back panel edges being careful not to cover the zipper stitched marks. I then added my gift card in the middle and placed the finished shaker pocket down on top of the tape. To hide the rough adhesive edges I made a frame from the large stitched rectangle dies from Lawn fawn and adhered that to the top of the shaker pocket.


Hidden Gift Shaker Card | TheCraftyPickle.com

I love that you can see the gift card through the vellum but the message still stands out. The shaker adds a fun playful confetti party like feel.

Hidden Gift Shaker Card | TheCraftyPickle.com

Here is the view of the back . I started lifting the bottom up……

Hidden Gift Shaker Card | TheCraftyPickle.com

But then I decided I wanted to show you all how cool it looks when it is opened up all the way!

Hidden Gift Shaker Card | TheCraftyPickle.com

What I love about putting the zipper in the back is that the front stays pretty and intact so you can still display as normal if you like.

Hidden Gift Shaker Card | TheCraftyPickle.com

This card was a lot of fun to make. Let me know in the comments below if you would like to see a video tutorial on how to assemble a gift card like the one shown today.

If you have never seen the zipper panel from Ellen Hutson yet. Check out this how-to video that Julie Ebersole (the designer) made. The die is just genius!

Links to the items I have used are listed below.

https://static.inlinkz.com/ppr.js
Thank you for stopping by. I hope you found my card project inspiring. I love giving gifts, but making gift packaging pretty is extra special!

Have an extra fun and crafty weekend!

Taniesa Vlasak | TheCraftyPickle.com