Today I am guest designing over at the Kat Scrappiness blog and shop and I am super excited to share this fun shaker card!
I absolutely love Kat’s exclusive dies. The stitched tree was just perfect to have the Lawn Fawn Frosty Fairies decorate!
To make the shaker I used the two largest double stitched rectangle dies in the set. I just nested them together and used a bit of tape to make sure they stayed in place. I die cut my cardstock frame, the acetate, and the foam as well! Came together super quick!
I used several shades of blue distress ink for my background and colored the cute little fairies with copic markers. Not a lot of shading was needed because they are small. I went over their wings and other details with a glitter pen after I was done coloring.
To get some texture on the absolutely fabulous stitched tree I used the small pine spring in the Frosty Fairy friends set and did some second (and third) generation stamping. You can see more on that in this little quick tip video.
I added my favorite white, blue and clear sequins from Kat’s shop in the shaker, I didn’t add a lot because I didn’t want it to take away from the decorated tree.
This card came together in a snap and I just love how it turned out. It is easy enough to mass produce and if you wanted to skip the shaker part it could come together even faster.
Thank you so much for stopping by. I am excited to be guest designing for Kat Scrappiness and I will have more fun projects for you soon! Check out Kat’s store at http://www.katscrappiness.com and for direct links to products used today see the links below.
I hope your weekend is off to a fabulous start! I thought I would kick off my weekend by participating in the Pin-Sights challenge over at Ellen Hutson.com.
You can find out more by clicking the link HERE (and see some AMAZING project entries!)
The challenge was to take Essentials by Ellen product(s) and pair them with one of your favorite companies products. I have really been enjoying the latest Honey Bee Stamps release and decided to pick something from my Honey Bee stash!
I LOVE the essentials by Ellen stamps, dies, and other papercrafting items so this was a great challenge to hop into and jumpstart my creativity. Today I will be working with the Essentials by Ellen Bohemian Garden stamps and Zipper Panel die.
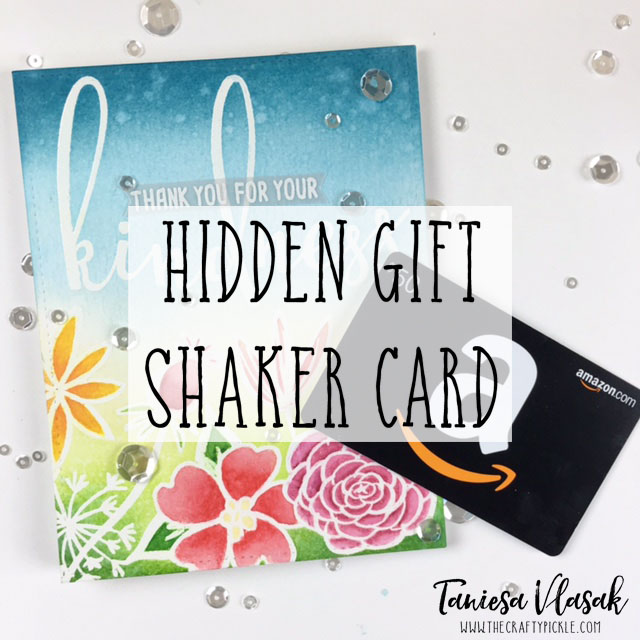
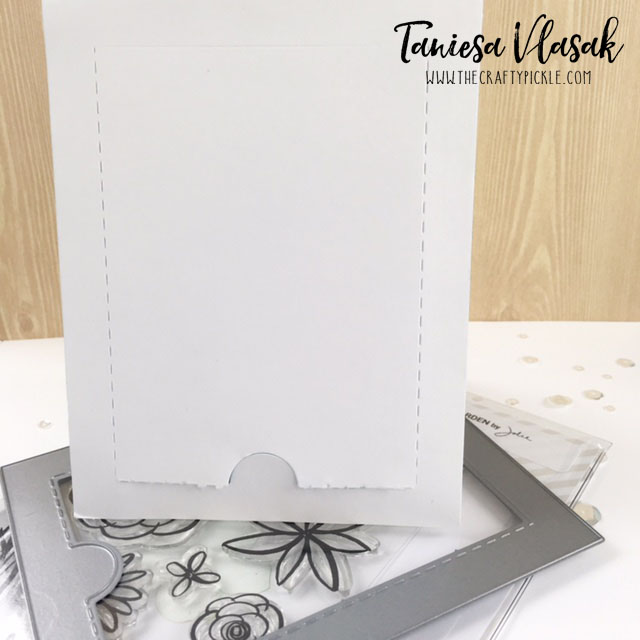
Today I wanted to mix things up a bit and I thought… “What if I used the zipper panel in the back of the card rather than the front?” This way the recipient could see the gift when they opened the card but take the gift card out when they were ready.
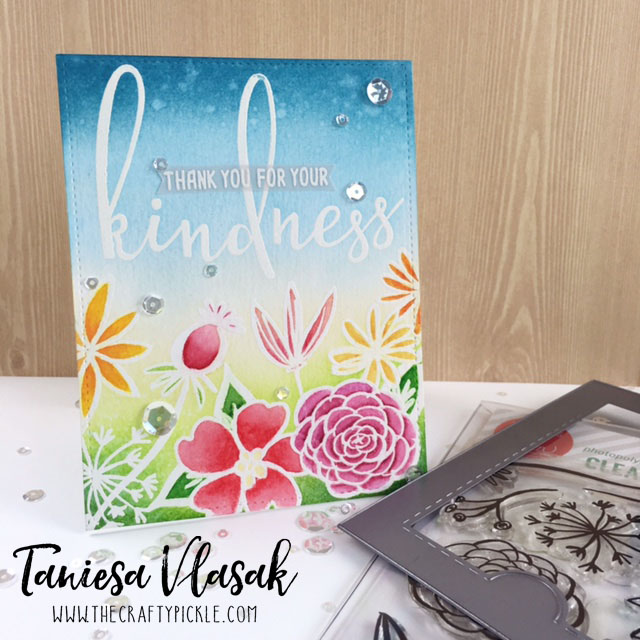
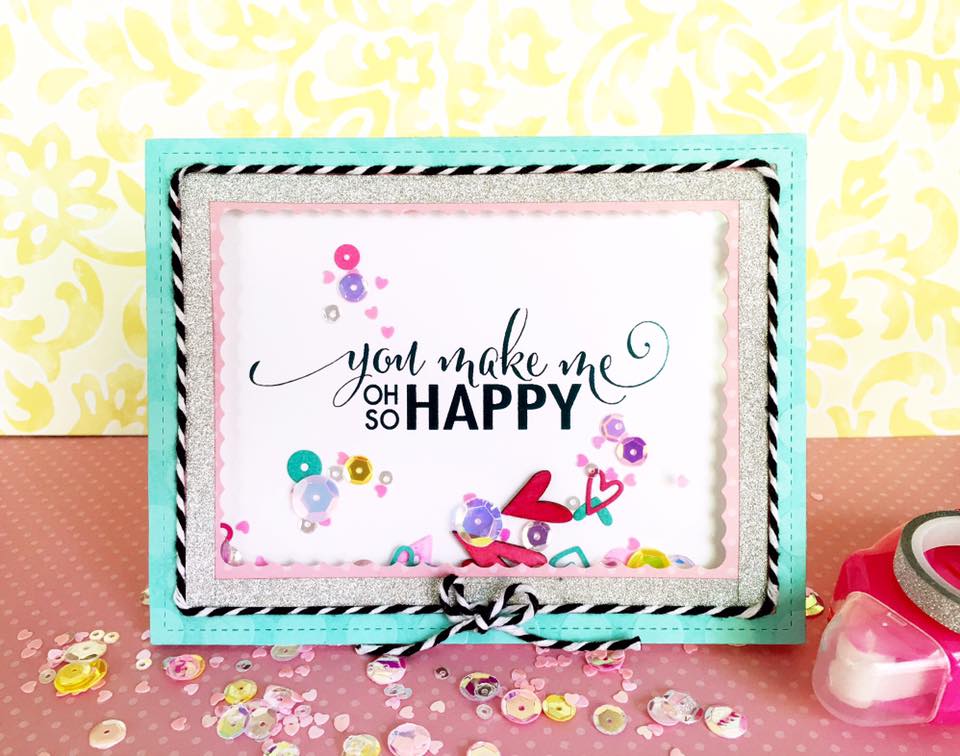
For the front panel I did all my stamping in Versamark ink and heat embossed with Hero Arts white embossing powder. I did ink blending at the top and at the bottom with distress ink (colors listed at the bottom of the post) and mixed some Daniel Smith watercolors to color my floral images. I did add a vellum flag out of Essentials by Ellen 40 lb vellum and heat embossed the same as the card. For the final touch on the panel I added some Sparkling clear sequins with some Ranger Multi Medium Matte.
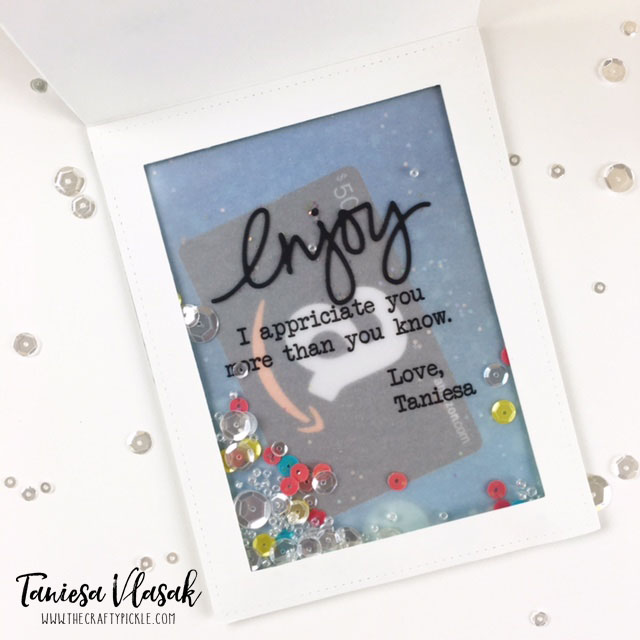
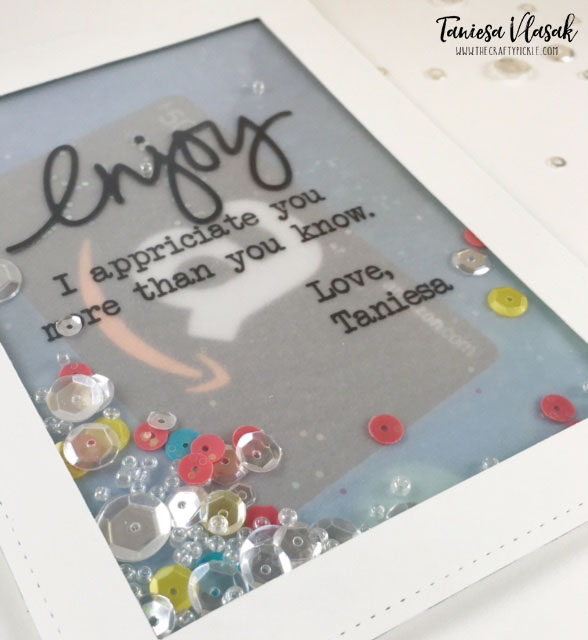
I set the front panel aside and went to work on the rest of the card. I made the shaker pocket from an Essentials by Ellen small stamp storage pocket and Be Creative tape. (I probably would have used my fuse but we are moving and it is packed up in a box at the moment). I printed my message on the same 40 lb vellum from Essentials by Ellen using my laser printer and cut it to fit inside the stamp storage pocket. I added the die cut “Enjoy” which is also apart of the zipper panel die set. Once that was dry, I added the pretty pink posh sequins, Prima beads, and Distress glitter.
I reinforced the center part of the zipper panel as Julie Ebersole has shown in her YouTube video (See bottom of post for video) with a piece of Neenah cardstock that I blended some distress ink on. I added be creative tape all around the back panel edges being careful not to cover the zipper stitched marks. I then added my gift card in the middle and placed the finished shaker pocket down on top of the tape. To hide the rough adhesive edges I made a frame from the large stitched rectangle dies from Lawn fawn and adhered that to the top of the shaker pocket.
I love that you can see the gift card through the vellum but the message still stands out. The shaker adds a fun playful confetti party like feel.
Here is the view of the back . I started lifting the bottom up……
But then I decided I wanted to show you all how cool it looks when it is opened up all the way!
What I love about putting the zipper in the back is that the front stays pretty and intact so you can still display as normal if you like.
This card was a lot of fun to make. Let me know in the comments below if you would like to see a video tutorial on how to assemble a gift card like the one shown today.
If you have never seen the zipper panel from Ellen Hutson yet. Check out this how-to video that Julie Ebersole (the designer) made. The die is just genius!
https://static.inlinkz.com/ppr.js
Thank you for stopping by. I hope you found my card project inspiring. I love giving gifts, but making gift packaging pretty is extra special!
Hi and welcome to Honey Bee Stamps 1st birthday blog hop!!!
Thanks for joining us on our week-long birthday celebration! Today the designers are featuring the brand new stamp set “Happy Everything” with a sweet little kit put together by designer Lisa Cisneros. We have lots planned for you this week and of course lots of prizes! Just leave a comment on our designer’s blogs along your hop for your chance to win!
You should have arrived here from Holly’s Blog, but if not click HERE to start at the beginning!
For my project I wanted to do a little something different with the stamping. Did you know that if you own a foiling machine or laminator, you can actually foil your stamping work?
All you need to do is do your stamping with a very good black ink. Using a stamp positioner like the MISTI tool can really help. If you miss any spots in your stamping be sure to go over it with a marker or a fine tip pen.
Then take your stamped paper and photocopy onto cardstock using a toner based printer or photocopier. Your image is ready for foiling! Note: This should ONLY be for personal use due to copyright, do not share your photocopy images with others.
That is exactly what I did in my project below. You can see the aqua colored foil in the close up photo. I love how it shimmers right along with all the sequins in the shaker card.
I hope my little tip got your creative wheels-a-turnin’! I know that I want to foil ALL THE THINGS now! LOL.
I sure hope you had fun hopping along with us today for Honey Bee Stamps very first birthday blog hop. Make sure you have left a comment below as well as one on every designer’s page and of course the honey bee blog as well. Keep checking back on the Honey Bee Blog all week long for more inspiration and new products…. better yet join the Facebook party HERE for your chance to win lots of awesome prizes.
I am so stinkin excited for today!!! I have been shopping and creating long and hard for weeks leading up to this release all with my very sweet customers in mind! Here is a little bit of what you will find in our “little” Etsy shop right now
Seriously, there is so much I can’t even begin to tell you all about it. Hop on over to our store and check it out!
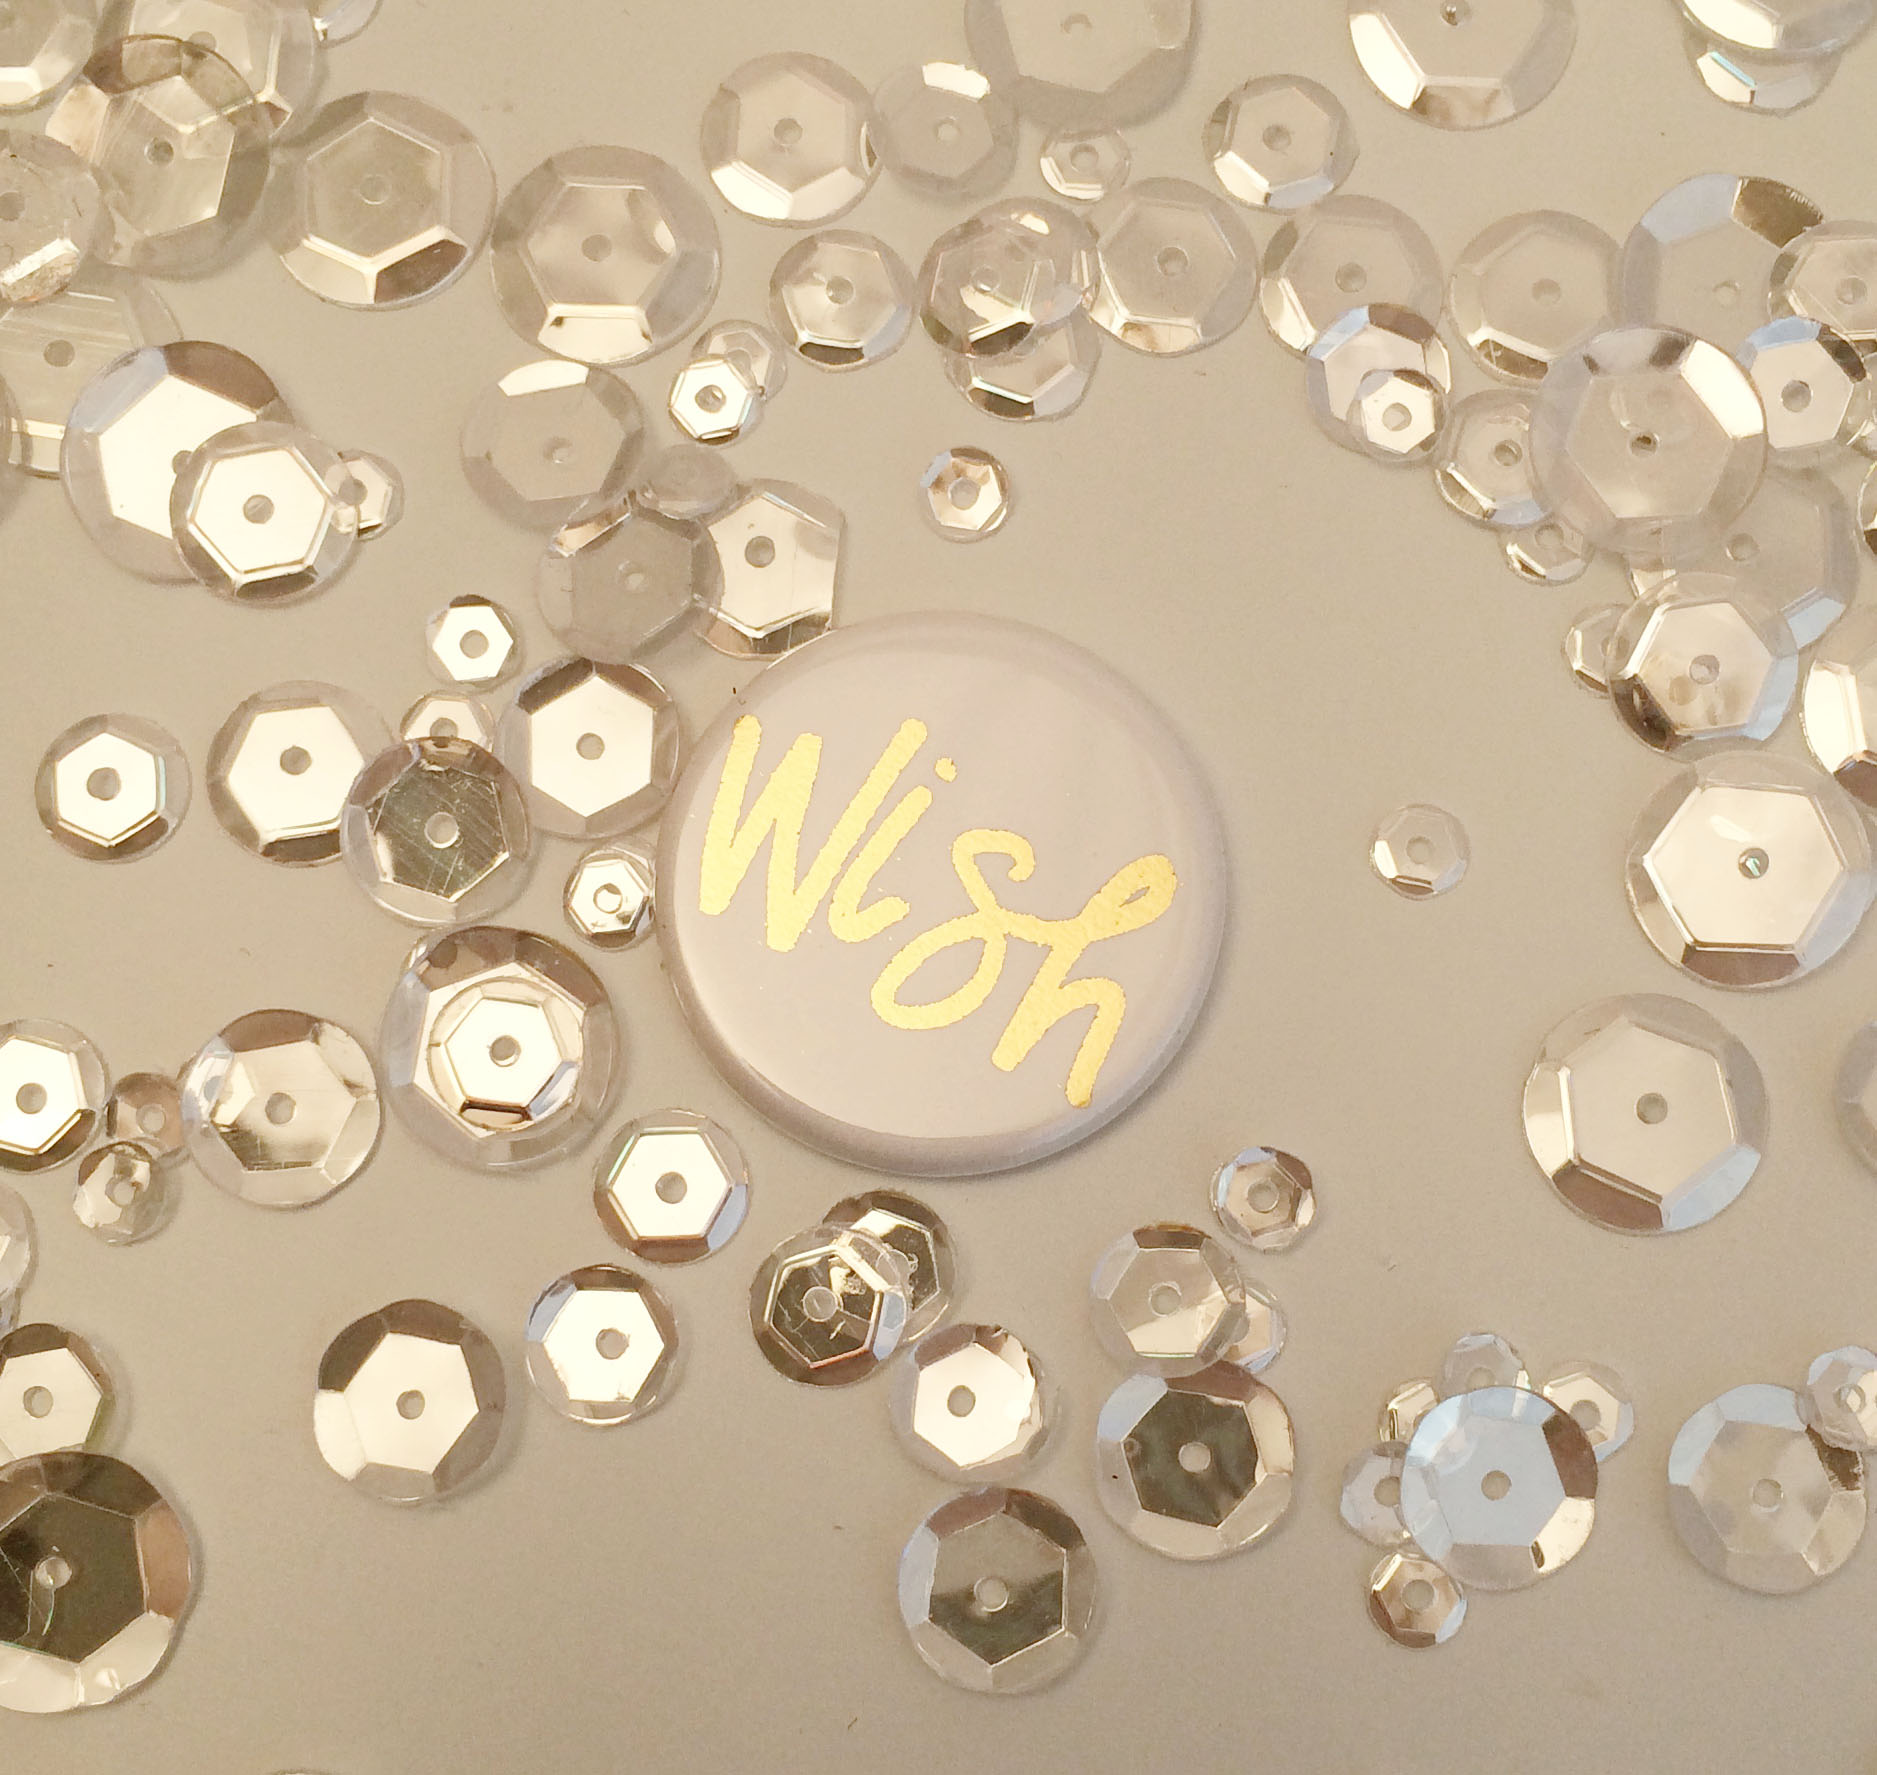
Oh! While supplies last every one of our customers will be receiving an exclusive limited edition can’t-buy-it-anywhere gold foil flair just for placing an order! Our Wish flair is perfect for birthdays, christmas, or maybe made into a clip for your Crafty Pickle WISH list!
Every Friday though the summer months we will bring you a new idea/concept using flair. Your not going to want to miss these fun posts! These ideas will come from not only our designers but also super neat flairtastic ideas we find from our customers and other talented papercrafters. Make sure that when you share any of your projects on Instagram or Facebook using flair, that you tag it #FlairTasticFriday. You just might see your own photo featured here on our blog!
This week we will be showing you some awesome greeting cards by our wonderful design team!!! Each Design Team member uses flair differently to make a fun greeting card …and with this flair it is nice and flat to fit on any card!!!
Here is Joann’s super fun FlarTastic Greeting Card I love how she used the vellum as an overlay to soften the background paper …so great!!! And how she used the Something Shiny Slightly Cupped Sequin to follow your eye down the card for interest!!! And bunching the twine behind the Orange Pop of Flair …i am so going to steal that idea!!!
And next we have Carrie
I am sorry but Carrie makes the prettiest cards I know …they are just so lovely anyone would love to receive a card from her!!! Carrie used Watercolor Butterflies Flair for her fun and whimsical Thank You card!!!
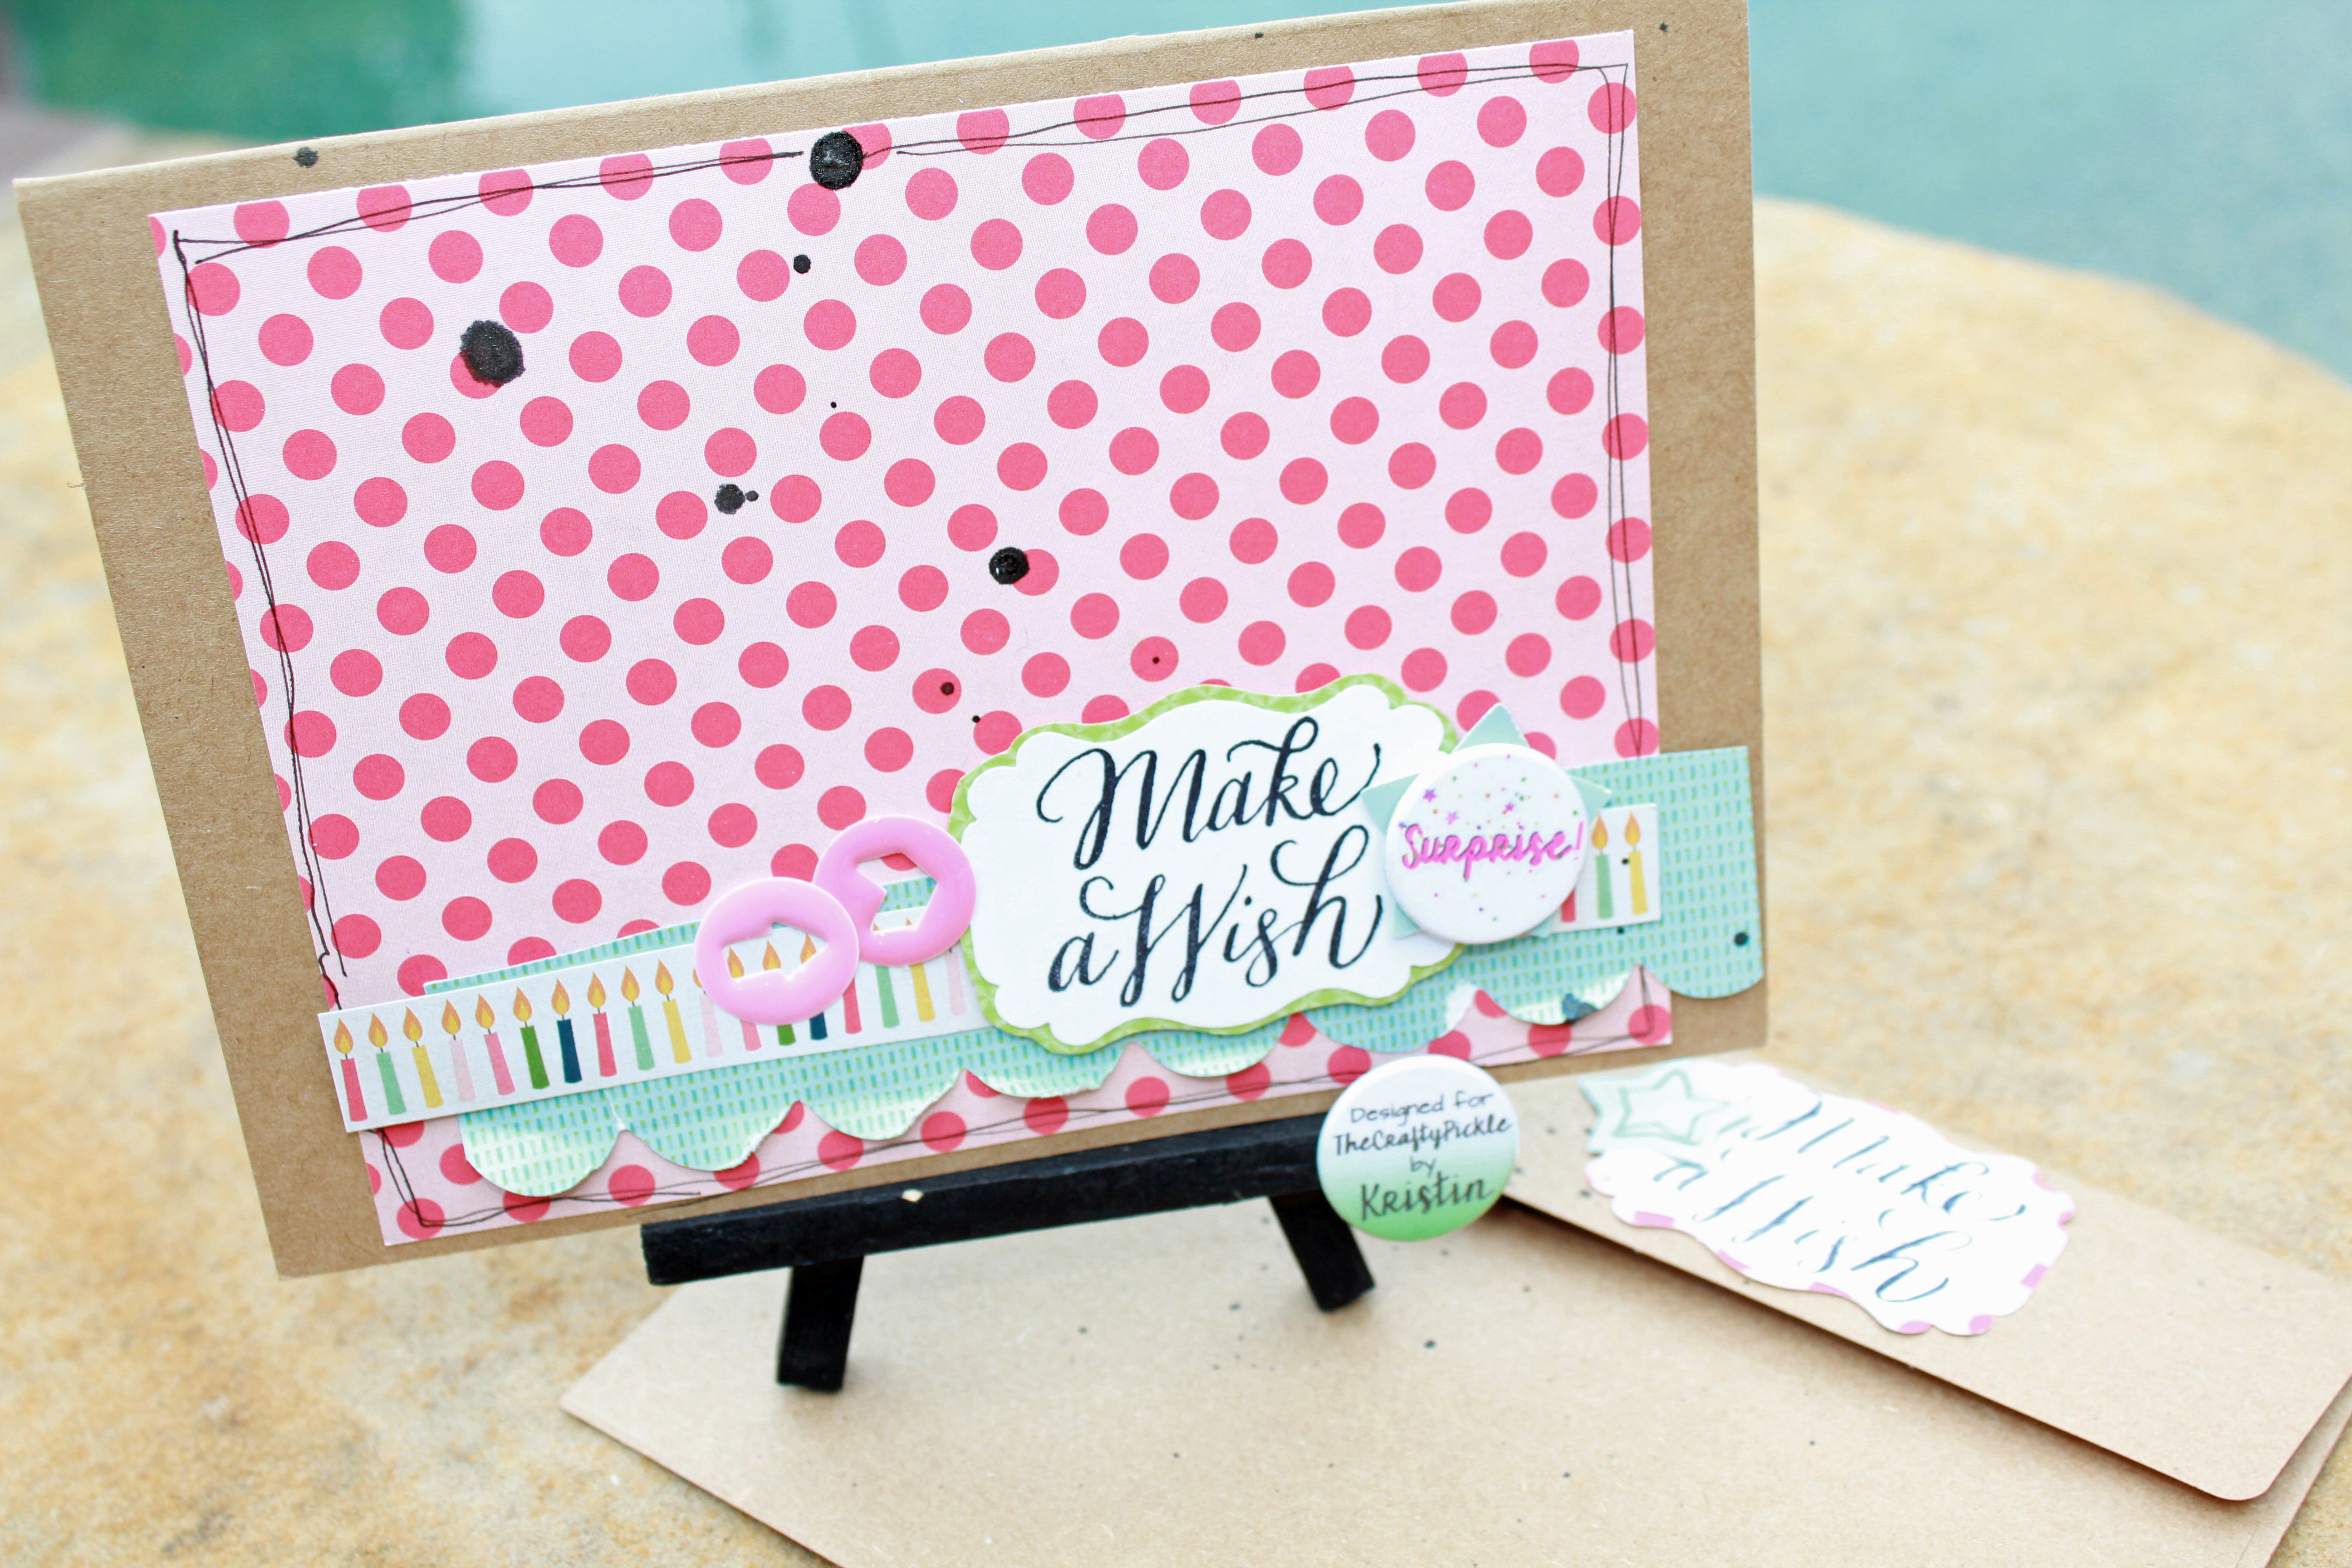
How sweet is this card by Treasa with this cute big candle right on the front and the Suprise Single Flair
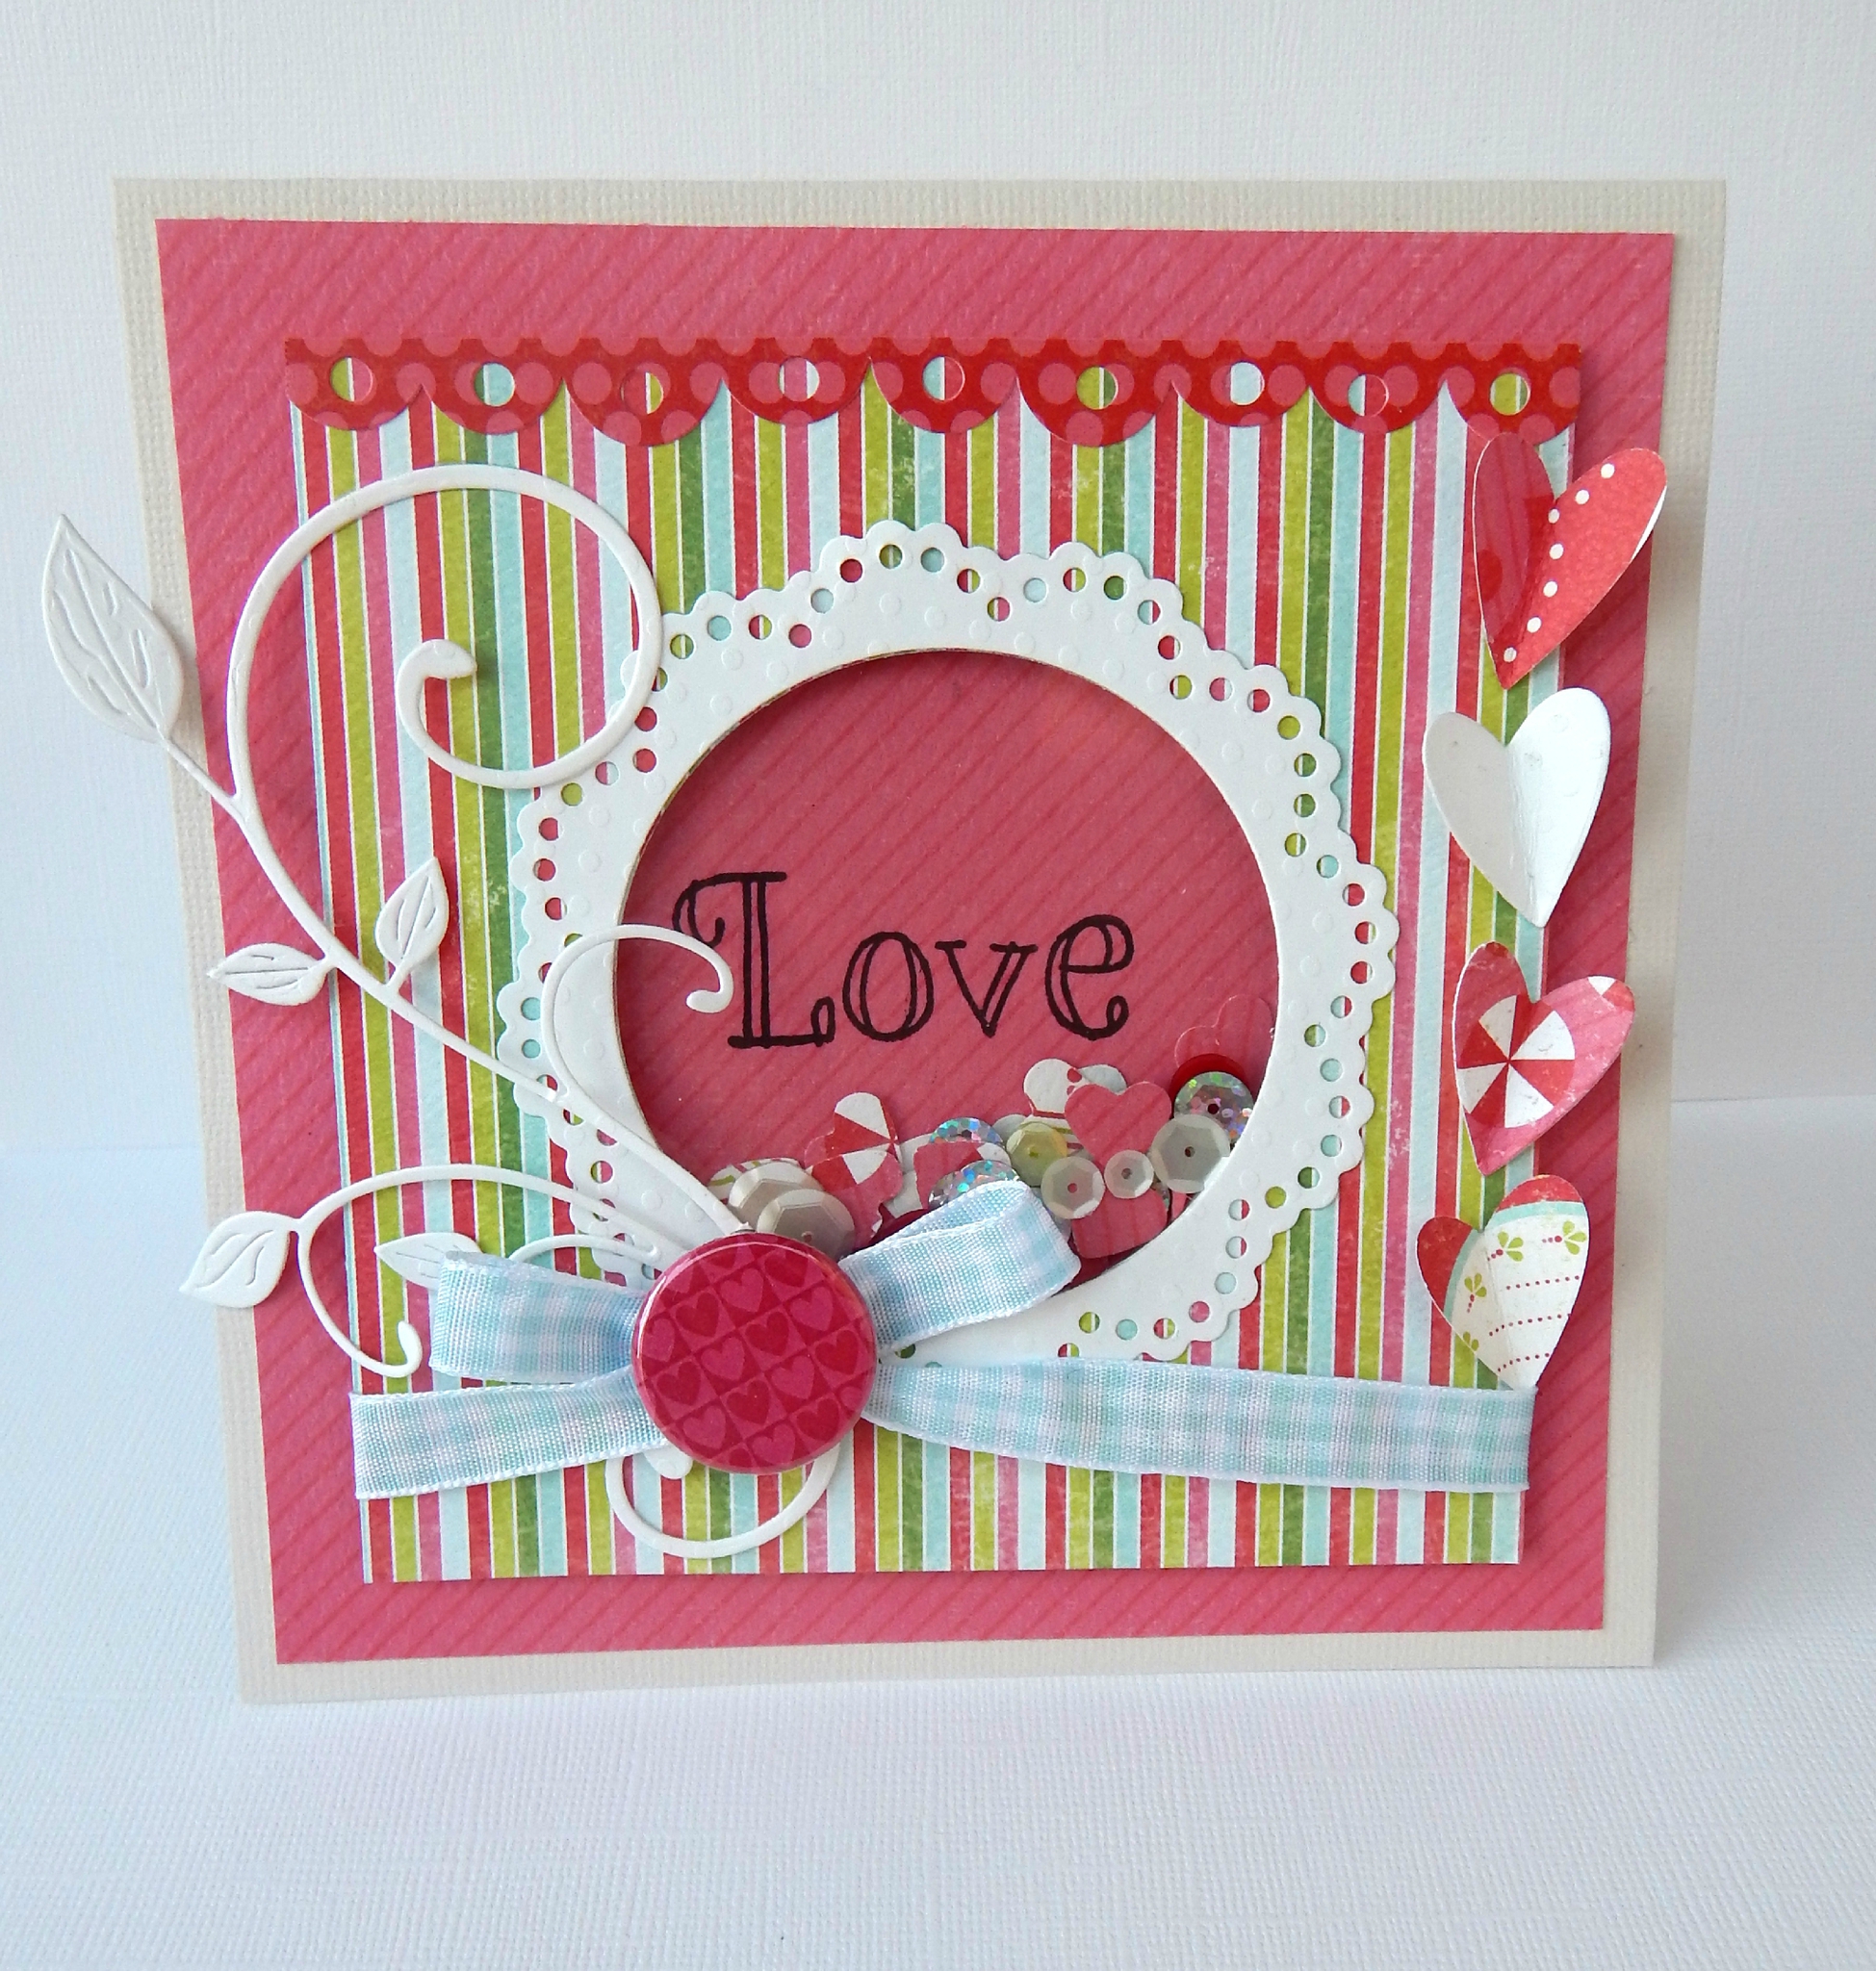
Next …we have Stephanie’s so sweet circle shaker box card with the red white and blue Star Spangled confetti mix
How will you use flair on a greeting card?????
Stop by The Crafty Pickle Etsy Shop if you haven’t been by recently. We will be releasing a few little things between now and our next big release. We will also be having a big TCP Birthday celebration this month with giveaways and a brand new exclusive foil flair coming mid July!
Dont forget to use the hashtag #FlairTasticFriday to play along with us!
Designer, Elodie is already in the Valentines Day spirit and has made a lovely Valentine’s shaker card along with an adorable everyday card too! Check it out!
Hi Crafty Friends! Elodie here. Today I would like to show you 2 Valentine’s day card that I made with TCP button’s flairs.
Thanks, Elodie. I just love how you took your Christmas and winter sequin mixes and made a valentine mix that works for your shaker card. Absolutely beautiful!
Speaking of Valentine’s sequins. We have a new mix coming to the shop soon (also some new fun sprinkles in your flair packages too!)