And the organization continues…

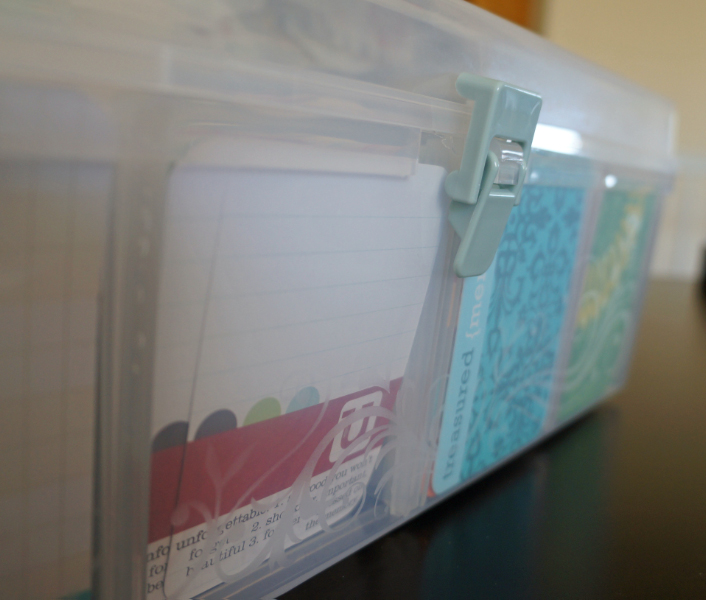
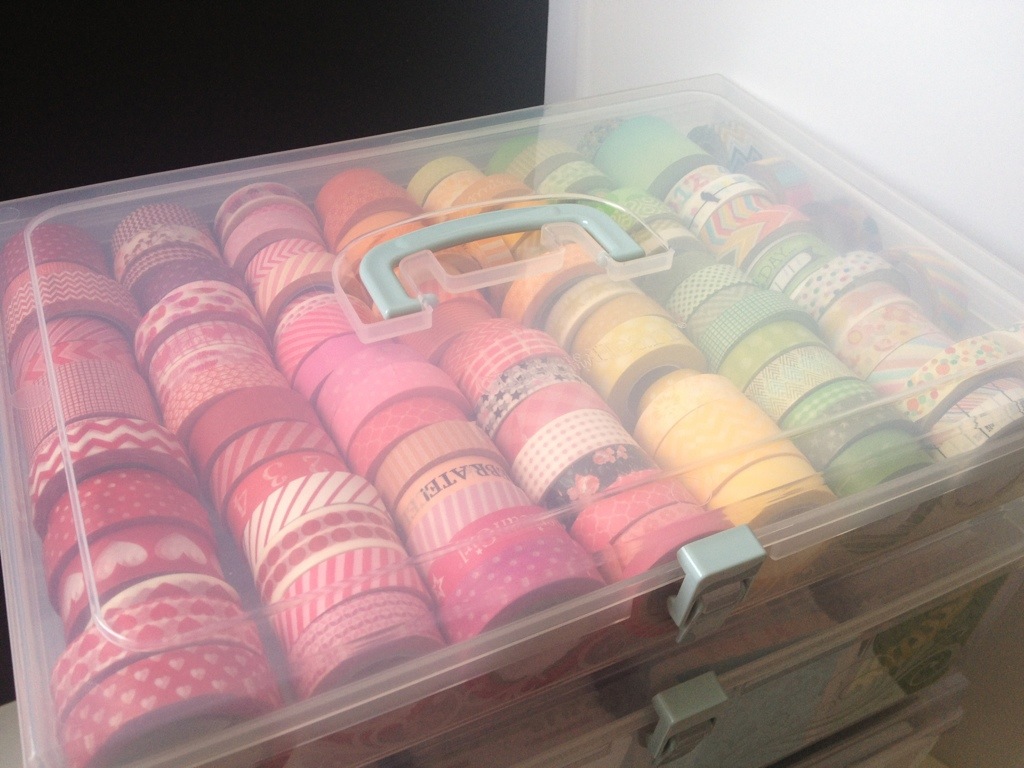
Here I am again, sharing my organization for the little things now. I have been sorting, purging, organizing my scrap space. It seems like a never ending job. My order from Close To My Heart finally came in though and I was armed with new organizational supplies to get things together! My goal this last couple of months is to really streamline my supplies to have them take up as little space as possible beings I am working with a limited space in my Loft right off the master bedroom. You have seen my boxes from CTMH holding my project life cards, my 6×6 paper pads, and my washi collection…… ahhh washi, I love you so! So without further ado let me share my wood veneer and sequins storage!

This is my before photo how I sorted my ever growing wood veneer collection. It started with an embroidery floss box and then added a container I found at the dollar spot at Target. Not a bad storage idea I was just running out of room, they felt really squished, and  I was just got happy how it looked.

For more info visit www.thecraftypickle.com


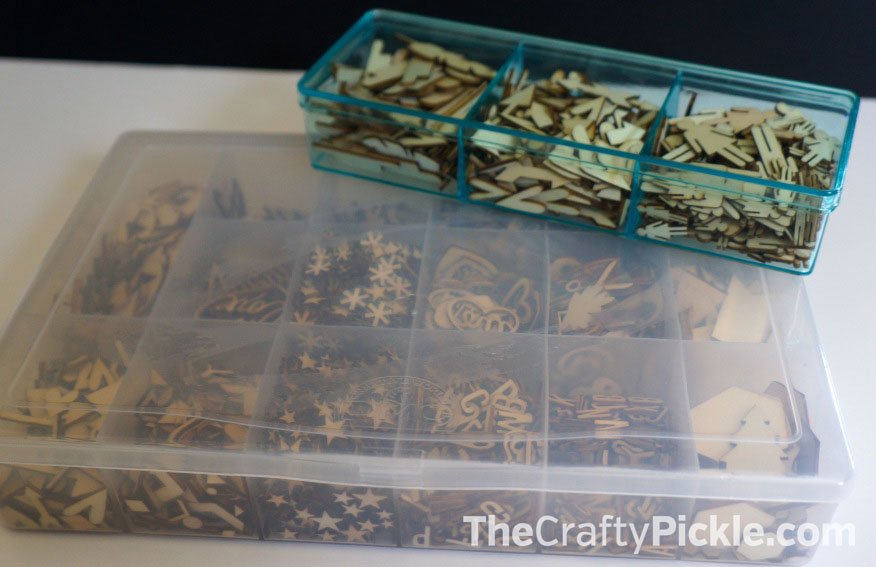
And here is my after. I was able to fit a few different designs per box as they hold quite a bit, I put like items together. I still have some growing room for more as well.

For more info visit www.thecraftypickle.com


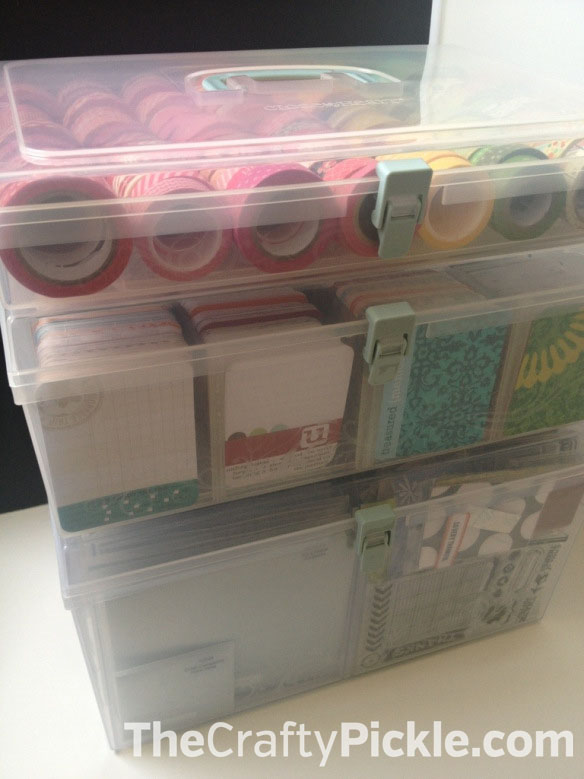
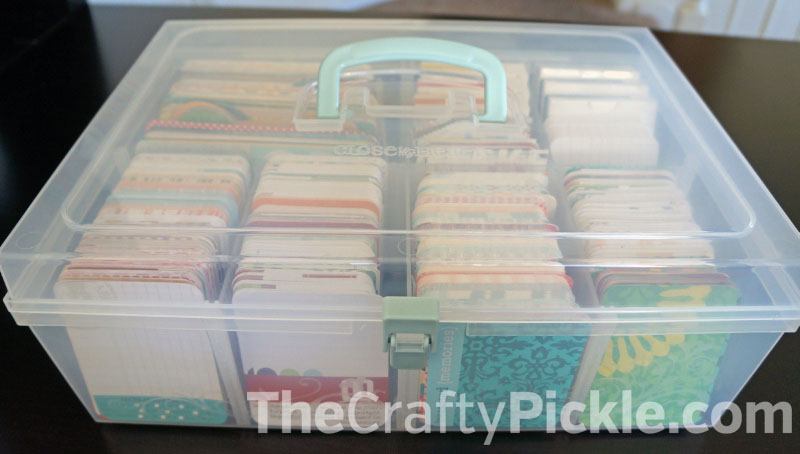
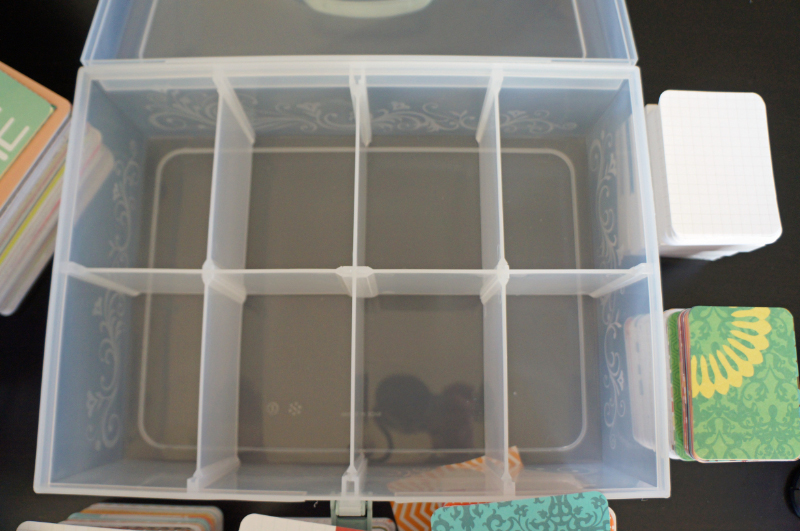
What you see here is the Close To My Heart Small organizer, The foam insert, and 4 sets of the craft boxes to go inside.  I love how I can take out the box I want to work with and not have the entire thing on my desk.

For more info visit www.thecraftypickle.com


Adorable right? So then once I completed this I thought of other things I could organize in the same fashion…. Buttons, Brads, Little die cuts, Flair, a little mix of everything in one box to carry ALL your embellishments. Of course I only had one more case and my sequins collection has started to get out of hand so you can guess what I did…

For more info visit www.thecraftypickle.com


For more info visit www.thecraftypickle.com or www.thecraftypickle.ctmh.com


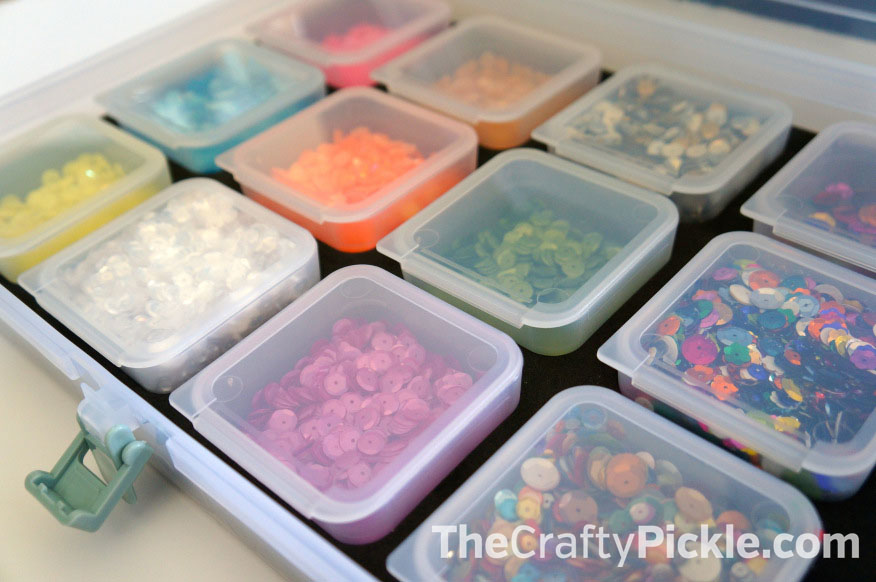
Same exact idea with the wood veneer. Now I only have to take the box that I will be working with to my table instead of having all of them out. I have all different sizes of sequins in the same box as it is so easy to poke around and find the one I want.

As soon as I get all of my supplies in order and my scrap space the way I want it, I will definitely do a little tour. I hope this helps you with ideas to sort your supplies. You can purchase all the CTMH container supplies I have shown today and in the past posts from your local consultant or directly from my website here. If you have any questions about the storage I used here or any of my other storage solutions please let me know. I am happy to help in any way I can, *** I am no longer an active CTMH consultant but keeping things at a hobbyist level. If I can help you get supplies you need just let me know.***

Happy Crafting!

The quest for the perfect white pen.

I think every scrapbooker, mixed media artist, carmaker,and paper crafter has asked the question, “What is the best white pen out on the market?”. I really think it depends on the user. Some prefer bold lines while others want fine polished lines. I thought I would do a little experiment for those of you out there that are shopping for a good white pen. My hope is to save you from making a bad purchase and wasting your money and directing you to a white pen that you love.

Lets start out with the pens that in my opinion are junk for a paper crafter

20130412-175534.jpg

These three pens didn’t even show up on black cardstock at all. The sharpie is oil based which is why I gave a thumbs down, their water based paint markers are some of my favorites.

20130412-175308.jpg

The first set of pens I would consider for detail work and journaling. I have found that I reach for my signo and my extra fine tip sharpie the most. The soufflé pen has a cool dimensional feel to it once dried. The distress marker and zig chalk writer would be a nice option if you are doing a chalkboard kind of effect.

20130412-175319.jpg

The second set here is more bold and I think better for large lettering or white ink needs on a larger scale. The Elmer’s painters marker was a little iffy for me. Came out kind of watery as took longer to dry. The galaxy marker is just okay as I felt it wasn’t sharp enough in the end

20130412-175339.jpg20130412-175402.jpg

So there you have it. I am sure there are white pens out there that I haven’t tried. If you have a pen you LOVE and it isn’t mentioned here I would love to hear about it! I hope this helps you decide what the best white pen is for your crafty projects.

Happy crafting!

Project Life: Week 8

For this week’s PL spread I tried to stick to just the Studio Calico Feb. Project Life kit however a few pieces of the Doodlebug papers from their “Take Note” collection sneaked their way into my album. I couldn’t help myself, I love those bright colors and they were prefect for my middle son’s birthday! I can’t believe he’s 13 already *Sad Face*

week 8week 8 side 1

See what I mean, Bright and cheery and FUN! I got the 6×6 paper pad from TwoPeasInABucket

week 8 2This card came from the Studio Calico PL Feb kit, I was going to use it for week 7 but it was a bit too dark for the layout I had. I like the contrast of the dark woodgrain to the bright color around the title card. I stamped the “happy birthday” phrase as well as the dates in CTMH “White Daisy” ink. This was my first time using this particular white ink pad and I was really pleased, Going to have to try it on some chalkboard paper next I think!

week 8 1

I had a few little photos that I wanted to include but did not want them to take center stage of my layout. I used my “PicFrame” app on my iPhone to create this little collage of photos then numbered them using the Sn@p sticker letters in aqua. I stamped the numbers and wrote in the description of each photo. Short and sweet. I am not fond of my handwriting but I do like that it is fast and easy and I had too many weeks to catch up on to spend time fiddling with the computer.

week 8 side 2To write on my photos I use a slick writer. I LOVE these pens and recommend any project lifer have this in her toolbox. I used the black pen here but the Amy Tangerine color slick writers are so pretty as well.

week 8 3

Does he look sick to you? Me neither! I don’t get many photos of my teenagers so this one was definitely going in the book! Again, I used the slick writer fine point on this photo as well.

week 8 5

I am in love with cluster embellishing lately. Its so much fun to dig around in my little bowl of snippets and whatnots to put together an adorable card.

week 8 6

You can probably tell how much I love little sticker alphas throughout this layout. All the sticker letters used are exclusive from studio calico kits over the last three months. The little derby car is a download from the silhouette store.

So there is week 8 all wrapped up! I am pretty pleased with how it turned out. Week 9 and 10 coming soon!

Happy Crafting!

Project life catch up!

So I was doing pretty darn good keeping up for the first 6 weeks, but then life started picking up speed and before I knew it I was 4 weeks behind. I haven’t really been stressed out about it because I keep pretty good notes and take lots of photos (mostly on my iPhone) and I use an app called project 365 pro. Its super simple, sends me a reminder to import or take a photo daily and because of its simplicity I have been able to stick with it. I also have a grid card in my project life album for every week and every so often I will jot a note on the grid card so when I go to complete the layout it jogs my memory.

This past week or so I have been able to catch up though week 11, with week 12 almost complete. I thought I would share my week 7 with you today, Valentines week was a lot of fun and very busy for us.

week 7

This was the first week I used any type of insert and It worked out perfect. I love the Becky Higgins envelope inserts. worked perfect for a valentine card my husband gave to me. I used a piece of 6×6 patterned paper in the back

week 7 9week 7 8

week7 2week 7 3week 7 10  I am in love with those little enamel dots! They are so much fun and add a nice texture to the layout. Clustering little embellishments has also been my new fun thing.

week 7 4

This week we ended up getting a new washer and dryer (our washer and dryer both died within a week of each other) they were MUCH bigger than our old ones and for a large family this is a very good thing! I had one more picture that I wanted to include but no room and It seemed silly to use an insert for just one photo. I had a package of CTMH Flip flaps that I had never used and thought I would give it a try. I saw how some of Becky Higgins design team members used flip up page protectors in their albums last year and always thought it was adorable. I stapled a little tab to the inside edge of the flap that says OPEN.

week 7 7

I used another card from my Studio Calico kit behind the photo on the front so that the back of the photo wouldn’t show. After trying this out I definitely became hooked on these cute little 4×6 page protectors. You simply remove the paper covering the adhesive strip and line it up with your page protector. These little cuties come in a pack of 15 for $3.95, a total deal if you ask me. They also have other sizes, I just found that this one works best for project life. If you want to see the CTMH 4×6 flip flaps click HERE.

So thats my week 7 spread! Be sure to check back as I will be showing my album weeks 8 – 11 throughout the week!

Happy Crafting!

I know, I’m at it again…..

I PROMISE this week I will be posting a few weeks worth of my Project life spreads (I am really excited to share them with you too) but for today I am doing a product spotlight for the Close To My Heart Large organizer.

Z1834

You have seen my posts on how the medium organizer is PERFECT for project life card organization (if you haven’t  check out my past post I am still giving away a set of organizing tabs for every medium case ordered until the 19th). You also may of seen my Washi Tape organizing solution using the CTMH Small organizer (best solution I have found that works really well for my tape obsession collection) But now I have to share an idea that I discovered totally by accident. It’s kind of a funny story…. So I am a fairly new consultant for CTMH and during my first month as a consultant I sold some cases for project life organization via my website ( http://thecraftypickle.ctmh.com). I saw only the large and the small on the website so I assumed the case I had for my cards was the large. So my lovely customers ordered the cases and while they were in route to them I discovered that the medium cases were the ones they wanted and they were out of stock *OH NO* I felt so completely horrible that I made such a mistake. I contacted these kind ladies and explained my situation and told them rather than have them go through the hassle of shipping back to CTMH waiting on a refund or an exchange and having to absorb MORE shipping charges that I would just purchase the cases from them and refund all shipping fees. This left me with two lovely large organizers. I figured that I would just use them for stamp storage. Goodness knows I need to get my stamps under control. While this worked out pretty well for my stamps (Its actually very ideal for CTMH stamps, they fit PERFECTLY) its not quite what I wanted. I am still contemplating using Kinsey Wilson’s stamp organization system she did for hers (check it out here: http://kinseygirl.typepad.com/my_weblog/2012/09/acrylic-stamp-storage.html ) So I was brainstorming how to use them beings that I am still working on reorganizing my scrapbook loft. I ended up finding the perfect solution and goes perfectly with the other organizers as I use them all for Project life. my 6×6 paper pads! Take a look!

For more info visit www.thecraftypickle.com or www.thecraftypickle.ctmh.com


I am still not completely happy with the dividers I am using, Going to play around with the cameo and see if I can make something prettier but for now these get the job done. I have them organized by manufacturer except for christmas themed ones as I had so many of those. You could be extra fancy and use the dividers made to fit this case by CTMH (they are quite pretty) I Just haven’t got my hands on them yet.

Z1839

These Large organizers stack with the medium and small organizers perfectly, they have a little grove in them so they fit without sliding all over the place. I have mine stacked in a trio when I am not popping the medium one in my ikea cart for use. (they all fit in the popular Ikea RÅSKOG cart as well, I will post photos of this on my instagram)

For more info visit www.thecraftypickle.com or www.thecraftypickle.ctmh.com


For more info visit www.thecraftypickle.com or www.thecraftypickle.ctmh.com

The large organizers just got back in stock and I am so excited because some of you have been waiting for yours. I hope this 6×6 paper storage idea helps you gain control of your cute little paper pads like it did mine. If you would like to order one please contact your CTMH consultant or order from me here: http://thecraftypickle.ctmh.com/Retail/Products.aspx?CatalogID=164 (this link takes you directly to the organizers)

Happy Crafting (and organizing)

Finally found a Washi storage system that works!

So I have been on the hunt for a storage system for all the Washi tape I have accumulated. I started out in one drawer and that worked for a while but I quickly outgrew that. Washi was everywhere! You might remember my post a few weeks ago about my project life card storage using the Close To My Heart Medium organizer cases. Well those worked out so well that I got a couple of large organizers for my stamps. Those cases stacked up perfectly which made me think of the small organizer and my washi dilemma. I wasn’t too sure if my washi would fit or the rolls would be a little too big so I took a chance and ordered just one of the cases. I was so excited everything fit perfectly with a little room to spare height wise.

For more info visit www.thecraftypickle.com or www.thecraftypickle.ctmh.com


20130319-084553.jpg Did I mention that these cases stack perfectly together? The only difference in the dimentions is the height of the cases.

For more info visit www.thecraftypickle.com or www.thecraftypickle.ctmh.com

20130319-084800.jpg


So now that I found that these cases work I am going to order a couple more to fit the rest of my collection (yes that was only half of my washi) in the case that I pictured I have a total of 116 rolls, some are wide washi rolls so it could fit more or less depending on the size of your washi tape. I also plan on getting one more along with the insert and small boxes so that I can organize my smaller embellishments like wood veneer.

If you would like to see these cases with the washi a little closer check out THIS youtube video.

To check out the organizers I have described and see more, check out my CTMH website at http://www.thecraftypickle.ctmh.com or click the blinkie on the right hand side of my page (under my photo)

Happy Crafting!

Project life storage discovery!!!

* edited update: If you would like to see a video of how I am currently organizing my Project life cards and monthly Subscriptions please click HERE to be directed to my most current card organizing post.*

Ok, I am really excited to share, this might be old news to some people but for me it was brilliant!!! Close to my heart, a stamping/scrapbooking company, has this medium storage box meant for their acrylic stamps (the stamps are equally as awesome btw) but, it just so happens that is is the perfect storage for ALL my project life cards! Check it out!

ctmh1-1_edited-1

My friends, what you see is my becky higgins card sets (seafoam, cobalt, clementine, turquoise  cherry, and amber collections (aprox. 3/4 to 1/2 of each kit) both the complete Bridgeport and the Mayfield mini kits. I also have the Jan. studio calico project life kit, homemade cards, and blank, and grid cards ALL IN ONE BOX!!! I still have room for more cards in this box as well.

ctmh4-1

This is what it looks like empty. the middle divider is something that needs to stay put unless your taking out ALL the dividers… but the little ones can be removed to accommodate the larger 4×6 cards. See below.

ctmh3-1

Pretty neat huh?!?! I am sure that I will need an additional box once the new spring kits come out and I accumulate more Studio Calico cards. I do plan on putting divider cards for the card sections to mark what edition is what. Its also a pretty box. I like the light green handle and closure. and it has pretty etched scroll work around which you can see a bit below.

ctmh5-1

So…… I got so excited about these boxes, and then the adorable stamps that I can use in project life (love acrylic stamps!) that I became a consultant! If you would like to purchase one you can buy direct from my CTMH website which is: http://thecraftypickle.ctmh.com/

To find the box the path is Shop>Accessories>Organization and then you will find the Medium organizer at the bottom of that page. *edited 2/28 they are IN STOCK!*

If you have any questions at all please let me know! I am so excited to share this with all of you!

Happy Organizing!

TheCraftyPickle.com