Die-Namites Premier Blog Hop!

Welcome to the “Premiere” Die~Namites Dies Blog Hop.

Die-namites Blog Hop

We are so happy that you have chosen to join us!!!

Our blog hop will be from August 9th ~ August 11th.

Along the way, you will see creations by our Die~Namite Design Team using the LATEST release of Die~Namites Dies.

The Die~Namites Design Team Members will be sharing with you

how they made their pieces through video and picture tutorials.

Each of the Die~Namites Design Team Members

will have a secret word…..on their blogs.

Collect all the words, make sure to leave a little love,

to find the secret phrase this will give you one entry into our prize drawing. You will receive additional entries for Liking us on Facebook Signing up for Email Notifications.

 We will be awarding one Grand Prize of a $50 Gift Certificate to Die~Namites Dies and 5 ~ $10 Gift Certificates to Die~Namites Dies.

So enough about the logistics…. LET THE HOP BEGIN….

If you have arrived here from Lisa Tottle’s blog you are in the right place. If you have just arrived in the midst of our Blog Hop please head to the Die~Namites Blog.

Hope you enjoy the “Premiere” Die~Namites Dies Blog Hop!!!

Today I am sharing a quick Project Life weekly title card tutorial using the Flowering Branch Die as well as showing a few of the NEW Die-namites dies! Be sure you collect my secret word at the bottom of my post and leave a comment, I would also love if you would follow TheCraftyPickle as well so I can share even more Die-namite inspiration with you!

My secret word is:  IN

Thank you so much for stopping by TheCraftyPickle!

TheCraftyPickle.com

Now head on over to Dunja Dücker’s blog to continue the “Premiere” Die~Namites Blog Hop!!

Whimsical Twist Blog Hop! Water Park FUN!

Welcome to the Whimsical Twist Blog Hop!Welcome to Whimsical Twist’s first challenge! We thought it would be a lot of fun to also have a Blog Hop to celebrate our first challenge! How does that sound?

During the Hop you will be visiting blogs from several of our fabulous design team members. You will find so much inspiration on the way, that your head might explode!

The hop will start at the Whimsical Twist blog and end at Lisa Wilkinson’s blog. If you are just joining in, be sure to go to the Whimsical Twist blog to start. If you get lost along the way, just look at the list below to get you hopping in the right direction.

And you can’t have a Blog Hop without giveaways and this one is no different! In order to be entered into the giveaways, you will need to be sure you leave a comment on each blog on the hop. Whimsical Twist will also be giving away a $15 gift certificate to the shop to one random hopper! We will be announcing the winners of our giveaways on August 12th, so be sure to watch for the announcements.

Without further ado, let’s get this celebration started!

Our first challenge is inspired by summer! The photo below is our inspiration / mood board

Our inspiration board WhimsicalTwist.com

I knew the perfect photos I wanted to work with for this challenge. These are some water park photos I came across a few days ago with my boys, 4 years ago. It’s hard to believe these boys are going to be in 8th grade and a freshman in high school in just a couple of weeks!

Water Park Layout @thecraftypickle.com

I used papers from Elle’s Studio and Simple Stories for this layout. I added in some different washi tapes for the border on the side of the photos to tuck into.

Water Park Layout @TheCraftyPickle.com

Water Park Layout @TheCraftyPickle.com

All of the sticker letters and accent stickers are from Simple Stories as well. I added some Liquid Glass from CTMH for the letters spelling WATER to give it that wet look.

Water Park Layout @TheCraftyPickle.com

Water Park Layout @TheCraftyPickle.com

I misted the top left corner with Mister Huey’s in the color Desert over a mask and then I accented with some of the beautiful sequins you can find in the Whimsical Twist Shop. I also used a mask and some ink to create a bubble confetti background on the bottom using CTMH Lagoon ink and then layered with some of the same beautiful sequins from the shop. The two colors I used are Pineapple and Caribbean. I adore these beautiful sequins so much, I think I may even use them more than my enamel dots! To adhere the Sequins I used the same Liquid Glass that I used on the title letters.

Now for something a little fun! As I said before, you will see giveaways along your hop today. I am giving away a set of project life cards that I made especially for our giveaway! Below is a little peek at some of the cards included. I am also including a little bag of sequins, a sample of all the colors offered in the Whimsical Twist shop! All contained in this little 4×6 case perfect to use as a project life on the go or journaling kit for your purse! Make sure you comment on each of the blogs today in order for a chance to win!

Handmade Project Life Giveaway @TheCraftyPickle.comHandmade Project Life Giveaway @TheCraftyPickle.comHandmade Project Life Giveaway @TheCraftyPickle.com

Thank you so much for visiting my blog! You should have arrived from Ashley Hamm‘s blog and now you are heading to Charissa Miller‘s blog, but if you get lost along the way, here is the hopping order.

Lisa Lahiff 

Alexandra Polyzou  

Sandi Pressley 

Amanda Johnson

Ashley Hamm 

Taniesa Vlasak  (you are here)

Charissa Miller  

Kimmie Rishebarger 

Sharm Nidyanandan 

Laurie Danielle 

Lisa Wilkinson 

Happy Hopping!

TheCraftyPickle.com

Happy New Release Day!

Those of you that haven’t seen the new Close To My Heart products have got to stop whatever you’re doing and go look! So many beautiful new products I can’t even stand it! Here is a sneak peek of some of my favorite new releases from this new idea book/catalog:

This has to be my new favorite alpha stamp set! I love that it is sized to store with my other CTMH sets now too!

CTMH Framework alpha

Check out some of the adorable new sets!

CTMH Happy autumnCTMH CityscapeCTMH all the detailsCheck out one of the new mini stamps CTMH is offering for under $3!

CTMH Heartfelt birthday wish

For all you Cricut lovers out there, here is one of the amazing new cartridge packages!

CTMH artbooking

And a look at CTMH’s take on smash type of journaling/scrapbooking collection “My Crush”

My Crush favorites assortment

Wearable art? Yes, Please!

CTMH wearable art

And you all know how I love my CTMH Organization. Here are the two new small organizer foam inserts! One for daubers and one for the mini ink squares.

ctmh Daubers insertCTMH Ink insert

What would a new release day be without some sort of fun special to get you going! from now until Aug. 15th I am offering 10% off all orders! To receive the discount you must email your order to TaniesaVlasak@gmail.com along with your mailing address and email address you want a PayPal billing to be sent. You can view all the new products HERE or go to http://www.thecraftypickle.ctmh.com.

I hope you enjoy all of the new products as I have!

Happy Crafting!

Dress up your packages with die cut accents!

Hi Die-Namite fans!

Bringing you an idea today to step up your gift giving with one of my favorite Die-Namites die cut shapes, the Grassy Cattails.

I Love using solid color wrapping paper or in this case plain kraft mailing paper. This allows for the decorative card or tag to really shine. I decided to tie up my package with pretty pink ribbons and a tag created using the Grassy Cattails Die-namites Die.

I cut two of the shape out of kraft cardstock and then colored in with copic markers. I added a bit of glitter pen accent. I wanted the backing of the die cuts to be slightly transparent so I took white vellum and my copic markers, I colored a section of the velum with the green copic in two different shades for both.

I then attached the die cut shape on top of the velum using just a little bit of liquid adhesive. I cut around the shape which went really quick. I glued the die cuts and the flowers down with some glue dots and tied it up with some velvet ribbon to the package.

Wouldn’t you love to receive a gift like this? It’s such a simple yet stunning way to dress up your gifts. Surprise your next gift recipient with a die-namite wrapped gift!


Welcome to Christmas in July @TheCraftyPickle!!!

Hard to believe we are already in mid July! Where has the time gone? Before you know it the holidays will be upon us again so for today and the rest of this month I am going to have christmas themed posts for you all to inspire you to finish up your December Daily (or get started on your 2013 foundation pages), Start making those christmas cards so its not so chaotic come November, and perhaps a few gift ideas as well.

To kick off my Christmas in July I am joining up with a bunch of very talented ladies in a Christmas Blog Hop! If you are following the hop in order you just came from Margareta‘s blog!

Christmas In July Blog hop @thecraftypickle

Welcome to the Christmas in July Blog Hop, inspiring you to get out your christmas stash and use it before all the new collections are introduced this month at CHA! Join the fun and create something too, use the hashtag #scrapbookchristmas in twitter, facebook or instagram.

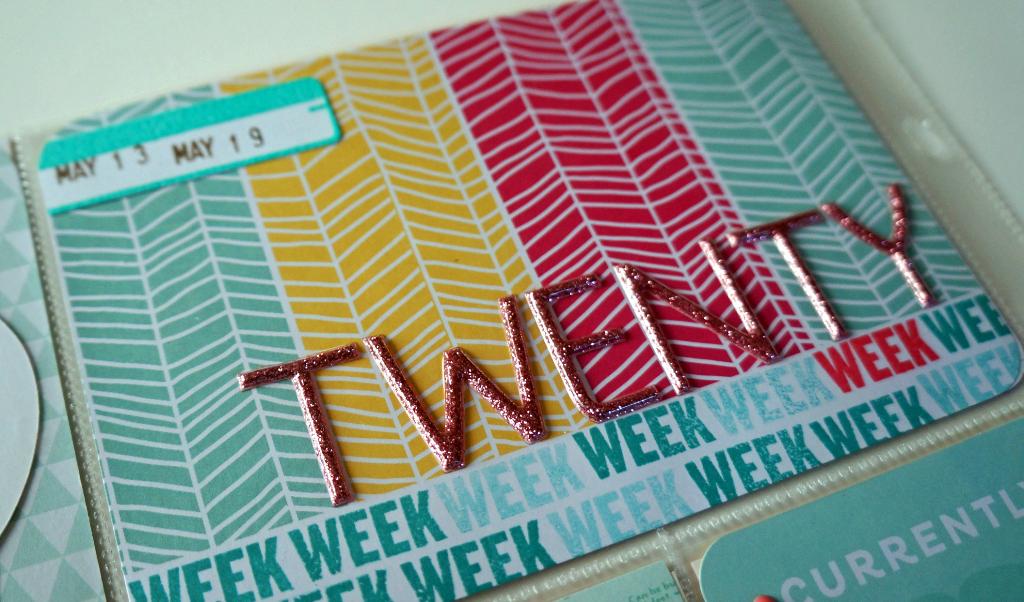
Now I have a confession. I started out last December extremely excited about December Daily! I got my album all prepped and ready and I even did pages for the first and the second! Then, I Just got busy and said “oh nooo problem, I will catch up this weekend” well you guessed it I was busy then too. Then I thought well I will just wait until after christmas is over and then knock the whole thing out the last week of December. Yeah…. Didn’t work so well. SO being very excited about all the new christmas product coming out I figured I better get a move on and get 2012 done so I can figure out my 2013 (I may change my format) The pages I am about to show you are Dec. 1 to Dec. 12 which I pretty much completed all yesterday afternoon (Procrastinators unite!) I Plan on showing you 13-25 at the end of this week or beginning of next week. I WILL finish this album!!!

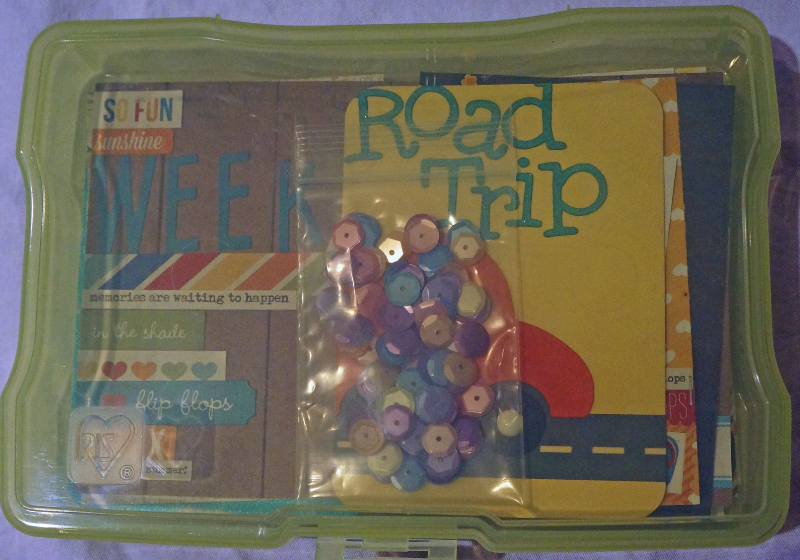
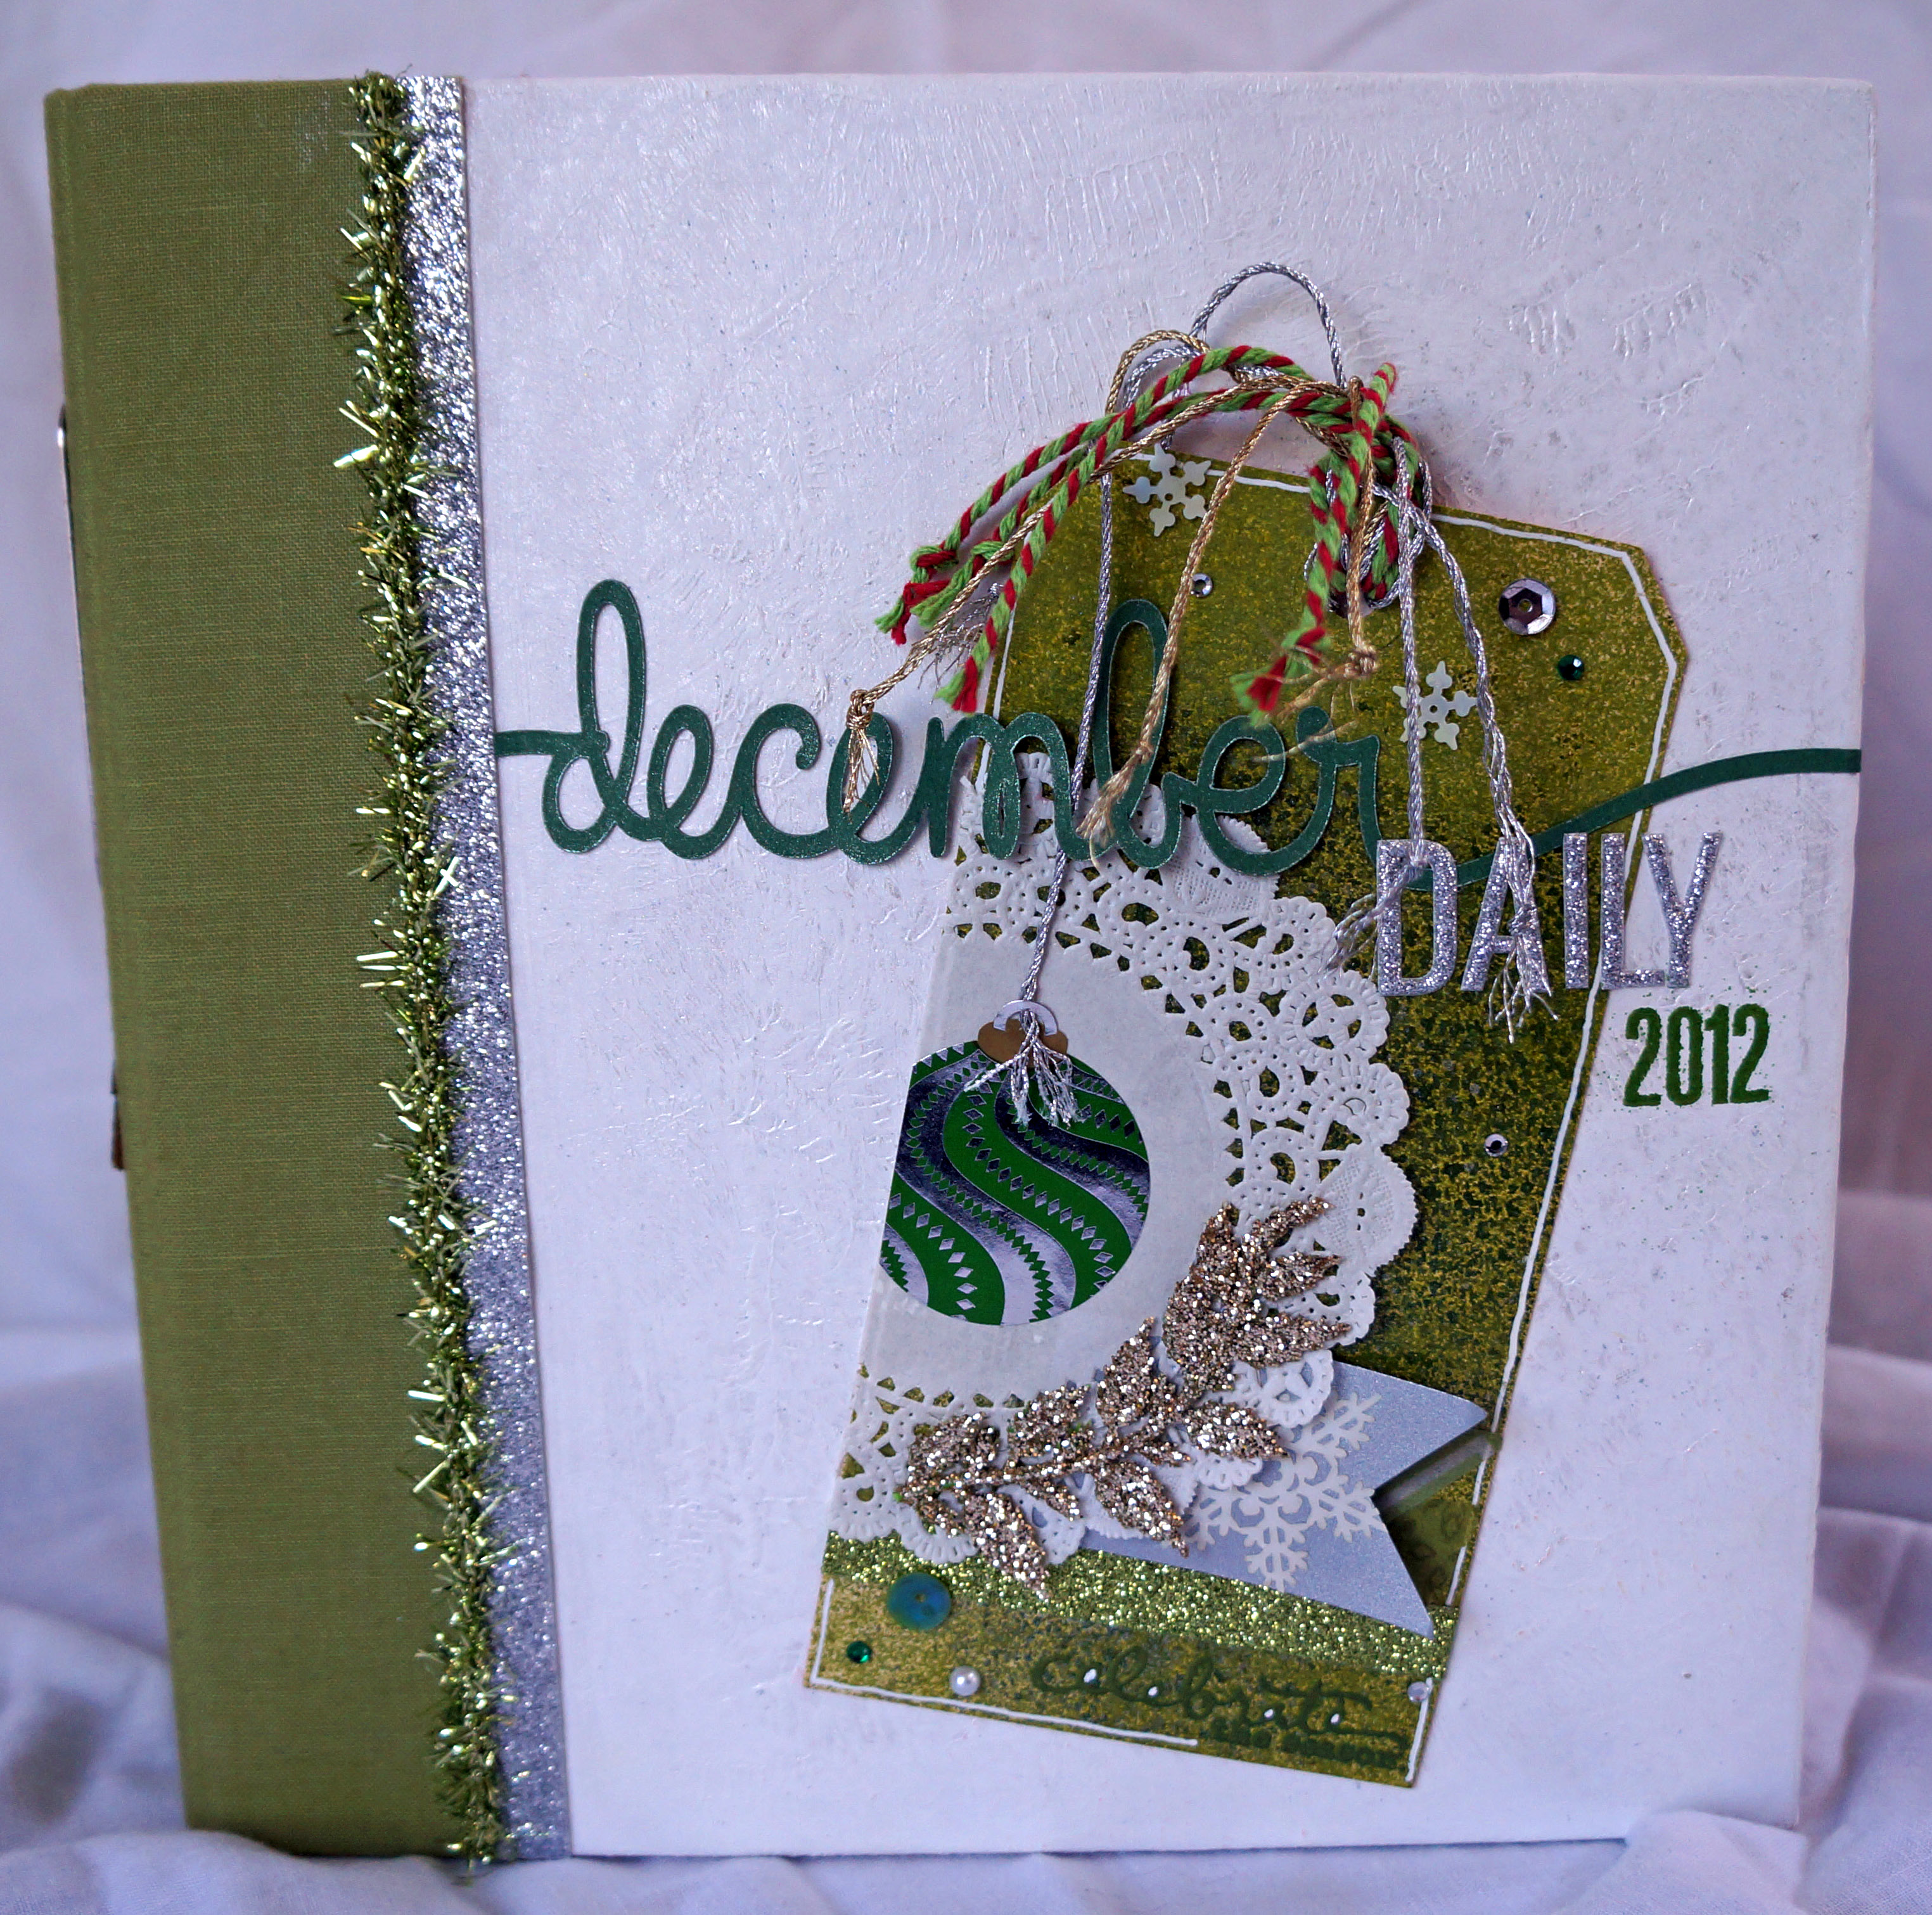
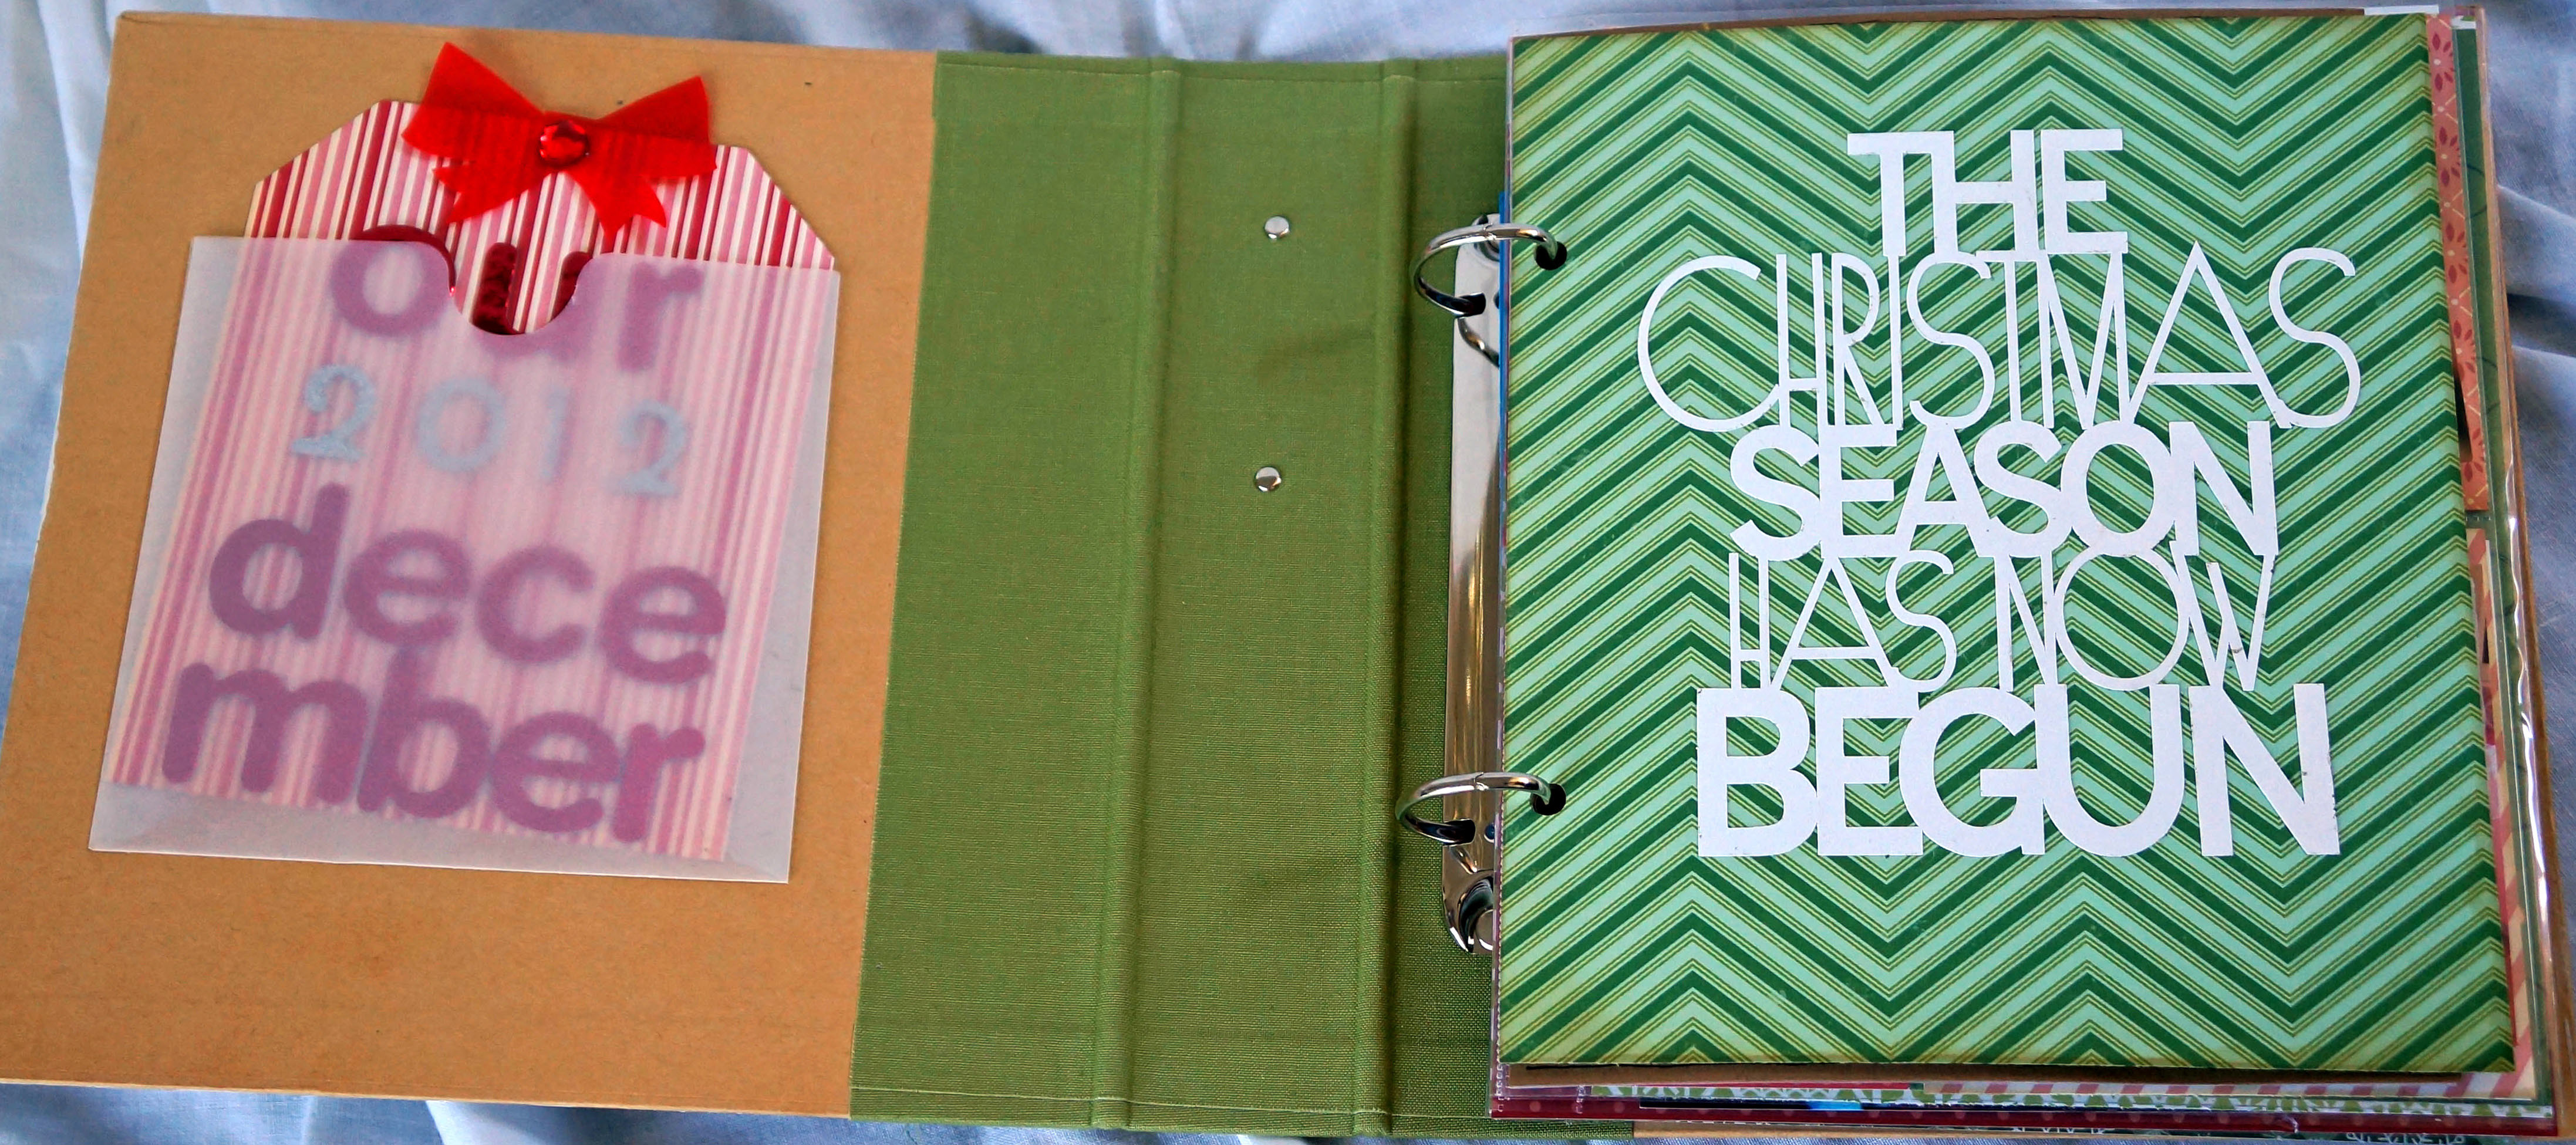
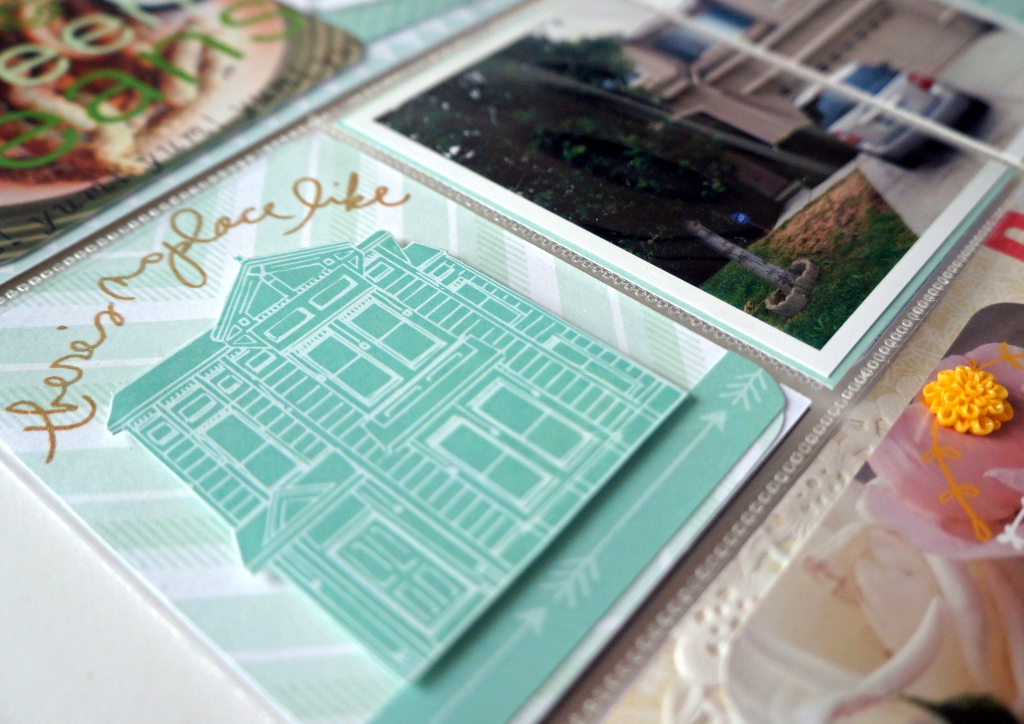
Here is a look at my album cover.

December Daily@thecraftypickle.com

I started with a Simple Stories SN@P album in green. I altered the cover with a few layers of gesso, with the last layer being one to just add some texture. I sprayed with Mister Huey’s Calico Shine on the top and added a embellished tag. The spine has the date and a cute wood veneer tree that I painted with some nail polish.

December Daily@thecraftypickle.com

I decided to only paint the front cover. The inside of the cover I attached a glassine envelope and added a little tag. Originally I was going to put a DVD of home movies here. I still might but this fills the spot for now. The die cut on the title page is from Lori Whitlock and paper is from October Afternoon.

December Daily@thecraftypickle.com

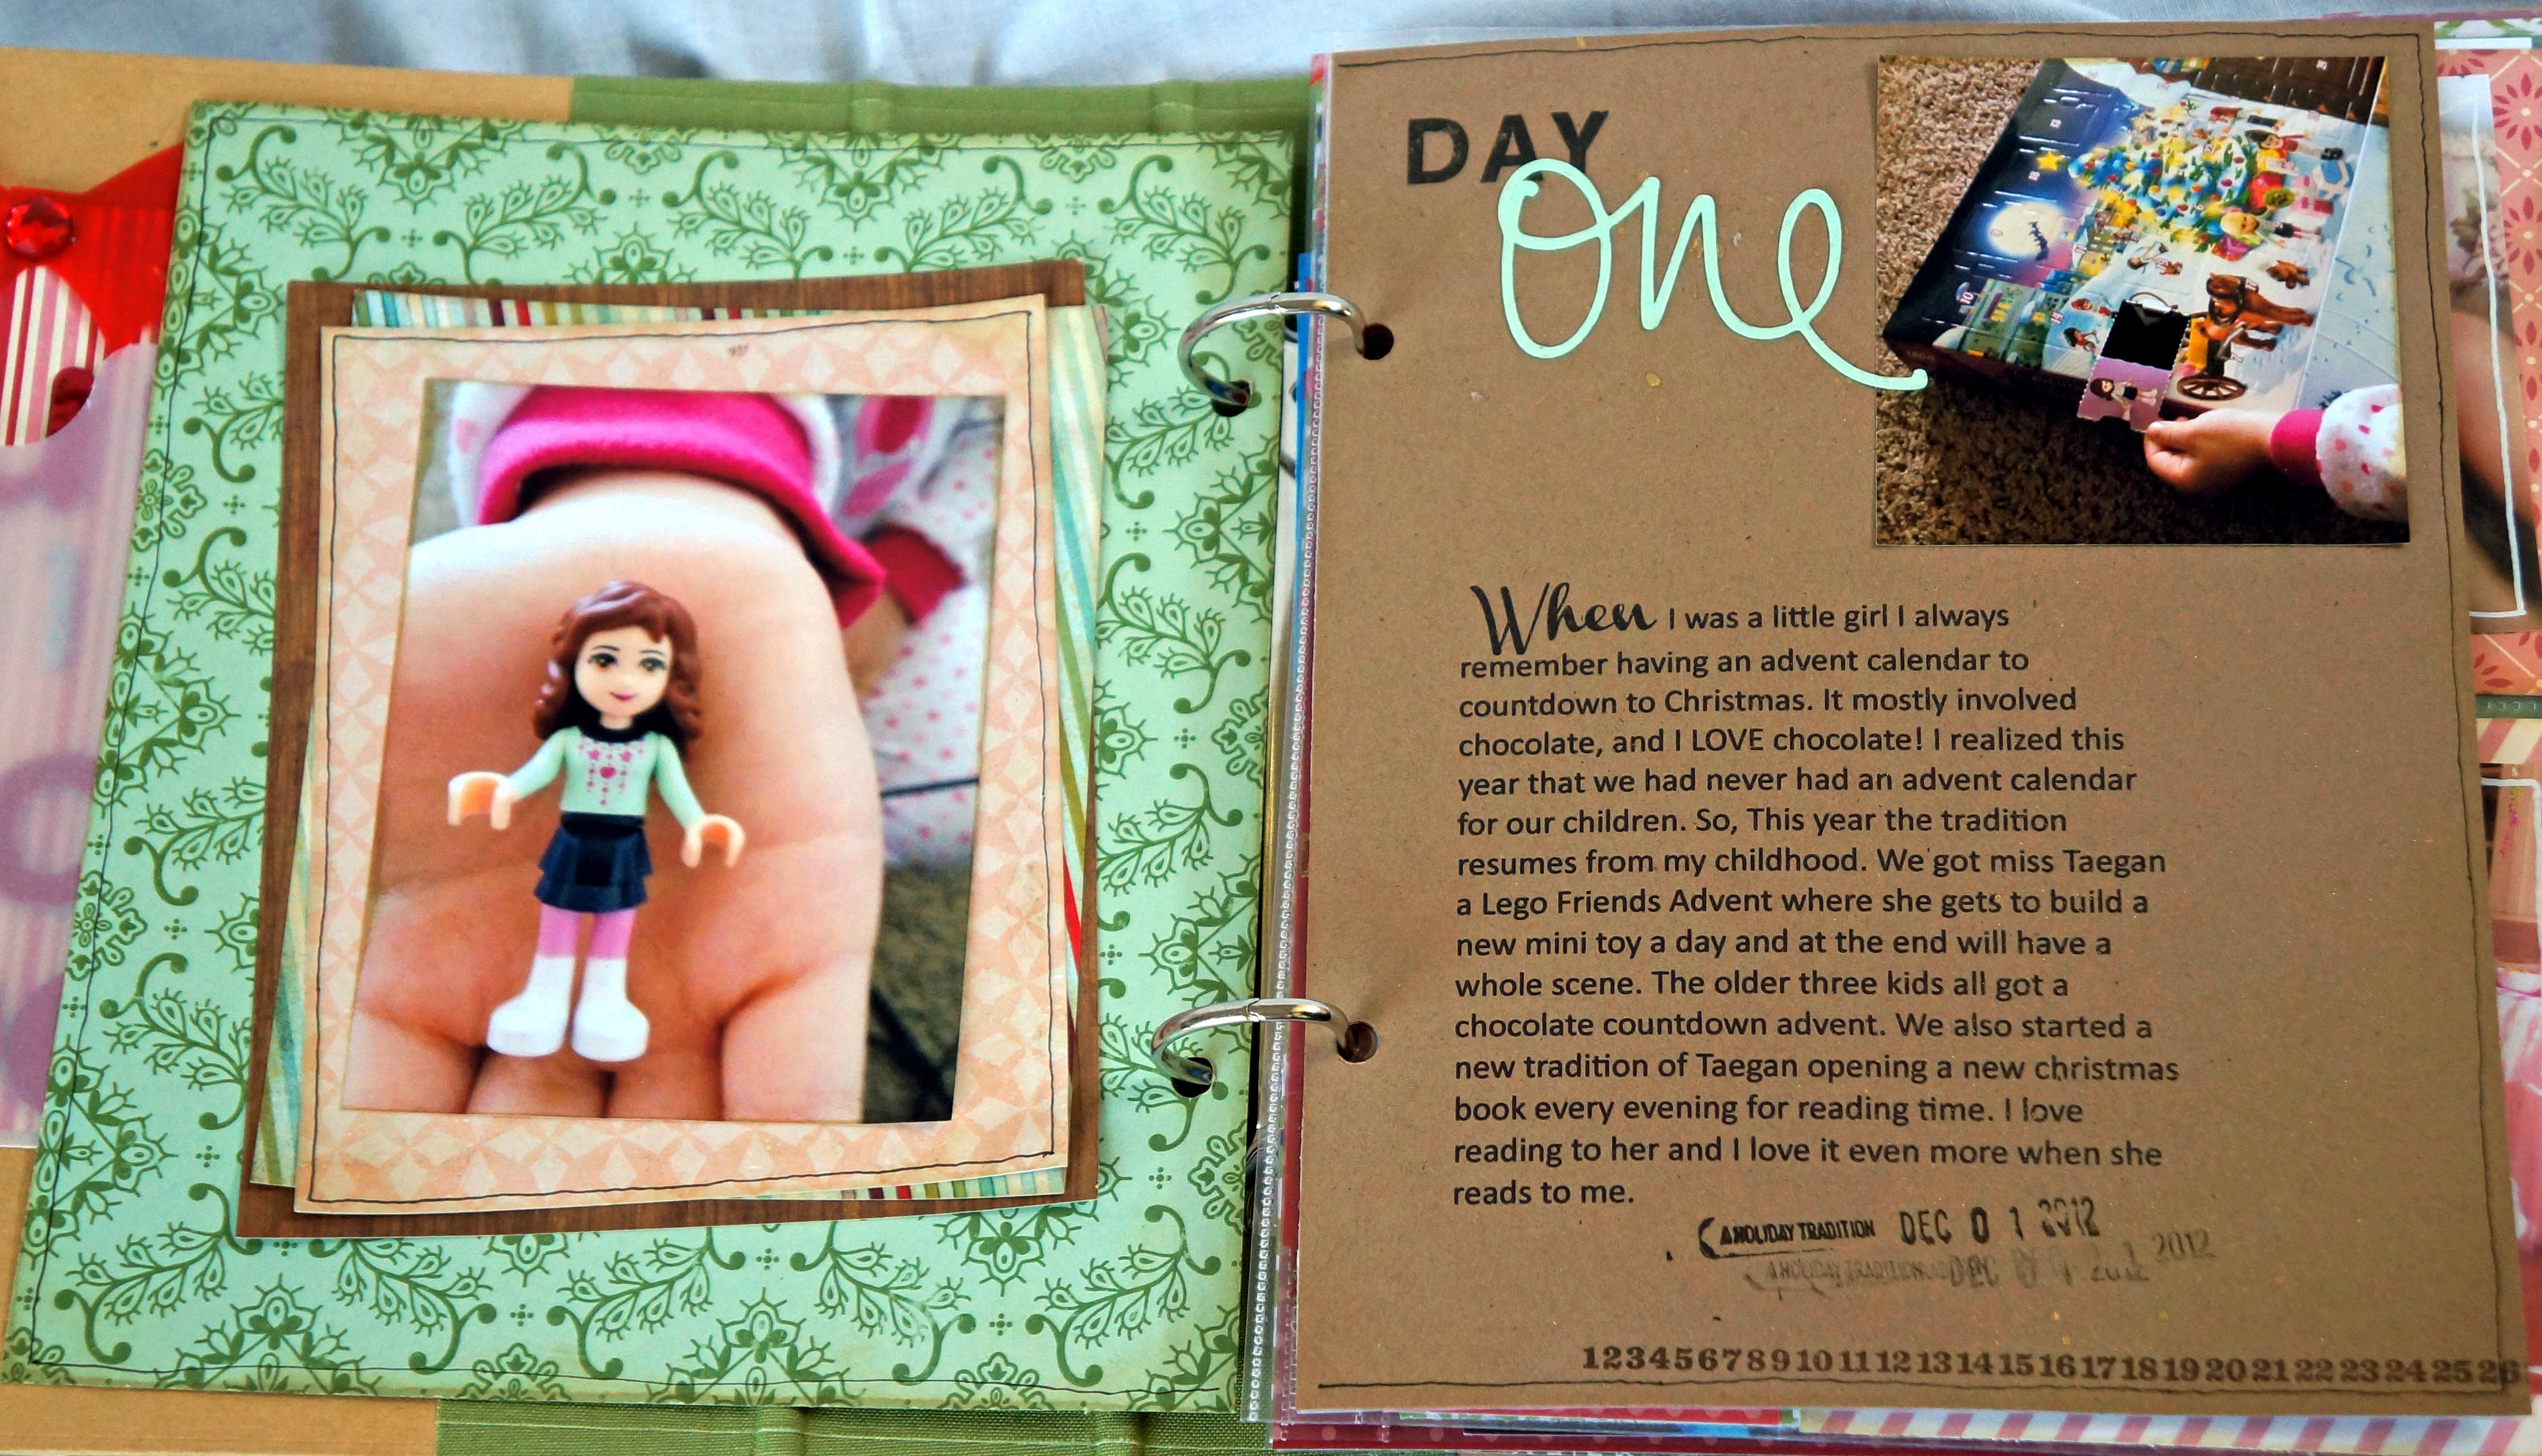
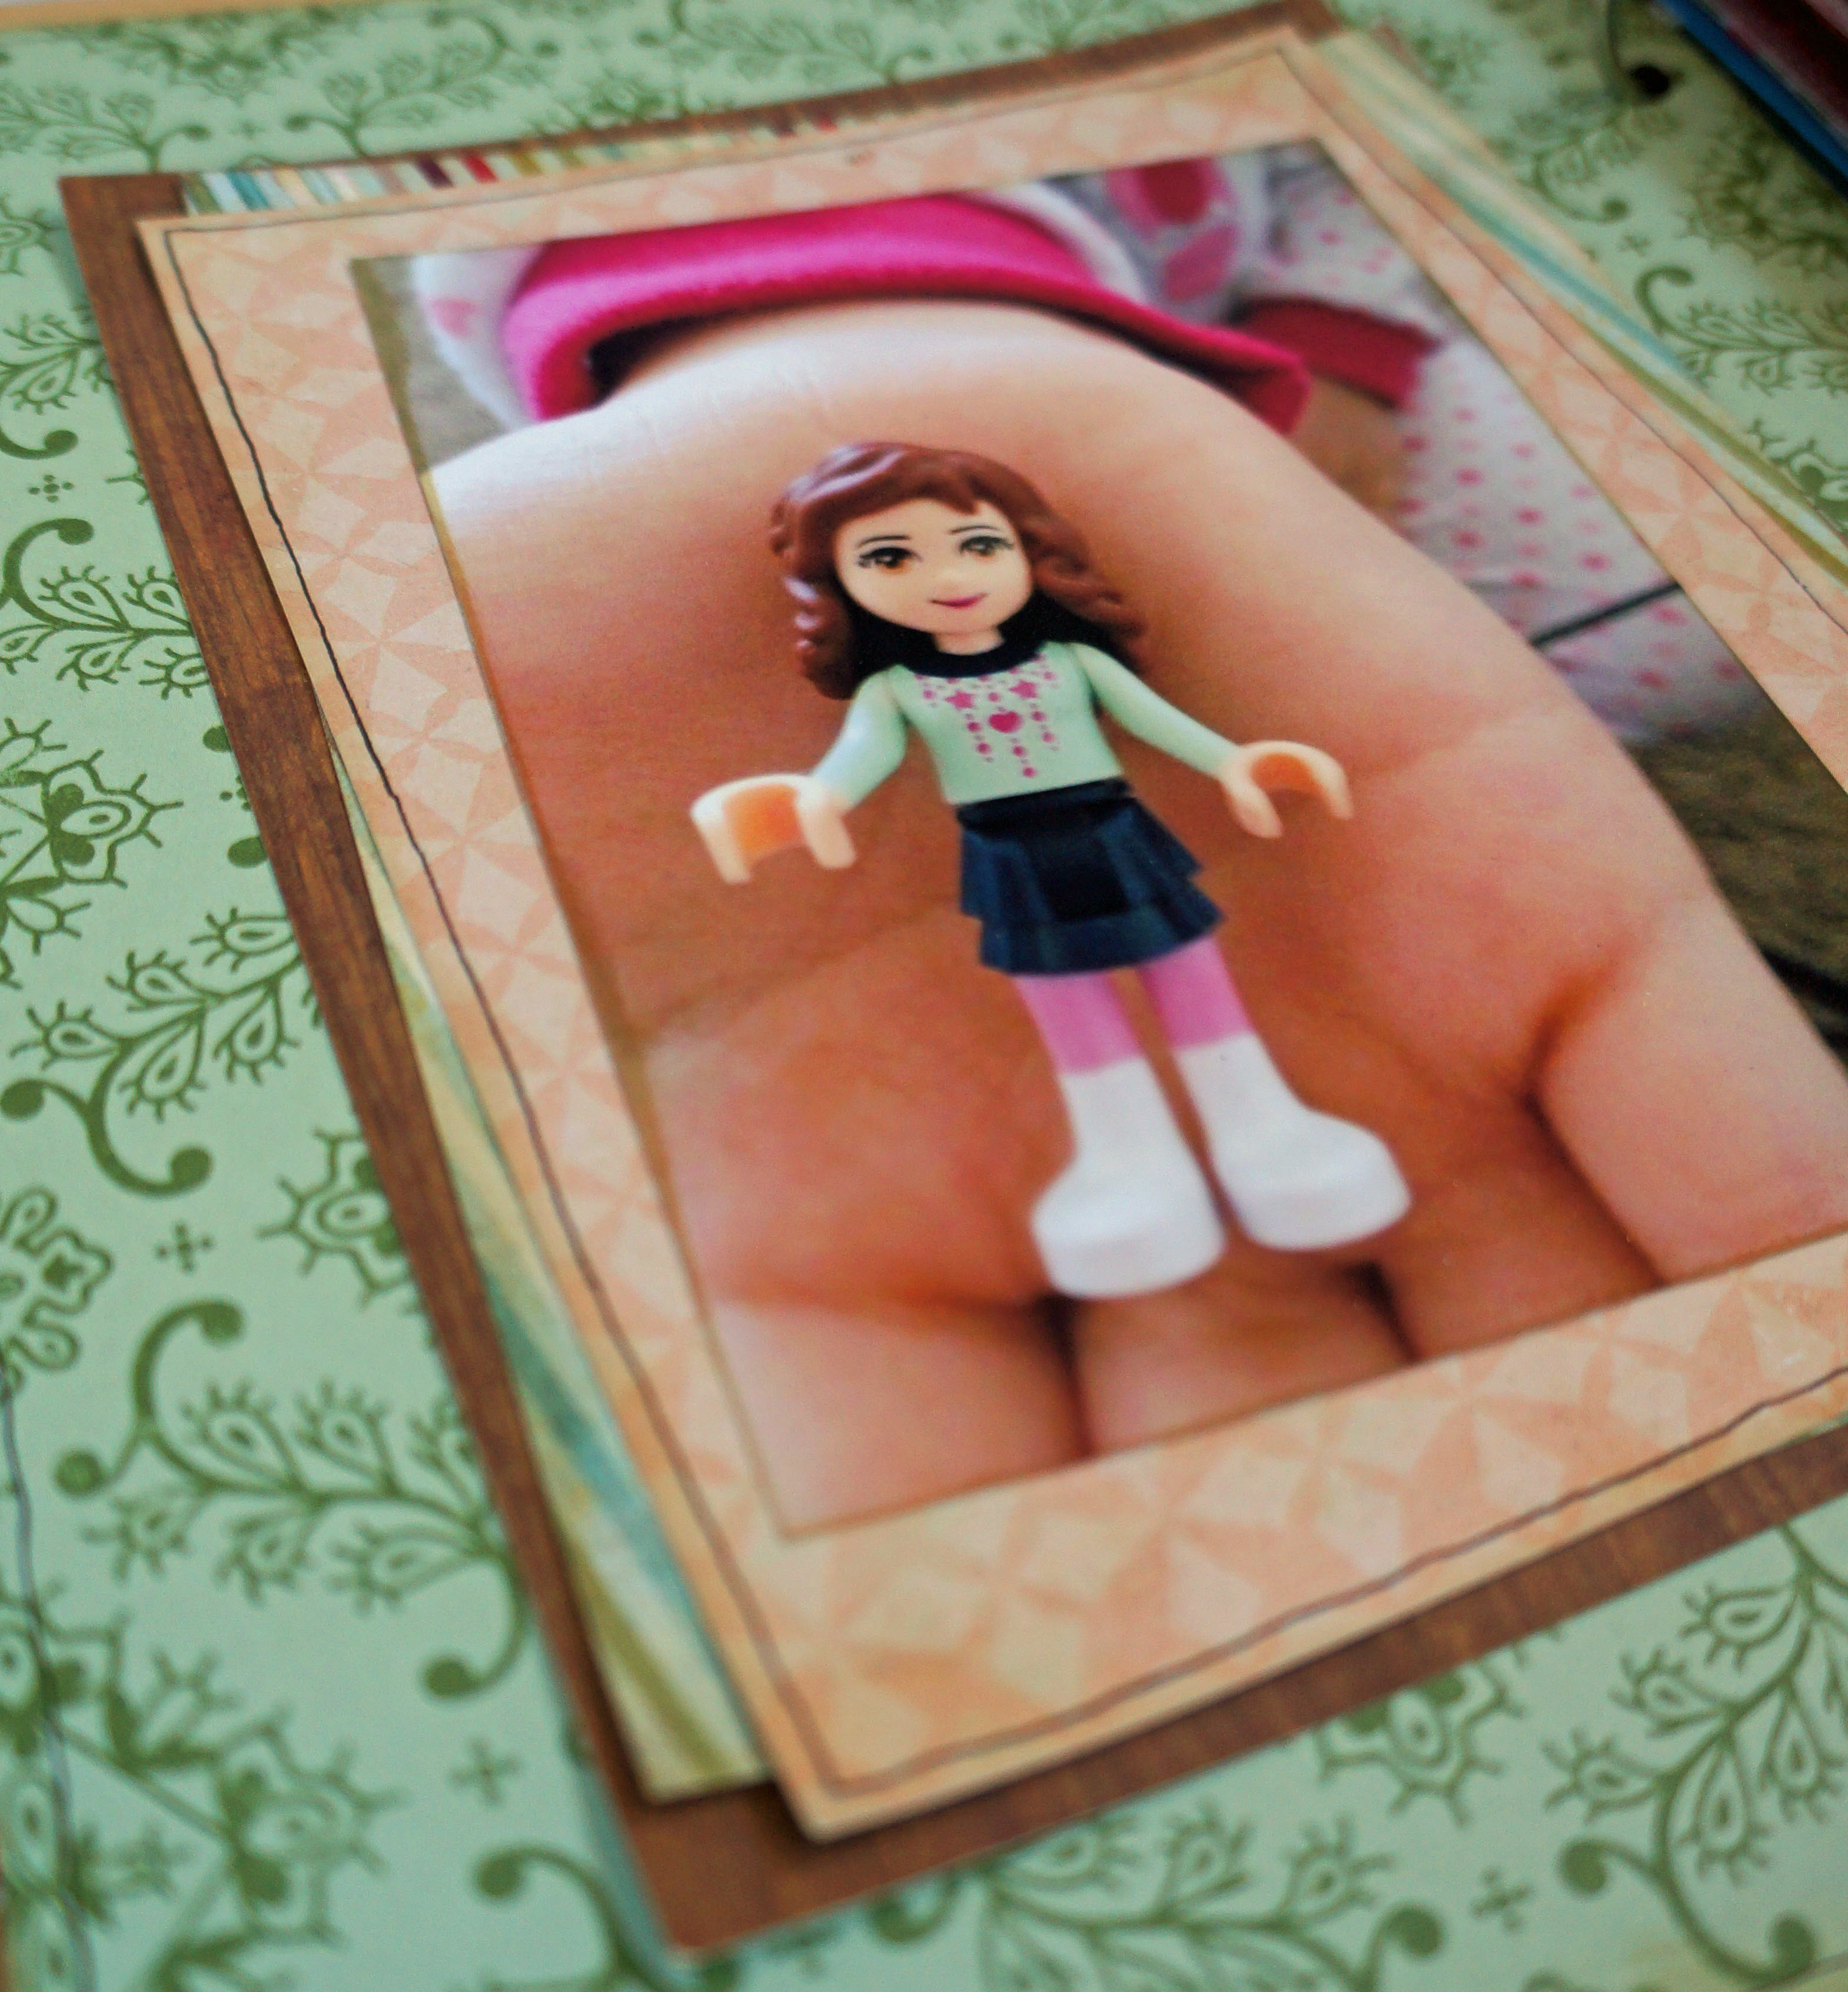
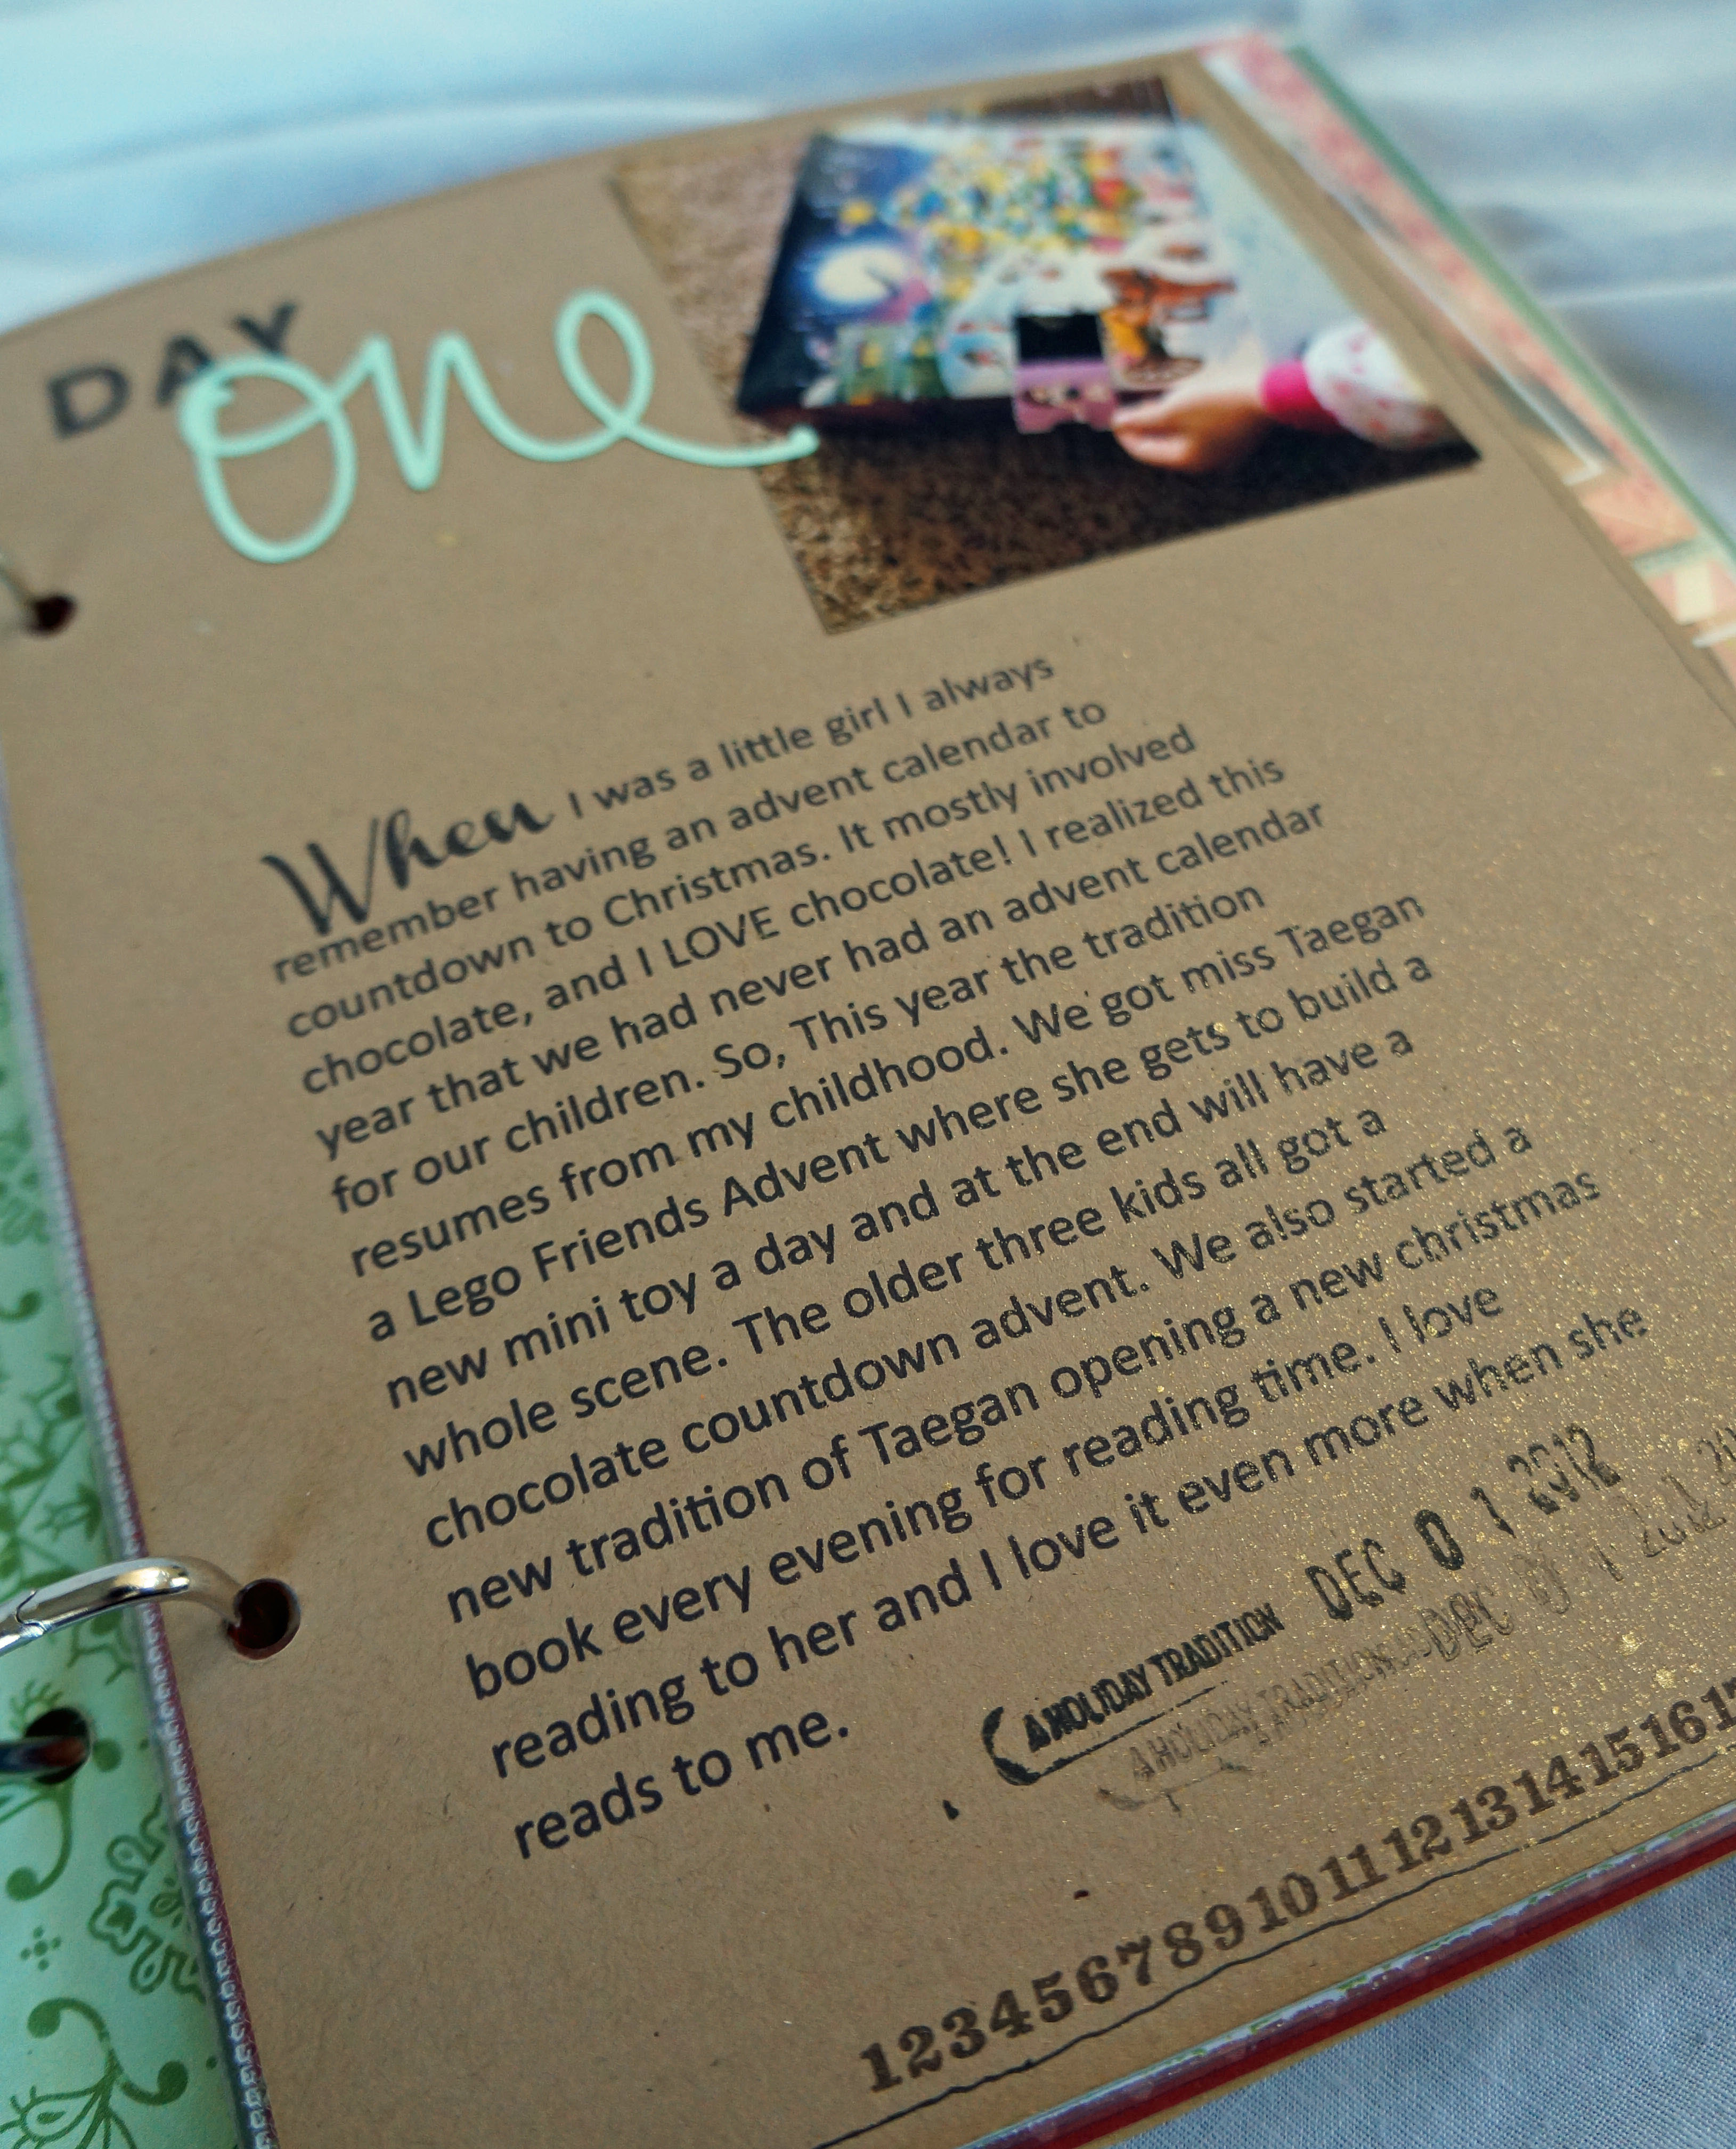
Day one: Lego advent! I loved advent calendars when I was a little girl so I got my own little girl one this year. She LOVED it. I especially love the picture of her holding the little lego doll, a reminder that her hands were this small once.

December Daily@thecraftypickle.comDecember Daily@thecraftypickle.comDecember Daily@thecraftypickle.com

Day number two we celebrated my niece’s 5th birthday. I used October Afternoon’s Cakewalk line in this two page spread. The photo of the two cousins giggling always makes me smile every time I see it.

December Daily@thecraftypickle.com

December Daily @ Thecraftypickle.comDecember Daily @ Thecraftypickle.com

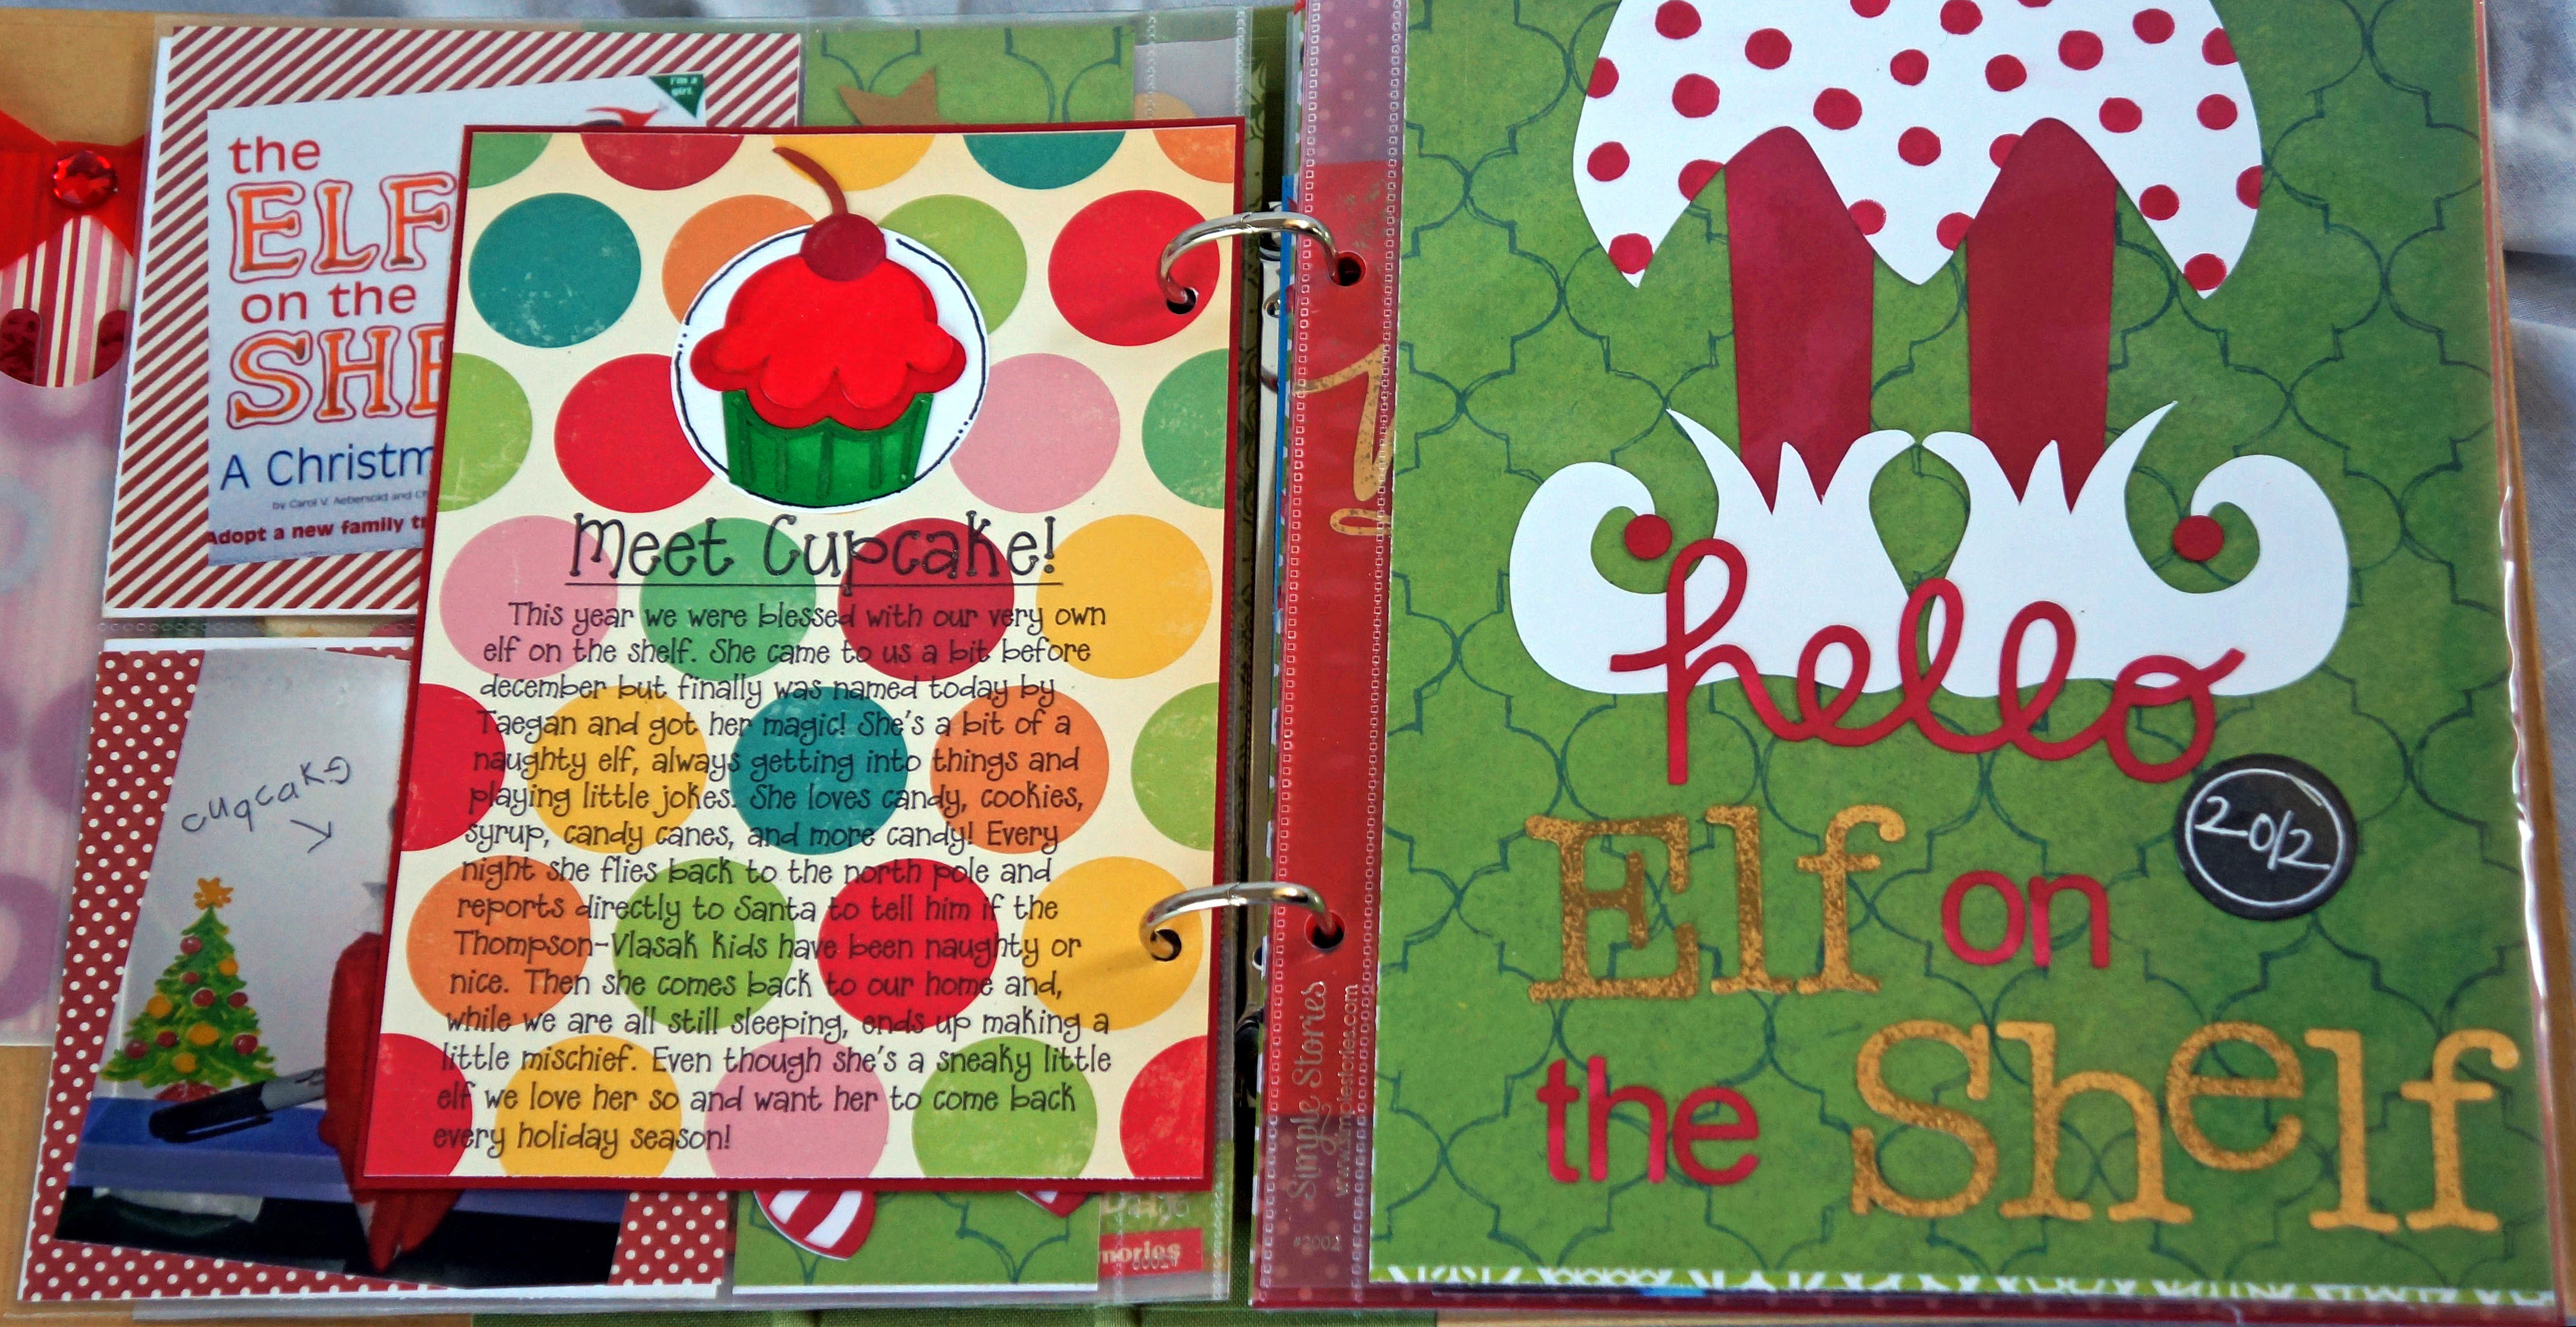
Day number three we finally got around to naming our Elf on the Shelf so she could get her magic! Cupcake it is. We had so much fun for our first year doing Elf on the Shelf!

December Daily @ Thecraftypickle.com

The letters that spell ELF and SHELF were cut out using the silhouette as well as lots of the other die cuts on this page and other pages within the album. What I did differently with these though is that I took a Brilliance Gold mini ink pad and dabbed it all over the letters, I let it dry for a little bit (it stays wet for quite some time) and then I took some gold ZING embossing powder and sprinkled it on the letters lightly. I Heat embossed the letters and it gave it some added metallic shine and texture that I loved. You will see I repeated the technique a lot in my album because I loved the effect. In the photo it looks a little dull but in person its very shiney.

December Daily @ Thecraftypickle.com

December Daily-1-23December Daily @ Thecraftypickle.com

Day four we trimmed our tree. All the kids had fun going through our ornaments and remembering when they got theirs or made which ones. Its always my favorite part about decorating is seeing how special these ornaments are to my children.

December Daily @ Thecraftypickle.com

December Daily @ Thecraftypickle.com

The little dots around the photo below were made with an embossing marker and adding gold ZING embossing powder to add to the twinkle of the photo.

December Daily @ Thecraftypickle.com

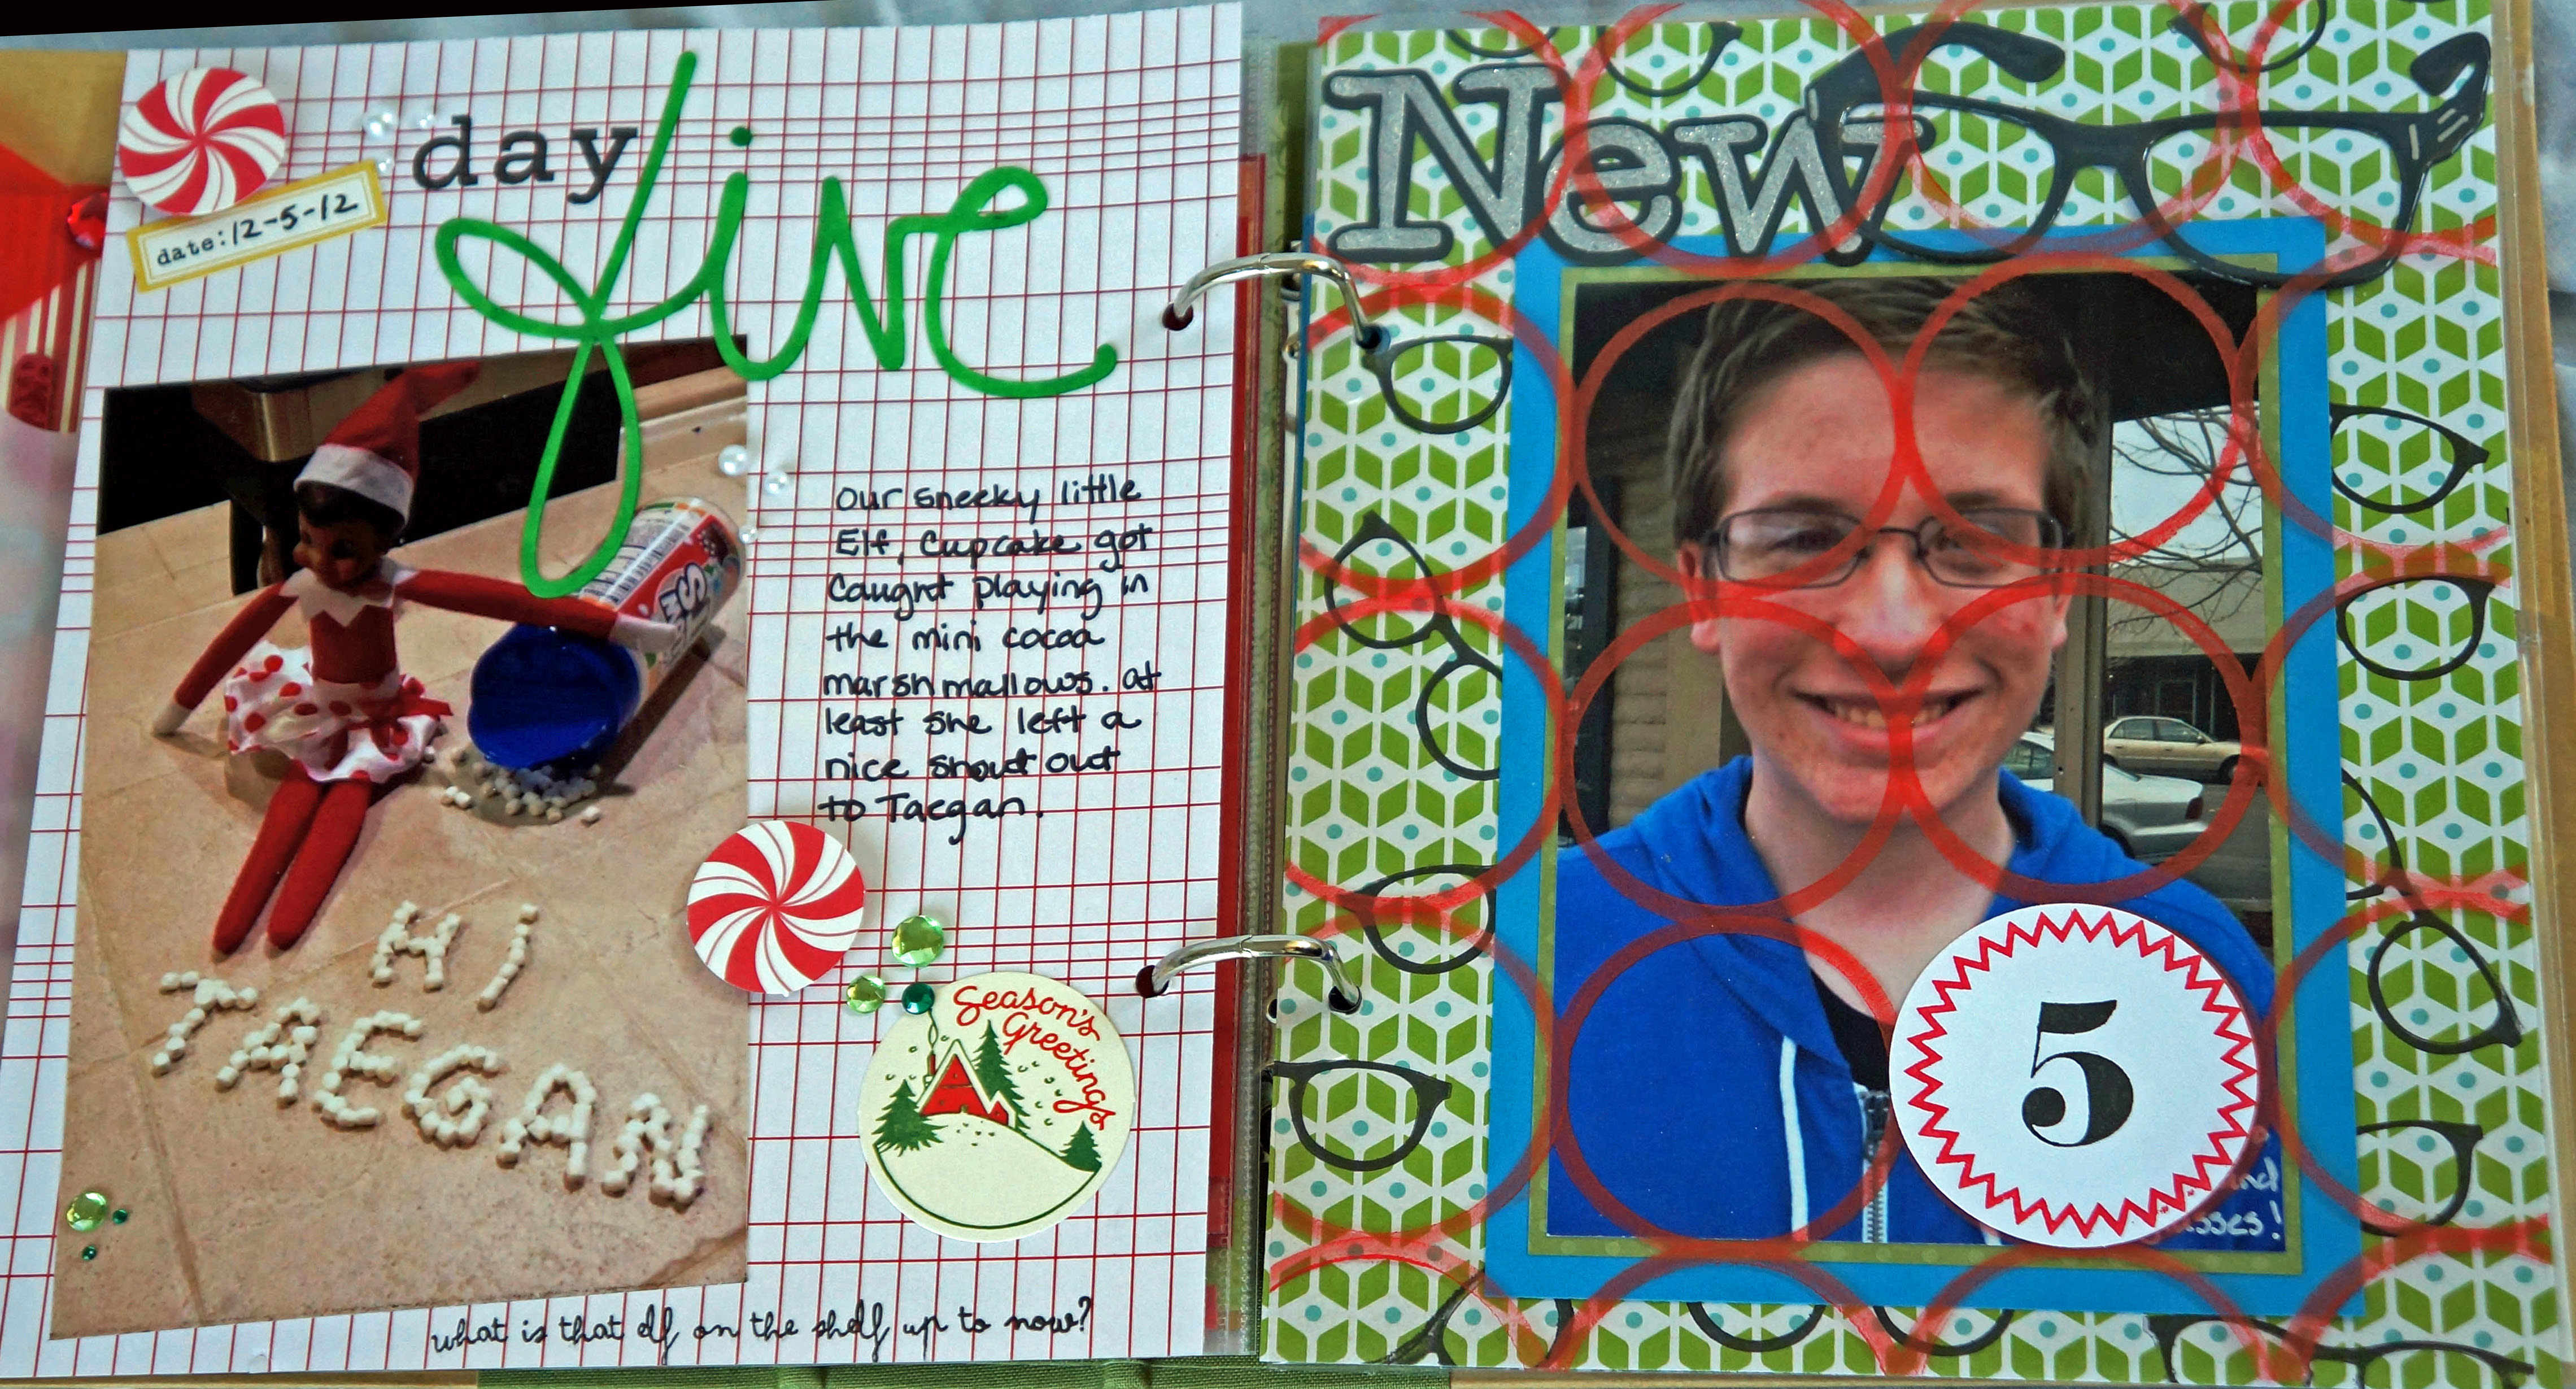
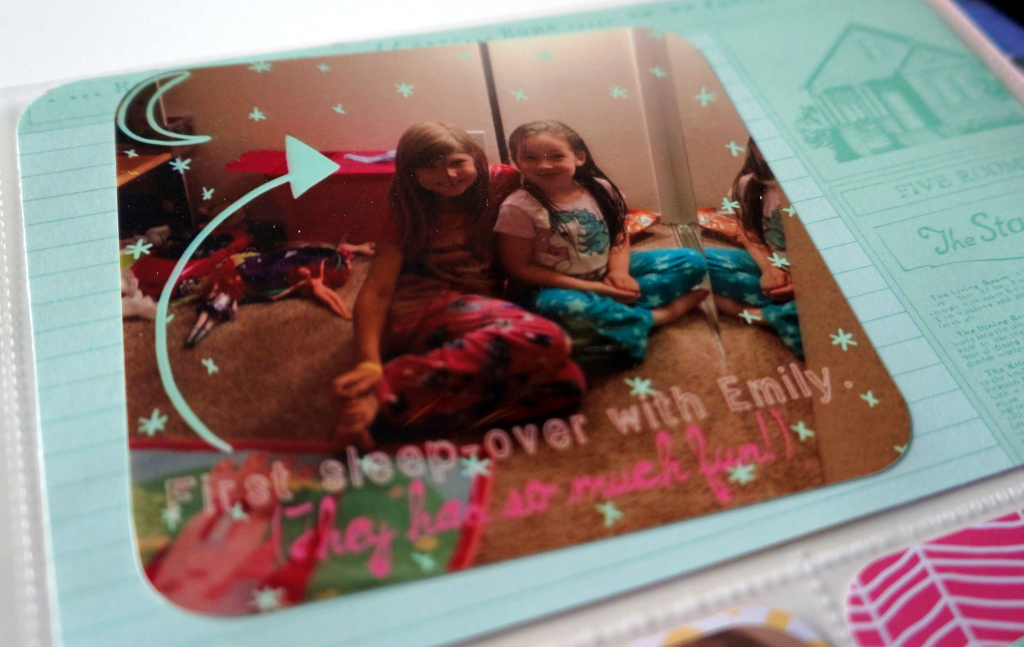
For Day five I just had a photo of our Elf, Cupcake, writing a little hello message to Taegan. This was one of the most favorite things Cupcake did that Taegan loved (besides she got to eat all the marshmallows after!)

December Daily @ Thecraftypickle.com

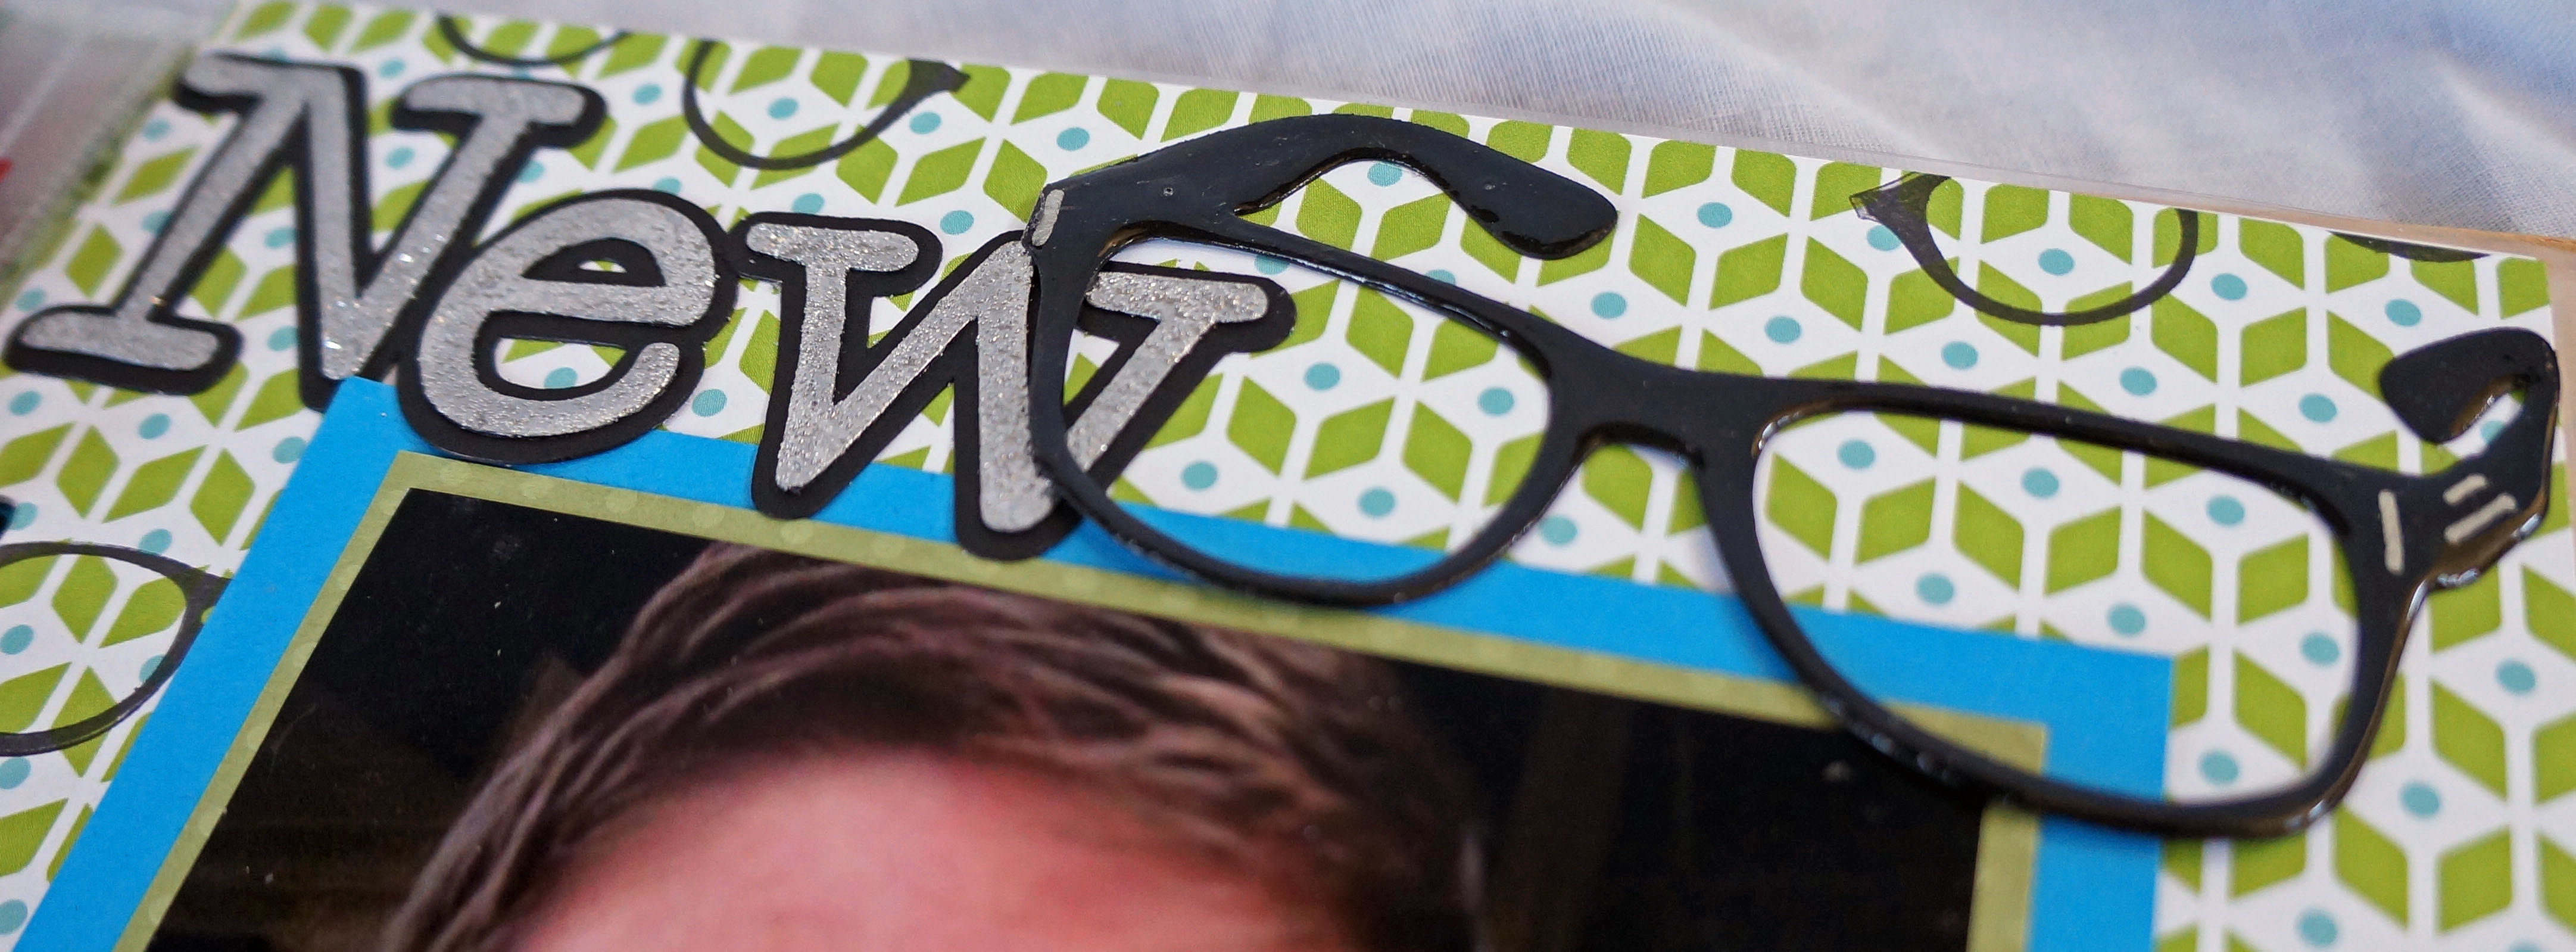
and on day 6, my son got new glasses.

December Daily @ Thecraftypickle.com

The glasses in the title were cut with the silhouette. The other glasses were stamped using a brand new release stamp from close to my heart *bonus sneak peek* . For the title “NEW” I cut one set and a shadow set from the silhouette. I dabbed platinum ink on the top letters and covered it with silver glitter ZING embossing powder.

December Daily @ Thecraftypickle.com

(I realized that I completely forgot to photograph day 7 and 8 *OooOps* so I will have to go back and do those this week)

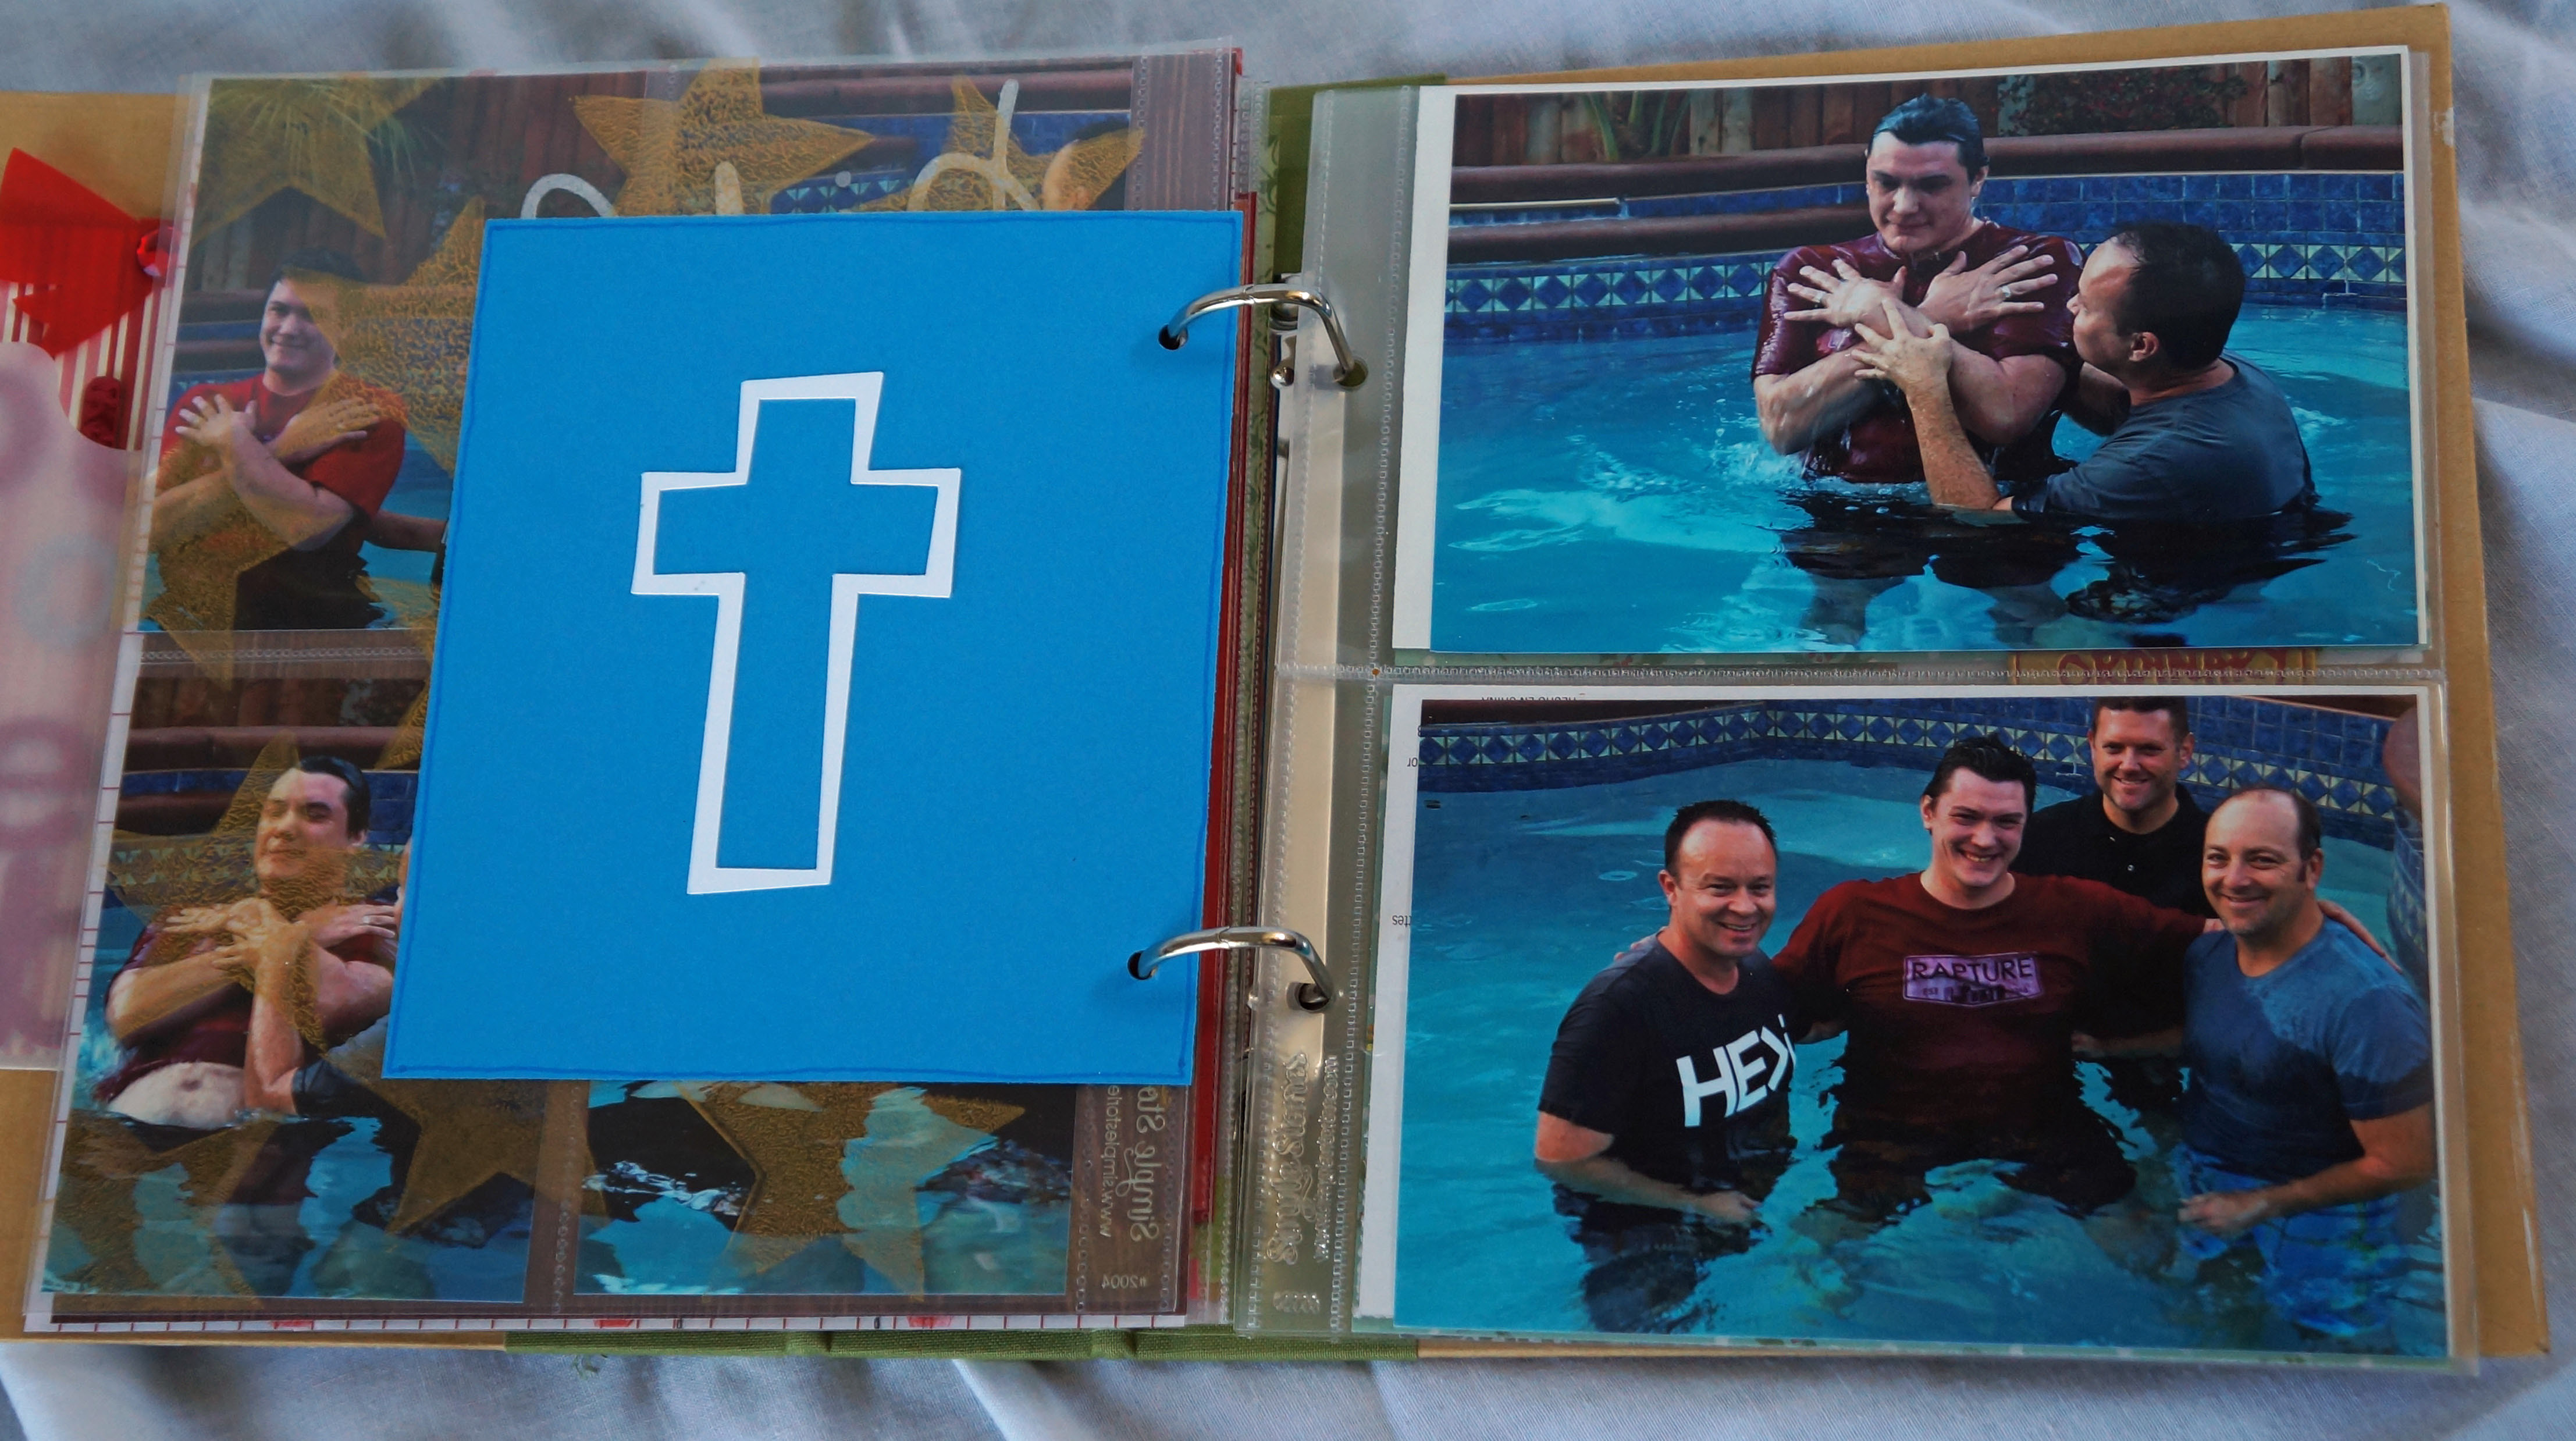
Day 9 was a VERY special day for my husband and my family. Baptism Day. My husband chose such a wonderful time of the year to be baptized. For our entire marriage he was not a believer but at the end of summer 2012 he gave his life to Christ. I was honored and humbled at being able to witness the experience and transformation God has done in my husband.

December Daily @ Thecraftypickle.comDecember Daily @ Thecraftypickle.comDecember Daily @ Thecraftypickle.com

Transparencies were really hard to come by since Hambly studios went out of business. So one afternoon I got out some foam stamps, packing bubbles, and anything else i could find along with some acrillic paint and some blank transparencies and decided to make my own. They were very easy and I just let them dry overnight. I made about a dozen in total.

December Daily @ Thecraftypickle.com

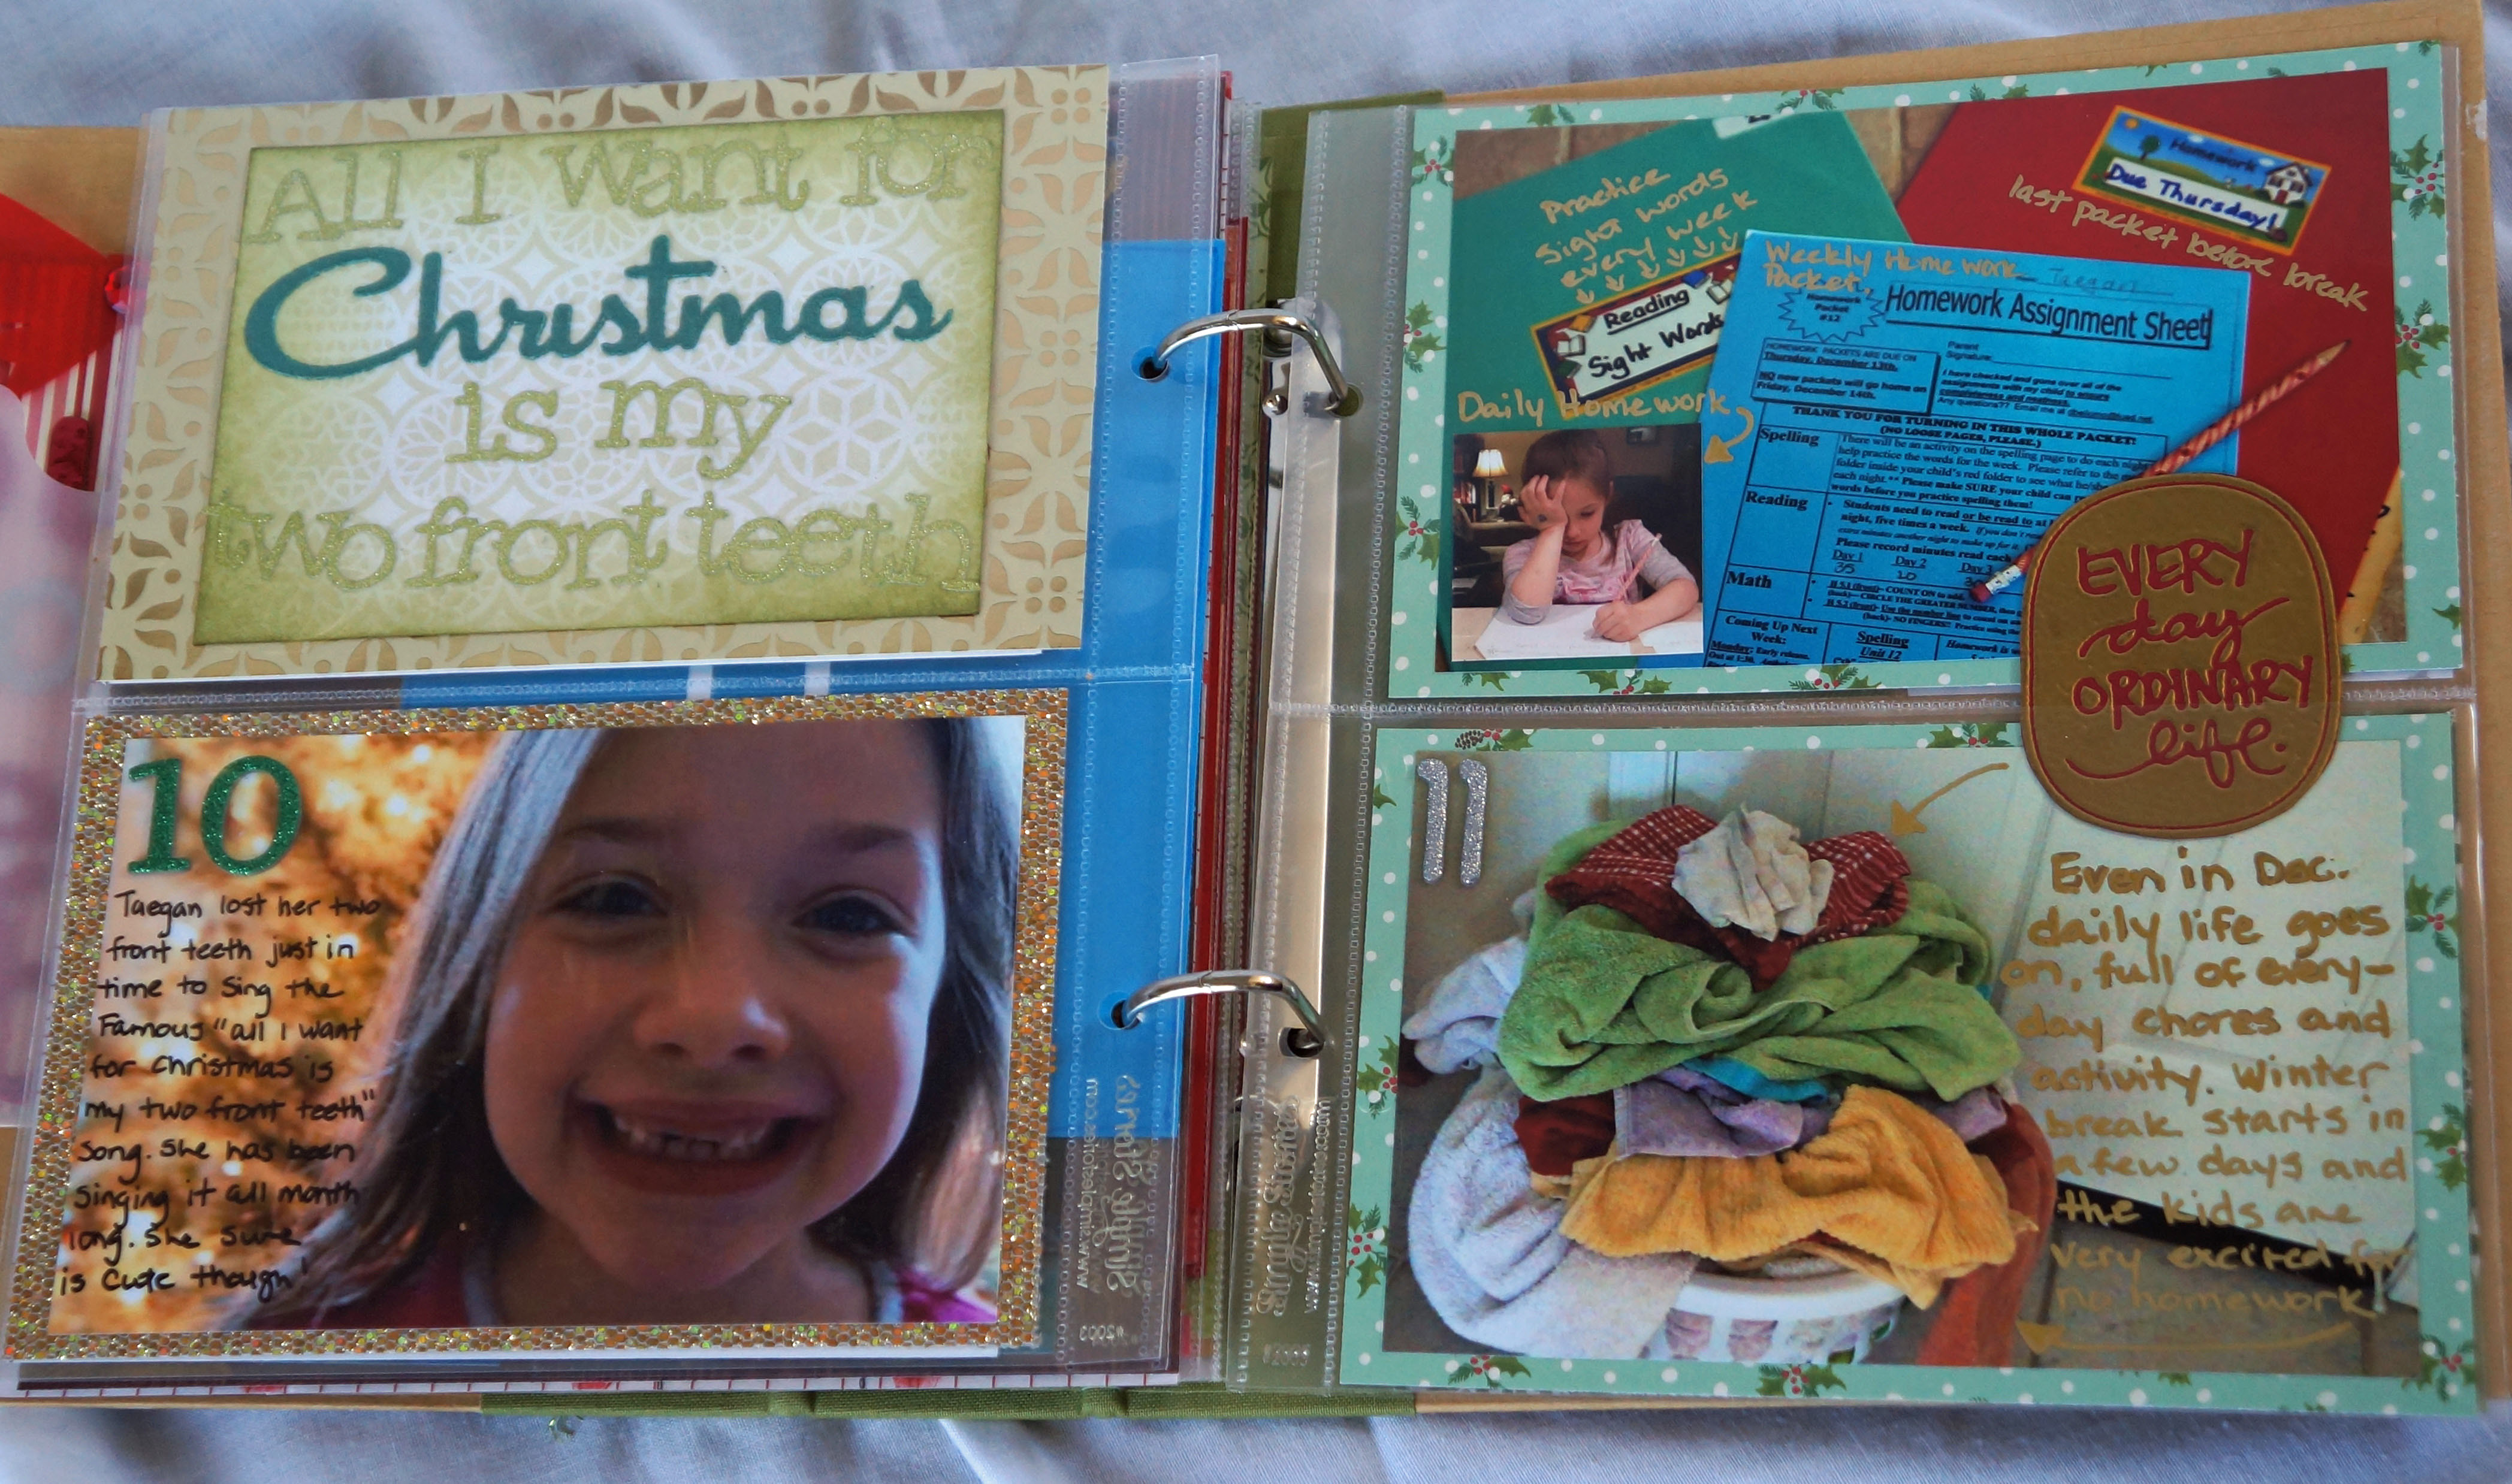
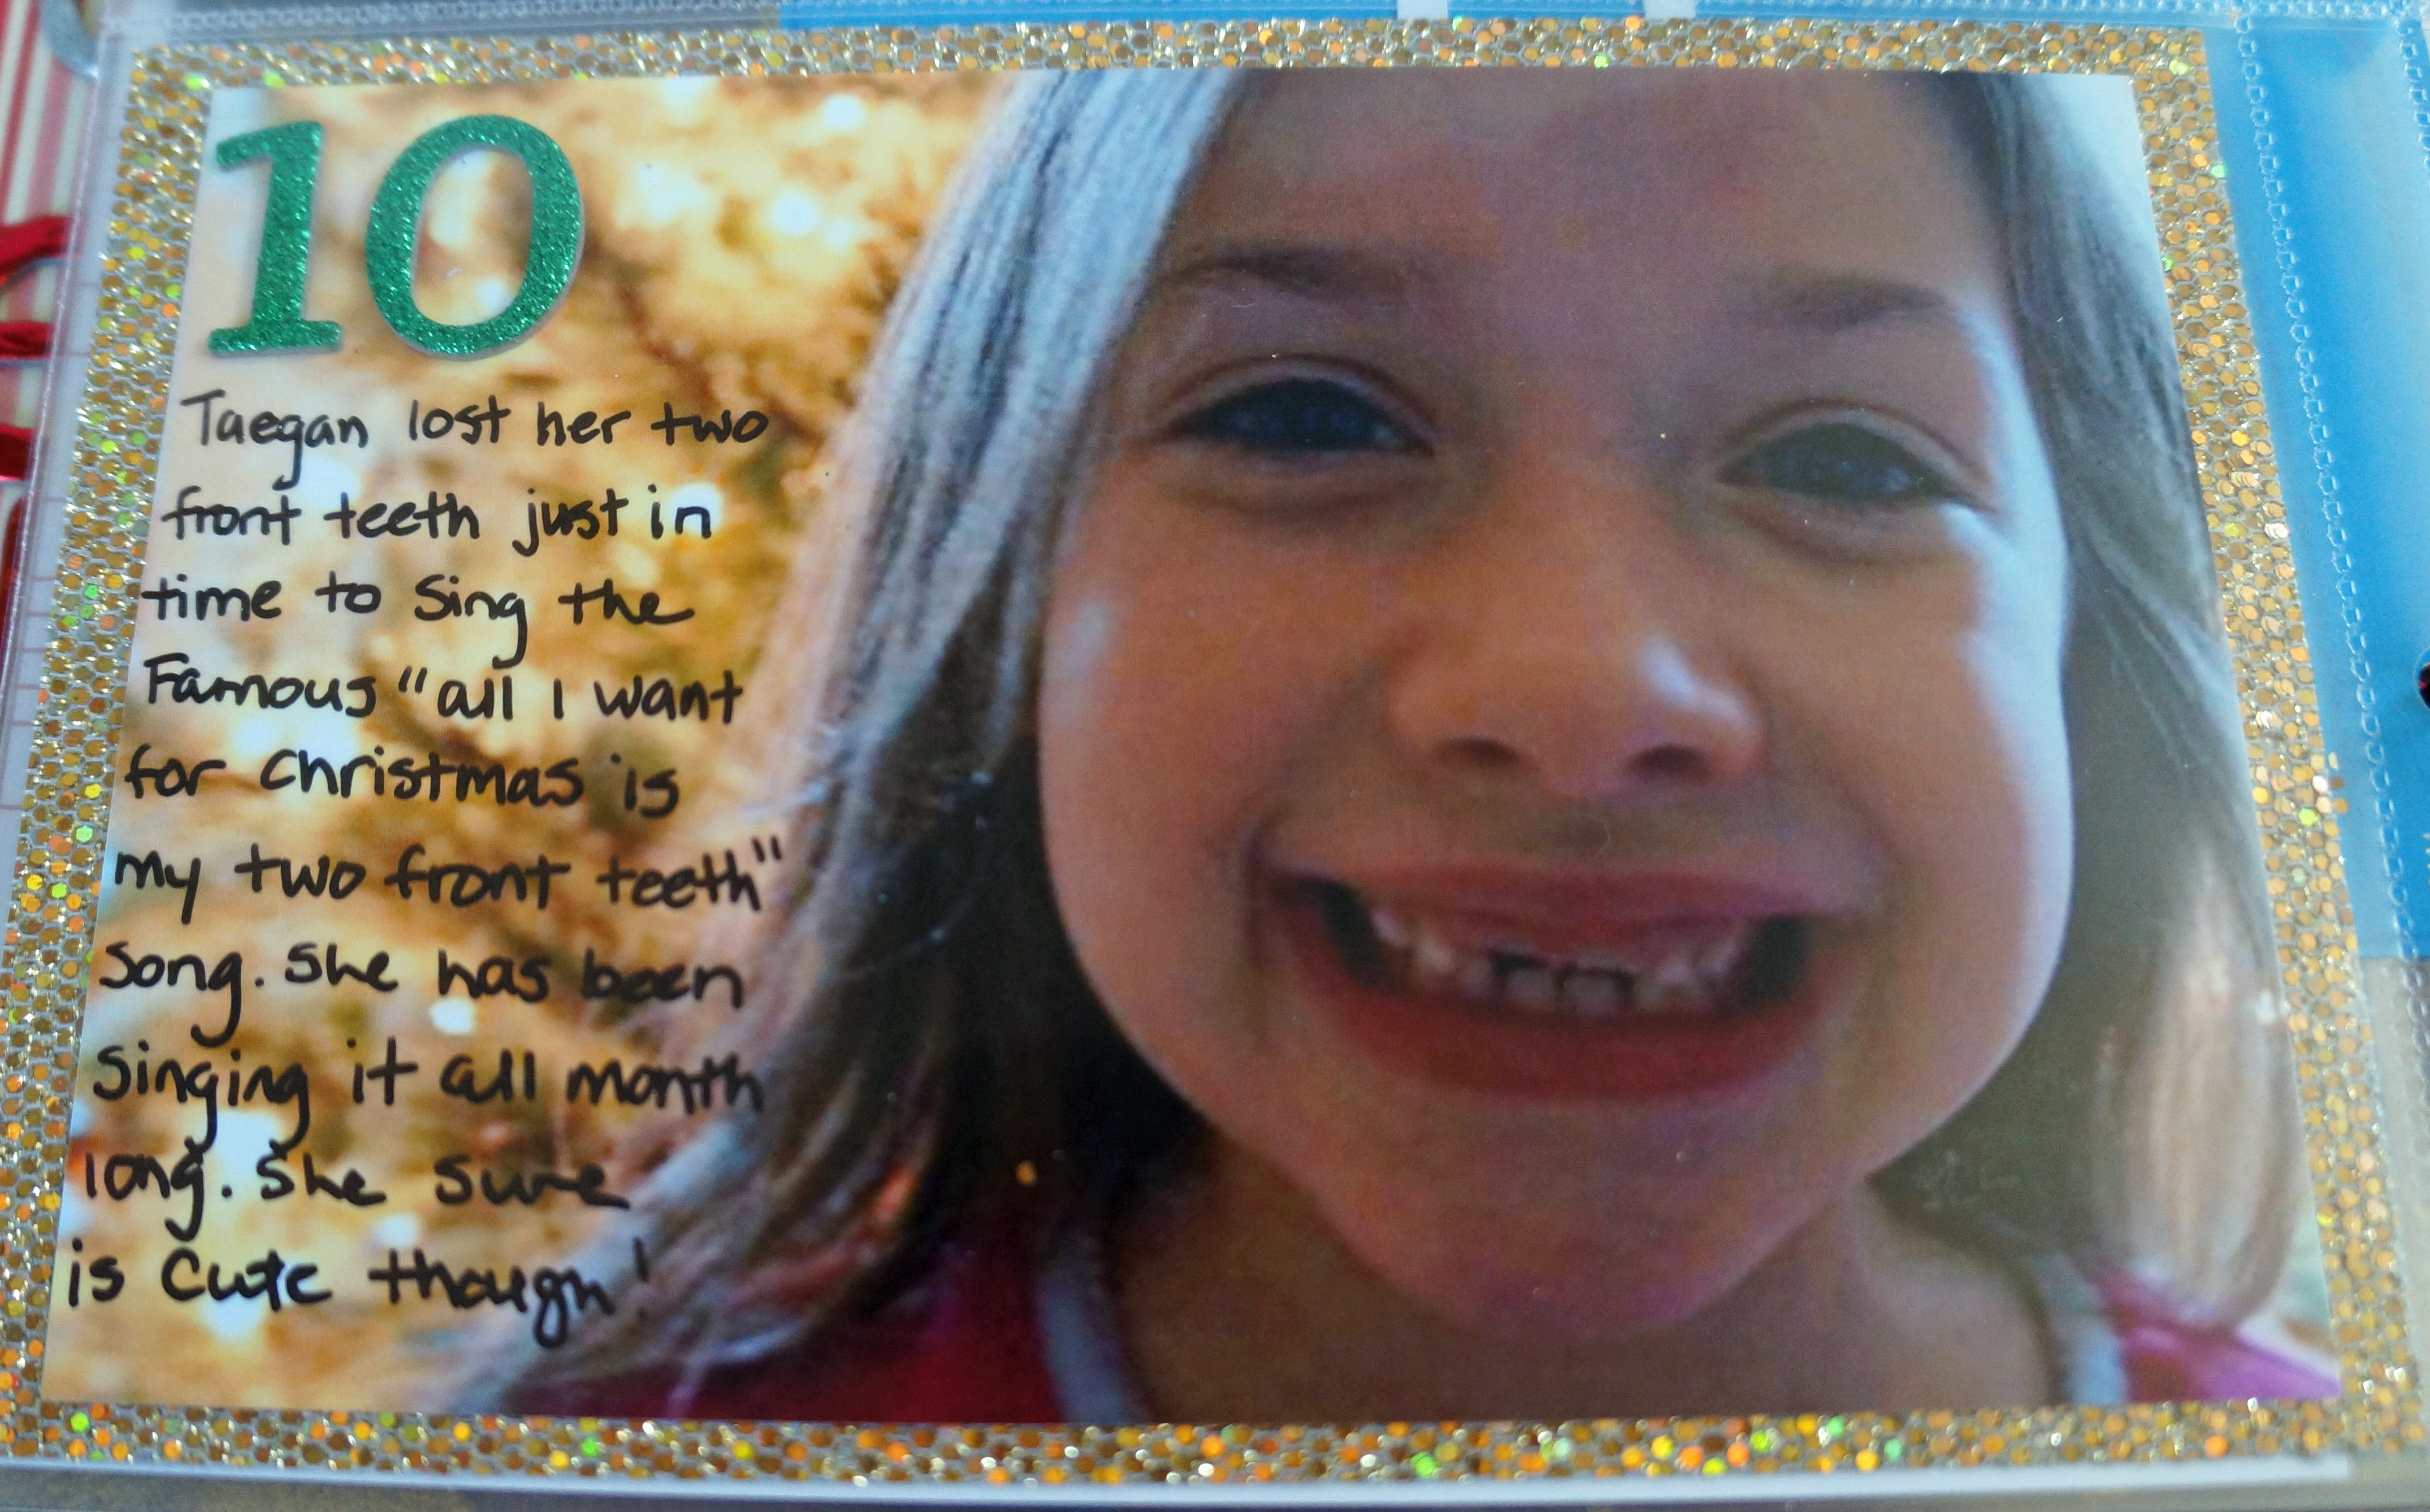
You know that song “All I want for Christmas is my two front teeth”? Yeah we got to hear that one A LOT this year!!!!!

December Daily @ Thecraftypickle.comDecember Daily @ Thecraftypickle.comDecember Daily @ Thecraftypickle.com

She was a super cute toothless sweetheart! In her words “the best thing about having no front teeth is that you have a place for your straw and you can whistle though the space” …. I love the things kids say!

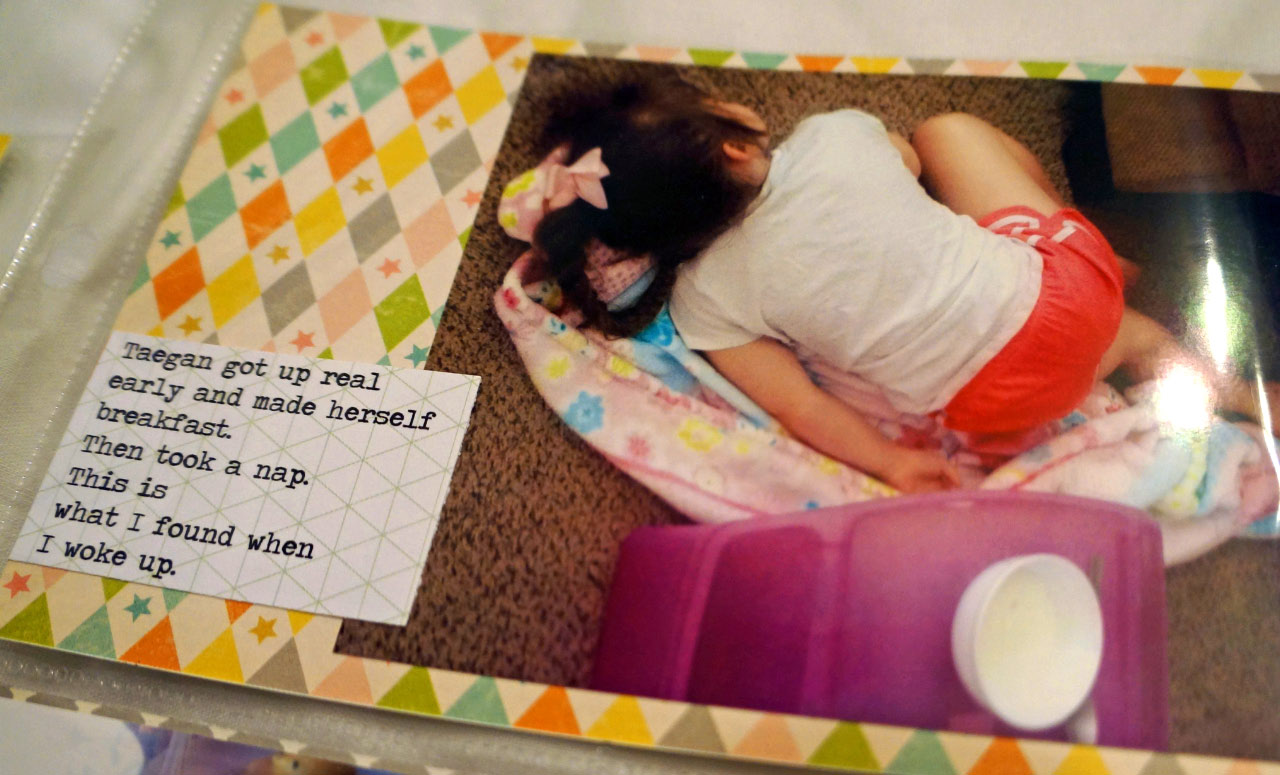
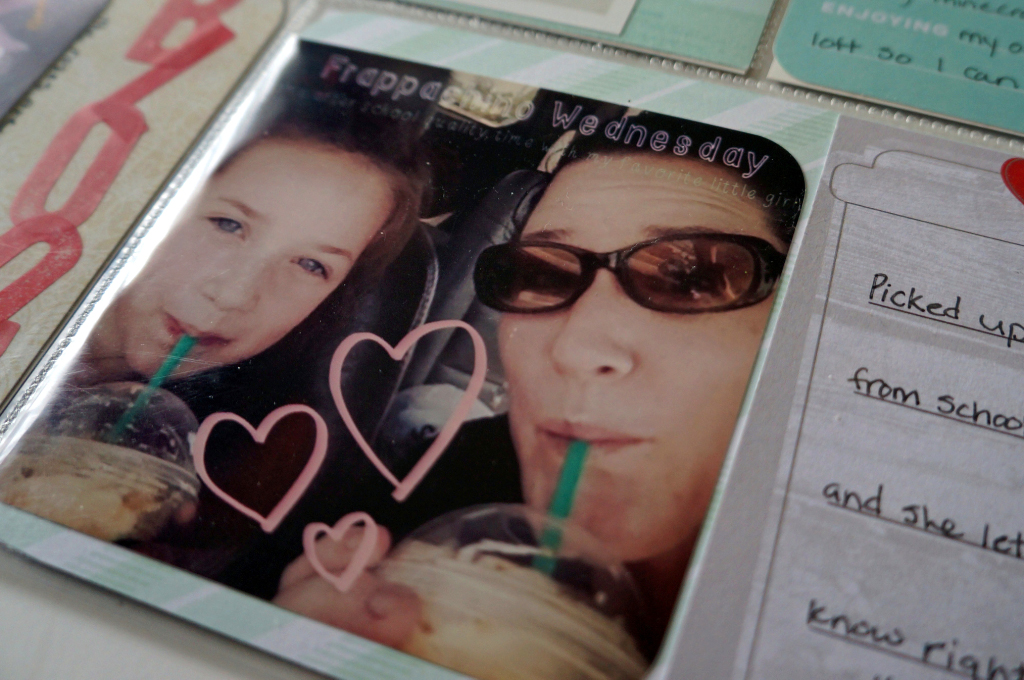
My Day 11 was documenting that even though we are in a festive busy month we still have our normal everyday tasks, chores, and daily life that we have to do.

December Daily @ Thecraftypickle.com

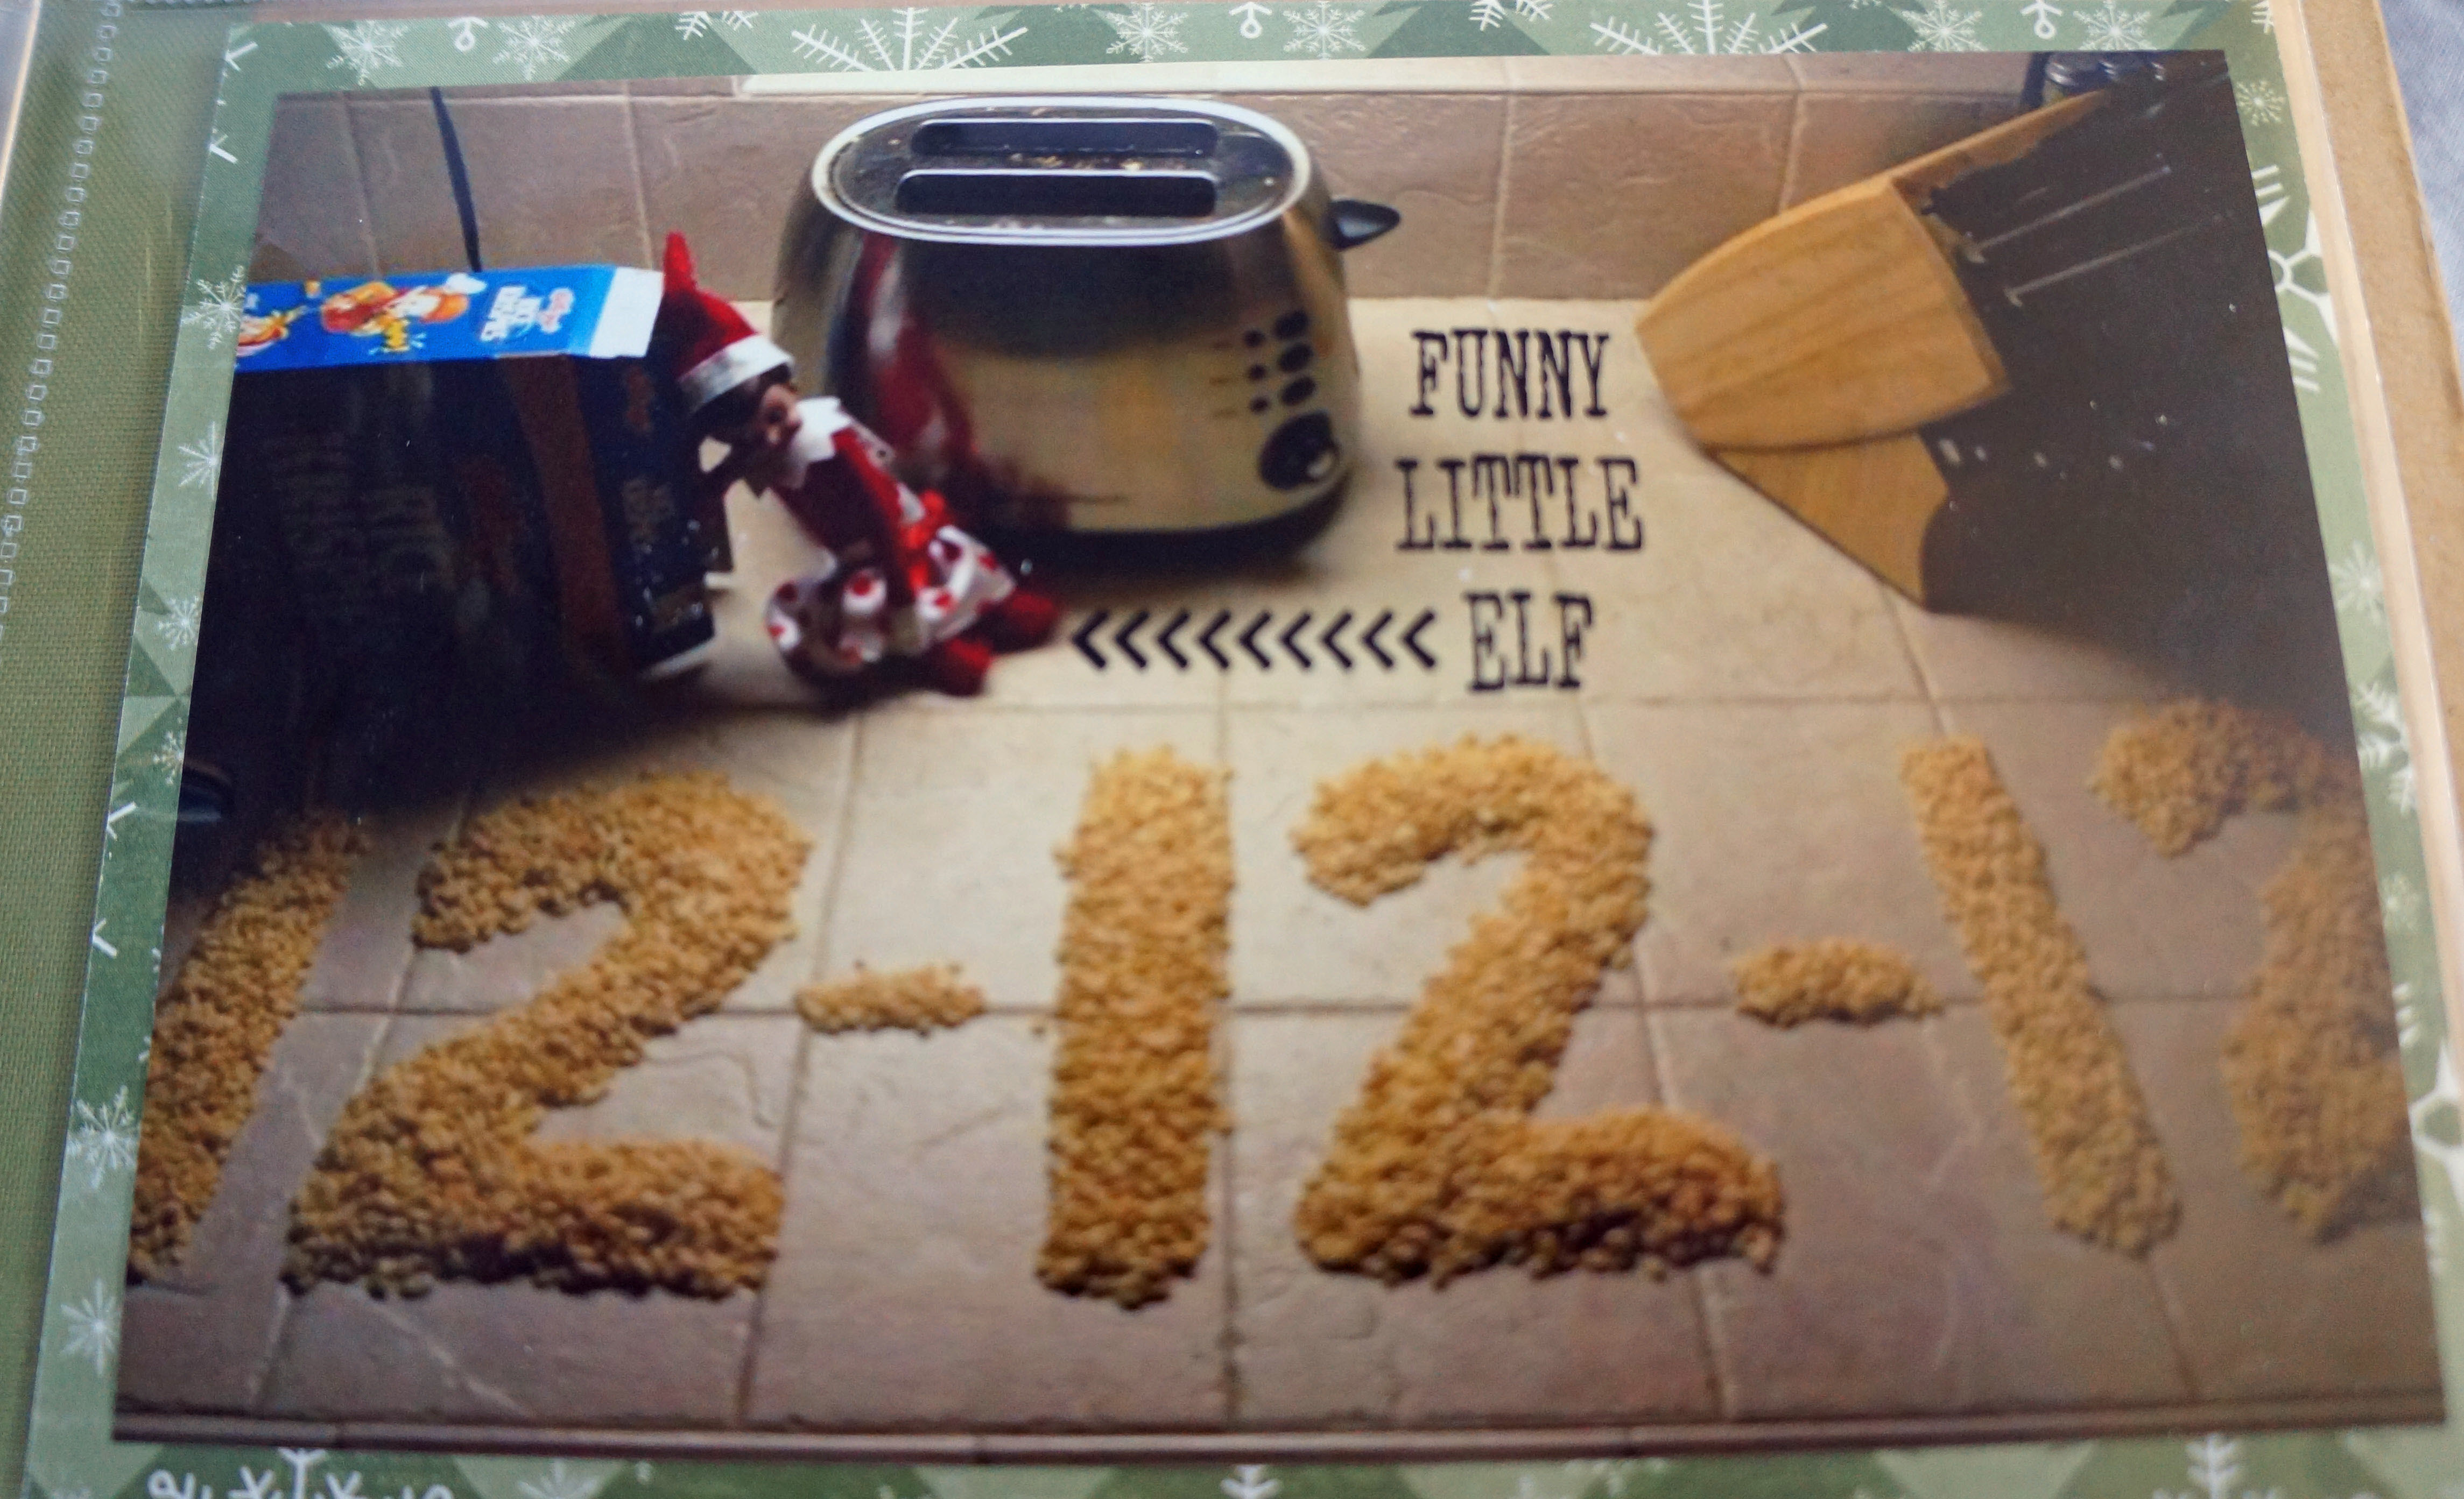
Day 12 was a super fun day for us. We managed to do everything we possibly could with the number 12! I even had a 12 year old to take a photo of! Some of the things we did were: Call 12 special people in our lives and talk for 12 minutes ONLY, Baked 12 cupcakes, bought 12 lottery cards, Boiled 12 eggs for breakfast, I reached my lucky 12 at starbucks for a free drink, Stayed up until 12:12 at midnight on 12-12-12 and again at noon making sure to text my husband at that exact minute. Our little elf, Cupcake even had her “twelve” fun with some Rice Krispies!

December Daily @ Thecraftypickle.comDecember Daily @ Thecraftypickle.comDecember Daily @ Thecraftypickle.comDecember Daily @ Thecraftypickle.comDecember Daily @ Thecraftypickle.com

I hope you enjoyed your first peek into my 2012 December Daily. I promise lots more Christmas in July is coming though the rest of this month at The Crafty Pickle. Until then Hop along to some of these other talented ladies blogs to see more yuletide inspiration!

Next on the hop is Smitha

In case you get lost at any point, here is the list all the blogs

Ruth – http://scrapmachine.com/

Bernice – http://btsoi.blogspot.com/

Theresa – http://himynameistheresa.com/

Holly – http://harmonydiy.blogspot.com/

Sandar – http://www.thecraftybunch.com.au/

Melissa – http://digitalscrapbookinghq.com/christmashop

Kimberly – http://kimberlymariekett.blogspot.com/

Stella – http://myscrapbliss.blogspot.com/

Alanna – http://scrapping-and-life.blogspot.com

Megan – http://meganlianesblog.blogspot.com/

Jen – http://myreillyboysandme.blogspot.com

Lisa – http://mykreativepursuits.blogspot.com

Margareta – http://www.paperpilekitten.com/

Taniesa – https://thecraftypickle.com/    *You are here*

Smitha – http://www.smilingcolors.com

Catherine – http://paperaddictcatherine.blogspot.com

Kate – http://www.funkytales.blogspot.co.uk

Tasha – http://tashascreativejuice.blogspot.com/

Melissa – http://yesterday2day4ever.blogspot.co.nz

Alison – http://magicalmesses.blogspot.com/

Cat – http://decisioninspired.com

Manda – http://www.mandalikadesigns.com/

Madeleine – http://senoritaml.wordpress.com/

Melissa – http://www.scrappyjedi.com/

Amanda – http://amandathemadscrapper.blogspot.com/

Ali – http://www.moloneystylestamping.wordpress.com

Jenny – http://scrappinjen-partyoffive.blogspot.com/

Ros – http://noteverypicturezperfect.blogspot.com.au/

Sue – http://themakingtable.blogspot.com.au/

Julie – http://plywthpper.blogspot.com/

Thinking of you….. A dry embossed look using die cuts!

Hi Friends!

I missed my Make-A-Card Monday post as I was celebrating my little girls birthday so I thought I would share a card I made for a special person in my life (hoping it brings a little smile to her face)

For this card I mimiced the dry embossing look with some intricate Die-Namites die cuts. The two dies I am using for this card are  the Berry Flower die and the Birds on a Branch die. I am using this teqnique on a card today but this same look would be great on a scrapbook page, altered project or project life card.

Berry Flower die from Die-Namites

Birds on a Branch Die-Namites Die

I love that you can achieve the look of dry embossing with die cuts on cardstock in the same color. I went with white for my card but you could do this easily with any color cardstock. The effect looks better with smooth cardstock rather than textured cardstock. Here is a look at just the background of the card:

Thinking of you background portion of card @thecraftypickle.com


I used a total of 5 die cut shapes to do the entire card front. The key thing is to make sure that the die cuts are adhered down completely. I ran the die cuts through my xyron machine, but working with a glue pen would also work well as long as you are careful not to apply too much glue. Once I had my dies arranged, trimmed and adhered I took a rubber cement eraser and cleaned up any extra adhesive from in between the flower detail. I also took a nail file and lightly sanded the cut parts of the die cuts around the edge of the card to soften the edges and blend them into the card. This technique would also look beautiful as a scrapbook page background.

Thinking of you card @thecraftypickle.com


After the background was done I began working on the sentiment strip. I took a Close To My Heart ink pad in the Lagoon color and stamped some of the ink on a clear acrylic block I use for stamping. I removed a little of the ink at a time with a water brush and beginning at the edges of the white cardstock I added color working my way in towards the center. I love the watercolor look this achieved. I stamped the “Thinking of you” sentiment in the same color ink and then went back in with my water brush to add a little more color in between the letters.

Thinking of you card @thecraftypickle.com

To complete the card I took the Birds on a Branch die and cut it in the same color cardstock as the border strip. I fussy cut a few of the pieces apart and attached them to the left of the sentiment. I finished by adding some glitter detail on the butterflies using a clear wink of stella glitter pen.

I hope you enjoyed this fun little tip! The intricate designs of the Die-Namites dies are perfect for this look. Experiment with any of the Die-Namites dies for a bit of POP in your next project! Check out more Die-Namite die cut tips and projects on the company blog!

Happy (almost) embossing!


Project Life Week 24: die-cut embellishments

Hi Fellow Project Lifers!

Today I am working backwards a bit and showing you my week 24.  This week I had a bunch of fun playing with some brand new dies from Die-Namites! You have seen in previous posts that I am very fond of my silhouette die cutting machine, but the one thing I find that I have a hard time with is getting really good intricate cuts from the machine. Thats why these dies rock! There is so much detail that brings a little wow to your project life without bulk. To cut my dies I use an Epic 6 by lifestyle crafts, but any manual die cut machine will work.

Here is the full two page spread:

Week 24 @thecraftypickle.com

And one of just the left hand side:

Week 24 @thecraftypickle.com

For my title card I used the Die-Namite’s Scrolly bird design. I originally cut it from a heavy white cardstock and then colored it with a light blue copic marker. I took a piece of cream cardstock and attached various strips of washi tape. I fussy cut the different pieces of washi to fill in the different parts of the bird. It really helped the die cut pop and didn’t add any additional bulk to my pocket. I LOVED the result.

Week 24 @thecraftypickle.comHere is the second page of my layout:

Week 24 @thecraftypickle.comFor the second half of my project life layout I decided to use the center portion of the page as one 4×12 strip just cutting it in 3×4 sections.

Week 24 @thecraftypickle.comI used two different Die-Namites dies for this section. The first was the Floral Corner die. I cut two of these corners out of heavy watercolor paper and then played with some greens and pink watercolors. I put the two together to make a little frame around the title. The watercolors add a little more than just coloring with a marker or cutting from cardstock.

Week 24 @thecraftypickle.comThe second die in the last pocket was the Flowering Tree die. I cut this from heavy white cardstock and colored in with copic markers. I added red enamel dots on the tree to mimic apples. I thought this was fitting being next to Snow White. Cutting off the very edge of the die makes the section of the layout flow a bit better.

Week 24 @thecraftypickle.com

My oldest daughter had a wonderful opportunity present itself, to be a disney princess for a local production company, these photos of her are her trying on the different costumes.

Week 24 @thecraftypickle.com

To check out more about the Die-Namite Dies I have used today and more, please visit the site HERE. A little birdie told me there is some amazing new stuff coming out SOON!

Looking for more project life inspiration? As always, I am linking up with The Mom Creative who shares her album every week and links up with several other talented project lifers.

Project Life Tuesdays @TheMomCreative.com

Have a great week everyone!

Happy Crafting!

Project Life (weekend edition): Week 26

Hi Project Lifers!

This weekend I am skipping ahead a bit to week 26. I will work backwards until I get caught up but I don’t want to forget things while they are fresh in my head. Even though I keep a pretty good journal on my iPad of what’s happened and when, It’s the little details that might get left out. I am very much enjoying my new planning process. If you missed out on how I utilize my iPad and the Paper by 53 app, Check it out HERE.

Week 26 was our VBS week and it was so much fun! The theme our church picked was Colossal Coaster World: Facing fears, Trusting God. With the roller coaster theme going on this week it made me think of the Midway papers from October afternoon. I had been hording saving these papers for a fun summer spread and this ended up being the perfect week for them.

Project Life week 26 @thecraftypickle.comFor the title card I used elements from the different midway pattern papers and cut them up for a cute title and accent date arrow. It’s hard to tell in the photo but I took my clear glitter pen and added a little sparkle around the letters.

Project Life week 26 @thecraftypickle.com

I adore the photo booth elements to this collection and a collage of some silly photos taken one morning this week worked out well for these accents. The app that I used to make the collage is called PicFrame.

Project Life week 26 @thecraftypickle.com

Heres a shot of just the left side of the spread:

Project Life week 26 @thecraftypickle.com

Here is one just of the right side:

Project Life week 26 @thecraftypickle.com

I was able to fit in a few things saved from my daughters week at VBS. They gave these cute little buttons to the kids on the first day, VBS Flair? Yes Please!

Project Life week 26 @thecraftypickle.com

A big time saver for me this week was completing all of my journaling on one sheet and printing it out on some Studio Calico graph paper. Once printed I was able to cut out the journal card and the journaling strips that you see in the photos below.

Project Life week 26 @thecraftypickle.comProject Life week 26 @thecraftypickle.com

I hope you enjoyed the peek into my week 26 🙂 Today I am sharing my Project life along with others in a Saturday blog hop hosted by Michelle Bostinelos. If you did not come over from her blog please follow the link HERE to check out even more project life inspiration! Michelle hosts a great group of Project Lifer’s every Saturday. Be sure to check her out!

Have a great weekend everyone!

Watercolor your Wednesday!

Last weekend I had the privilege to attend a workshop taught by Studio Calico design team member, Shanna Noelle. Not only is she as sweet as she seems online, she’s a kind, funny, and very talented girl in person as well.

She shared her tips and tricks on using watercolors in your scrapbooking. Watercoloring is so on trend right now and I loved playing, mixing different colors, and seeing the effects that it can create on paper. It is really hard to pre-plan how this was going to go so I just started adding water, then paint, then more water and more paint. It really started coming together once the paint dried. For this layout I used  watercolor paint tubes and I mixed the white and green to get the aqua color I wanted.

Watercolor Wednesday @thecraftypickle.com

Once I had the color down and I was ready to embellish, I discovered a happy mistake. I went to color the wood veneer stars with watercolor but when I put it down on the paper it landed on the wrong side. When i lifted it up i saw it made a pretty watercolor stamped image of the star that I loved. So I began “stamping” with these watercolor painted wood veneer stars to make the background look more dreamy. I also took a clear outline star stamp and added that in a few places as well.  I added a bit of Mister Huey’s calico shine for some shimmer and accented with a glitter pen here and there. I also added the painted wood veneer stars I used to stamp with.

Watercolor Wednesday @thecraftypickle.com

The stamp phrase (from Lawn Fawn)  was the added little touch. After I stamped the phrase I took a light wash of the watercolor and painted around and in the letters of the phrase to make it melt into the layout more. I added a bit of star washi at the top of the photo and a shooting star at the bottom of the stamped phrase and left it alone after that. I love this photo of my little girl and really wanted it to take center stage.

Watercolor Wednesday @thecraftypickle.com

After having so much fun creating this layout in class I decided to play a bit more at home. I was thinking of ways that I might incorporate this into my project life and remembered that I had some 4×6 watercolor postcards! I got mine on Amazon but they are in most art supply stores. I played with some warm colors (red, oranges, yellows) to create a sunset look. This time I used the Peerless watercolor films which I LOVE! the color is so rich. I sprayed a fine mist of water on the paper before I started painting. I recommend picking up a water brush with these watercolor films to make painting even easier. After the watercolor dried, I lightly sprayed on some Mister Huey’s gold ink spray to give it more shimmer. The glitter sticker letters are from Pink Paisley and I cut out the sunrise word from my silhouette. This will make a perfect title card for my daughters Senior sunrise breakfast she had at the beginning of her senior year.

watercolor wednesday@thecraftypickle.comIf you have been afraid to try watercolors and painting in your scrapbooking in the past, give yourself permission to play. You will be happily surprised at the results!

If you haven’t heard, Shanna, along with a fabulous team of talented ladies are teaching a class called “Toolbox” over at Studio Calico in the month of August. There is also a great bunch of contributors to the class as well! I am determined to learn some digital scrapbooking techniques and this class has that and MUCH more. Check the class out HERE! You have until July 31st to sign up. I hope you’ll join me!

Thank you Shanna, for expanding my scrapbooking to include more watercoloring technique. I have a feeling I will be doing many more watercolor backgrounds in the future!

Happy Painting!

Project Life Tuesday: Week 20…. wow, seriously!?!? Week 20!!!!!

Hi Project Lifers!

I seriously cannot believe how fast this year is going by! I just completed week 20 and went back flipping through the entire album so far. I was just amazed at how it seemed like I just started my album. It really is a treasure having something simple like Project Life that helps you slow down and really treasure the everyday because otherwise we might miss some pretty important moments and memories in all our busy-ness. Maybe you are new to the Project Life concept. If so I recommend you go HERE to Becky Higgins website, Creator of the Project Life system.

This was a calm at home week for us. The biggest excitement was that my 6-year-old little girl was allowed to have her first sleepover. Our sweet neighbor came over and I got to experience giggly girls who were up wayyyy too late LOL.

Project Life: Week 20 @thecraftypickle.com

This week I largely used a combination of Becky Higgins Blush core kit and Dear Lizzy: Fifth and Frolic. Both matched up perfectly to one another and went along with the overall theme of the week.

Project Life: Week 20 @thecraftypickle.com

The left side focuses mostly on our week. A few random things including a photo of our home that I have been trying to find a spot for in the album. Beings that I didn’t take a lot of photos this particular week it fit perfectly. I fell in love with the Dear Lizzy line and was so pleased that it seemed to be made to match with the Blush core kit.

Project Life: Week 20 @thecraftypickle.com

The little house was fussy-cut out of a 12×12 sheet of the Dear Lizzy paper and the arrows were apart of the tear strip. The background “card” behind the house was another sheet of paper from the same collection. I stamped a sentiment from the Technique Tuesday : AE Studio “Memories of Home” set. It was straight but I curved it on my stamping block to fit on the card insert.

Project Life: Week 20 @thecraftypickle.com

For the title card I used a card from the Blush kit and stamped “week” several times along the bottom in two different ink colors. The lighter seafoam color was just a second stamping of the darker ink without re-inking. The beautiful glitter thickers are also from Dear Lizzy but from the Neapolitan line, Can you tell how much I *LOVE* her designs and colors? The little file tab was stamped and heat embossed with Aqua ZING embossing powder.

Project Life: Week 20 @thecraftypickle.com

A few of the photos this week were edited using the “A Beautiful Mess” app. If you haven’t checked it out its amazing! I definitely recommend purchasing the app and the add-on designs. So much fun! The coffee cup card is from the Studio Calico Project Life monthly kit.

Project Life Week 20 @thecraftypickle.com

The right side was all about the sleepover. Aren’t those seafoam polkadot thickers adorable?

Project Life: Week 20 @thecraftypickle.com

Perfect color and perfect font. I had been hoarding these cuties for a while, So happy I had the perfect opportunity to use them.

Project Life: Week 20 @thecraftypickle.com

Again, some more editing using the “A Beautiful Mess” app and more of the Dear Lizzy paper (same sheet of paper called Bowtie Boulevard.)

Project Life: Week 20 @thecraftypickle.comAnd finally a fun speech bubble to highlight the final words to wrap up my daughters sleepover experience. She was out like a light until lunchtime!

Hopefully you all have a special place in your album to document your home along with all that happens in it. I am grateful for my home where we create meaningful everyday memories, where we come together as a family.

Looking for more project life inspiration? As always, I am linking up with The Mom Creative who shares her album every week and links up with several other talented project lifers.

Project Life Tuesdays @TheMomCreative.com

I hope you all have a wonderful week! Don’t forget to snap photos of those little moments along the way!

Happy Crafting!