Meet the all new Crafty Pickle Design Team!

I am so excited to finally announce the FIRST Crafty Pickle Design Team!

The Crafty Pickle design team

I cannot wait to share with you the amazing talent these ladies possess. Stay tuned for some beautiful inspiration coming your way this November, including a special blog hop with lots of prizes!

Have you checked out TheCraftyPickle Etsy shop lately? we have added over 35 new sets, A new color POP pattern series and three seasonal limited edition sequins mixes! Make sure you hop over and check it out!

Happy Crafting!

The Crafty Pickle

Finally found a Washi storage system that works!

So I have been on the hunt for a storage system for all the Washi tape I have accumulated. I started out in one drawer and that worked for a while but I quickly outgrew that. Washi was everywhere! You might remember my post a few weeks ago about my project life card storage using the Close To My Heart Medium organizer cases. Well those worked out so well that I got a couple of large organizers for my stamps. Those cases stacked up perfectly which made me think of the small organizer and my washi dilemma. I wasn’t too sure if my washi would fit or the rolls would be a little too big so I took a chance and ordered just one of the cases. I was so excited everything fit perfectly with a little room to spare height wise.

For more info visit www.thecraftypickle.com or www.thecraftypickle.ctmh.com


20130319-084553.jpg Did I mention that these cases stack perfectly together? The only difference in the dimentions is the height of the cases.

For more info visit www.thecraftypickle.com or www.thecraftypickle.ctmh.com

20130319-084800.jpg


So now that I found that these cases work I am going to order a couple more to fit the rest of my collection (yes that was only half of my washi) in the case that I pictured I have a total of 116 rolls, some are wide washi rolls so it could fit more or less depending on the size of your washi tape. I also plan on getting one more along with the insert and small boxes so that I can organize my smaller embellishments like wood veneer.

If you would like to see these cases with the washi a little closer check out THIS youtube video.

To check out the organizers I have described and see more, check out my CTMH website at http://www.thecraftypickle.ctmh.com or click the blinkie on the right hand side of my page (under my photo)

Happy Crafting!

How I Organized some of my Paper crafting supplies. (And a little giveaway!)

 Happy Wednesday everyone! Today I am going to show you how I have tackled a problem I had been having for a while. For 14 years I have accumulated A LOT of crafting supplies. I have a pretty good memory of what I have, but when it comes to a few things If i don’t see it I wont use it, you know that whole out of sight out of mind thing. Also, I can’t tell you how many times I have purchased duplicates of washi, ink mist, stamps, etc… So I took a binder I had purchased from staples a while back for another use (it’s about 8×10) a great size for on my desk but also to throw in my bag if I happen to go out shopping.

Binder 1-1

 I made my own dividers (the ones that were sized for the binder were too small compared to the page protectors) I just stapled on a color tab to make it easy to flip to what I needed. The first section is washi tape. Washi tape is a pattered roll of tape that is easily torn and also doesn’t stick to your paper if you try to peel it off. It does become quite an addiction. If i happen to have a tape that has multiple colors that stand out I might put a sample in each color section. Below are a few pictures of some of the washi samples. I use front and back of each page. Whenever I get a new roll I will not put it away until I put a sample in my book.

binder 2-1

binder 3-1

binder 4-1

Binder 5-1

 Next up, Embossing powder. I haven’t used embossing powder much in the past but find myself using it more lately. It has been really hard remembering what colors I have. I split it into three sections, Opaque, Metallic, and Glitter. I stamped all samples with the same stamp and versamark ink to show differences in how it shows up compared to another. Most of my powders are by American Crafts (Zing) which are my favorite but there are a few other brands as well so I listed them in case I run out and need more.

Binder embossing 1-1

binder embossing 2-1

embossing #3-1

 Last in the little binder is my ink mists. Oh how I love misting, but I have purchased a few duplicates and it is always nice to have a dried sample so you know what color you are getting. Most of my mists are from Studio Calico (Mister Huey’s) but I noted down which is which along with the color name to make things easy to find.

mists 1-1

mists 2-1mists 3-1

 I’m really pleased with how it all came together and in the short time I have had it completed it has helped me quite a bit. I am still working on my stamp binder (a different binder that is 8 1/2 x 11) I have a LOT of stamps so this will probably take me a while. I finished all my wood mounted stamps and I am working on the clear stamps next. I snapped a few pictures of what I am doing though, so you get an idea.

stamps 3-1

stamps 2-1

stamps 1-1

 I think stamping my clear sets will go by a lot faster. I used versafine black ink and white cardstock to do all my stamp samples.

 I hope this has inspired you to do a little supply organization, in whatever way works for you. If you have any other creative suggestions I would love to hear about them!

 And now for a little giveaway! As I said, I accumulated some duplicates before putting this binder together and I would like to share a few things with someone (see photo below). Please enter a comment below with your location, and if you have any organizational tips I would love to hear that as well! and a winner will be chosen Friday Feb.8th around 12pm PST. This is open to anyone (even international!)

giveaway-1

Happy 100th Day of School!

So last week I told you about an assignment my first grade daughter had coming up. The assignment was to bring in 100 things for the 100th day of school. Well we worked all weekend (its rough being a model when your 6 years old) and in my opinion the end result definitely paid off! Here are the simple instructions if you would ever like to do the same thing for your little ones.

Step one: Pick up a poster frame at your local discount store (we got ours from target) and also a roll of wrapping paper in a solid color (my daughter chose Pink, big surprise there)

DSC01475


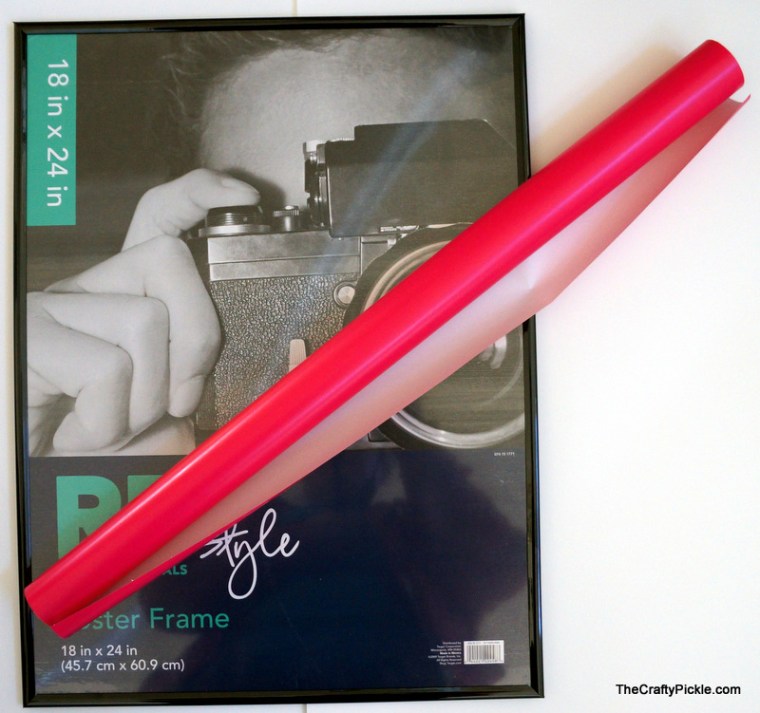
Step two: Disassemble the frame and wrap the backing, its usually cardboard. What I did was take my scrapbooking adhesive gun and put adhesive all over the cardboard, cut a piece of the wrapping paper big enough to overlap the cardboard a bit and then smoothed it out on the surface. Then i just trimmed off the extra paper all around the edges of the cardboard.

DSC01476


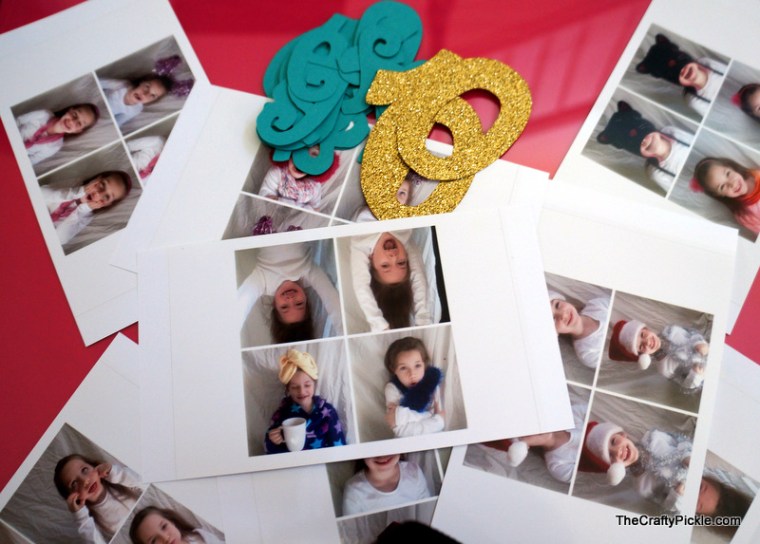
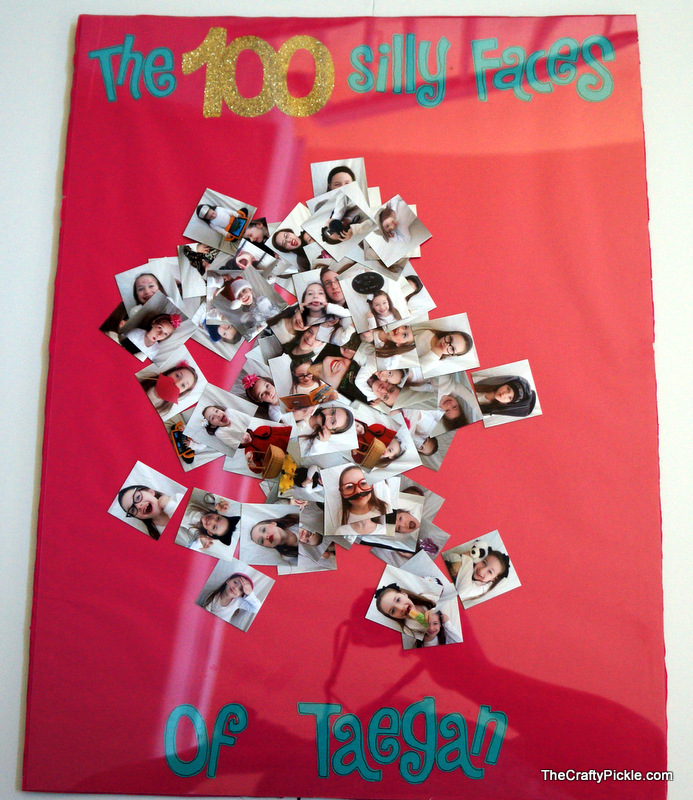
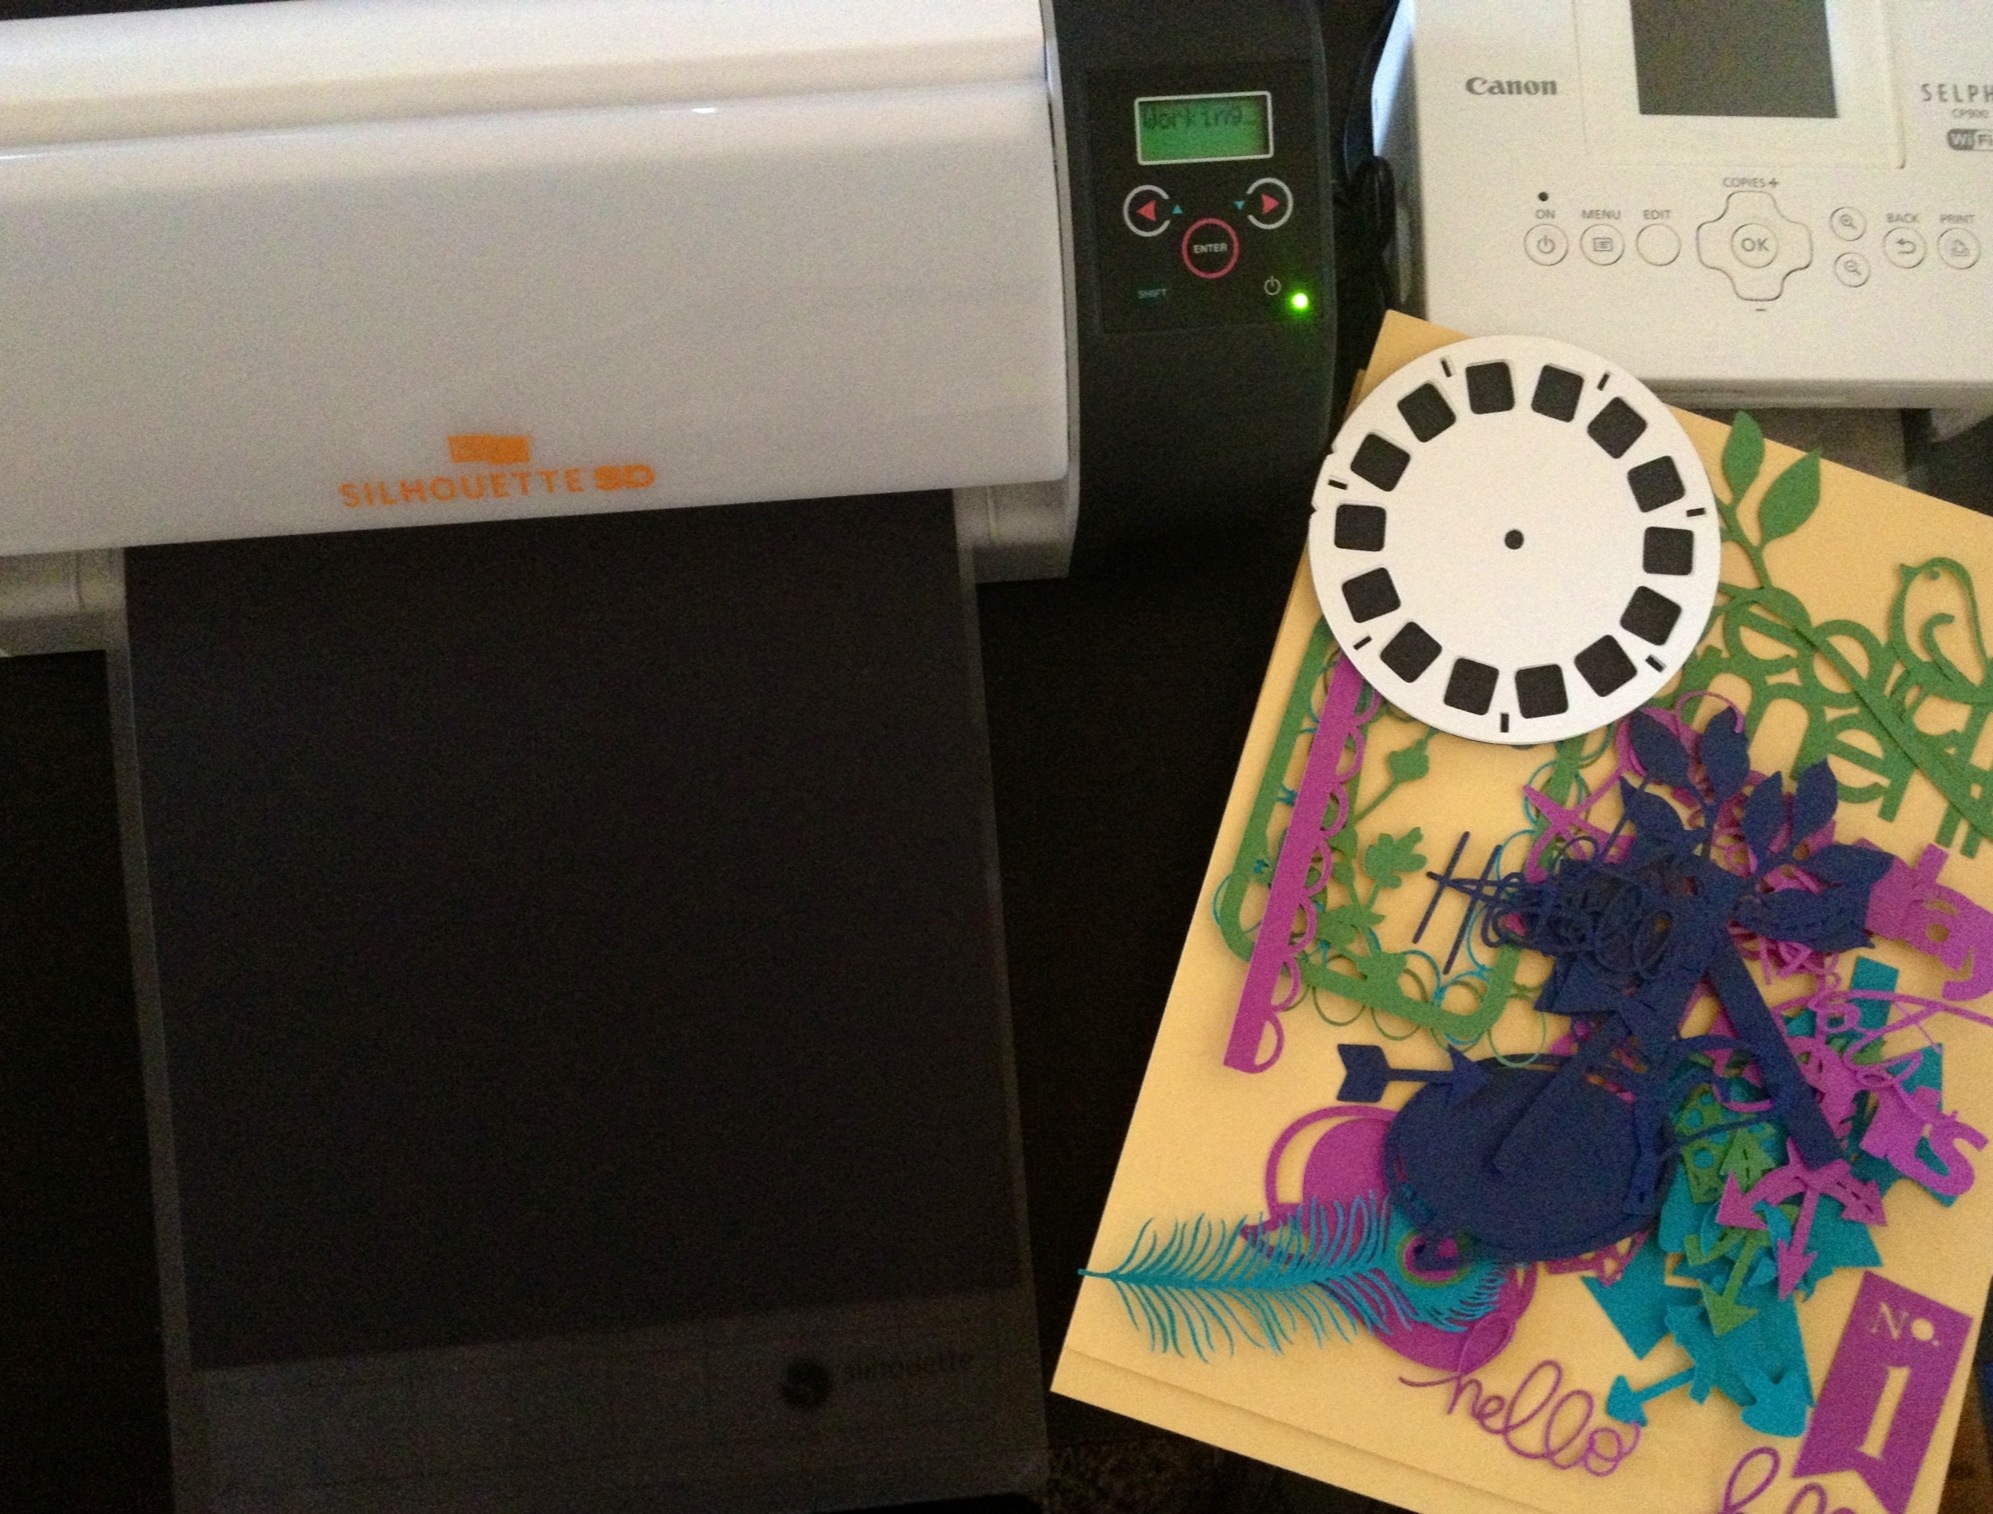
Step Three: Now for the fun part. Break out your camera, dig around your house for any sort of props you can find, crazy hats, red lipstick, funny glasses, scarves…. anything at all, definitely get your child involved in this as they have fantastic imaginations! take a neural colored sheet or big piece of fabric and drape it over some kinda surface, we used two tall chairs to hold the sheet up. Then let the fun begin! Take lots and lots of photos, your going to need 100 but not all of them will make the cut so have them make silly faces, think of every emotion they could show on their face, give them hats and silly mustaches and see how they play to the camera. I used my iPhone 4s for all of my photos for the convenience factor…. then I grouped them in 4 to a photo using an app called Picframe. after I put them all 4 to a photo I printed them on my Canon Selphy CP900 wirelessly (seriously, the best little photo printer ever). Then I trimmed each photo down. I used my Silhouette machine to cut out the title (Stampin’ Up teal cardstock and American Crafts gold POW glitter paper)

DSC01477


Step 4: I first figured out how much space i needed by putting 10 photos across and 10 photos down (I should of bought a bigger frame but it turned out that I liked the overlapping photos) Then I placed my title at the top and the bottom. I felt it needed a bit something more so I took a black fine tip pen and outlined each of the teal letters. Using a glue stick, I adhered the title all down first. Be sure to allow about a half inch of space all the way around your covered cardboard, the “frame part” will cover up some of your words if you don’t.

DSC01479


Step Five: Arrange your photos 10 across and 10 down so you know what your spacing will be. Then just fill in the rest of your photos, overlapping them a little if unnecessary. I adhered the photos down with a little bit of scrapbooking adhesive in the center, just enough to move them around if needed. Then once you have all the photos set the way you like, place the plastic that came with the frame back on top. You will want to carefully slide the black rims back on each side. As a side note suggestion that I learned for when we did this for my son’s 100th day project, you will want to apply a little bit of glue on the inside of those black rims. I used a tacky glue pen before I slid the black rims on, worked out perfectly.

DSC01482


Isn’t it adorable? I snapped this picture without the plastic in place for the sake of glare (that’s why you see small gaps in the rim of the frame, once I put the plastic on everything held together perfectly)

This was a super fun project to do with my daughter. Took a bit longer than it should of cause I was sick, but she had a great time. Now not only will she have a great project to share with her friends in class Monday, she will have a keepsake from first grade that she can hang on to forever (my 13 year old son still has the one we did for him in Kindergarten).

Have you done anything unique and fun for the 100th day of school? I would love to hear your ideas! Please comment below! Have a great week everyone!

I *Love* my silhouette!

20130119-175942.jpg

20130119-180004.jpg

Today I gave my little silhouette machine quite a workout. I am making some custom project life cards this weekend for the Feb. Studio Calico swap. I have the older version of the silhouette (the SD) which is now revised into the silhouette portrait. Although I would love the 12 inch cameo I can’t see spending all that money when my sweet little machine is going strong. It truly is amazing how far die cutting has came. I still remember coveting my pebbles in my pocket templates and hand cutting all my letters for titles to my pages. I will be transforming these piles of cut beauties (isn’t that peacock feather adorable?) into cards and posting them here on my blog very soon! Have a great weekend everyone!