A Thank You card and a Project Life card using Flair

Hi Crafty Friends!

Today I have teamed up with Scrap your Scraps to share some ideas using Flair buttons! I wanted to share two different ideas using some brand new Flair that I just added to The Crafty Pickle Etsy Store.

First up is a thank you gift card holder that I made using my silhouette and a flair from the Cozy Fall Set. I adore Autumn and pumpkin spice latte’s are my favorite!

Coffee Gift Card @TheCraftyPickle.com

I used some cardstock I had on hand and cut out the card design on my Silhouette using design # 29511

Coffee Gift Card @TheCraftyPickle.com


I die cut a tag from some cardstock scraps I had, added a little bit of decorative trim and attached it with a little clothes pin. I attached the PSL (pumpkin spice latte) button with some tombo xtreme adhesive. You could also use a button from the Starbucks flair set too, I just wanted to go for an autumn feel with this card.

Coffee Gift Card @TheCraftyPickle.com


The inside has room for the coffee gift card as well as a little room to write a personal message.

Coffee Gift Card @TheCraftyPickle.com


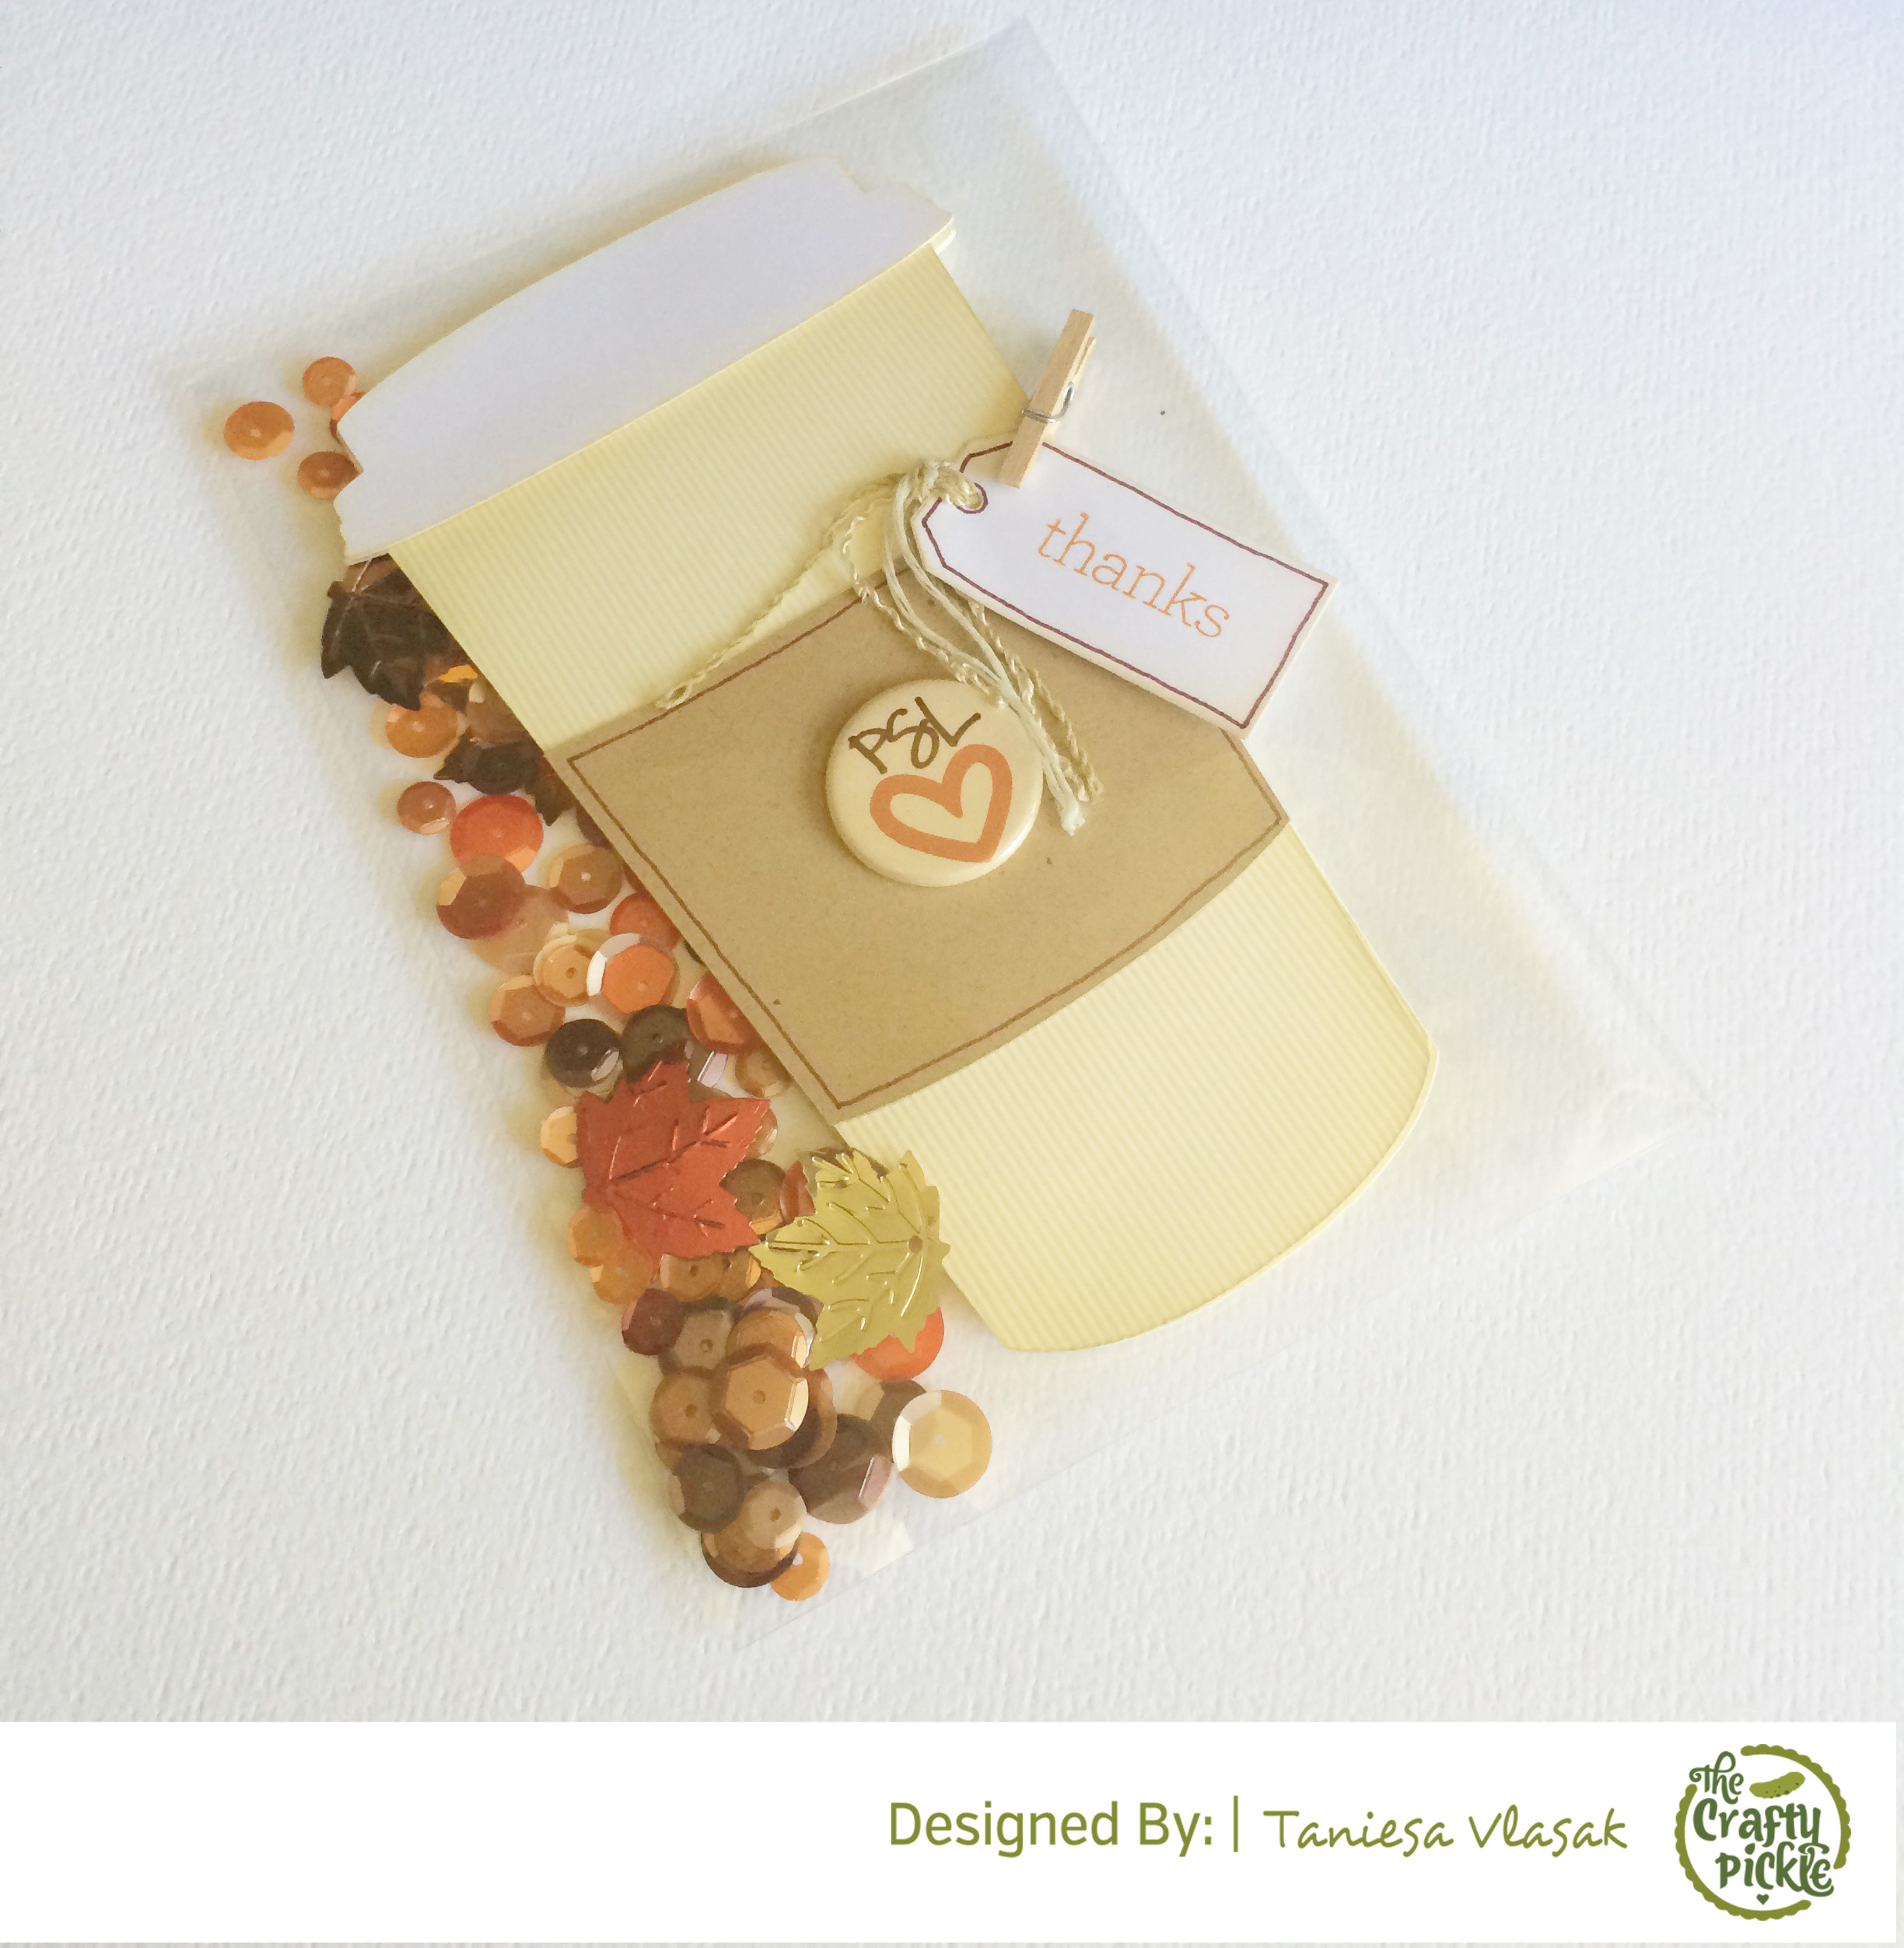
Once it was all finished I slipped the card into a clear envelope and tossed in some of the exclusive autumn mix sequins from The Crafty Pickle Etsy shop for a little added fun touch.

Next up I have a project life card that I am sure anyone can find use for in their album, Mine is usually inspired by one of my teenage boys dodging the camera. For this card I am using the Photo Not Available flair from the Everyday Photo #2 set

No Photo Available Project life card @TheCraftyPickle.com


To make this card I took a white piece of heavy cardstock that was in my scrap pile and cut out the camera design on my silhouette (Design #41015)  The design called for several shades of gray but I only had two shades on hand so I just cut everything out of the white cardstock and colored the pieces with my copic markers (N8, N6, N4, N2, Y15, and Y19) I also used my wink of stella glitter pen and my Stardust gelly roll pen by Sakura

No Photo Available Project life card @TheCraftyPickle.com


I attached a few sequins (that are always included in my flair packages) and attached the Photo Not Available flair with some Tombo Xtreme adhesive. The base card is a Becky Higgins Project Life grid card.

No Photo Available Project life card @TheCraftyPickle.com

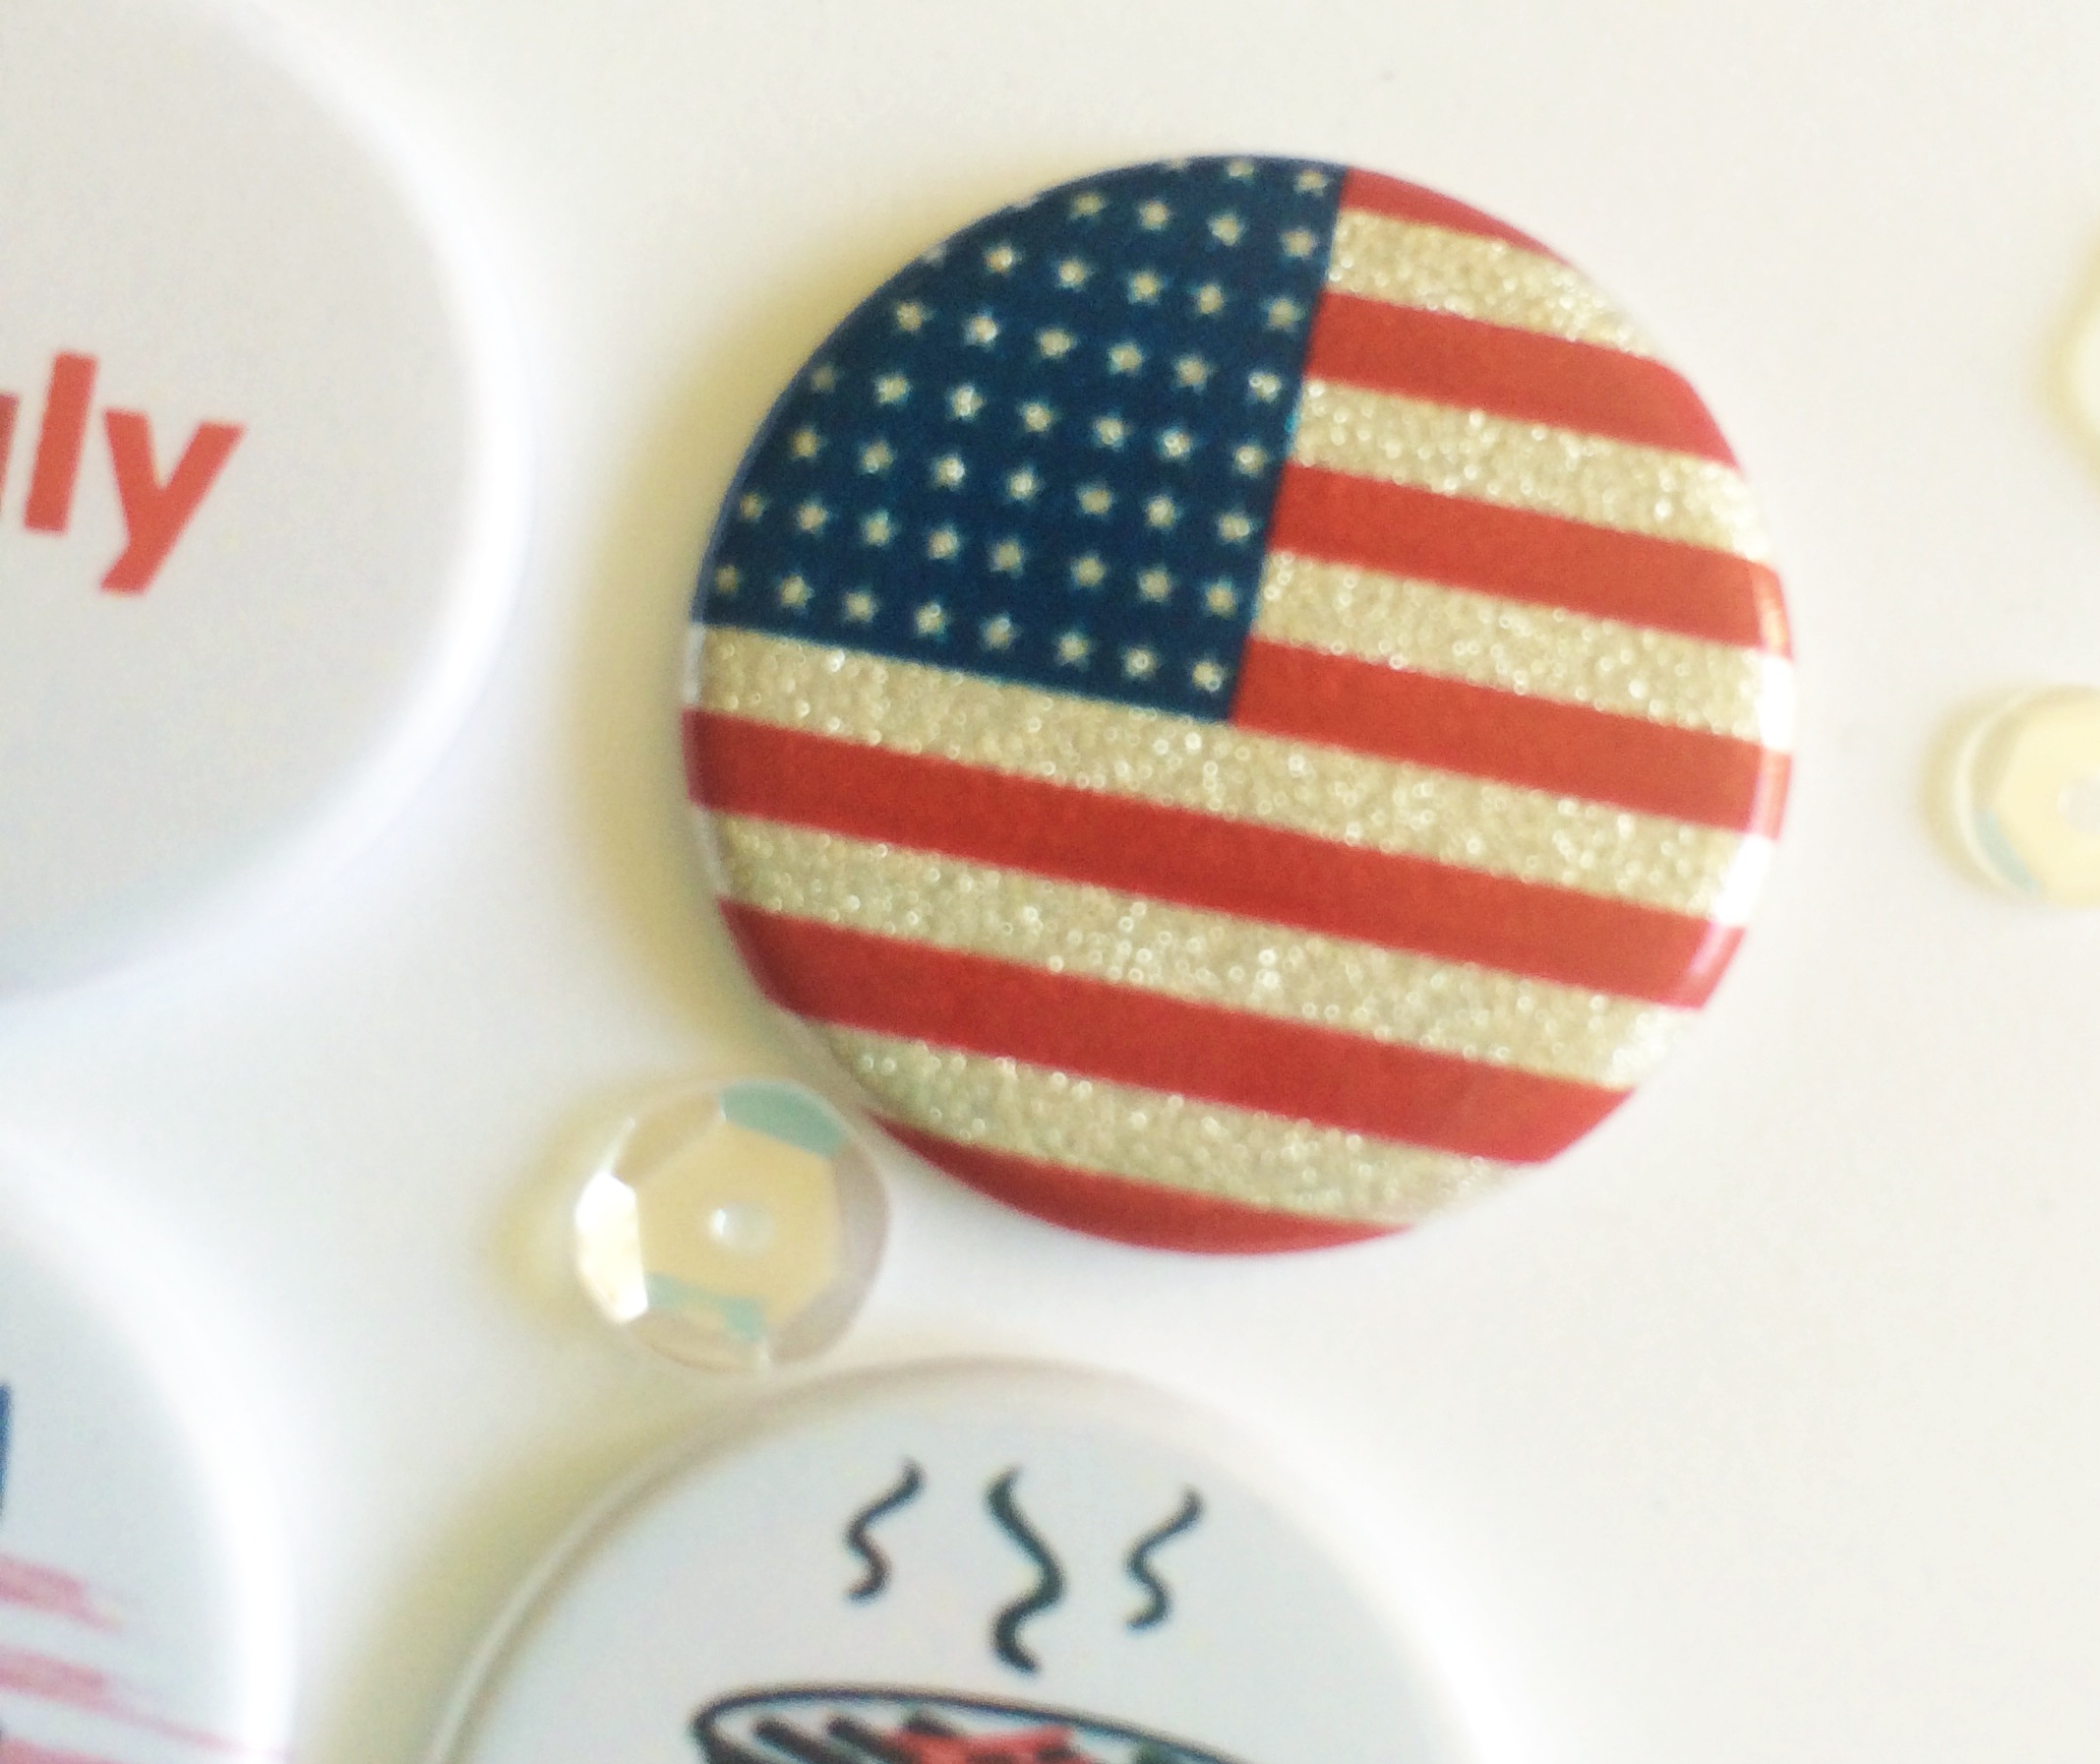
As you can see above my flair has a very low profile making it ideal for page protectors of all types, especially pocket pages. It’s about the same dimension as chipboard or thickers.

If you haven’t visited The Crafty Pickle Etsy shop recently you might be surprised to find over 30 new flair sets including our new color patterned pop collection and some special limited edition sequins mixes.

Make sure you Stop by the Scrap your Scraps blog for even more flair inspiration, Not to mention a fun giveaway from The Crafty Pickle Etsy Store too!!!

Happy Crafting!

The Crafty Pickle

Meet the all new Crafty Pickle Design Team!

I am so excited to finally announce the FIRST Crafty Pickle Design Team!

The Crafty Pickle design team

I cannot wait to share with you the amazing talent these ladies possess. Stay tuned for some beautiful inspiration coming your way this November, including a special blog hop with lots of prizes!

Have you checked out TheCraftyPickle Etsy shop lately? we have added over 35 new sets, A new color POP pattern series and three seasonal limited edition sequins mixes! Make sure you hop over and check it out!

Happy Crafting!

The Crafty Pickle

The Crafty Pickle’s FIRST Design Team Call!

Be apart of The Crafty Pickle Design Team!


Hi Everyone!

I am excited to announce that I am hosting my first ever design team call for TheCraftyPickle! Design team members will work with TheCraftyPickle Flair buttons, Close to my heart stamps and supplies, and other shop items as they become available.

I am looking for a variety of crafters, Cardmakers, Scrapbookers, Project lifers, Special DIY project makers.

As a design team member you will receive:

  • Free Flair and accessories from my Etsy shop to work with.
  • A discount on all Close To My Heart products, Plus free bonus product as available.
  • Your creative work featured on The Crafty Pickle blog, Etsy example photos, Pinterest, Instagram, Facebook, and other social media.
  • Support and creative connections with our design team in a private facebook group.

What we are expecting of our Designers:

  • Two to three projects per month using Flair and or Current Close To My Heart Products, and to share them on your personal social media (Blog, Pinterest, Facebook, Instagram, etc..
  • An active blog and active presence in other social media such as instagram, facebook, Pinterest, etc…
  • High quality project photography.
  • Participation in Blog hops and group events.
  • Participation in at least one detailed tutorial (text/photos or Video) that will be on The Crafty Pickle blog per month. (this counts as one of your projects)
  • Promote and share The Crafty Pickle products and blog whenever possible using social media.
  • A Three month commitment (starting November) with the option to continue longer if mutually agreed.

This call is open to all crafters, even international.

Sound like fun? Here is what you need to do to apply to be apart of the TCP Design team.

Email the following application to TCraftyPickle@Gmail.com with the subject Design Team Call.

  1. Your name, location, and a short bio of yourself.
  2. Links to your Blog, Facebook, Instagram, Pinterest, and any other social media sites you actively use. Link any craft type forms you are apart of and would post to as well.
  3. List any past or present design team experience (experience is NOT necessary).
  4. Submit at least three projects showcasing your talents especially in the area of using flair buttons and stamping. Using TCP Flair and CTMH stamps are a plus but definitely not a requirement.
  5. Do you own an electronic die cutting machine?
  6. Attach a photo of yourself that could be used on the blog if chosen for the design team.

I am beyond excited to see your projects and form a fantastic team. Due date for your application is October 17th at 11:59pm PST. Every applicant will be notified by October 24th. Followed by an announcement on The Crafty Pickle blog  the following week.

Thanks for stopping by!

Happy Crafting!

The Crafty Pickle

HUGE Etsy Shop update!

Hi Friends!

I just finished with a HUGE Etsy shop update this week. Lots of new flair sets and a couple of fun things like Ponytail holders and bookmarks perfect for project life, scrapbooking, or your organizers/filofaxes!

Here is a peek:

TheCraftyPickle.com Etsy Update!All Button flair is flat so it adds less bulk to your page protectors.

TheCraftyPickle.com Etsy Update!

Flair paper clips!

TheCraftyPickle.com Etsy Update!

Ponytail holders made with ANY of the buttons in the shop!

TheCraftyPickle.com Etsy Update!

Monthly flair sets including this one for July. The flag flair is made with real glitter!

TheCraftyPickle.com Etsy Update!My little girl is obsessed with My Little Pony right now and this is a set I created for her… maybe some of you have little fans out there too.

TheCraftyPickle.com Etsy Update!

My addiction 😉

To see all of the 22 NEW listings check out my Etsy shop HERE.

Happy Crafting!

The Crafty Pickle


More Embellishment Organization!

Organize your Flair buttons! More @TheCraftyPickle.com

Hi everyone,

It’s been a while but I am back to share an idea of how to organize and store your flair buttons/badges.

I actually struggled with this one and searched for a solution everywhere. At first I had all of mine in a jar but that was a pain to sift though.

I saw ideas of putting them flat in CD cases. Putting them in packaging inside a basket and flipping though them, even putting them in coin page protectors and placing in a binder. All very clever ideas but none of which I thought would work for me.

I knew that they needed to be organized by color. If you have seen my previous posts you know that I organize nearly everything by color. I also knew that I needed something that would have room to add more than my current collection. I didn’t want to have to have multiple cases for one type of embellishment (except washi tape and PL cards, those don’t count ).

While I was at Michaels in the beading section I came across a fantastic sectioned organizer (for bead organization) and it was really reasonable ($5.99) It had more space than a embroidery floss organizer box ($2.99) and I figured it just might work. Here is my little button collection.

Organize your Flair buttons! More @TheCraftyPickle.com

Organize your Flair buttons! More @TheCraftyPickle.comIn addition to organizing by color I have 4 sections dedicated to seasonal buttons. Spring, summer, fall, and winter. There is also multi-colored button sections and spaces for specific themed flair.

Organize your Flair buttons! More @TheCraftyPickle.com

Organize your Flair buttons! More @TheCraftyPickle.com

I think this little case would also be perfect for shaped paperclips, buttons, and wood veneer as well! If you have a larger collection or want a bit more portability I would suggest the Close to my heart small organizer with the foam insert and small craft boxes. I store my wood veneer in those and it works out really well for me.

Thanks for stopping by!

Happy Crafting!

The Crafty Pickle

Now is a GREAT time to join!

Hi Friends!

Just a quick stop in to tell you about a fantastic opportunity going on right now!

Join CTMH with TheCraftyPickle.com

Join Close To My Heart as an Independent Consultant April 1–30, 2014, and receive your favorite “art-full” Close To My Heart Cricut® collection FREE! Our New Consultant Kit is just $99 and comes packed with nearly triple the retail value in products and supplies to help you succeed. Plus, when you qualify for the Straight To The Top program, you will be refunded the price of your New Consultant Kit. Select your FREE Cricut® collection—retail priced at $99—when you order your New Consultant Kit and watch your new business soar!

Dates: Offer valid April 1–30, 2014.

 Only a week left to start your business with this sweet bonus! Please contact me at TaniesaVlasak@gmail.com or call 209-834-7092 if you have any questions. If you are ready to just jump in you can sign up HERE.

Happy Stampin!

The Crafty Pickle

Using flair buttons in your Project Life albums.

Hi Everyone!

Today I am showing a few of the new Flair sets in my etsy shop as well as some ideas for using flair in your Project Life albums.

I had a problem in the past with using flair inside my pocket pages because of the bulk and I really didn’t care for putting mine on the outside of the page protector as it seemed to pop off or come loose over time. Now that I am using my own flair that are flatter profile, I am less worried about bulk and have been using them lots more in my album.

Here is a look at the flatter profile from a side angle.

Flatter profile flair buttons for Project Life @TheCraftyPickle.com

Here are a few ideas using TheCraftyPickle flair!

Sometimes keeping things simple is the best way to go. Although I love adding clusters of little embellishments throughout my album, sometimes keeping a simple design makes a big statement. For this card I used my silhouette to cut out a simple frame. I attached it to a Project Life pre-designed card and then added a flair piece from the everyday set.

Using Flair in your Project Life album @TheCraftyPickle.com


This next one I whipped up in minutes. I took a clip art TV and positioned it on my 3×4 card in Photoshop Elements. I added a flair from the afternoon/Evening set in the center of the TV and now it is ready for a small photo or some journaling.

Using Flair in your Project Life album @TheCraftyPickle.com


Background stamps are wonderful for making your own Project Life cards. For the sunshine card I stamped the background using a Studio Calico background stamp and added on a little yellow face flair (which are free with any purchase for the month of April!)

Using Flair in your Project Life album @TheCraftyPickle.com


This next one uses a basic Becky Higgins grid card and a few scraps of cardstock. I cut out the shapes using some basic paper punches and added a Flair piece from the Crummy day set. To finish it off I splattered a bit of gray and black ink in the bottom corner.

Using Flair in your Project Life album @TheCraftyPickle.com


This next card was made using a digital stamp from Tracy Larsen, some cloud washi tape, and a flair from the May Flair set. Right now there are January though June monthly sets in the shop and they all include one real glitter flair piece! July-December coming soon!


Using Flair in your Project Life album @TheCraftyPickle.com


Same idea for a monthly marker card. Layered with a paper punch and some chalk stenciling in the background.

Using Flair in your Project Life album @TheCraftyPickle.com


This sweet card was made with a silhouette cut, a label punch and a heart flair from the Watercolor Hearts flair set. The elements in this card would be great layered over a photo directly as well.

Using Flair in your Project Life album @TheCraftyPickle.com


Using Flair as a “O” substitute is lots of fun. To make this card I just splattered red ink over white cardstock and added some Heidi Swapp Mistable letters to make the word JOY. The Flair piece is from my Everyday set.

Using Flair in your Project Life album @TheCraftyPickle.com


I LOVE enamel dots and they are so fun to mix with flair. This one uses a piece from the Family set.

Flatter profile flair buttons for Project Life @TheCraftyPickle.com


And this one uses a piece from the Disney set.

Using Flair in your Project Life album @TheCraftyPickle.com


My Teenagers are very much into Minecraft lately. These three pieces come from the Minecraft set. Try making a border with three matching flair either in the center of your card or off to the side of a 4×6 card.


Using Flair in your Project Life album @TheCraftyPickle.com


Finally, a card to celebrate spring. This one was made by stamping some clouds and die cutting a little tree that made a perfect spot to add the Spring flair piece from the May Flair set.

Using Flair in your Project Life album @TheCraftyPickle.com


I hope those examples provided some inspiration of your own to use flair in your albums.

Here is a peek of some new flair sets that have been updated to my Etsy shop. I am also happy to do Custom orders as well, Just drop me an email or send me a custom order request though Etsy.

Flatter profile flair buttons for Project Life @TheCraftyPickle.com

Flatter profile flair buttons for Project Life @TheCraftyPickle.com

Flatter profile flair buttons for Project Life @TheCraftyPickle.com

Flatter profile flair buttons for Project Life @TheCraftyPickle.com

Flatter profile flair buttons for Project Life @TheCraftyPickle.com

Flatter profile flair buttons for Project Life @TheCraftyPickle.com

To see more Crafty Pickle flair sets click HERE to visit my Etsy Shop. Want even more flair inspiration for your Project Life album? The talented girls over at ProjectLifeCardSwap.com have come up with some beautiful designs using my flair, And if you hurry over before March 31st you can enter to win a Crafty Pickle Flair package.

To celebrate my shop update I would like to give away two sets (any that are in my Etsy store) to two lucky winners. For a chance to win please add your name, location, and tell me what Crafty Pickle flair set is your favorite. Winner will be announced 3/28 Friday afternoon.

Update: Congratulations to Cyndie Hart and Lynne Thomas Rudolph! You both win a CraftyPickle Flair set. Please drop me an email and let me know which set you would like.

Happy Crafting!

The Crafty Pickle


Rainbows make me HAPPY!

Using a nail polish display to organize your ink mist, glitter, and embossing powder. More at www.thecraftypickle.com

I think Rainbows make most people happy, but they have to make papercrafters ESPECIALLY happy! Which is why I couldn’t wait to show you my organization for my ink mists, Glitter, and embossing powder!

I have played around with organization on these items a few times… nothing really seemed to quite work… and as I was trying out different methods I was accumulating more colors of everything. There is something about a new bottle of Mister Huey that makes me warm and fuzzy inside.

I saw a few ideas around pinterest and organization groups like this one, and i thought spice racks would be just the thing… but I don’t have much wall space in my craft studio so it left me with little options.

Then one day I was browsing Amazon and I found THESE!!!

Using a Nail polish display as storage for ink,glitter, and embossing powder. More at www.TheCraftyPickle.com

Nail polish displays!!! You can find them on amazon HERE, but shop around to find the best deal. Just make sure that if you get more then one and you want them to line up even with each other, you purchase from the same company as the measurements on these guys can vary.

I was so excited when I got them in the mail that I started organizing my things right away…. even when I didn’t have my shelves up yet (still waiting on those). My original plan was just to organize my ink mists *if* the rack happened to work….

Using a nail polish display to organize your ink mist, glitter, and embossing powder. More at www.thecraftypickle.com Using a nail polish display to organize your ink mist, glitter, and embossing powder. More at www.thecraftypickle.com

well, It worked for me! I was so excited, and admittedly, I just stood there for a little while starring at my pretty inky rainbow, ignoring the rest of my disorganized room that I had been working on. Then a couple of days later i was trying to figure out where to stick some of my other supplies like glitter and embossing powder…. they had been in a drawer and a little cabinet but it wasn’t working very well for me. I thought for sure the embossing jars wouldn’t fit on the nail polish display as they were wider…. but they did!

Using a nail polish display to organize your ink mist, glitter, and embossing powder. More at www.thecraftypickle.com

The embossing spinner is the same style I used for my sequins station in a previous post. I keep my most used embossing powders here… White, Clear, Black, Silver, Gold… This I had for a while I just moved the location. If you missed the Sequins Station I posted a while back HERE is the link to that post with all the information on what I used.

Using a nail polish display to organize your ink mist, glitter, and embossing powder. More at www.thecraftypickle.com

I hope you enjoyed my little happy rainbow. If you are looking for even MORE inspiration check out this blog: Life, Scrapbook, Repeat Toni has some awesome ideas she gathered along with her own pretty little rainbow 🙂

I hope you all have a wonderful weekend!
xoxox,

The Crafty Pickle