Hi Crafty Friends! It’s Lisa here today from Happy Paper & Ink to share a new Project Life card that I created. I am doing some preparation for my December Daily album, so that is what inspired me to create this card.
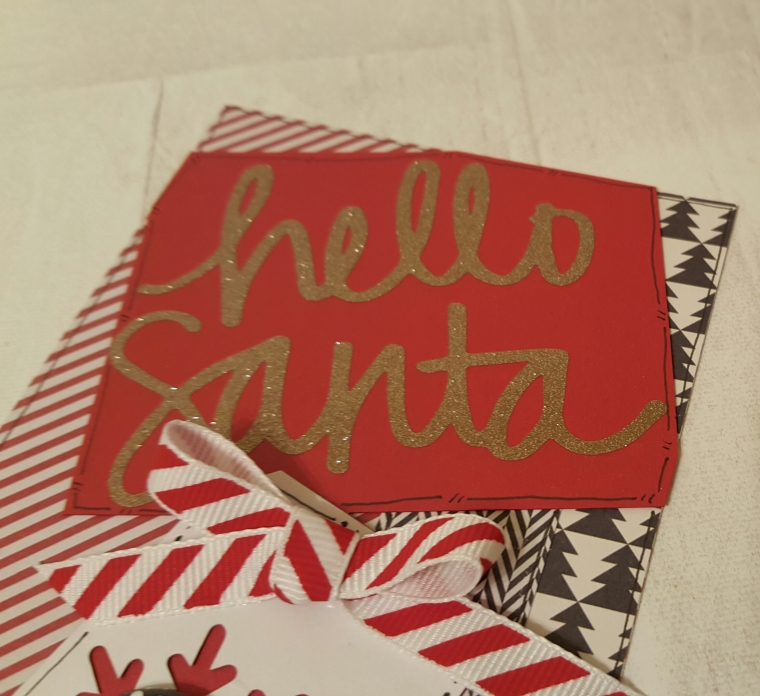
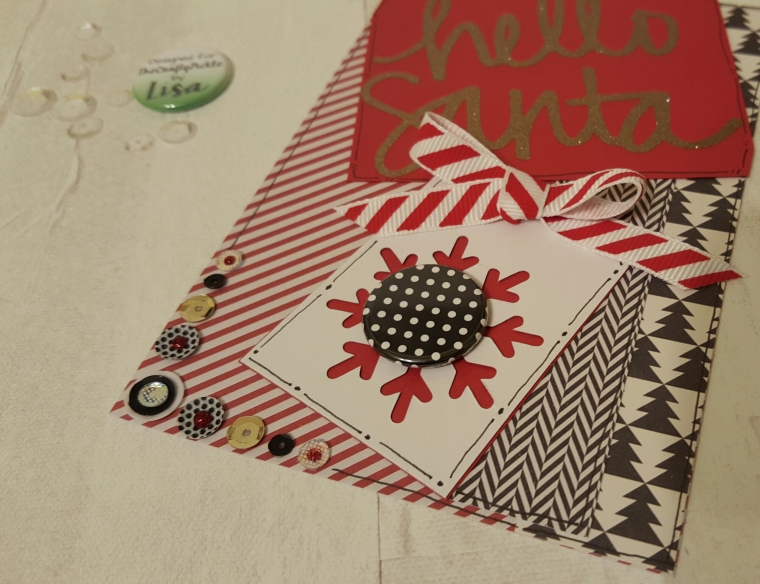
For this card, I started with Pink Paislee Merry & Bright 6×6 paper pad. I cut a tag and a 4×6 project life card from the paper pad. I then cut strips of paper for the side border to add some interest. I cut a snowflake tag on white and red paper using my Silhouette Cameo. I also cut the title using gold glitter vinyl and my Silhouette Cameo for the title “Hello Santa”. I doodled around all the edges with a black 0.8 American Crafts Black Pen and inked with black Memento Ink.
To finish off the card, I used The Crafty Pickle’s Black & White Color Pop Flair and applied it to the top of the snowflake tag. I added some sequins to the corner of the card from The Crafty Pickle. Adding any of the Relish Mixes to your layout or cards gives a fun, sparkly and thin embellishment. These come in all colors, I used the Magical Mouse mix for this card. I layered the sequins and put red glitter stickle dots on top of some of the sequins to change the look a little. And finally, I tied a bow at the top of the snowflake tag to tie it all together!
I hope you enjoyed my Project Life card & are inspired. Look for some more blog posts showing my December Daily in the future!
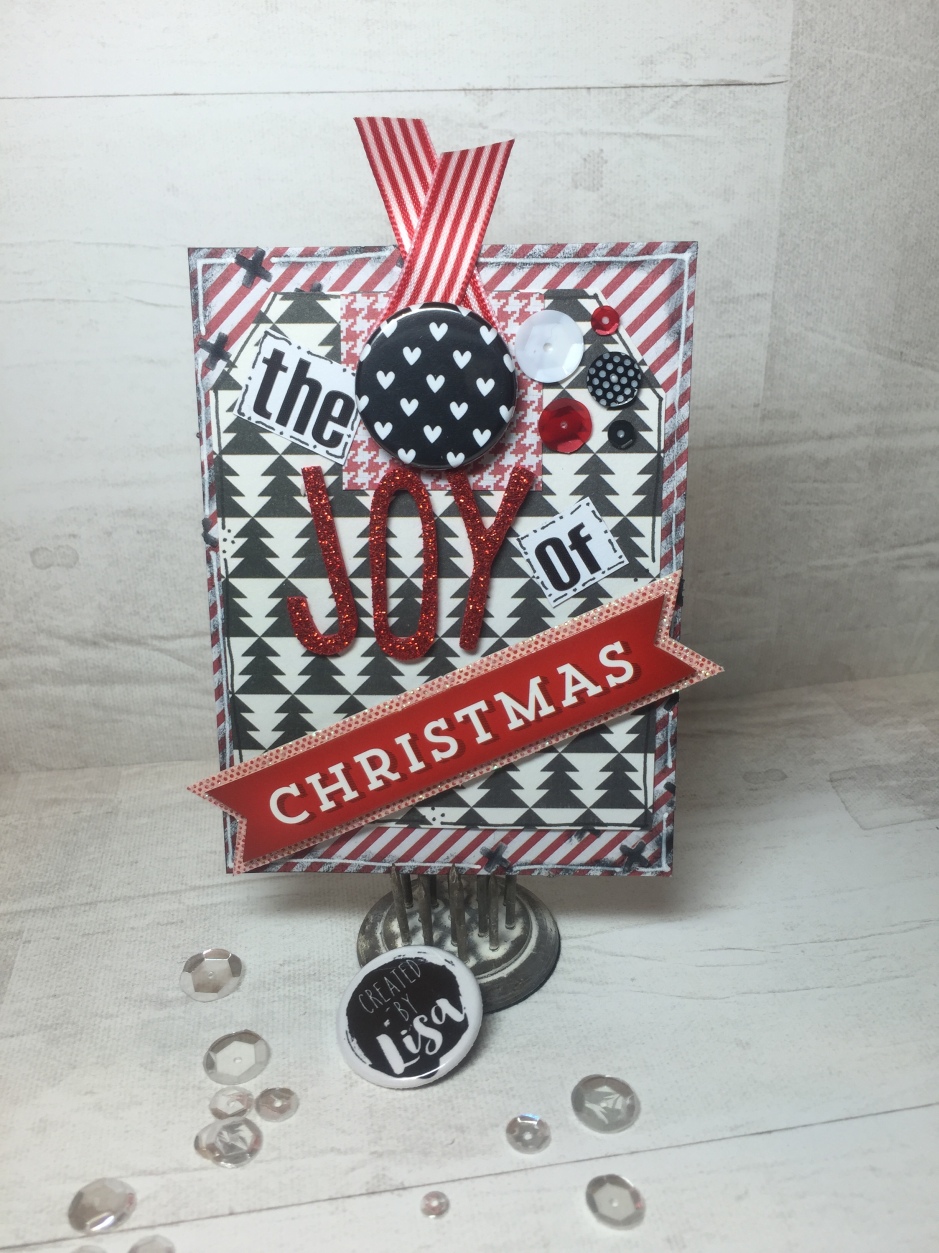
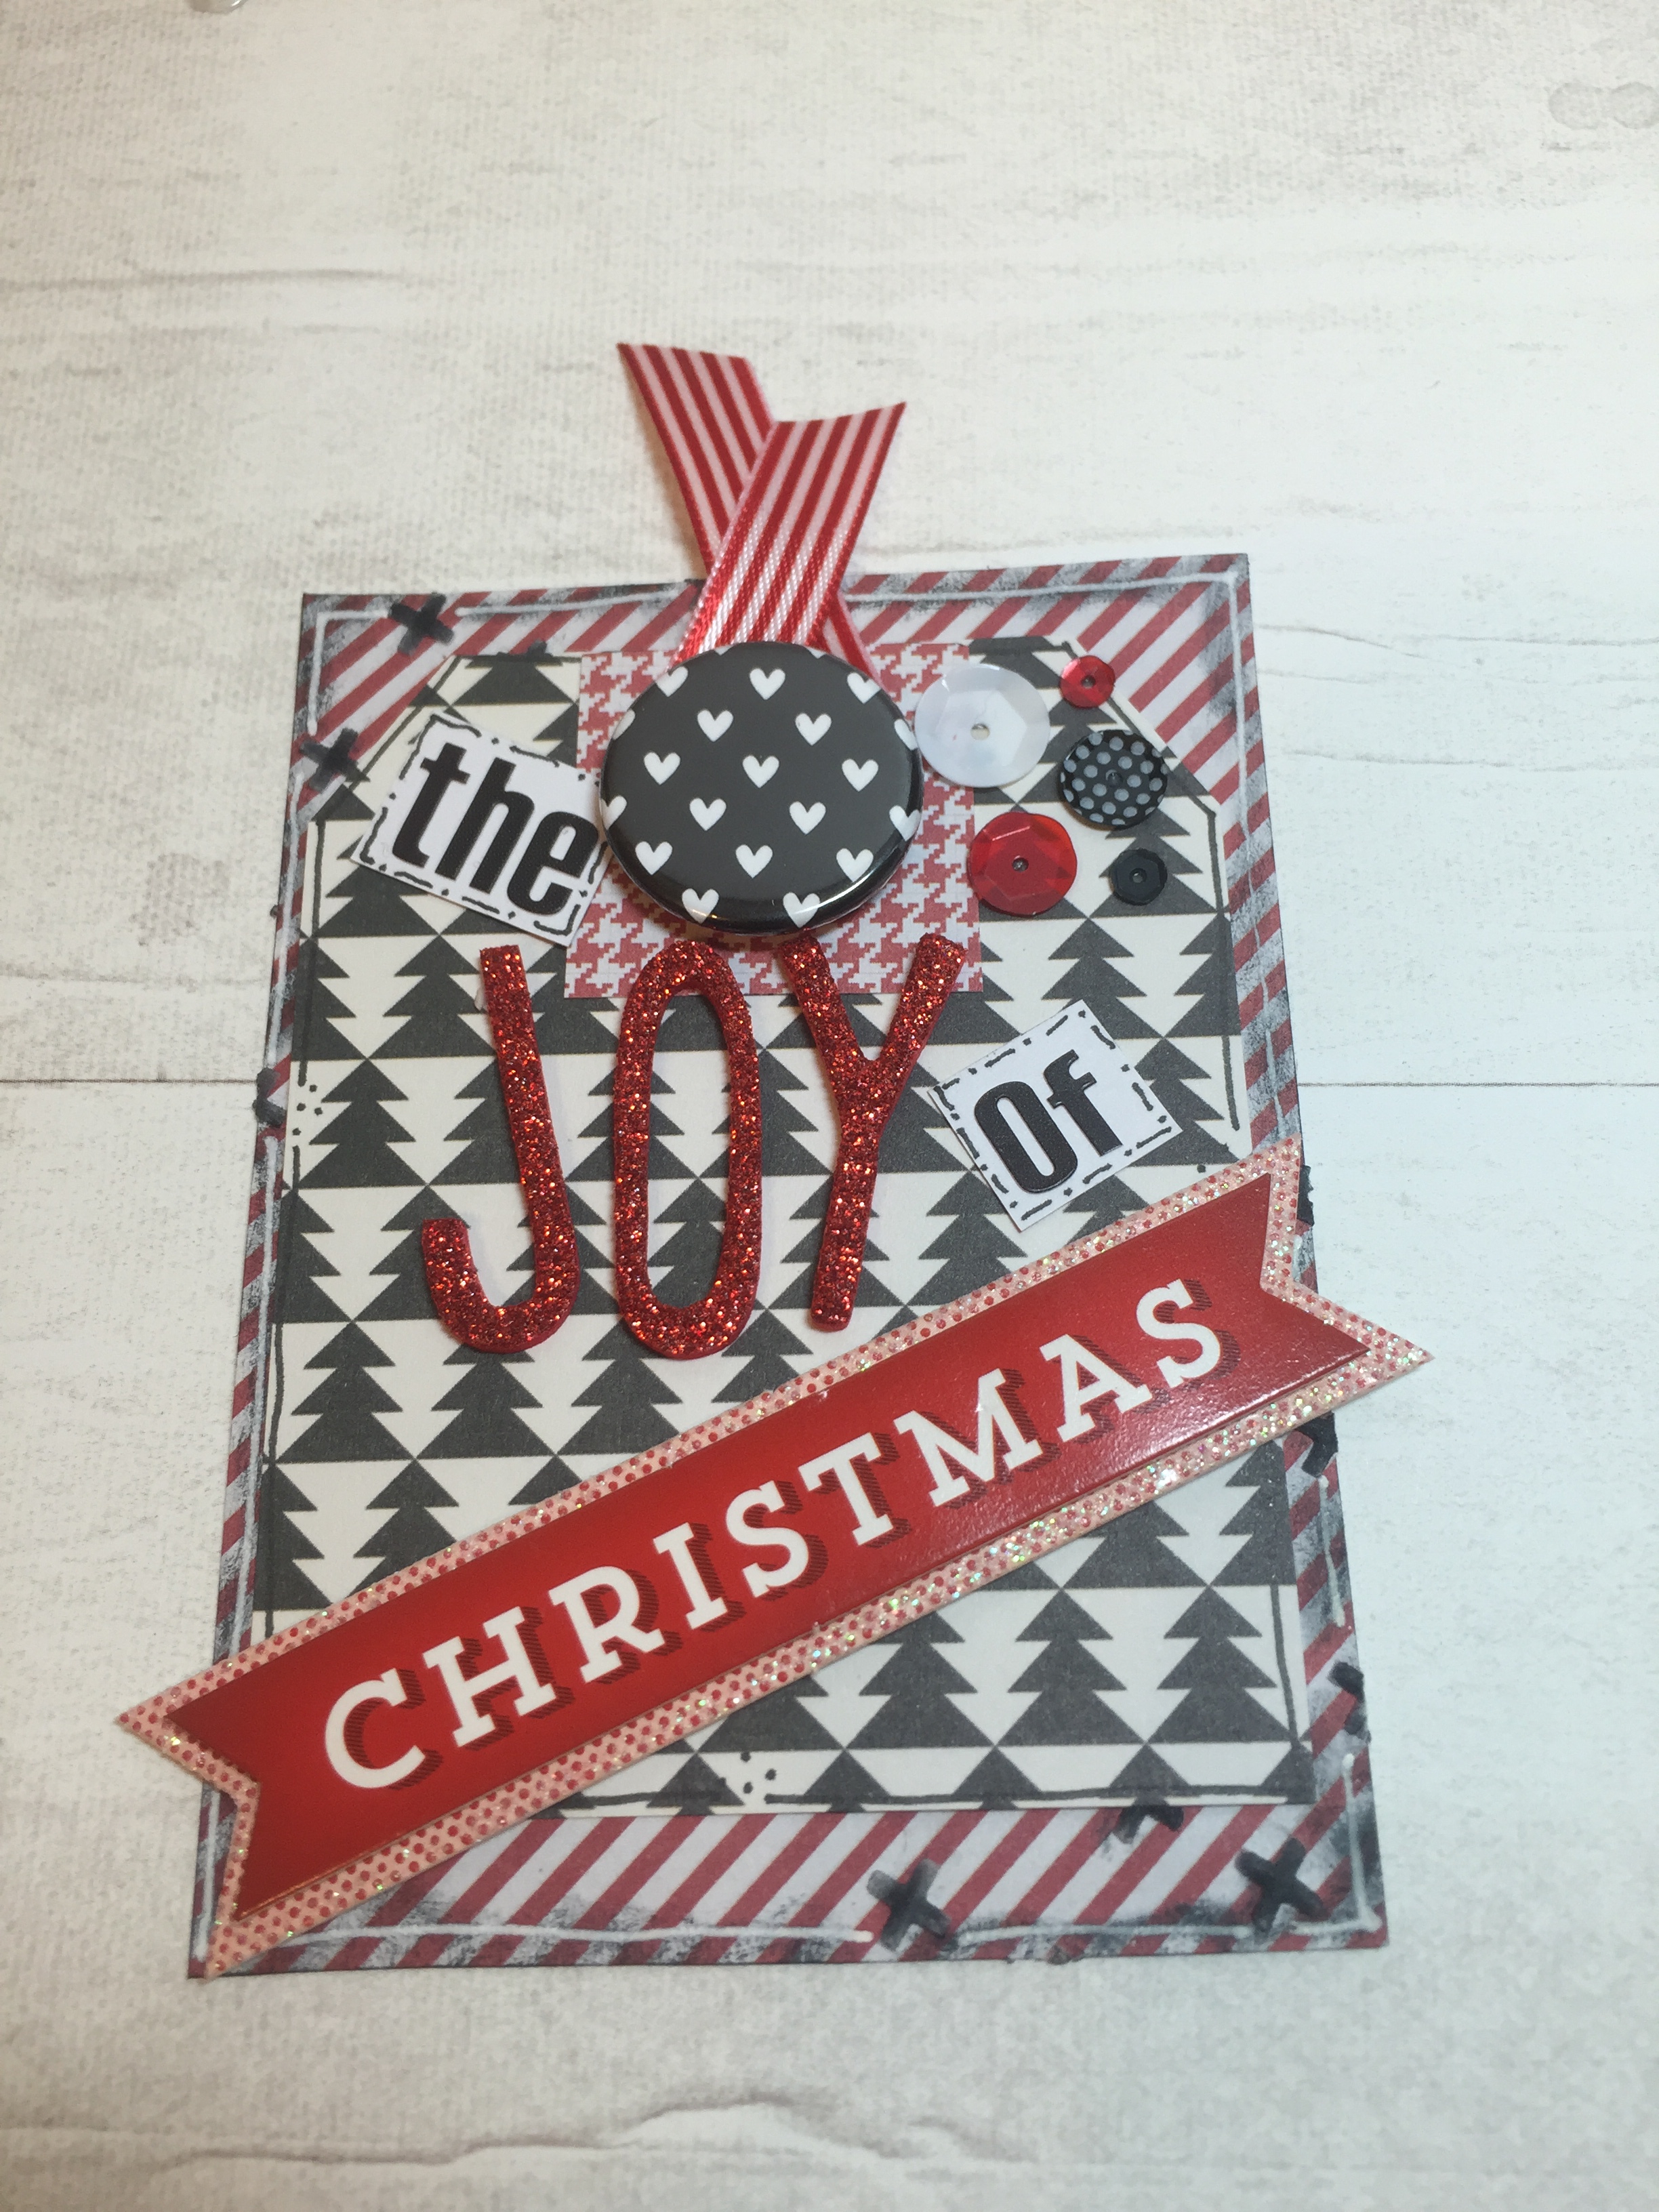
Hi Crafty Friends! It’s Lisa here today from Happy Paper & Ink to share a new Project Life card that I created. I am in the beginning stages of working on my December Daily album, so that is what inspired me to create this card.
For those of you not familiar with December Daily, Ali Edwards created it to document the days of your December. Basically, you do a page for each day spotlighting the activities of the day to include your family traditions, etc. This will be my first year to do this, and I am super excited!
To finish off the top of the card, I used The Crafty Pickle’s Black & White Color Pop Flair and wrapped a ribbon around it. I added some sequins from The Crafty Pickle. Adding any of the Relish Mixes to your layout or cards gives a fun, sparkly and thin embellishment. These come in all colors, I used the Magical Mouse mix for this card.
I hope you enjoyed my Project Life card & are inspired to start a December Daily! Look for some more blog posts showing my December Daily in the future!
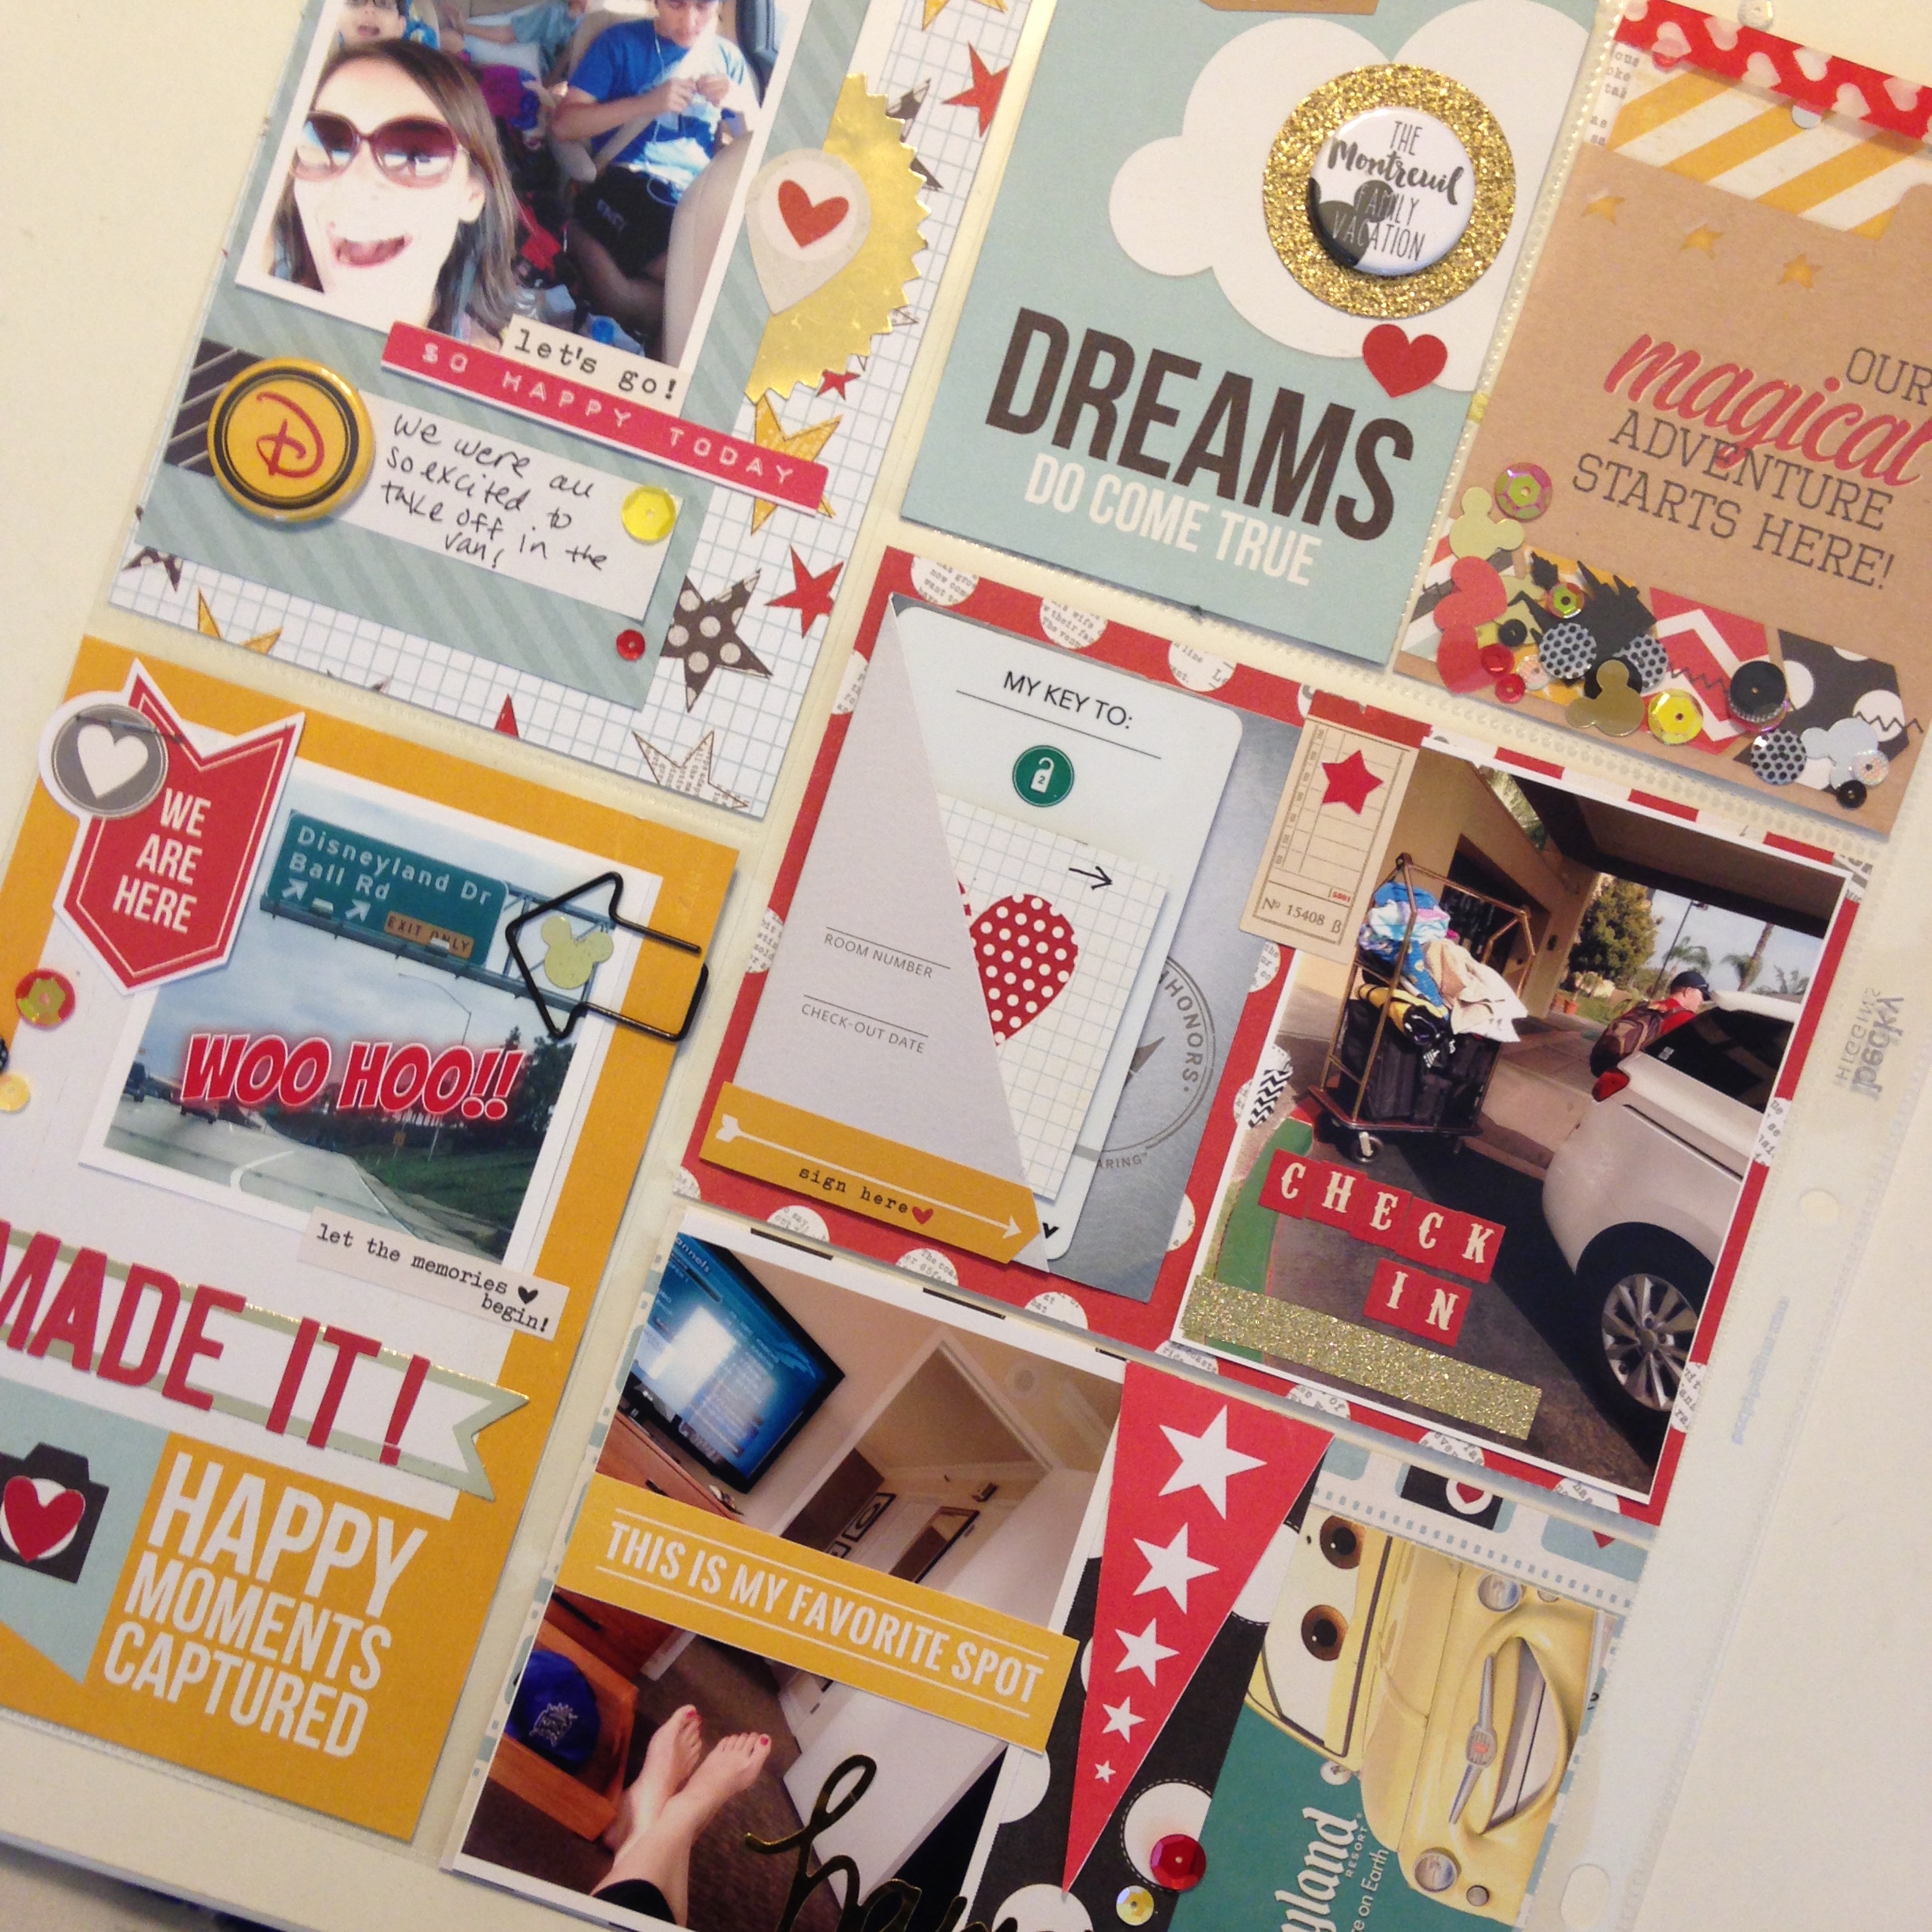
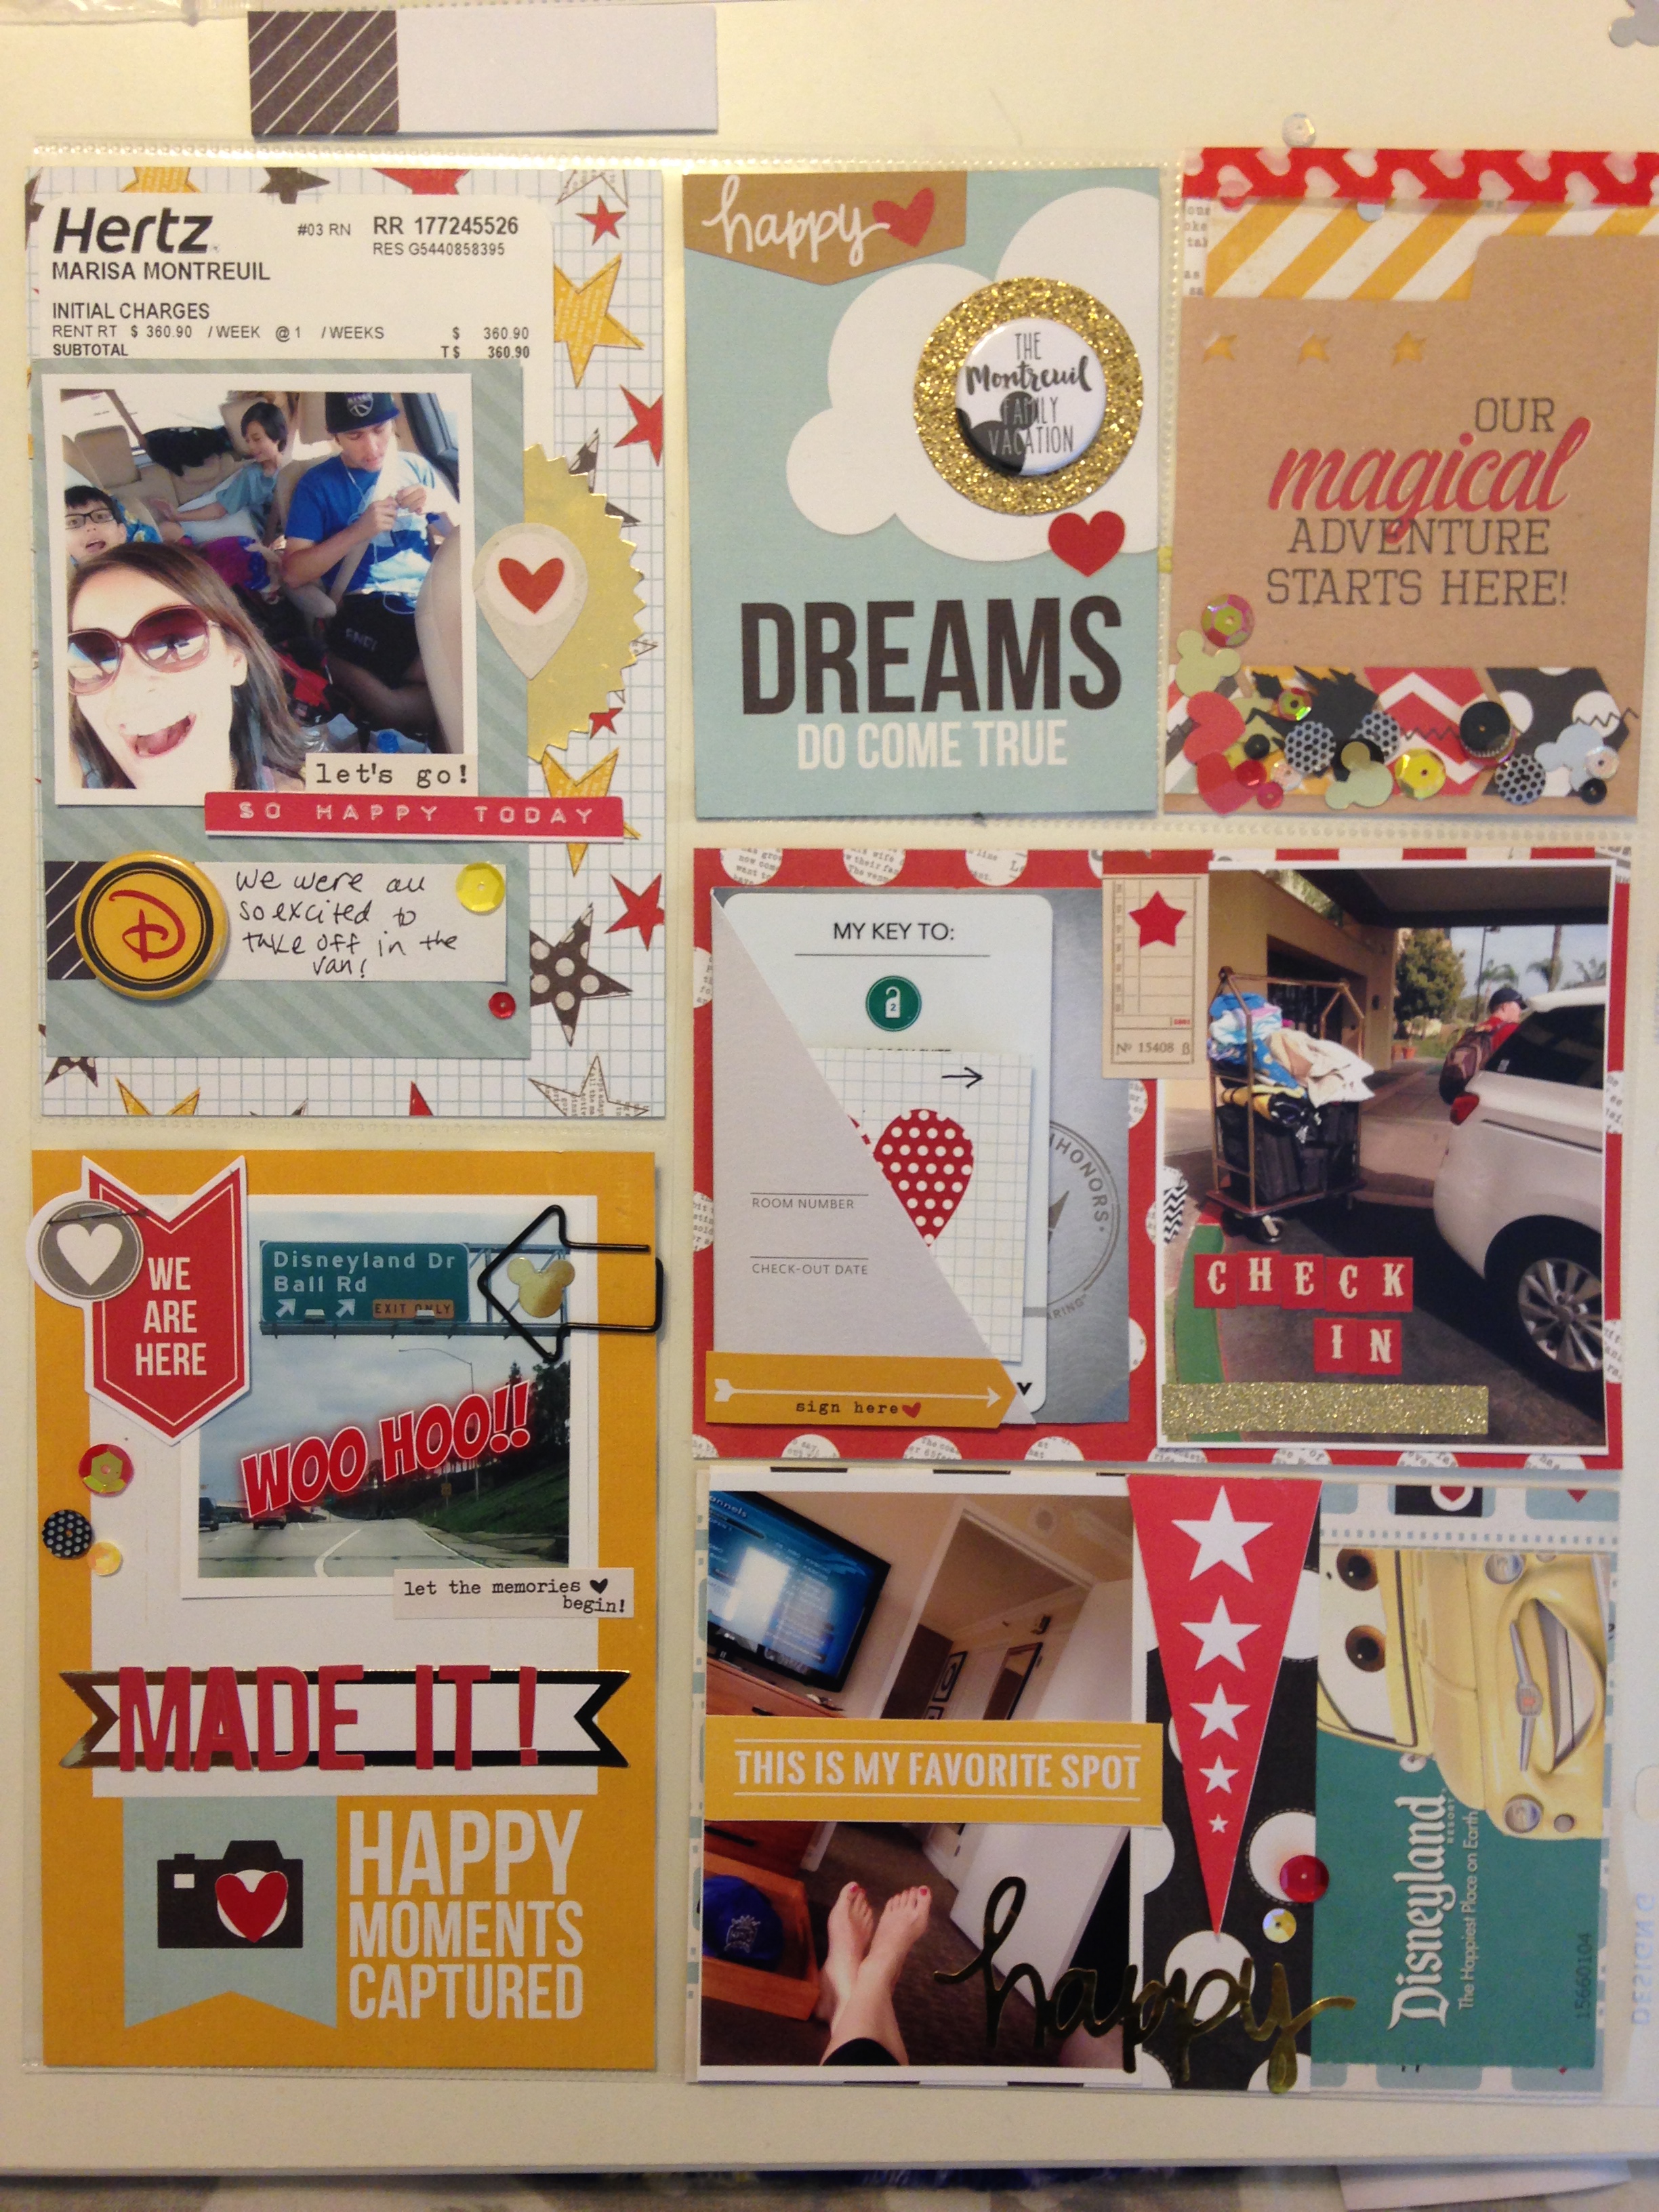
This was the second Disney section if you will in my PL albums. I’m not a big mini album girl so I like to have a special place in my albums of special trips.
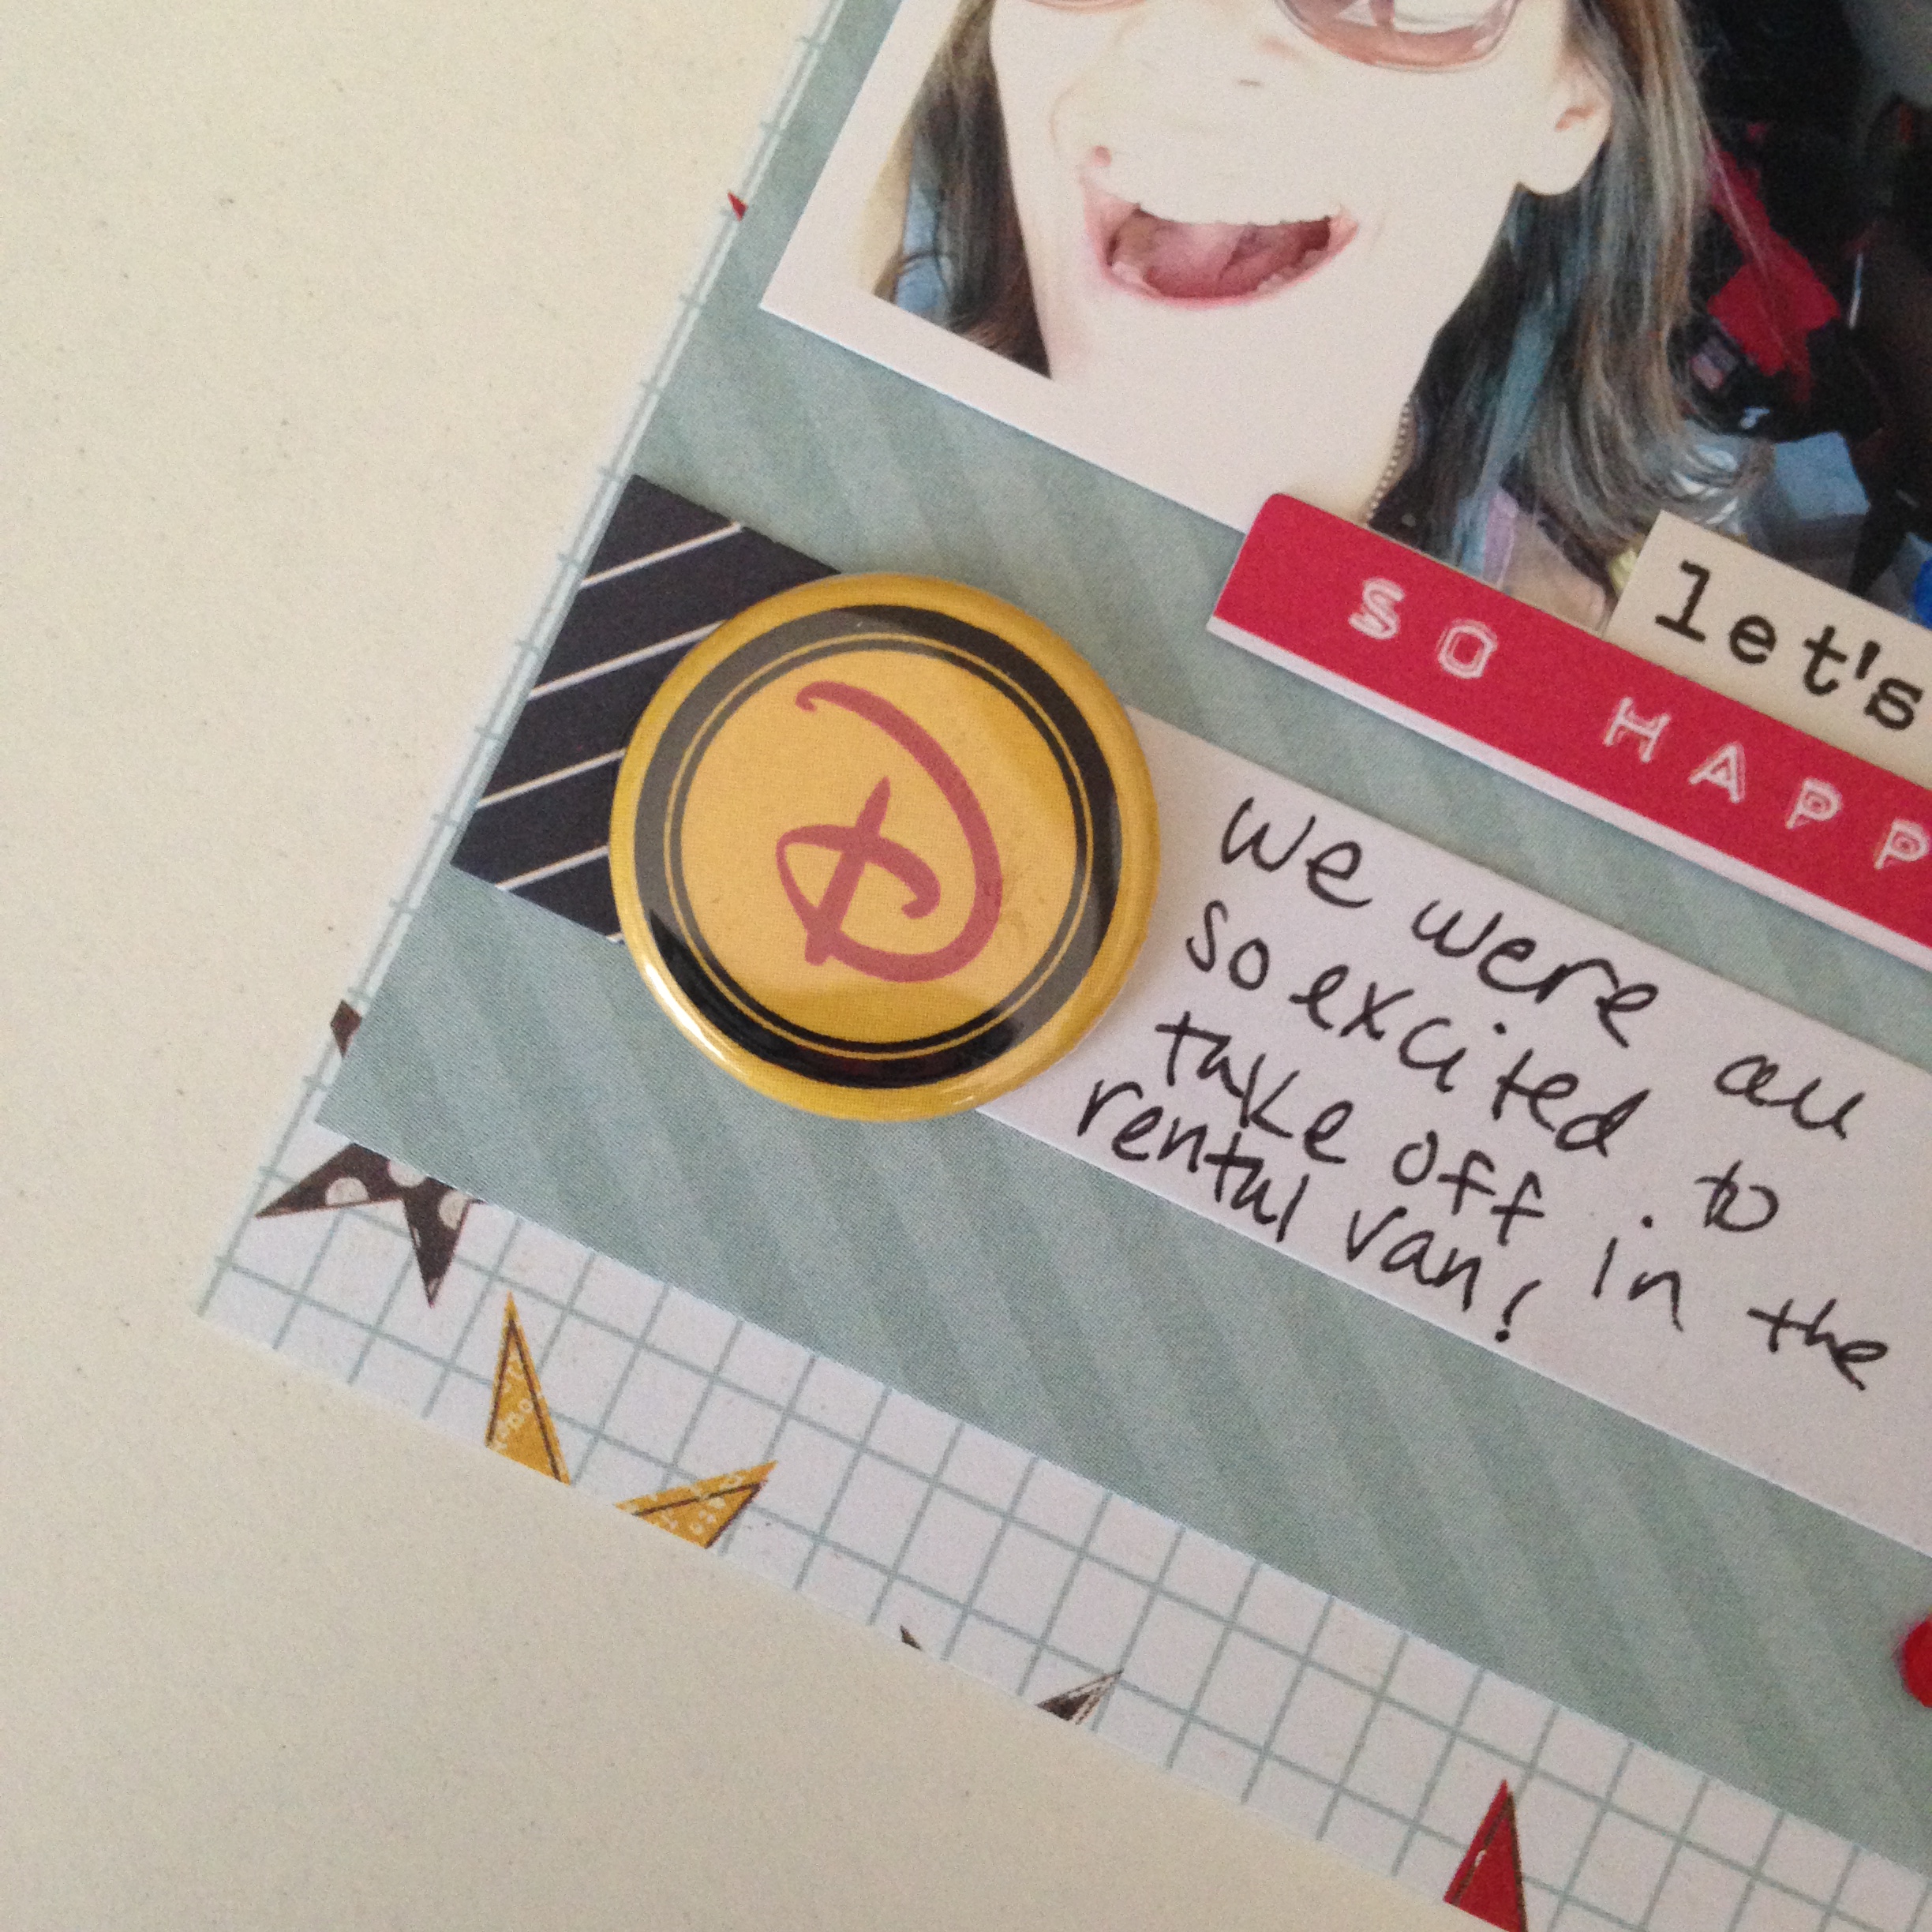
I was excited to finally use the customized flair from the shop. It reads “Montreuil Family Vacation” and it’s perfect! This is the second page in my documenting. The first page is always about the planning which is key with a family of 7 🙂
I put a little washi on the top of the pocket and aded some sequins from the shop along with a few die cut hearts and a castle.
I used a little glitter tape and a sticky spot to showcase our checking in picture. I also used the card key envelope from the hotel to hide journaling and the actual key. I always include ephemera from our trips.
I’m excited to share another Project Life layout this week and I decided to document another Scrapbook Expo from 2014 for my first page in August.
Yes 2014. Don’t judge. I’m THAT behind but that only means I have lots and lots to create with right? 🙂
I couldn’t wait to use my customized flair for this spread!
I used the new Dear Lizzy Documentary line to compliment The Crafty Pickle yummies!!
Stop it. Isn’t the flair adorable? We had a blast at the Crop and we shopped and literally dropped at midnight.
I love using the glitter tape because that glitter ain’t movin’ for nothin’! I usually cut the tape in half because I like thinner strips to accent. My title card deserved Relish mix 😉
I like applying washi to my wood veneers and was just about to do that when I forgot I picked up some “potty people” diecuts from Hobby Lobby on clearance! I used some of the black heart washi from the shop and put it on top of the diecut like i would the veneer and cut around. Voila! Custom embellishments!
Paula and I found a HUGE Daiso and we went crazy inside. I love using these Pickle Spots on my cards. The different shades are so nice because you are bound to find the right color for your project or planner layout.
Isn’t the road washi and Pit Stop flair perfect? I thought so too.
Thanks so much for stopping by! Sorry I don’t have a process video up this week but life has hit me hard this past week and I just picked myself back up!
I did film a quick video for my subbies and I hope you stop by!
It’s Marisa again with another fun project using TCP products!
This time I went outside the box..big time. But in a good way. Like I LOVE it good way.
I love documenting my life, especially the part with the 7 of us in it. I scrapbook, do Project Life and also love art journaling and mixed media. Well I added a new way to remember all the details of our crazy yet awesome days!
Enter my fauxbonichi. My knock-off of a Hobonichi. You can Google it. Or go on Instagram and ooh and ahh over how creative people can be in journaling their daily life. I know I did 🙂
I wanted to see if I could incorporate my CP products in this newfound love of mine.
I did just that.
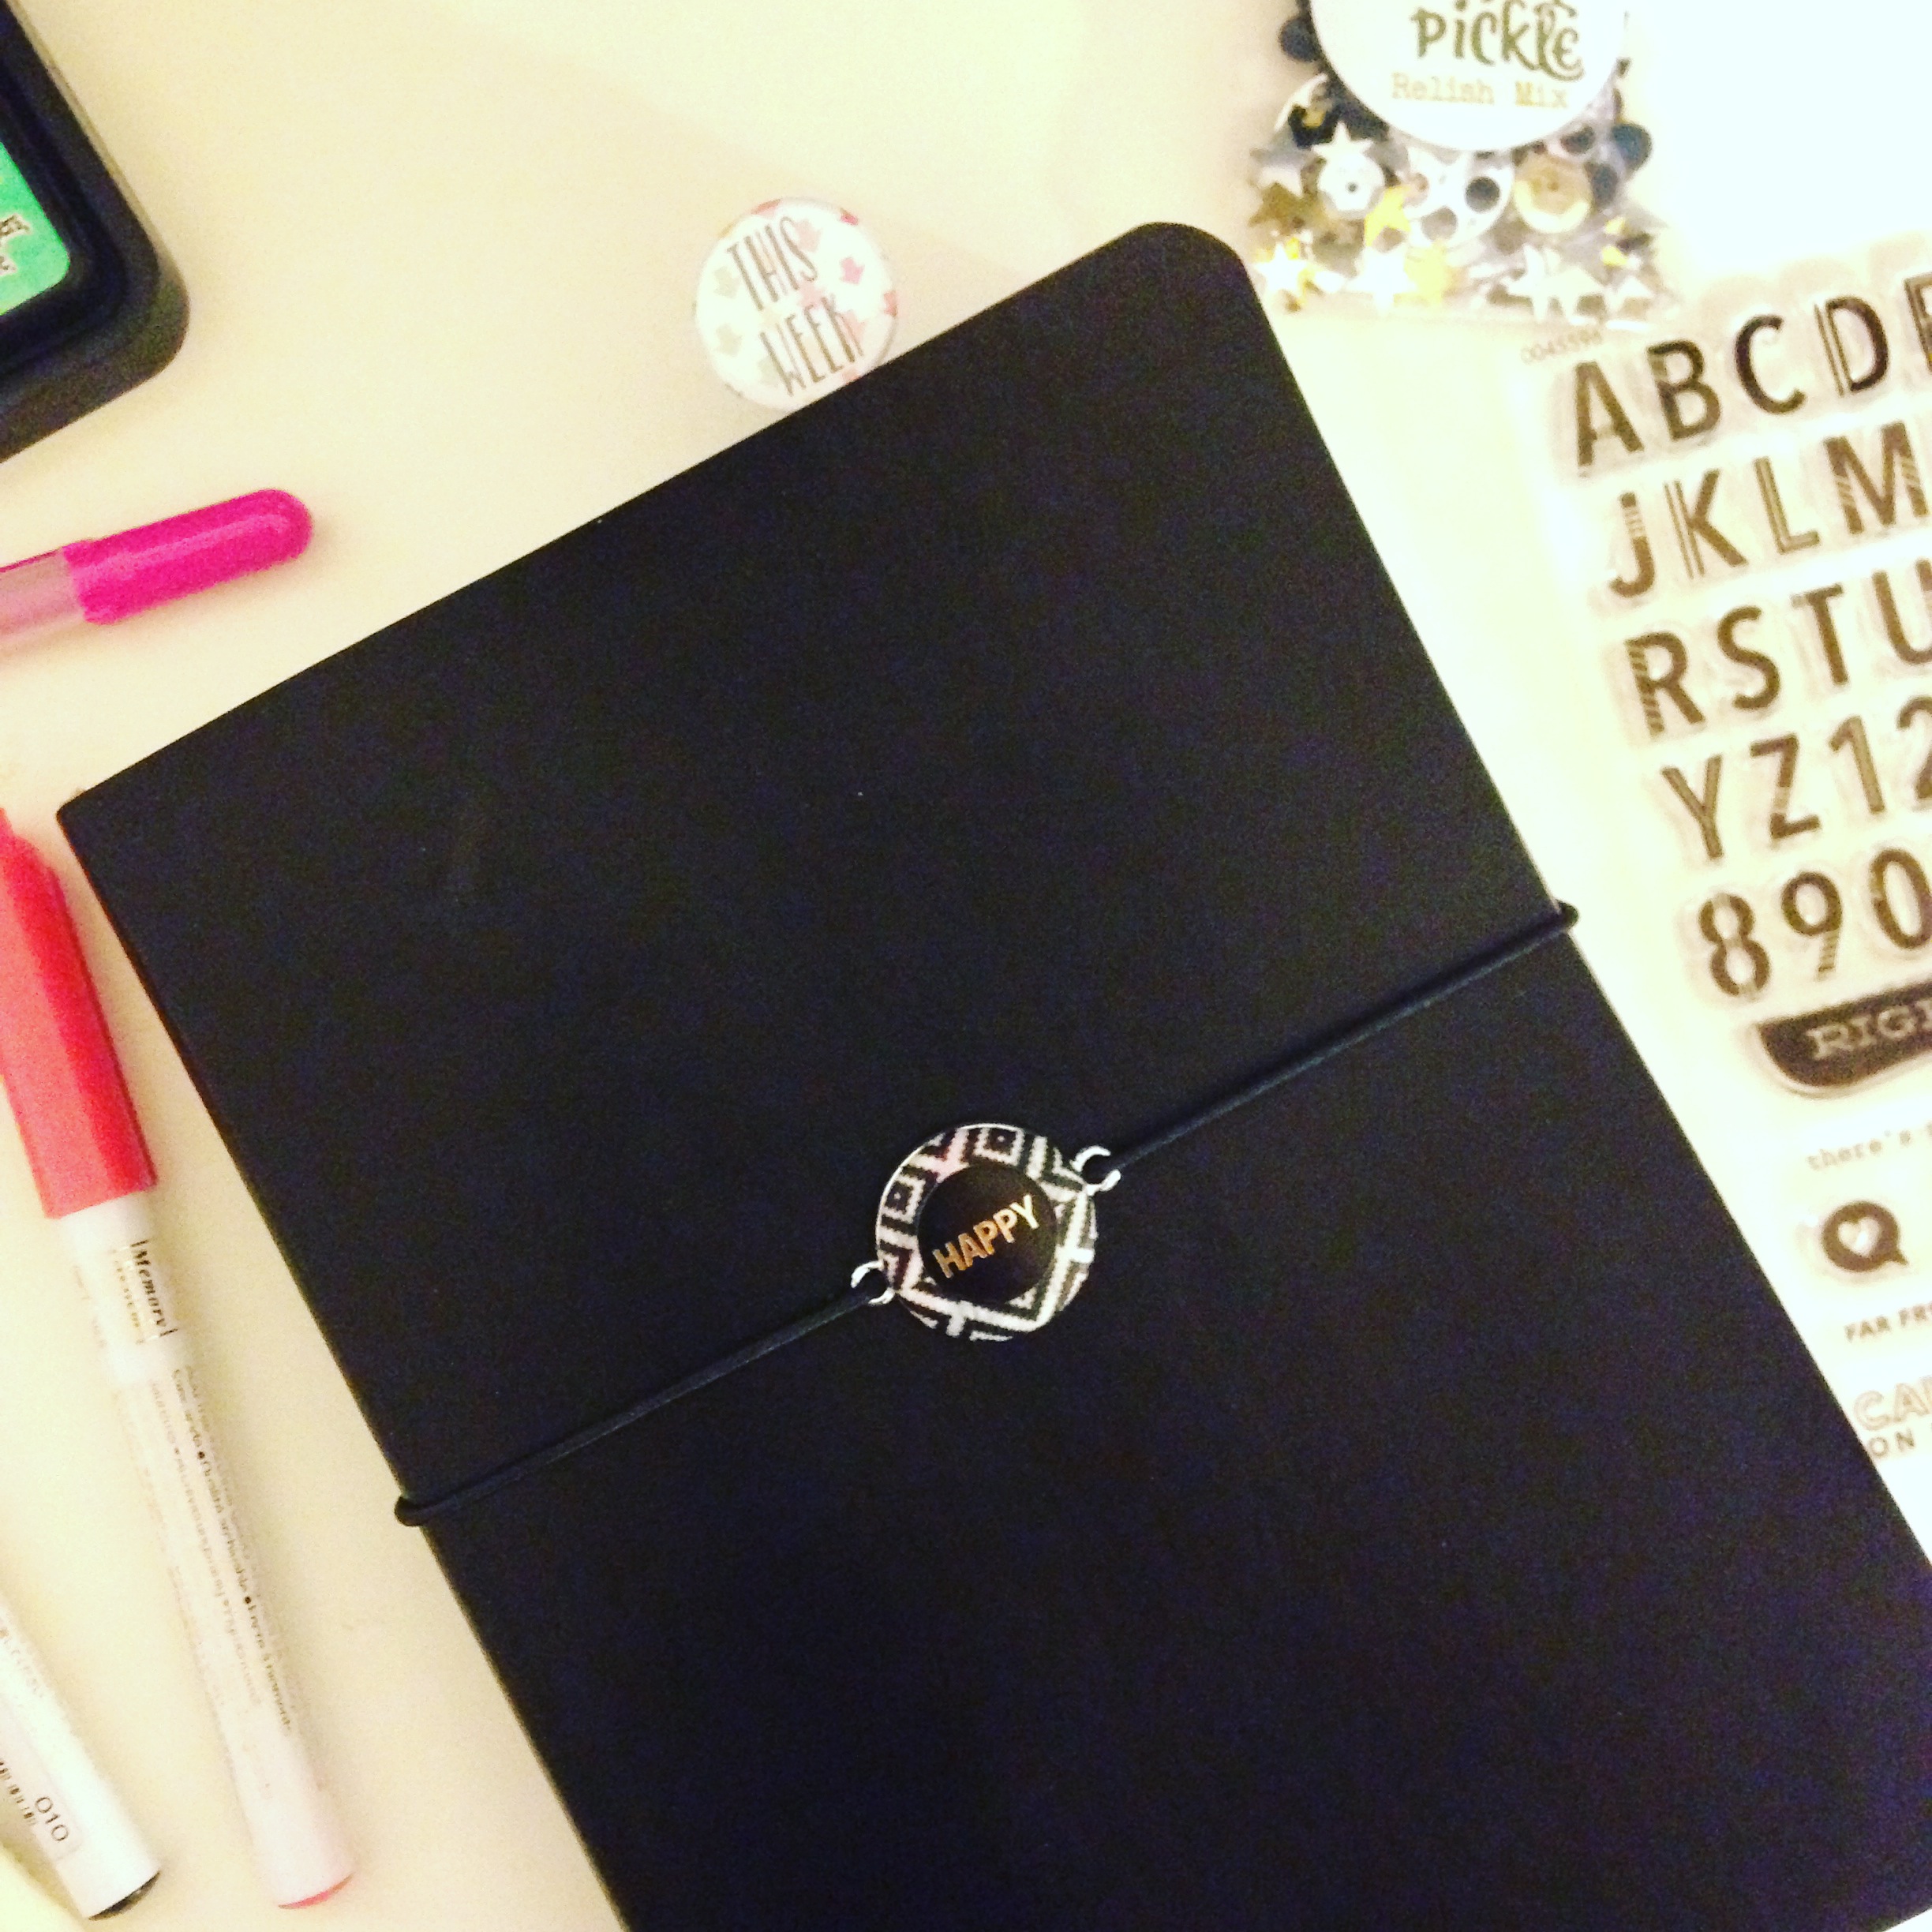
I wanted to make a band to keep my soft bound leather book closed. Keep the pages safe. The cover gets pretty dinged up.
I took the magnetic interchangeable piece from the shop that said Marisa’s Pretty Planner and temporarily altered it. I used washi tape and a cute sticker, tied elastic cord on it and BAM Cutest button ever. I also like using the This Week planner clip to mark where I am. Not just for planners anymore!
I used some cute washi from the shop to make a box for my Lister’s Gotta List daily challenge. Instead of using numbers on my list I used the Sticky Pickle Spots. Perfection.
The Relish Mix sequins in the shop work perfectly in my spread. They lay completely flat and add no extra bulk to my book. As much as I love chunky journals, this is one I want to keep on the flatter side. I used some star Pickle Spots as well.
The road washi was spot on for my story about my trip to Mike’s! Those Pickle Spots are really growing on you aren’t they? You’re welcome.
I’m so happy I busted out my products and made them work. Most of all I’m happy it added fun pops of color and helped me tell the story of my day.
Check out my video to hear a few stories of how fun and unpredictable my days can be! Oh and to see the goodies up close 😉
Hello hello! Guess who? That’s right..it’s me Marisa!
I’m super excited to share with you my Project Life layout using some yummy goodies from the shop. I stepped out of my comfort zone on this one and guess what? I L-O-V-E it! You know you do too! Ha!
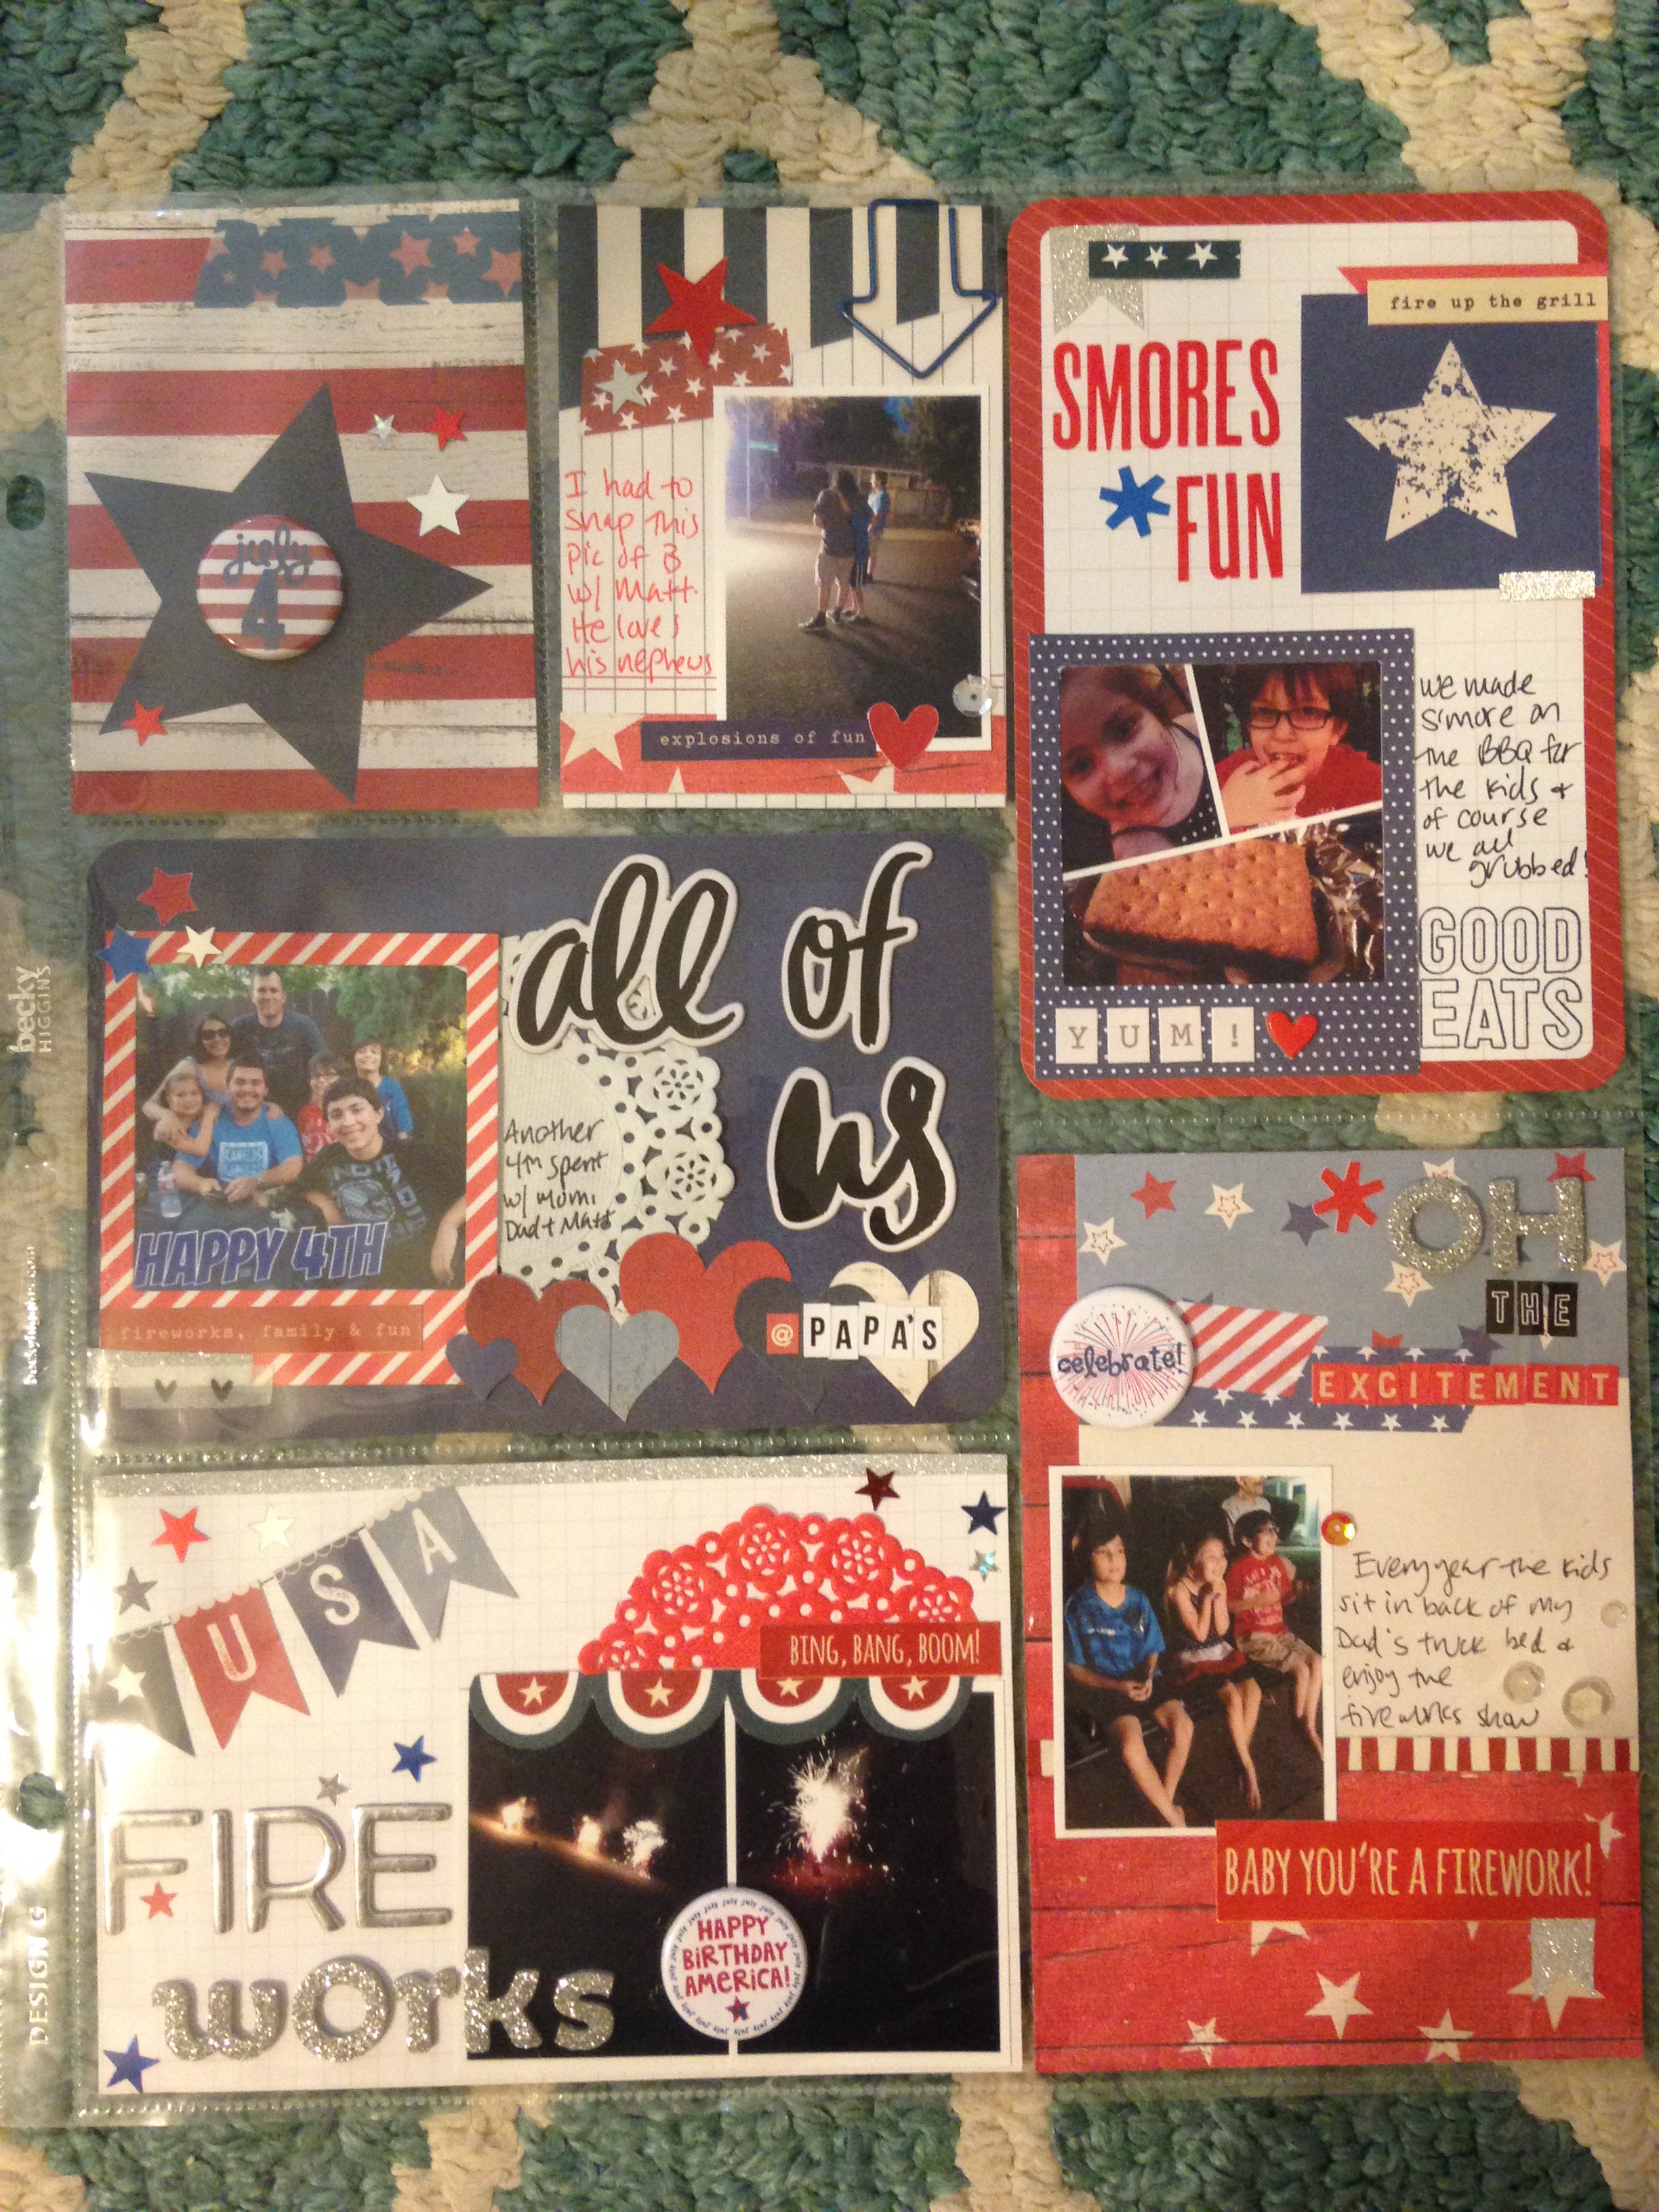
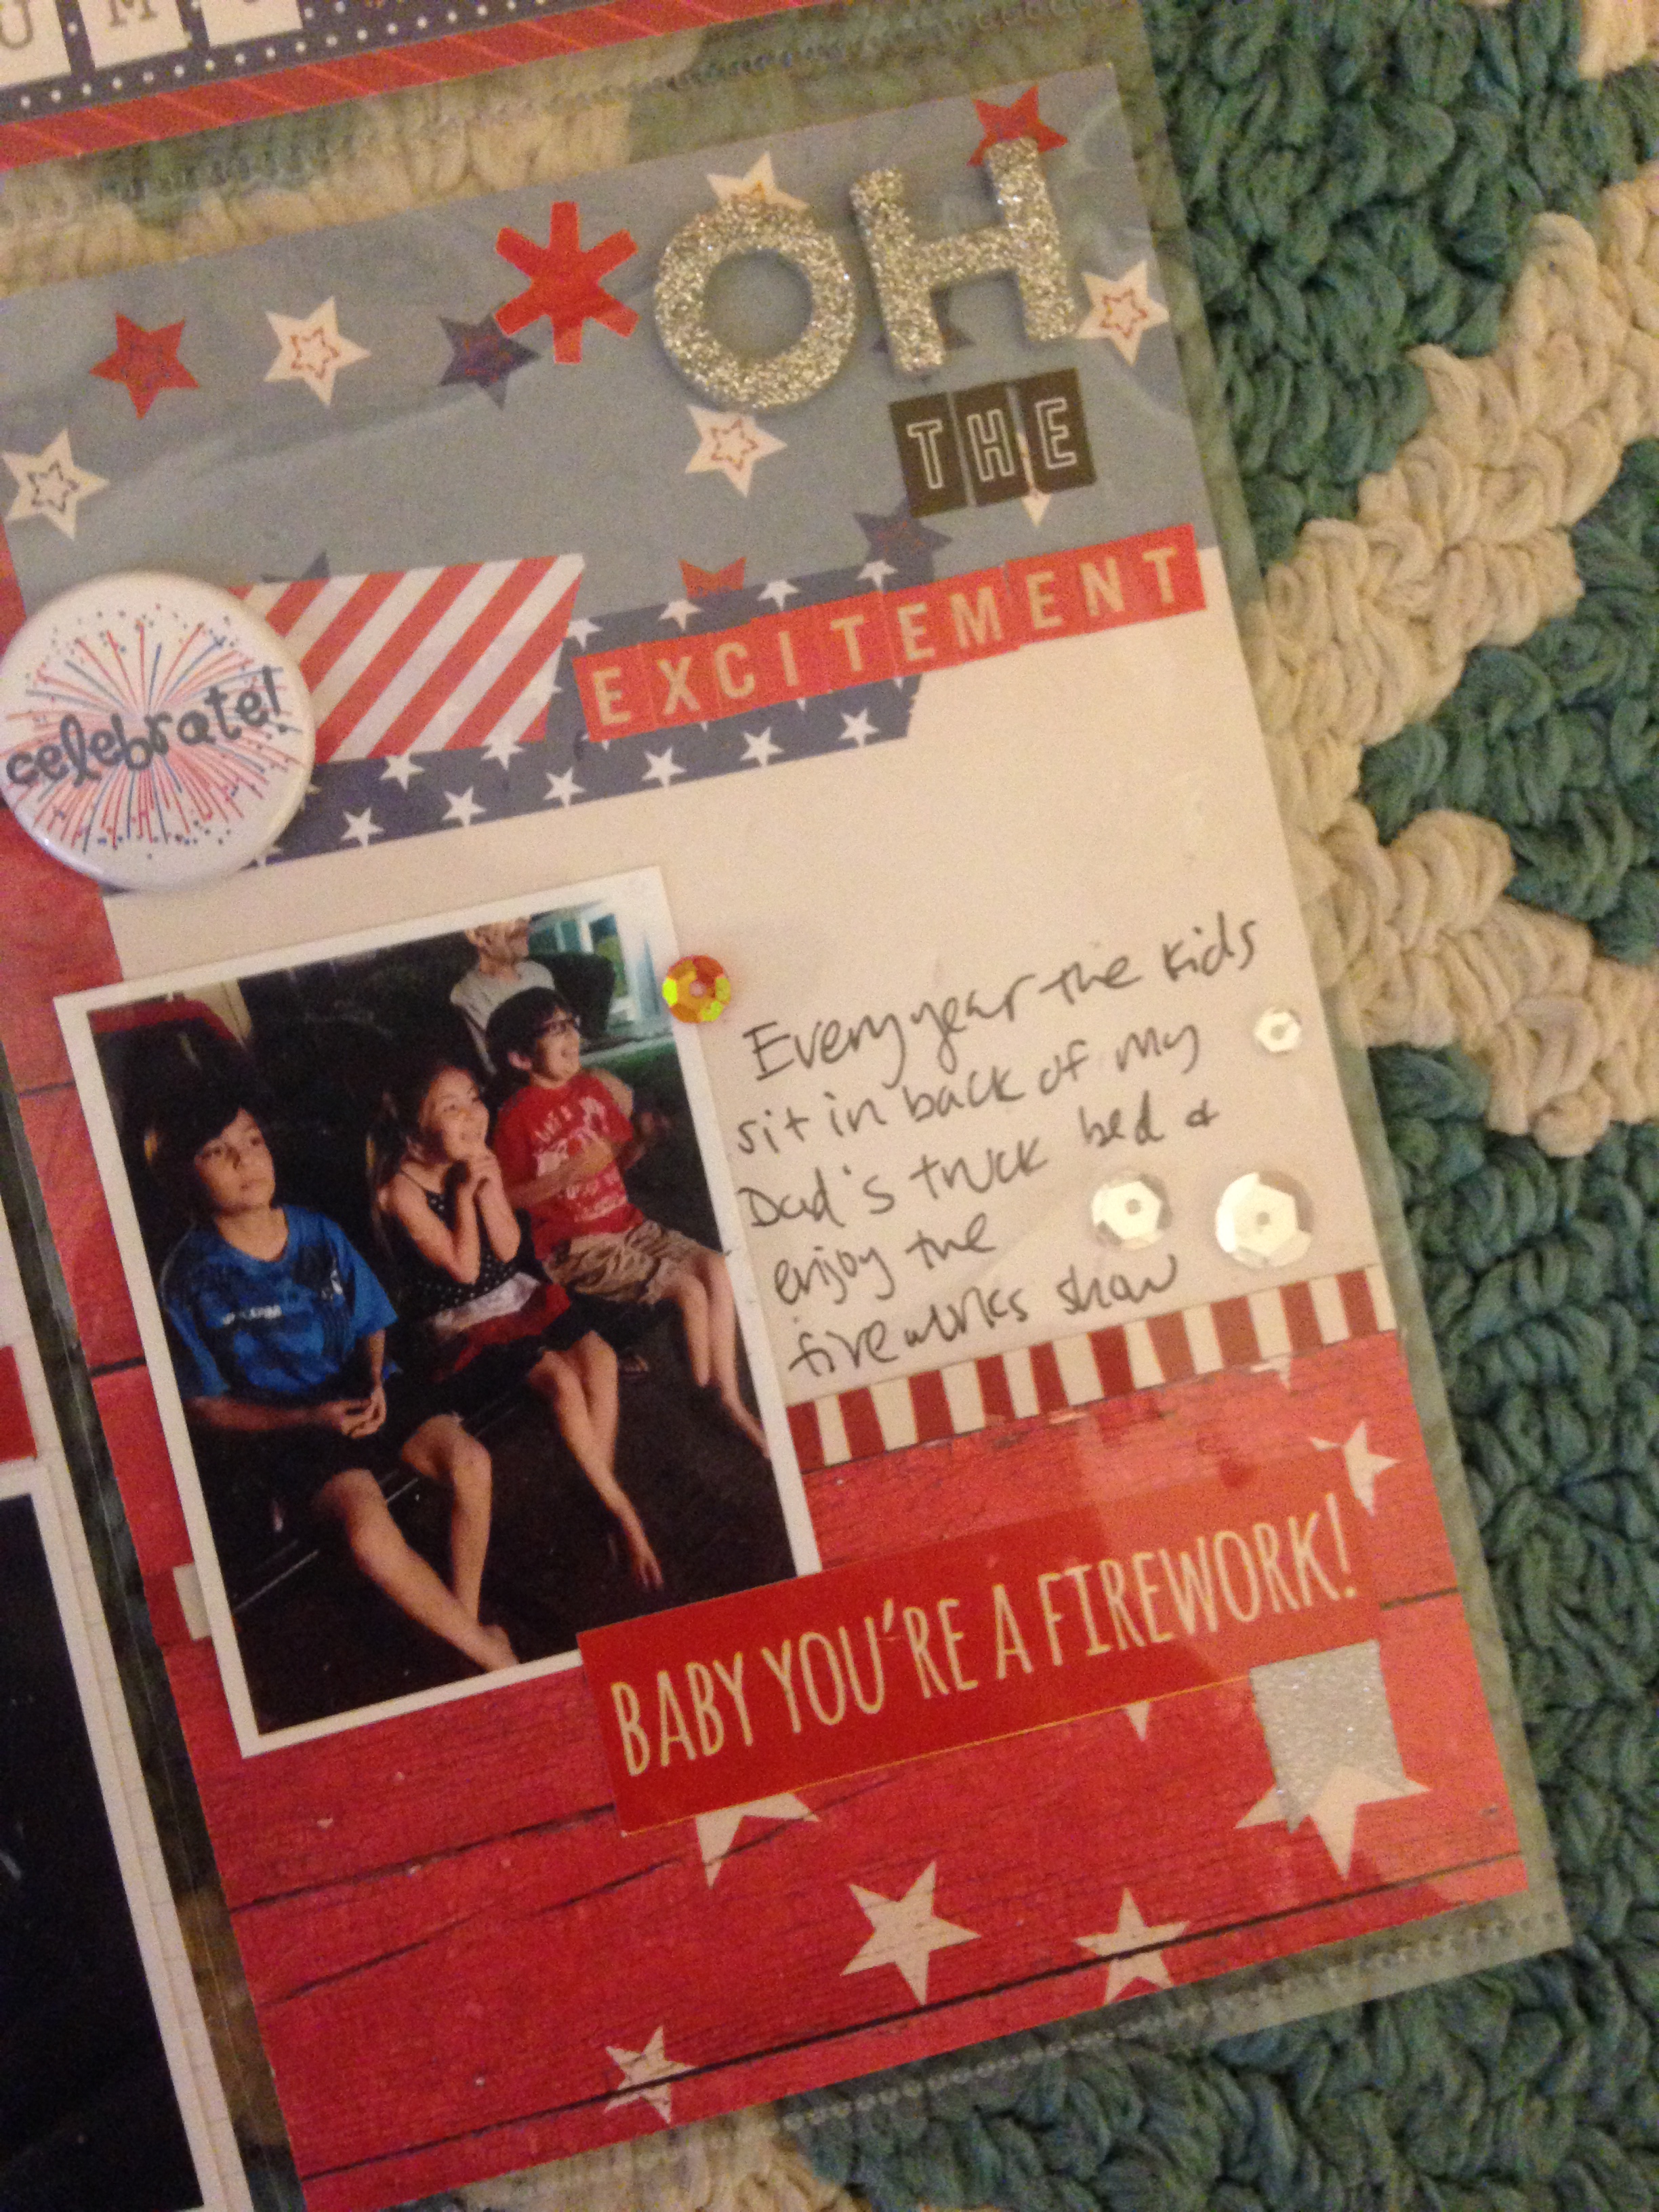
I wanted to document our 4th of July celebrating like I do in most of my layouts..with lots of pops and pizzazz! Not hard to do when you have festive products to play with!
These 4th of July flair were perfect to use and it’s the most flair I’ve ever used on one page. Enter stepping outside of my zone. The reason it was easier to incorporate them was because they all coordinate and that’s what I love about The Crafty Pickle’s products.
The Relish Mix was perfect for sprinkling stars and sequins throughout my page. I like to treat each of my cards as mini layouts since scrapbooking is my #1 love! So embellishing is definitely my jam 😉
I also like to use washi and any other tapes to layer with and even die cut shapes out of. On this spread I used the Silver tape to make tiny banners to accent a few cards and added just small strips to tie it all in.
Think outside the box my crafty peeps!
A lot of my embellishments for my Project Life pages are tiny. Alphas, enamel dots and stickers, etc. So when I saw the Pickle Spots I knew exactly how to use them. Yep. Say it with me. “Outside the box!” You my friend are awesome 😉
Check out my process video and see the products in action!