Say hello to our friend, Melissa!

Hi Crafty friends!

I would like to introduce you to a dear friend and fellow small business owner, Melissa Hewitt. Melissa owns a fabulous stamp company called Honey Bee Scraps. You might of saw her little company grow when it startedĀ on Kickstarter.

Melissa created a few beautiful handmade project life cards using her stamps and some Crafty Pickle Flair. These are stamps using her last release.

Melissa Hewitt for TheCraftyPickle.comMelissa Hewitt for TheCraftyPickle.comMelissa Hewitt for TheCraftyPickle.com

And these ones show some of the new stamps just released TODAY!

Melissa Hewitt for TheCraftyPickle.comMelissa Hewitt for TheCraftyPickle.com

Not only does she have stamps but she has some great digital files as well as digital sets that match her stamp sets.

Personally I am in love with her newest Alpha stamp and I love that it includes upper and lower case! The others are just as gorgeous.

HoneyBeeScraps.com

Make sure you stop by HoneyBeeScraps.com today and check out the new release. Follow Honey Bee Scraps on Facebook to keep updated on all upcoming releases!

Thank you Melissa, for sharing your talent and your beautiful stamps with us!

Have a fabulous weekend everyone.

Happy Crafting!

Taniesa for ThecraftyPickle.com


Meet the NEW CraftyPickle Designers!

Hi Friends!!

I am so very excited to announce the new team for the rest of 2015. We are blessed to have fiveĀ of our designers returning, and another five new talented ladies that I know you will all LOVE! So, Here they are!

Meet the new Crafty Pickle Designers @ TheCraftyPickle.com

TheCraftyPickle.com Designer, Kristin

Kristin is not only one of our returning designers, she is also the Design Team manager this term. She is my right hand girl and I am so blessed to have her help as well as her talent. While I am busy filling orders and creating new product, Kristin is also working hard by making sure our designers are organized and the blog runs smoothly. Ā  Peek at her blog HERE.

TheCraftyPickle.com Designer, Carrie

Carrie is also a return designer and has been with me from the very beginning of The Crafty Pickle. She is definitely my cheerleader and she also is my Social Media Manager. Chances are if you are chatting us up on Instagram or Facebook she will be the one to beat me in responding! I don’t know what I would do without her! Make sure to check out Carrie’s blog HERE.

TheCraftyPickle.com Designer, Stephanie

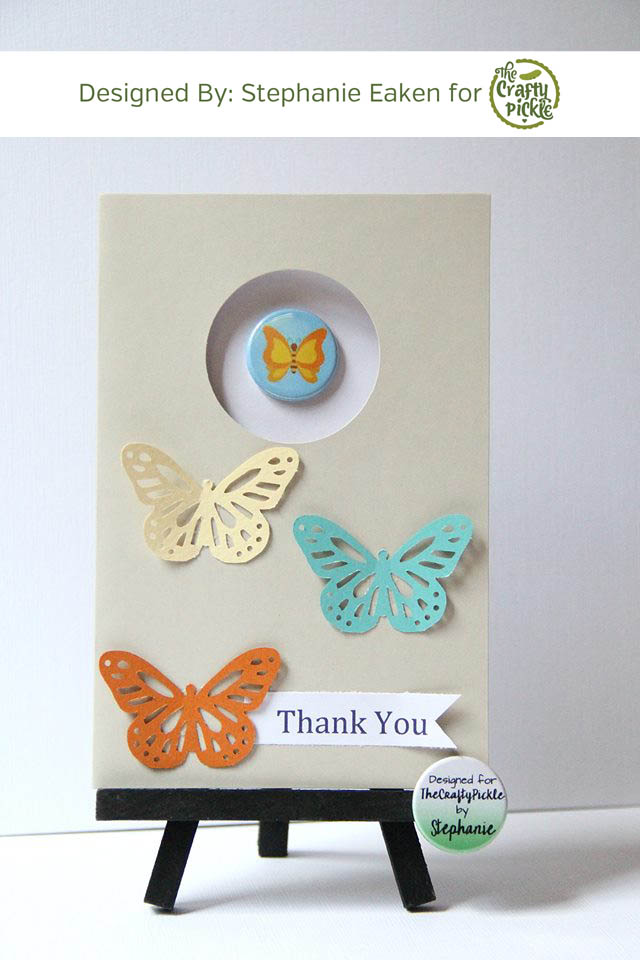
Stephanie, also a returning designer is so sweet and talented. I have loved watching her grow as a designer not only for TCP but for others as well. If you haven’t had a chance, grab a cup of coffee or tea and browse her blog HERE. So much inspiration in one little spot on the web!

TheCraftyPickle.com Designer, Treasa

Treasa is a returning designer and an amazing person. She truly is one of the sweetest girls you will ever meet. She not only designs for TCP but she runs a super awesome and successful swap group for Project Life. You can search for “Project Life Card Swap” on Facebook or go to projectlifecardswaps.com to see some pretty amazing handmade cards. Make sure you also check out her blog HERE.

TheCraftyPickle.com Designer, Joann

Joann… How can I express how lucky I am to have Joann as a designer, and my friend. She creates the most beautiful projects both on the page and off as well. She works with CTMH product in ways I never thought of. Seriously, if you haven’t already, check this beautiful girls blog out right HERE.

Now for our new Designers…. I have been so excited to share our new talented girls with you!!! Some are new friends and some are old friends,Ā butĀ all of them are so sweet and so talented. Please help me give them an extra special Crafty Pickle Welcome!

TheCraftyPickle.com Designer, Tabitha

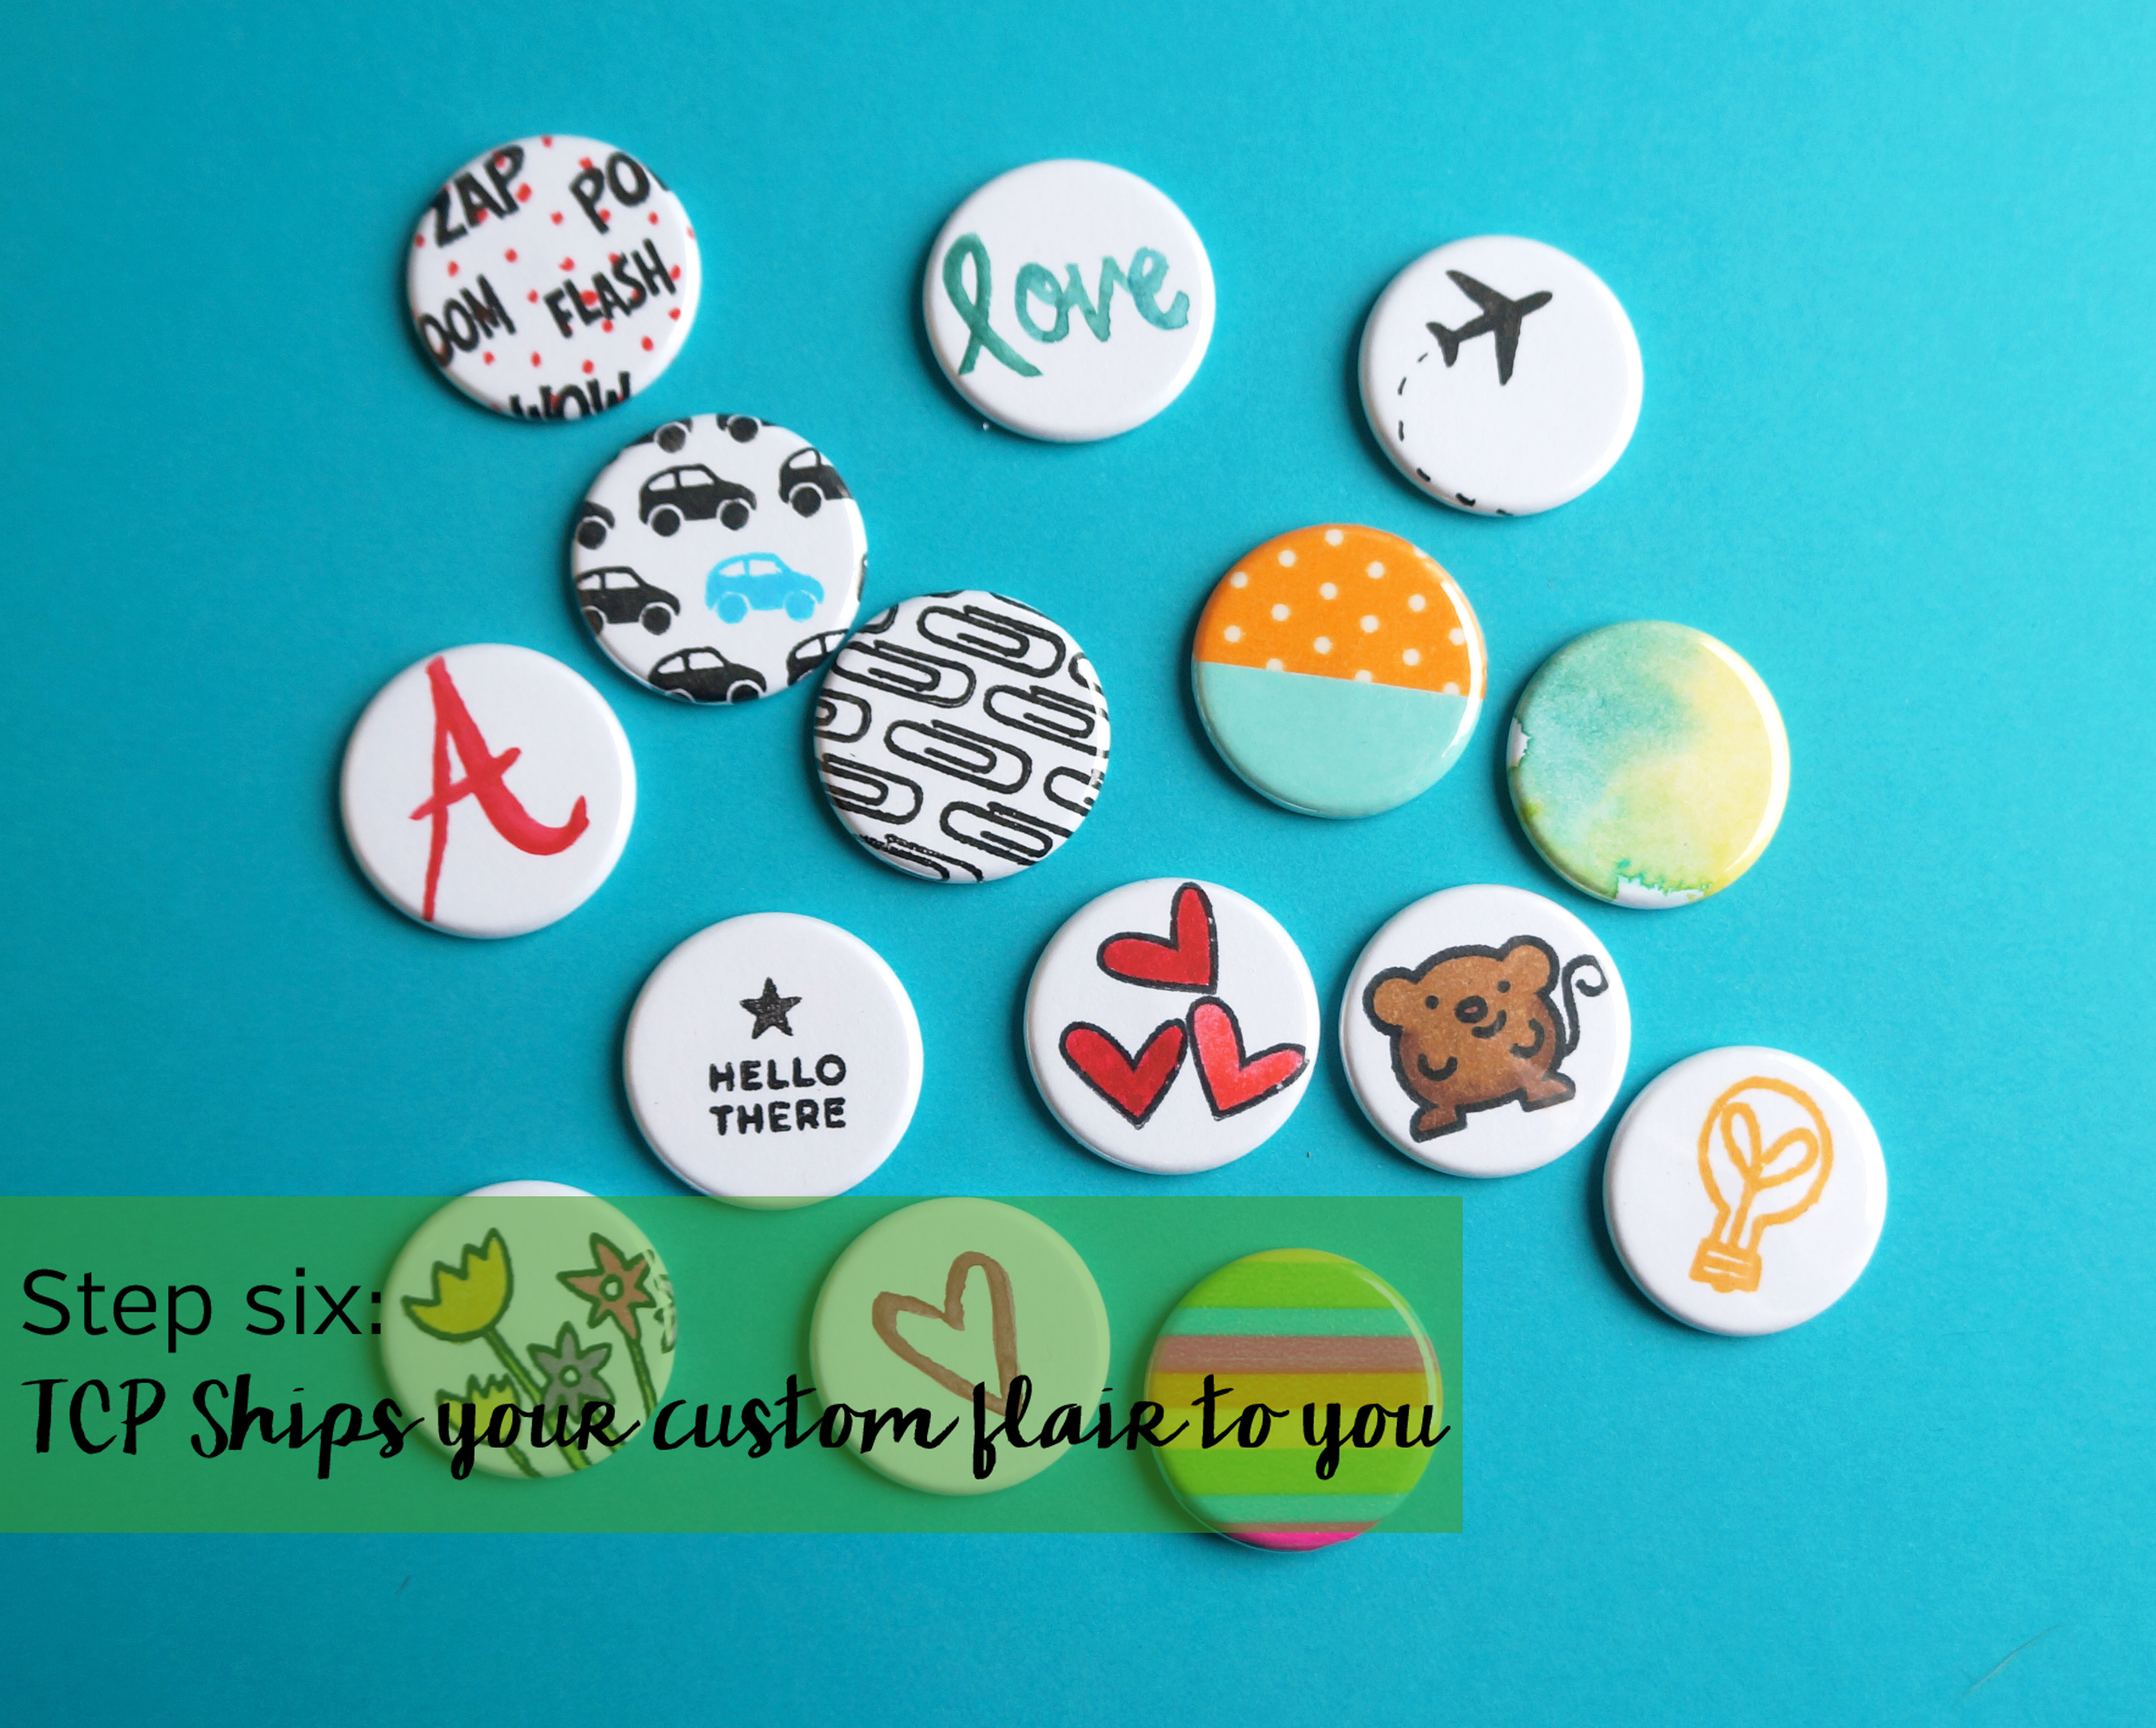
Say Hi to Tabitha! This sweet girl has a definite talent for papercrafting but it was her beautiful Pocket letters that caught my eye, I knew I had to have her on our team. I think you will be seeing some fun pocket letter ideas (and maybe some Tabitha inspired pocket letter flair <wink>) Take a peek at this lovely lady’s blog HERE.

TheCraftyPickle.com Designer, Paula

Give a big warm greeting to Paula. She is a girl of MANY talents! Project Life, Scrapbooking, Planning, Mixed media, just to name a few. The girl has it all going on and lucky for us we get to watch her though the process! Although she isn’t a blogger she produces some great informational videos that I know you will all love. Kick back and relax while you check out her YouTube Channel HERE. Don’t forget to subscribe, you won’t want to miss her new TCP video tutorials!

TheCraftyPickle.com Designer, Marisa

Reach out and give a very big cyber hug to our new designer, Marisa! Marisa has been my friend for a few years and I have always admired her bubbly personality and quick wit. This girl is incredibly strong and I admire her even outside of the crafting world. Though she is not a blogger she is definitely a consistantĀ Vlogger and you will CRACK up at some of the videos she has on her channel. Take a look at her YouTube channel HERE and again, don’t forget to subscribe! She also will have some fab tutorials coming soon! I just know you will just fall in love with her too!

TheCraftyPickle.com Designer, Theresa

Most of you probably already know her, and you might not even realize it. Theresa has been such a huge inspiration for me for years. She is theĀ reason I had to have a traveler’s notebook.Ā Theresa isĀ a Stampin’ Up consultant, serves on many other big design teams, is a guest teacher for some great Studio Calico classes currently, and all this while raising a family too. I don’t know how she does it all (andĀ does it all so very well) but I am truly honored to have her apart of our design team. If you haven’t seen her Instagram feed you have to check it out HERE. Want everyday inspiration? Definitely click Follow on Theresa’s Instagram.

TheCraftyPickle.com Designer, Lisa

Last but definitely not least, meet my new sweet & talented friend, Lisa! Lisa is not only talented, but has so many creative ideas that I am amazed she just doesn’t walk around with a light bulb over her head! Some of the new TCP releases coming upĀ were inspired by the creative juices from this incredible woman. Please visit her blog HERE

Well there you have it, a whole HUGE JARĀ OFĀ TALENTĀ in this 10 member design team! I hope you will join in and follow along as they share their talent and creative passions with us.

Till then…

Happy Crafting!

Taniesa for ThecraftyPickle.com

Wearable Flair? Yes!!!! Hello FlairTastic Friday!

Happy Friday Everyone!

#FlairTastic Friday

Every Friday though the summer months we will bring you a new idea/concept using flair. Your not going to want to miss these fun posts! These ideas will come from not only our designers but also super neat flairtastic ideas we find from our customers and other talented papercrafters.Ā Make sure that when you share any of your projects on Instagram or Facebook using flair, that you tag it #FlairTasticFriday. You just might see your own photo featuredĀ here on our blog!

This week we will be showing you a few ideas taking flair off your pages to actual wearable art!

First up we have an adorable project created by our designer Joann!

Add the perfect touch to headbands @ TheCraftyPickle.com

Joann added some flair from our Cute Bugs set for her adorable little girl. How precious are these? I think they would be great in the center of a bow as well. Totally adorable, Joann!!

Next we have a few ideas that have caught our eye… Take a look!

Button Ribbons http://toostinkincute.blogspot.com/2012/07/flair-badges.html

These adorable flair ribbons are just too adorable and would make a perfect wearable award or celebration pin. Love this for birthdays, weddings, achievements, and so much more. These were designed by Page Evans.

Jacket flair found on pinterest

If you were an 80’s or early 90’s kid chances are you had a jacket similar to this one. I remember wearing my collection on my varsity jacket in high school. (photo found on pinterest)

Flair button Bracelet band found on Pinterest.

What a great idea of wearing a bunch of pin back buttons of the same theme? We saw this photo on pinterest and fell in love with it!

Kid designed wearable buttons http://thesoutherninstitute.com/2013/03/buttons-book-characters.html/

I love that these are kid designed buttons. You can read more about it HERE. For a smaller option our “Make your own Flair Buttons” would be a similar and fun idea.


Last but not least we have a photo share from one of our very own customers!

liz and daughter wearing custom Button necklaces from TheCraftyPickle.com

Customer Liz ordered a custom button necklace with her loved ones names inside our glitter heart flair, we thought her daughter needed one as well. Aren’t these two just adorable!

Not only do we carry necklaces, but these adorable Hair ties as well.

custom hair ties @ TheCraftyPickle.com


We can make these hair ties with any flair in the shopĀ or even a custom design.

Keep your eye out for our new wearable interchangeable magnetic jewelry coming to TCP’s shop in just a few weeks!

It must be the kid in me that loves flair so much. I loved wearing it then and I love wearing it now. Adding it to my papercrafting is an added bonus.

How do you wear your flair?

Stop by The Crafty Pickle Etsy Shop if you haven’t been by recently. We will be releasing a few little things between now and our next big release.Ā We will also be having a big TCP Birthday celebration in AugustĀ with giveaways andĀ a brand new exclusive foil flair!

Dont forget to use theĀ hashtag #FlairTasticFriday to play along with us!

See you for more FlairTastic Ideas next Friday!

Till Then….

Happy Crafting!

thecraftypickle.com


Cute on the inside as well as the outside! Card by Stephanie.

Hey TCP friends!

It’s Stephanie from Bits & Pieces (& Scraps) here to share my project today. I am featuring flair from The Crafty Pickle in a greeting card. I created this thank you card to send to our family members that recently hosted us at their lake house.

Dress up a greeting card with flair @ TheCraftyPickle.com

I began with a pre-made card and then punched 3 butterflies in coordinating colors. The flair I used here is the adorable butterfly from the “Cute Bugs” set. I love the added touch of something pretty when you open the card too! You can find this, as well as so much more, in the shop!

Thanks so much for stopping by!

stephanie for ThecraftyPickle.com

Turn your art into your own custom flair embellishments!

Hi Crafty Friends!

Today I wanted to share with you something new and exciting in our Etsy shop! Starting today, you now have the option to create your very own flair buttons in two different ways!

Make your own custom flair buttons with your artwork, stamps, washi, photos, and more @ TheCraftyPickle.com

First, you will need to download our TCP Flair template (found HERE)Ā thenĀ printĀ the templateĀ on your favorite paper. I used Neenah solar white 80 lb cardstock but anything 80 lb or lighter will work.

Make your own custom flair buttons with your artwork, stamps, washi, photos, and more @ TheCraftyPickle.com

Then gather together all the supplies you would like to use to create your flair. You can use different types of coloring mediums, stamps, washi tape, anything smooth and flat will work.

Make your own custom flair buttons with your artwork, stamps, washi, photos, and more @ TheCraftyPickle.com

Now for the FUN part! Doodle and color your heart out! Hand letter some phrases for your project life album. Ā Customize monograms or personalized buttons for gifts. Create cute page markers and charms for your planners. Use your favorite stamps (even digi stamps if your handy with photoshop) to create a unique embellishment! Little planner stamps work perfect for this project and most stamp sets have small images that are an inch or smaller.Ā Make sure that you keep your artwork in the center circle, the rest will be cut off when making the flair.

Make your own custom flair buttons with your artwork, stamps, washi, photos, and more @ TheCraftyPickle.com

Once you are finished creating your little 1 inch works of art, Cut down the sheet so that it will fit in the envelope you are using. Keeping two or more circles per cut is preferred but not required.

Make your own custom flair buttons with your artwork, stamps, washi, photos, and more @ TheCraftyPickle.com

Go to our Etsy store listing HEREĀ to order the amount and type of buttons you would like. If there is a different amount you are wanting than what is listed in our shop just send a custom order request and we can adjust the totals for you. Once you place your order we will send you the mailing address to send your artwork to.

Make your own custom flair buttons with your artwork, stamps, washi, photos, and more @ TheCraftyPickle.com

Once we receive your artwork we will send you a confirmation email so you know we have it in hand. We will then cut and create your flair for you and then ship it back. Remember that if you are requesting traditional flat backed flair you will get our signature low profile flat flair style making them perfect for projects that you don’t want to add a lot of bulk.

Make your own custom flair buttons with your artwork, stamps, washi, photos, and more @ TheCraftyPickle.com

Usual turn around time is 2-3 business days (sometime sooner) If a rush is needed please check before completing your purchase so we can make sure we can accommodate your request.Ā 

Remember, not only can you create traditional flat backed or pin backed flair buttons, but there is other options as well!

Flair / Button options @thecraftypickle.com

I did mention that there was TWO new listings to create your own custom flair. The next option is super easy. Simply grab your favorite papers, Journaling cards, and scraps. Make sure they are NO SMALLER than 2 inches by 2 inches. Pop those papers in an envelope and once you complete your purchase though our store we will send you the mailing address to send these papers in. You can find this shop listing HERE.

Make your own custom flair buttons with your artwork, stamps, washi, photos, and more @ TheCraftyPickle.com

We will then turn your collection of papers, cards, and/or scraps into your made to match embellishments! This is a great way to get unique flair to match your favorite paper lines and core kits.

What do you think? Sound like fun? Download the template and give it a try, There is no cost until you actually purchase the package you want to order. It is so much fun seeing something you create yourself made into a fun embellishment or accessory.

I hope you are as excited about these new options in the store as we are!Ā Let us know what you thinkĀ and share with your friends about this fun new option and you could win a $5 gift certificate to our shop! Click on the rafflecopter giveaway for several chances to win (you can enter every day) winner announced on 6/18/15!

a Rafflecopter giveawayĀ  ****Giveaway closed. Congrats to our winner, Tina! I have sent you an email with your Gift Certificate code to the Etsy shop. Thank you to all that entered!****

Happy Crafting!

Taniesa for ThecraftyPickle.com

BIG shop update!

Hi Crafty Friends!

We took a bit of a break the last few months in our TCP Etsy shop but now were back with 9 BRAND NEW Flair sets, New personalized singles including Monograms, a couple of sequin mixes and WASHI TAPE! YAY!

Here is a little peek at what you will find over in our shop!

Shop update! www.thecraftypickle.com


Head on over and check it out! Stay tuned for inspiration from our design team using our fun new products!

Happy Crafting!
The Crafty Pickle

Happy (inter)National Scrapbook Day!!!

Hi Crafty Friends!!!

Happy (inter)National Scrapbooking Day! I hope you are all getting some crafty time in this weekend.Ā I have a few special announcements for today so make sure you read all the way though!

I have been busy updating our Etsy shop and we have a few new flair sets, some singles, and some awesome sequin mixes. Here is a little peek of what is new.

Graduation 2015 flair set @ TheCraftyPickle.com


Movie Night flair set @ TheCraftyPickle.com


I love you to the moon! Flair @ TheCraftyPickle.com


Exclusive sequin/confetti mix @ TheCraftyPickle.com

Exclusive sequin/confetti mix @ TheCraftyPickle.com


Exclusive sequin/confetti mix @ TheCraftyPickle.com

if you want to see even more NEW stuff click HERE to go to my Etsy shop.

Speaking of the Etsy shop, What is NSD without a sale right? This weekend only, domestic orders over 10.00 ship for free (Use code NSD2015FREESHIP) and international orders over 10.00 can take 3.00 off their order (Use code NSD2015INTSHIP) Also ANYĀ order placed this weekend will have a free 2015 glitter ombre flair button and a special NSD sequin mix included with their order.

In addition to that, any order $35 or more will receiveĀ a free flair set (equal or lesser value) Just leave which set you would like in the comments at checkout!

The TCP designers will be posting some fantastic inspiration with our new flair and sequins soon and this next blog hop we thought we would ask one of YOU to be a guest designer with us! Our team will be working with this mini kit below that includes some Close To My Heart products, TCP Flair, and TCP Sequin mixes!

Be our guest designer! TheCraftyPickle.com

Be our guest designer! TheCraftyPickle.com

If chosen to participate you will receive the kit pictured above AND a $15 credit to the store to pick out anything you would like for other personal projects, which will all ship together for free.

Your design will be featured in our blog hop on May 26th! You don’t need to have a blog to participate,Ā but if you do we would love to include your blog in our hop!

To enter the Guest Designer call simply post a link in the comments to a layout or project that you have created by midnight Monday 5/4. Our guest designerĀ will be chosenĀ by our current DT members and announced this Tuesday 5/5.

To purchase the Close to my Heart products like the ones in the kit, visit my CTMH website HERE.

Make sure you check our Instagram and Facebook this weekend for some fun giveaways!

That about covers it for now. I hope you all have a fantastic weekend!

Happy crafting!
The Crafty Pickle


Baby Shower Favor

Baby Shower Favor

Hi Joann here today, thanks for joining me!

Today I am sharing a cute little baby shower favor that I made using the CTMH Artiste Cartridge!

Isn’t this box adorable and wouldn’t it also be great as an Easter Box to fill with treats for kids?!?! Ā To decorate my box I cut a 1 3/4 circle stamped an image using the CTMH-Holiday Tags stamp set and customized it with the due date using YES Months set for my month and finished it off with some scattered sequins.

Hope you enjoyed and thanks for stopping by!

Supplies Used

A Layout with a bit of Flair!

Hi again Crafty Friends!

Ā Two posts in one day means it’s a GREAT Friday! Today our designer, Cathy, is showing off one fantastic layout using TCP flair! Check it out!

Hi everyone, it’s Cathy here again with another layout for The Crafty Pickle.Ā  One of my favourite embellishments to use on a layout is flair badges, and since I have so many awesome ones from The Crafty Pickle I figured I’d see how many I could fit on a page!Ā  I mean, what’s better than one flair badge?Ā  Well in this case six flair badges!Ā Ā  Now right now Taniesas’ wonderful shop is on a short break, but when it’s up and running again be sure to check out the awesome collections I used to create my layout!Ā  I also used some stamps from Close To My Heart to round out my design! In order to achieve dimension with my badges I used hot glue for some and foam squares for the others so that I could layer them.Ā  Don’t be afraid to grab some of your stash of badges and pile ’em up high!Ā  The more the merrier!

I think this is one of my favorite’s of yours, Cathy! Thank you so much for sharing!Ā 
Happy Crafting!
The Crafty Pickle

Color CRAZY!!!!

Hi Crafty Friends!

So about a week ago I posted about the 30 day color challenge hosted by TheDailyMarker.com along with my first two projects. I decided to take my own spin on things and make a hand-made-hand-colored project life card for each of the 30 days. Today is day 10 and I am still going strong!

I have been sharing daily on InstagramĀ (check out hashtag #30days30Projectlifecards)Ā but I thought I would show you all my cards so far and a close up of those card’s I haven’t shown on the blog yet.

TheCraftyPickle.com #30days30projectlifecards

For this card I used Distress Ink for watercoloring along with a stamp set from Studio Calico’s Neverland Kits (Lost Boy’s add-on kit) I started by stamping the moon then using masking fluid to keep the moon white while I watercolored the background. I started with tumbled glass in the center and worked my way outward with darker blues and purples. When it was all dry I removed the mask from the moon, Stamped the black text and colored the moon in with Squeezed Lemonaid Distress Ink

TheCraftyPickle.com #30days30projectlifecards

This card was created with a new stamp set I got from Neat and Tangled called “My Heart Sings“. I had been working in my journaling bible this day so this card just seemed like the perfect carry over. Colored with Distress ink and a iridescent water-coloring medium. I love how sparkly this one is… you can’t really see it all on camera but it’s about as sparkly as a Wink of Stella glitter marker. In fact I have a water brush filled with this medium and a bit of water for anything that needs a bit of clear sparkle (ends up being a lot cheaper than purchasing clear Wink of Stella markers over and over)

TheCraftyPickle.com #30days30projectlifecards


TheCraftyPickle.com Close up of Iridescent MediumThis next card was created with this AWESOME stamp set by Paper Smooches called “A Magical Spring“. Isn’t that little Irishman the cutest? This one I colored using my Copic markers and added some gold thickers and gold sequins at the end.

TheCraftyPickle.com #30days30projectlifecards

I knew I wanted to document what we are watching on T.V. lately so this card ended up being perfect. The stamp is from Paper Smooches “Boob Tubes” stamp set. I colored it with some copic marker grey markers and added some silver gel pen accents. Once everything was dry I added Glossy Accents to the screen to make it shiny like glass. The letter stickers are from Studio Calico.

TheCraftyPickle.com #30days30projectlifecards

Today we are on our way to spend time with my sister and niece. My little one is super excited to see Cinderella with her cousin tomorrow and I thought this card would look great when I go to document this fun weekend with this super cousin duo. the stamps of the super hero girls are from Mama Elephant’s “Tiny Heroes” stamp set and the buildings and clouds are from Paper smooches ( sets “super” and “Whimsical“) I colored using my copic markers again and I stamped everything Ā out using my MISTI stamping tool (I LOVE THAT THING!!!!!)

TheCraftyPickle.com #30days30projectlifecards

This next card was completely and totally inspired by Kristina Werner’s Video on 3/9. I loved the spotlight color idea so I took a stamp set from ABeautifulMess.com with all these cute emoji’s. Stamped them all out and then lightly marked a circle in the center. I colored the circle of emoji’s with colored copics and then everything on the outside of the circle with grey copic markers in three different shades. It took quite a bit of time but it was a lot of fun and I love it!

TheCraftyPickle.com #30days30projectlifecards

I had next to no time to color on Wednesday (busy busy busy with new stuff coming to TheCraftyPickle Etsy shop) so I set aside about 10 minutes and played with this new stamp set from paper smooches called “Luminous Spring” (The unicorn and sun are from the “Spectrum” stamp set) I used Tombow markers and a blender pen for this one. The unicorn got a quick wash of the iridescent watercoloring medium and accents with a gold gel pen. I added a bit of glossy accents to finish it all off.

TheCraftyPickle.com #30days30projectlifecards

Yesterday’s card is a simple background stamp by Penny Black. I heat embossed the background image and then used 17 different colors of distress ink to watercolor the little circles. The label die cut stamp set is from Hero Arts “Clearly Kelly” line and the AM/PM is from the Ali Edwards monthly stamp subscription titled AM/PM.

TheCraftyPickle.com #30days30projectlifecards

Today’s card is simple and I got it done super early because I knew I was going to be very busy today. This is from another Paper Smooches stamp set called ” Hang Up’s“. Quickly colored with some copic markers and then distressed the edges of the card with some Vintage Photo distress ink and a blending tool. The text I printed out from the computer before I did my stamping.

TheCraftyPickle.com #30days30projectlifecards

There ya have it…. the first 10 days of coloring! I knew this would be a fun little challenge but what I didn’t plan for is how much I would learn about what types of coloring mediums I really love to use and some that I am not too fond of. Not only that, but there has been a really great little gathering of people participating in the challenge and encouraging one another with our projects. I just love that!

For more coloring inspiration definitely check out www.TheDailyMarker.com and the Instagram hashtag #TheDailyMarker30Day. Also if you LOVE to include handmade cards in your project life albums, check out ProjectLifeCardSwap.com. Even if you don’t swap, there is a TON of inspiration from these talented swappers!

Thanks for hanging in there with me and my LONG post for today. I hope you have a fantastic weekend!

Happy COLORING!

The Crafty Pickle