If December is the month to send out Christmas Cards than January has to be the month to send out lots of Thank you cards! Today I have a card that turns a cute little honey jar into a snow globe!
One of my most favorite and most used stamps is the Honey Bee Stamps “Sweet as Honey” stamp set. I especially love using the honey jar for lots of things like a vase, and today, as a snow globe by just turning it upside down.
I started by stamping the jar on white cardstock using a light blue ink. This was mostly so I knew where to put my little scene. I used a cute little house and tree die cut from the Essentials by Ellen and colored the windows and tree as well as a little heart with copic markers. Then I cut out the Thanks word from the Honey Bee Stamps Thanks and giving die set.
After my little house and tree were glued down I applied a coat of white Neon Abilify. This stuff is so fun for snow. I let the first coat dry and then dotted on a bit more for a layered effect. I also dotted on some of the paint to the top of the thanks die cut to look like it was dusted with snow. After all was dry I used my heat gun to puff it all up. I love the dimension it adds.
On the same color grey cardstock as I cut out the THANKS sentiment I cut a small strip and stamped Snow and Much from the Honey Bee Stamps Flakey Sentiments stamp set. I then heat embossed it using bright white embossing powder. I added the ! in with a white gel pen.
The cute jar topper was stamped using Versafine Onyx black ink on some Lawn Fawn Perfectly Plaid winter paper and cut out using the coordinating die. I added a bit of May Arts natural twine.
For my card base I took a piece of white cardstock and blended a gradient blue from light to dark using distress ink. I ran the dried piece of cardstock through my big shot with a small dot embossing folder. I cut out a piece of the same blue and gray plaid patterned paper using a stitched 4 bar card die and adhered that piece to a white 4 bar card.
I cut out the jar upside down from the blue panel where I wanted the snow globe to be visible and then covered the (backside) opening with some snowfall acetate I got at my local craft store (Urban Scrapbooker). I covered the back of that panel with foam tape and lined the opening with my snow globe “insides” that i cut down.
I placed the main piece on top of the covered card base and then glued on the sentiment and sentiment strip on top using matte medium. I finished it off by lightly coating the die cut and sentiment strip with my Spectrum Noir clear glitter pen.
That’s it for my card today. I hope you were inspired to use your own stamps in a unique unexpected way!
All supplies used today are listed below (Affiliate links where available)
I am super excited and honored to be apart of the 12 designers of christmas celebration over at the Honey Bee Stamps blog! Today I will be working with the Zen Florals stamp set, The brand new Thanks die set, the Fresh Lilac sequins mix and the brand new Be Mine sequins mix! All of these items are on sale for TODAY ONLY (Saturday December 10th 2016) you can shop for these items and lots more on the honey bee stamps shop HERE
I challenged myself to make two simple cards for this project. Both cards use only one stamp from the zen florals stamp set! You can make this same type of card with any small stamp and a sentiment die cut.
The first card I stamped out the little leaf stamp all over the card base. I then colored using shades of green copic markers. It doesn’t matter what greens you choose your just going to want 3-4 markers that blend fairly well.
I colored the entire panel with my lightest color. I wasn’t too careful because I really only needed to get the leaves. After that was done I took my darkest marker and outlined each of the leaves… this took a little time but I was watching a movie with the family so it went by quick. I went around the darkest line with the next lightest marker and then filled in any gaps with the marker slightly lighter than the last.
Once the coloring was done I positioned the shadow die directly on my card base and cut it out. I adhered this piece to a heavyweight card base. I colored in some white cardstock with my matching copic marker and then die cut the “Thanks”. I glued that into the gap of the card base with some Ranger multi medium matte. I then went over the sentiment and leaves with a wink of stella clear glitter pen. I finished off the card with some sequins from the Fresh Lilac mix and some Nuvo Crystal drops. That’s it. Super simple and can be done with any stamp and die combo that you wish.
For the next card I die cut a heart from some masking paper and placed this over a heavy weight card base. I Blended in some Spun Sugar distress ink to the inside of the heart and darkened the edges with Worn Lipstick Distress ink. I then stamped the little floral cluster stamp over and over to make a pattern inside the heart with some versamark ink. I sprinkled on some white embossing powder (you want to make sure the distress ink is VERY dry before this step) and I heat set it all. I colored in the flowers and leaves with a couple of Zig clean color real brush markers. I added some sequins from the Be Mine sequins mix and placed a few nuvo drops like I did with the other card.
Once that was all dry I cut out the thanks shadow from some pink vellum that matched the spun sugar distress ink and I cut the “Thanks” from glossy white cardstock. I glued the two pieces together using the Ranger multi medium matte and then glued that to the card base.
These were “Almost” one layer cards. They are perfect for those who enjoy coloring! I could see making a note card set like this to give as a gift.
I hope you enjoyed my cards. I am so thankful to Honey Bee Stamps for having me apart of this event and for YOU all as well! This has been an amazing year for Honey Bee Stamps! I hope you all have a very merry christmas and a blessed new year!
I don’t know about all of you but I am SOOOO ready for the weekend!
Today I am reviewing the Desk Maid system from Totally Tiffany. I recently moved and the new home had a bonus room that was a perfect craft studio. I did have the challenge of limited wall space and a bunch of built-in shelving nooks. I have always had a lot of success organizing with shelves on my wall but this would be a bit different. I was searching for ideas on the internet and came across the new Desk Maid system. Intrigued by it I talked to the kind folks at Totally Tiffany and they graciously sent me a 4 piece set to try out as well as their clip and create rotating board.
I am also showing my December Daily organization at the bottom of the post…. It’s a long post day, friends… but fill of good stuff and a giveaway! Read on!
Here is the Desk Maid collection…
This is the 4 piece set full of supplies. (as shown on the Totally Tiffany website)
After receiving the full Desk Maid set I knew that this was going to be a fantastic solution for my built-in shelving issue. I loved the product SO Much that I turned around the next day and ordered 6 more 4-piece sets!
I am still in process of organizing my room but I got a big chunk done, and thanks to the Desk Maid system I was able to condense what was in three of these built-in shelving units to ONE! Seriously… it was crazy how much space this saved! Take a look!
It’s like candy for my eyes! I love seeing my supplies, it helps me remember to use them. I love having my coloring supplies and tools right at hand. And while it is stored in this shelving unit, I can easily take whichever Desk Maid unit(s) back to my work table when needed. It keeps it nice and tidy and when I am done I just put the Desk Maid organizer back on the shelf and my work table stays uncluttered.
These pieces have a ton of versatility. You don’t JUST have to organize your craft supplies (think kitchen organization, makeup, office supplies, and more). You can even use them for specific project organization. You will see how I used the Pen & Ink Palace, Tool Caddy, and the Clip & Create Rotating Design Board to organize my December Daily supplies for this year further down in my post.
The Pen and Ink Palace holds all 80 colors of Zig Real Brush markers with room for your watercolor safe ink pad, an acrylic block, swatch chart, and more room at the top, I have a opalescent watercolor set in the top of mine.
On that same shelf you will see 5 Tool Towers all lined up in a pretty little row. This houses like items together of pens, paintbrushes, ink blending brushes, water brushes, markers, blending stumps and gamsol, chalk pastel pencils, watercolor pencils, and various tools. Easy to see what I have, easy to grab, and easy to put away!
The next shelf down holds my Gelatos, Distress crayons, PITT Markers in one Pen & Ink Palace, A tool caddy sits to the right of that with some specific project tools that I am working with now, and to the right of that is three Pencil Perches holding all of my Faber-Castell Polychromos pencils.
Remember that I had said these shelving units are deep? they get deeper as you go lower because of the wall angels. Because I had so much space behind these units, I placed product behind that I don’t necessarily grab all the time.
Behind the Pen & Ink Palace I have two Stadium Arrangers filled with embossing powders, reinkers, and mists.
In the center and to the left (behind the pencils) is another two stadium arrangers that I am still working on filling. The back is currently holding washi tape and the one more in the front has some empty 5×7 Iris cases that I am planning on using for some kit organization. In the middle of these 4 stadium arrangers I have placed a lazy susan and several ink tins from Tim Holtz. These hold my Distress ink cubes, Altenew Crisp Ink cubes and Some hero arts and Simon Says Stamp ink cubes.
I can spin the ink around to find what I am looking for if needed. I mostly use these smaller ones for traveling and my large ink pads at home but they are easily accessible if I need them.
On the last shelf you will see a Pen and Ink Palace that I am using for my December Daily Project on top of the Clip & Create Rotating Board. Beside that I have a plastic box for my acrylic blocks and then an acrylic nail polish rack I picked up from Amazon to hold all my Nuvo Drops and Enamel accents (some are missing because they are in my December Daily supply stash)
In the very back of that shelf is extra organizers I have not used yet and empty containers. I am thinking about using this for back stock of supplies like cardstock, adhesive, etc in the future. I still need to paint these shelving cubbies, they were unfinished when we purchased the home. I am painting them white which will help the colors and supplies stand out even more.
I think that the Desk Maid system is fantastic for organizing your craft supplies no matter if you keep them on your desk, In your Ikea Kallax, on a shelf, or whatever setup you have. The 4 piece set comes packed so well too! Surrounded by cushion and boxed separately to minimize the risk of damage. I was really impressed by that as well as the quality of the items. I like them white but you could easily paint these lightweight wood organizers any color you wish.
I decided to use two of the pieces of the desk maid system for my december daily organization. Take a look at the quick video where I show you what supplies that I have gathered and organized for my December memory keeping!
I LOVE that this system holds so much and takes up so little space on my desk!
I am super excited because the kind folks at Totally Tiffany have generously donated a 4 piece Desk Maid set for one of you! To enter the giveaway just click the link HERE and you will be taken to a sign up form, That’s it! Easy peasy. Winner will be announced on 11/23 at 6:30 pm Pacific standard time so be sure to check back. I will update the top of this post with the winners name.
I have listed the items that I have shown in today’s post below with links as well. I believe there is a black friday special going on where you get a free glue gun holder with a 4 piece Desk Maid set purchase!
Thank you for stopping by for today’s review and December Daily organization. I have more ideas coming for these great organization pieces so be sure to subscribe to my blog and youtube channel so you don’t miss any organization inspiration!
Today I am guest designing over at the Kat Scrappiness blog and shop and I am super excited to share this fun shaker card!
I absolutely love Kat’s exclusive dies. The stitched tree was just perfect to have the Lawn Fawn Frosty Fairies decorate!
To make the shaker I used the two largest double stitched rectangle dies in the set. I just nested them together and used a bit of tape to make sure they stayed in place. I die cut my cardstock frame, the acetate, and the foam as well! Came together super quick!
I used several shades of blue distress ink for my background and colored the cute little fairies with copic markers. Not a lot of shading was needed because they are small. I went over their wings and other details with a glitter pen after I was done coloring.
To get some texture on the absolutely fabulous stitched tree I used the small pine spring in the Frosty Fairy friends set and did some second (and third) generation stamping. You can see more on that in this little quick tip video.
I added my favorite white, blue and clear sequins from Kat’s shop in the shaker, I didn’t add a lot because I didn’t want it to take away from the decorated tree.
This card came together in a snap and I just love how it turned out. It is easy enough to mass produce and if you wanted to skip the shaker part it could come together even faster.
Thank you so much for stopping by. I am excited to be guest designing for Kat Scrappiness and I will have more fun projects for you soon! Check out Kat’s store at http://www.katscrappiness.com and for direct links to products used today see the links below.
I am sure you have all heard the BUZZ this week over the new Honey Bee Stamps release, but let me recap a few of my sneak projects that were shared on Social media.
First was a sneak of the Prayers sentiment builder set
Next up was the sneak for Kindness.
Here we have a little sneak from Smile.
Finally we have the sentiment builder set which is a great companion to all of the sets above and your existing Honey Bee Stamp sets.
Here is a look at all 4 new stamp sets!
and the BIG news is we are now carrying DIES!!! That’s right! These Honey cuts are fantastic. Perfect stand alone and coordinating dies that will add that little extra to your projects! Here is a project that I used the Color my world die and stamp set on.
SO much fun! I had a great time this week playing with all of the new products. You will find these products and MORE at www.honeybeestamps.com
Be on the lookout for LOTS of inspiration from the designers using this wonderful collection of stamps and dies!
Hi crafty friends! It’s Stephanie here today from Bits & Pieces (& Scraps) to share my latest crafty projects.
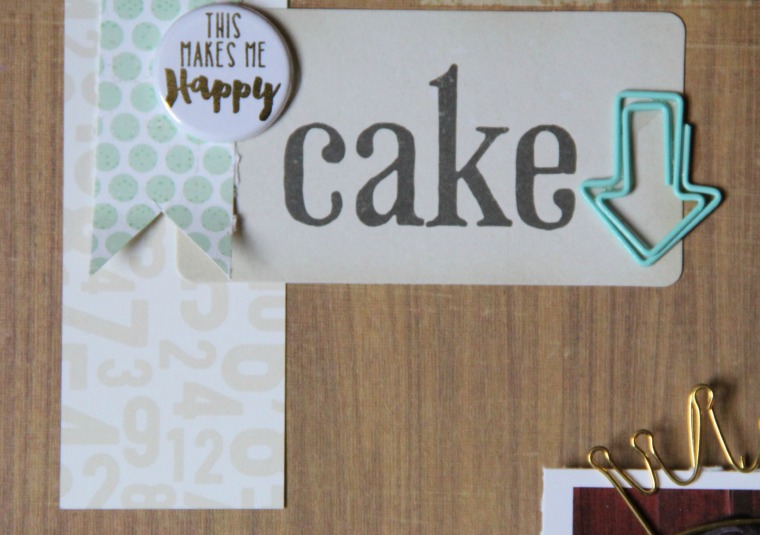
I know the holiday season is upon us, but in the midst of all the seasonal chaos, we have a daughter who celebrates a birthday (two weeks before Christmas)! So in preparation for her big day, I made two birthday projects. The first is a birthday layout featuring the new gold foil flair button:
I adore these foil buttons oh so much!
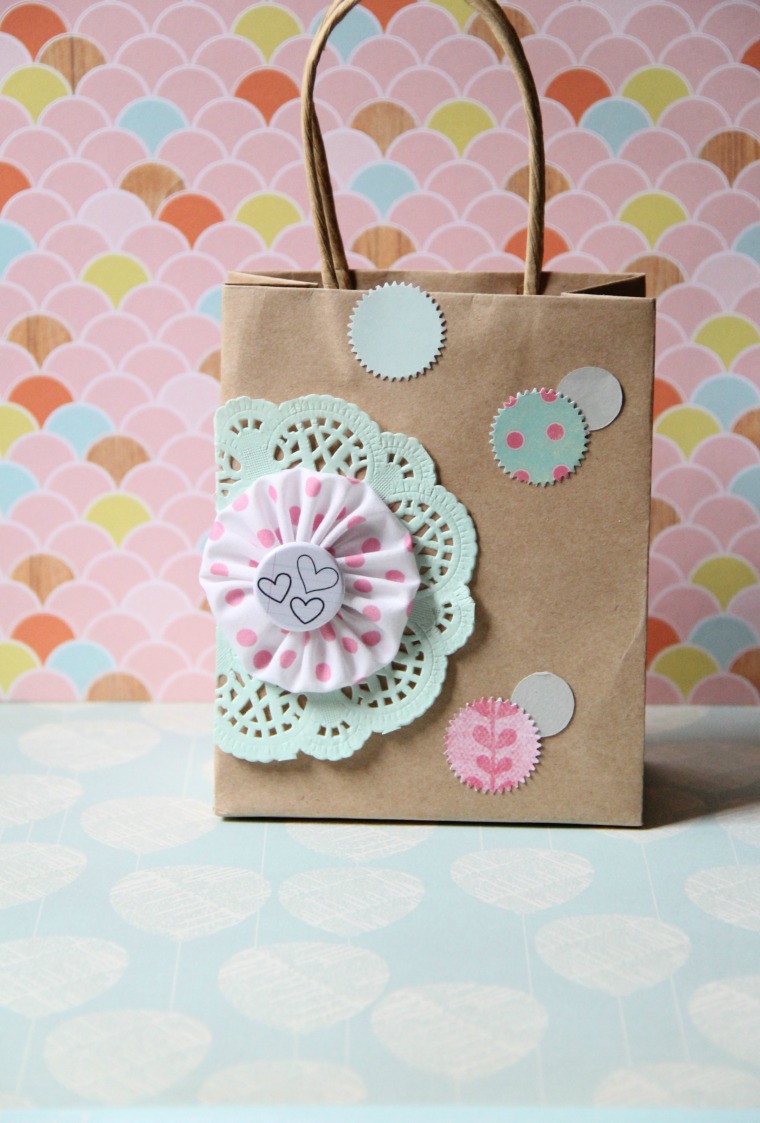
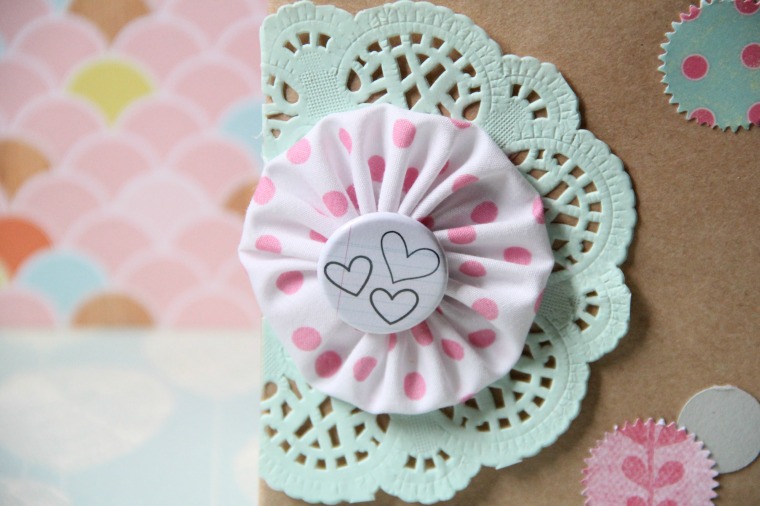
My next project is a small gift bag:
I use the hearts flair button here to adorn the fabric rosette and I love the way the gift bag turned out! It’s perfect for holding a gift card, nail polish or any other treasures a 13 year old girl would cherish!!
Thanks for stopping by today! Make it a crafty one!!
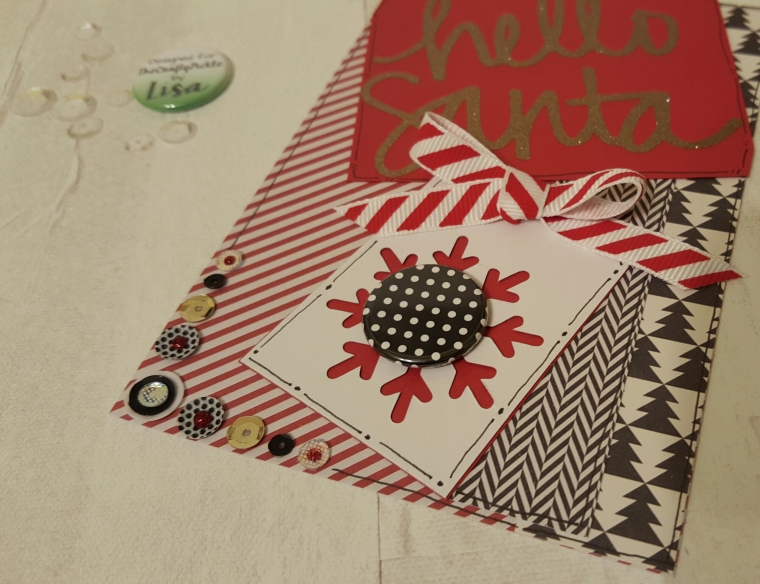
Hi Crafty Friends! It’s Lisa here today from Happy Paper & Ink to share a new Project Life card that I created. I am doing some preparation for my December Daily album, so that is what inspired me to create this card.
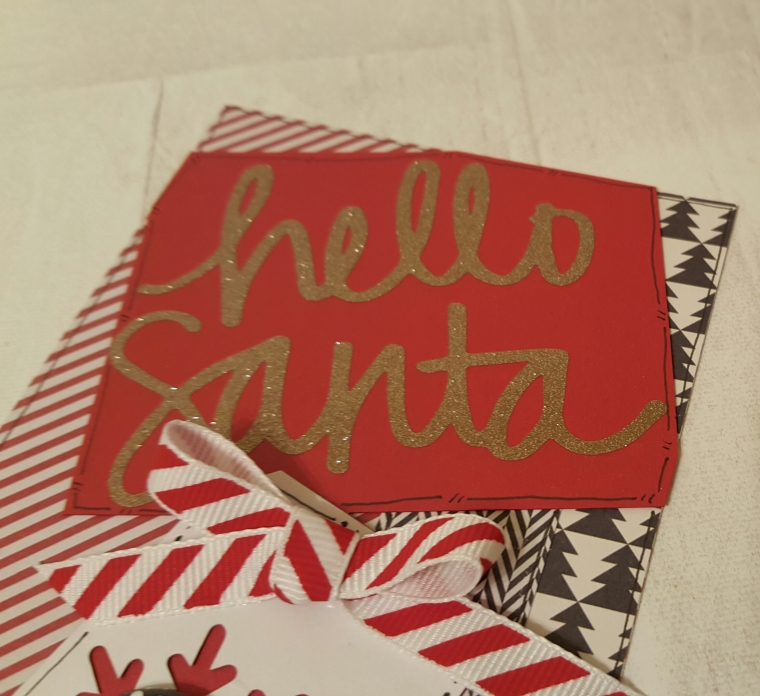
For this card, I started with Pink Paislee Merry & Bright 6×6 paper pad. I cut a tag and a 4×6 project life card from the paper pad. I then cut strips of paper for the side border to add some interest. I cut a snowflake tag on white and red paper using my Silhouette Cameo. I also cut the title using gold glitter vinyl and my Silhouette Cameo for the title “Hello Santa”. I doodled around all the edges with a black 0.8 American Crafts Black Pen and inked with black Memento Ink.
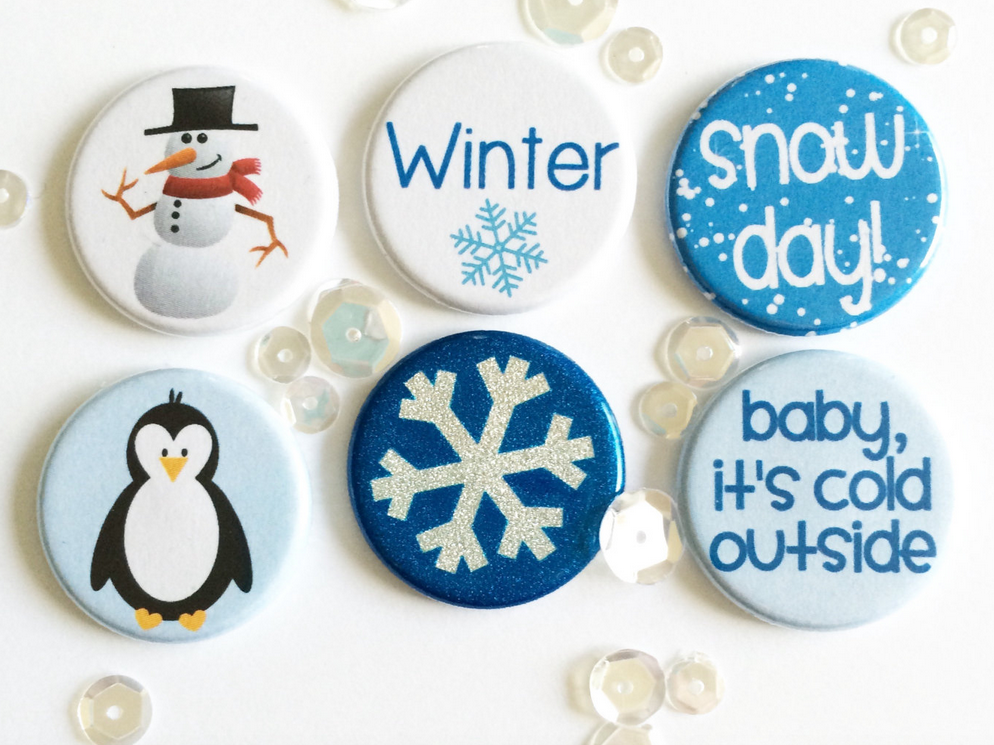
To finish off the card, I used The Crafty Pickle’s Black & White Color Pop Flair and applied it to the top of the snowflake tag. I added some sequins to the corner of the card from The Crafty Pickle. Adding any of the Relish Mixes to your layout or cards gives a fun, sparkly and thin embellishment. These come in all colors, I used the Magical Mouse mix for this card. I layered the sequins and put red glitter stickle dots on top of some of the sequins to change the look a little. And finally, I tied a bow at the top of the snowflake tag to tie it all together!
I hope you enjoyed my Project Life card & are inspired. Look for some more blog posts showing my December Daily in the future!
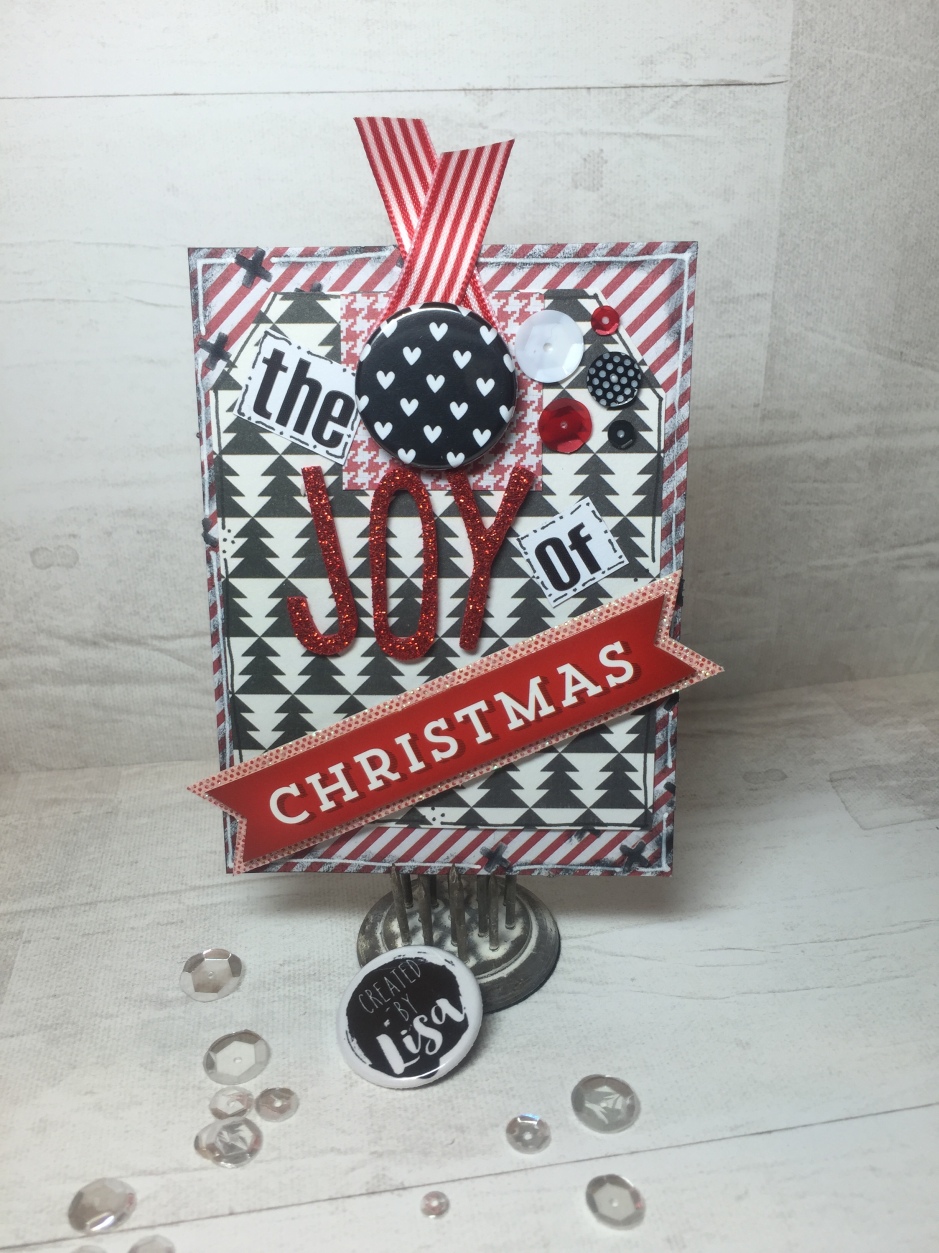
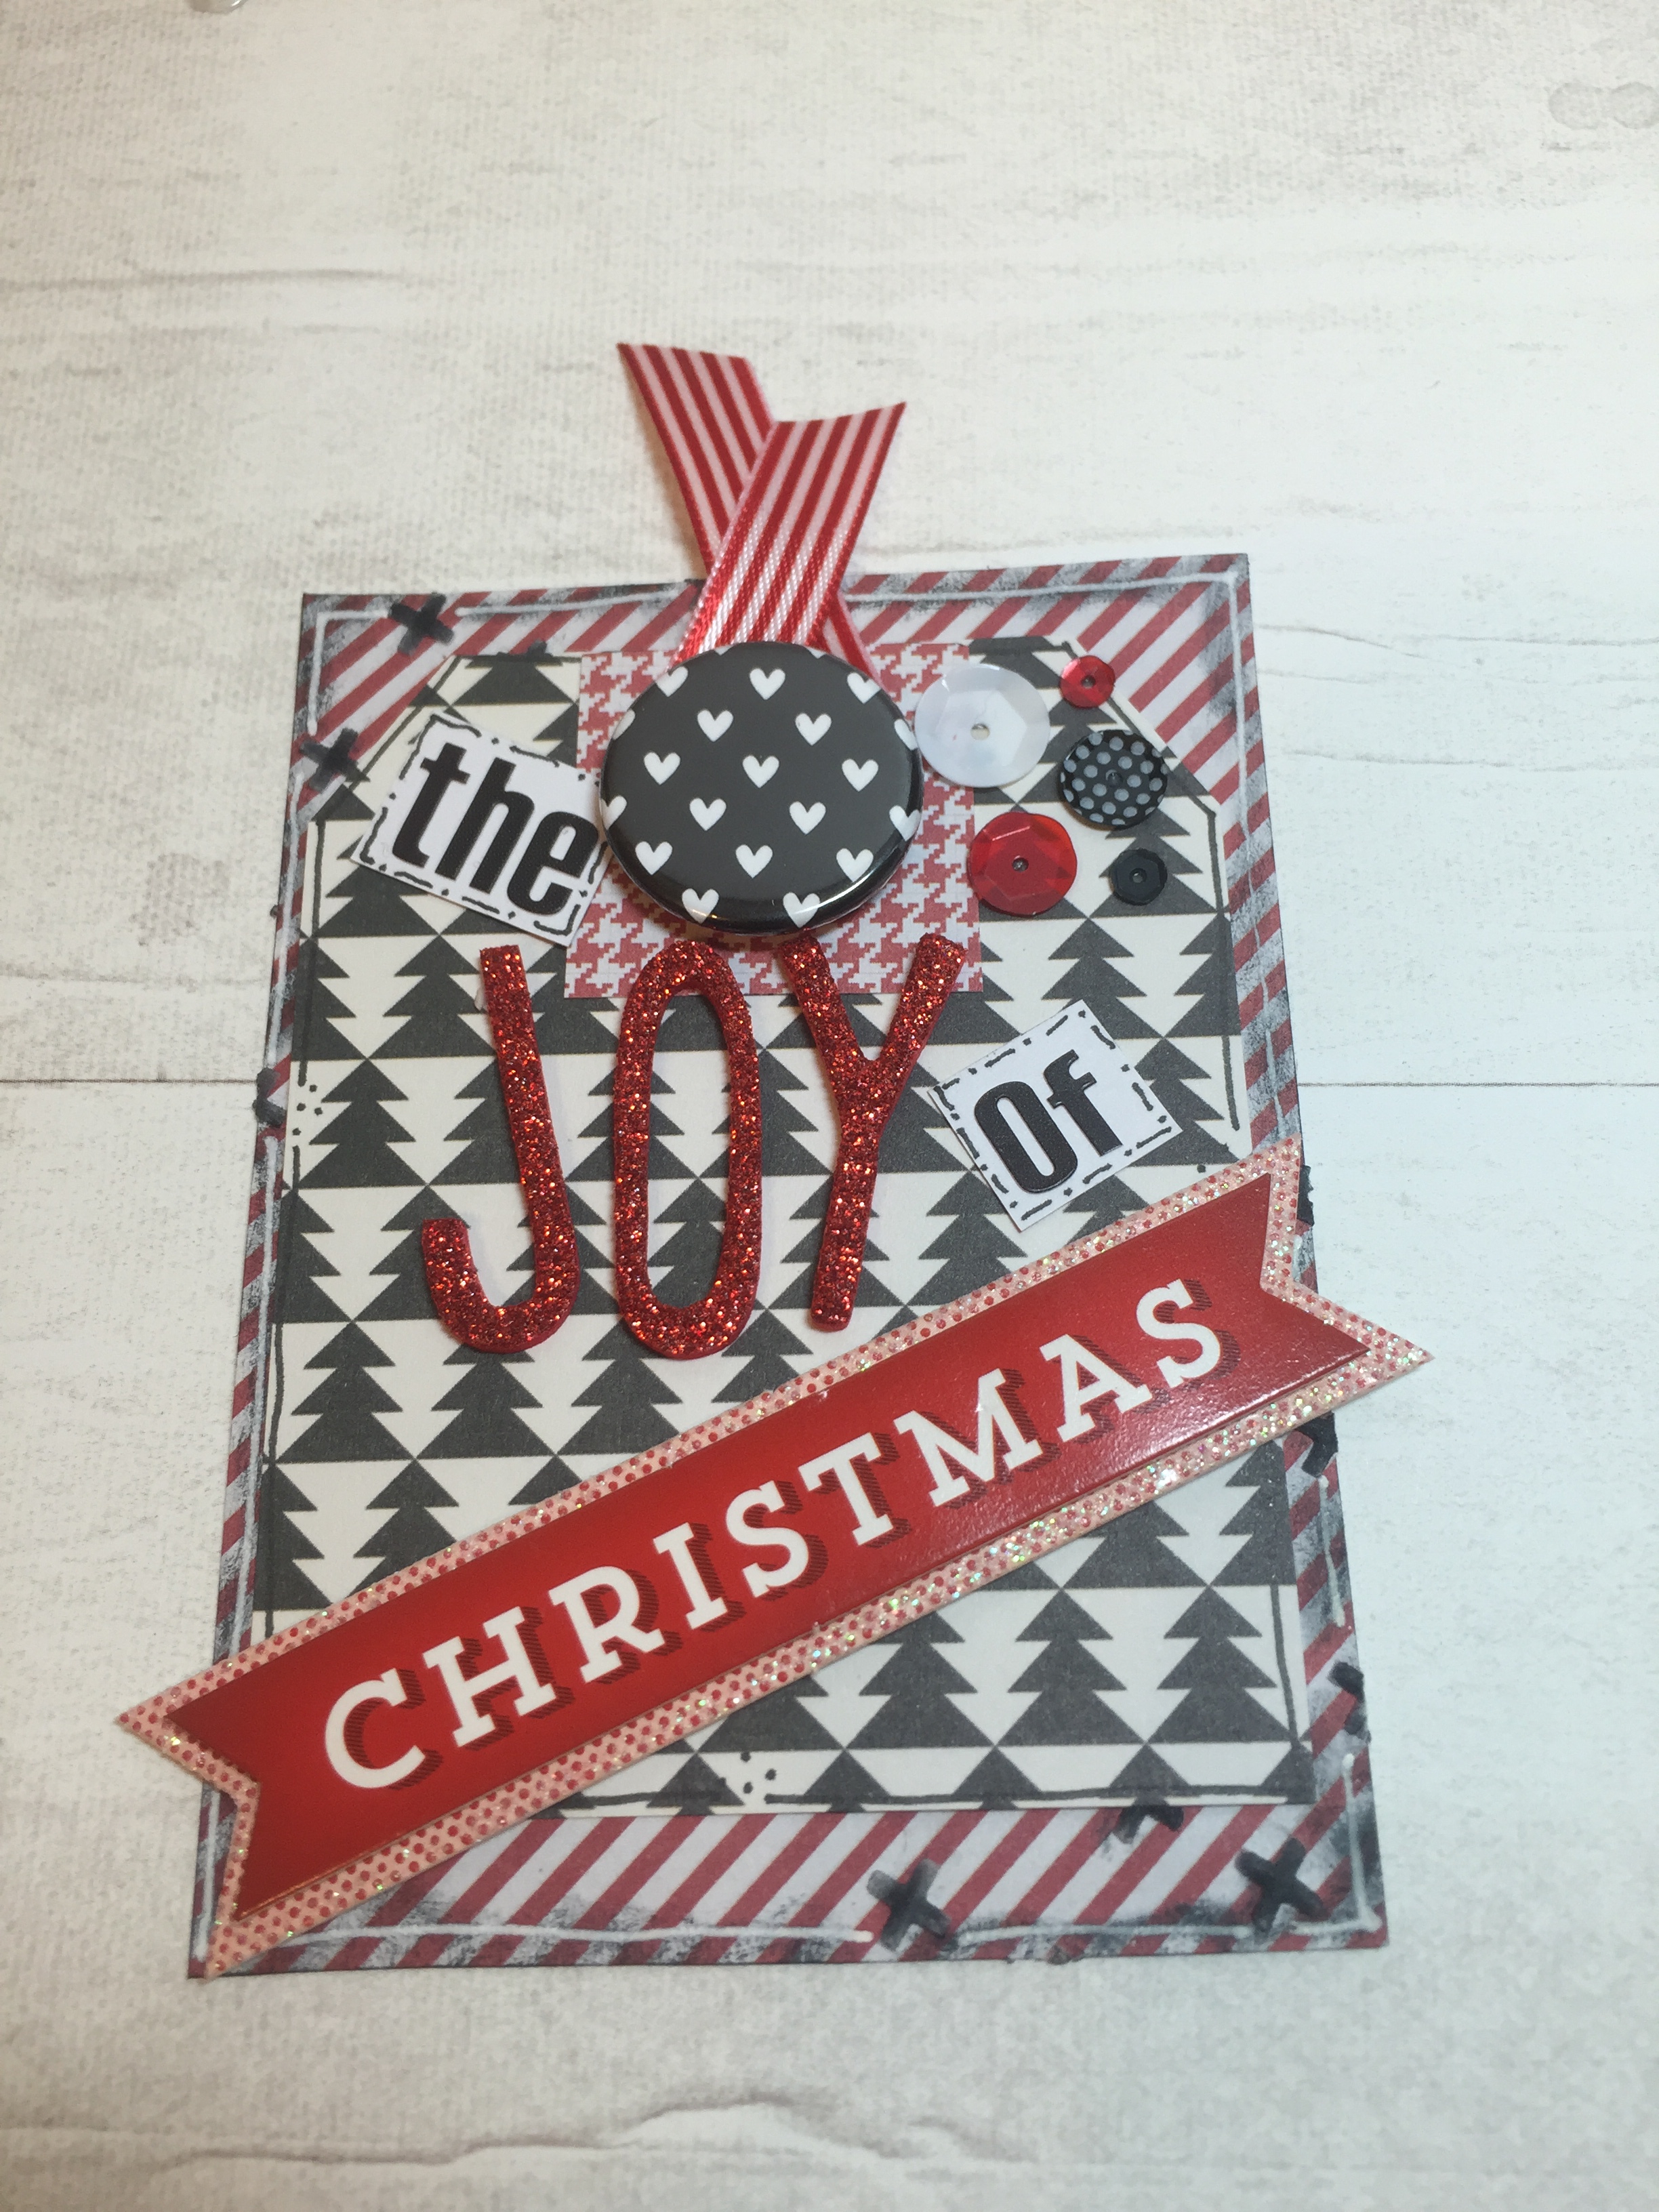
Hi Crafty Friends! It’s Lisa here today from Happy Paper & Ink to share a new Project Life card that I created. I am in the beginning stages of working on my December Daily album, so that is what inspired me to create this card.
For those of you not familiar with December Daily, Ali Edwards created it to document the days of your December. Basically, you do a page for each day spotlighting the activities of the day to include your family traditions, etc. This will be my first year to do this, and I am super excited!
To finish off the top of the card, I used The Crafty Pickle’s Black & White Color Pop Flair and wrapped a ribbon around it. I added some sequins from The Crafty Pickle. Adding any of the Relish Mixes to your layout or cards gives a fun, sparkly and thin embellishment. These come in all colors, I used the Magical Mouse mix for this card.
I hope you enjoyed my Project Life card & are inspired to start a December Daily! Look for some more blog posts showing my December Daily in the future!
It’s Lisa here today to share this week’s planner layout. Planners are on trend in the Paper crafting community. The Crafty Pickle’s shop will be opening back up soon. Be sure to check out all of the planner goodies in The Crafty Pickle’s new inventory. It’s a planner’s dream!!
For this layout, I was inspired by the new goodies in The Craft Pickle Shop. I covered all of the lines on the page using The Crafty Pickle’s thin glitter Washi Tape. This defines the boxes and makes it fun!! The Crafty Pickle just introduced the Sticky Pickle Spot Stickers. These are so awesome to accent important appointments or to just decorate with. They come in asterisks, stars, hearts and circles.
Adding any of the Relish Mixes to your planner gives a fun, sparkly and thin embellishment. These come in all colors, I used the Rock Candy Mix and are super easy to attach. I used a dot of Glossy Accents to attach them. Who doesn’t love sequins???!!!
I used the Project Life Everyday Line paper pad & cardstock stickers to accent my layout. I cut triangles & rectangles to accent the planner boxes which adds some color and texture to the pages.
I also attached a “This Month” planner clip! The Crafty Pickle has come out with personalized clips that are adorable!! I used the planner clip to “bookmark” my week. That makes it super easy to grab my week!
Thanks for stopping by and be sure to check out all the new items as soon as the store opens back up. There are so many things that are perfect for your planner!