Greeting FlairTastic Friday!!!

Happy Friday Everyone!

#FlairTastic Friday

Every Friday though the summer months we will bring you a new idea/concept using flair. Your not going to want to miss these fun posts! These ideas will come from not only our designers but also super neat flairtastic ideas we find from our customers and other talented papercrafters. Make sure that when you share any of your projects on Instagram or Facebook using flair, that you tag it #FlairTasticFriday. You just might see your own photo featured here on our blog!

This week we will be showing you some awesome greeting cards by our wonderful design team!!! Each Design Team member uses flair differently to make a fun greeting card …and with this flair it is nice and flat to fit on any card!!!

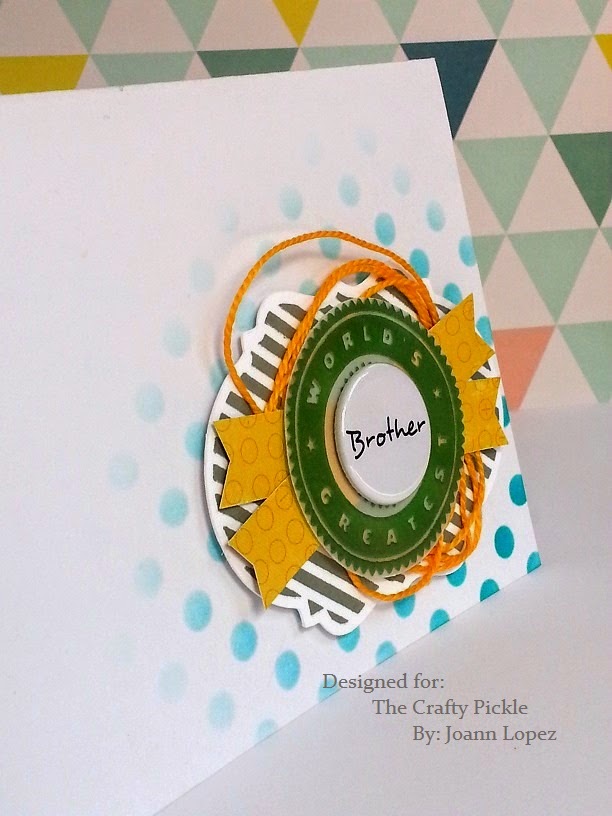
Here is Joann’s super fun FlarTastic Greeting Card I love how she used the vellum as an overlay to soften the background paper …so great!!! And how she used the Something Shiny Slightly Cupped Sequin to follow your eye down the card for interest!!! And bunching the twine behind the Orange Pop of Flair …i am so going to steal that idea!!!

10981518_834873829901622_8212451983378655224_n

And next we have Carrie

11666238_10204592919608247_6621388529462142881_n

I am sorry but Carrie makes the prettiest cards I know …they are just so lovely anyone would love to receive a card from her!!! Carrie used Watercolor Butterflies Flair for her fun and whimsical Thank You card!!!

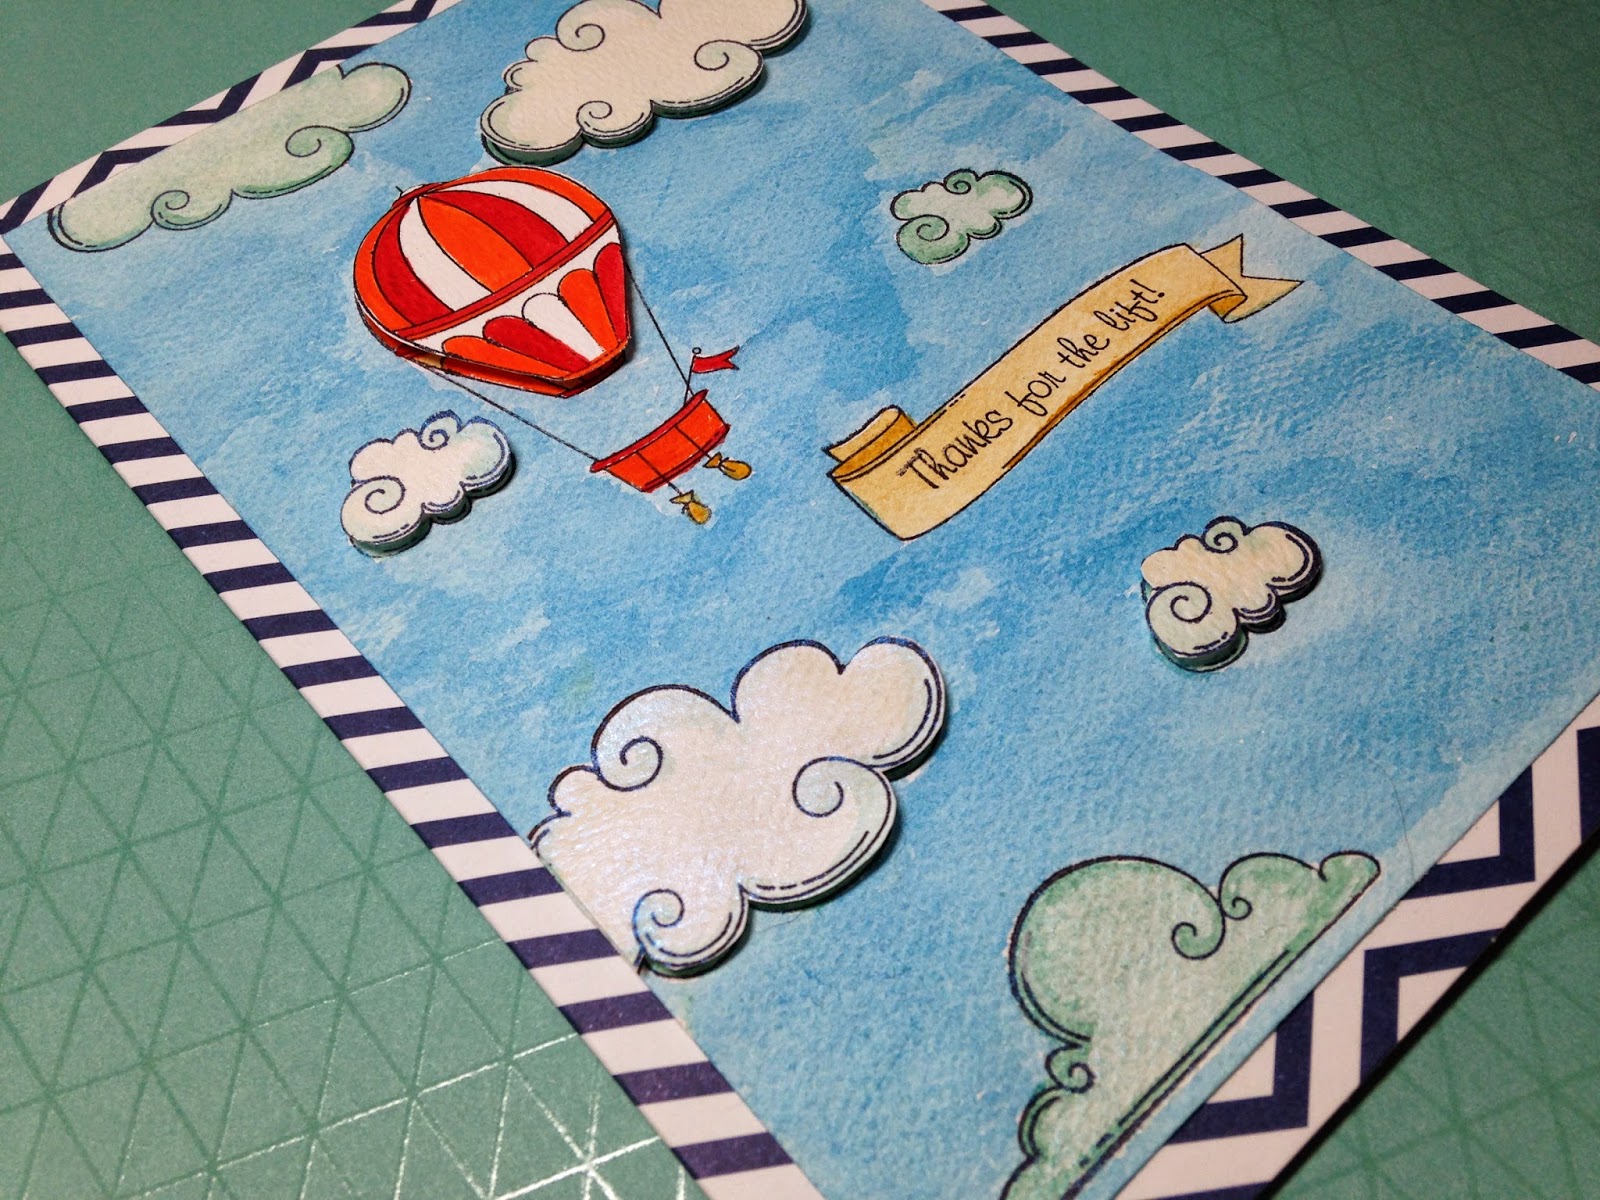
Here is mine Kristin

card

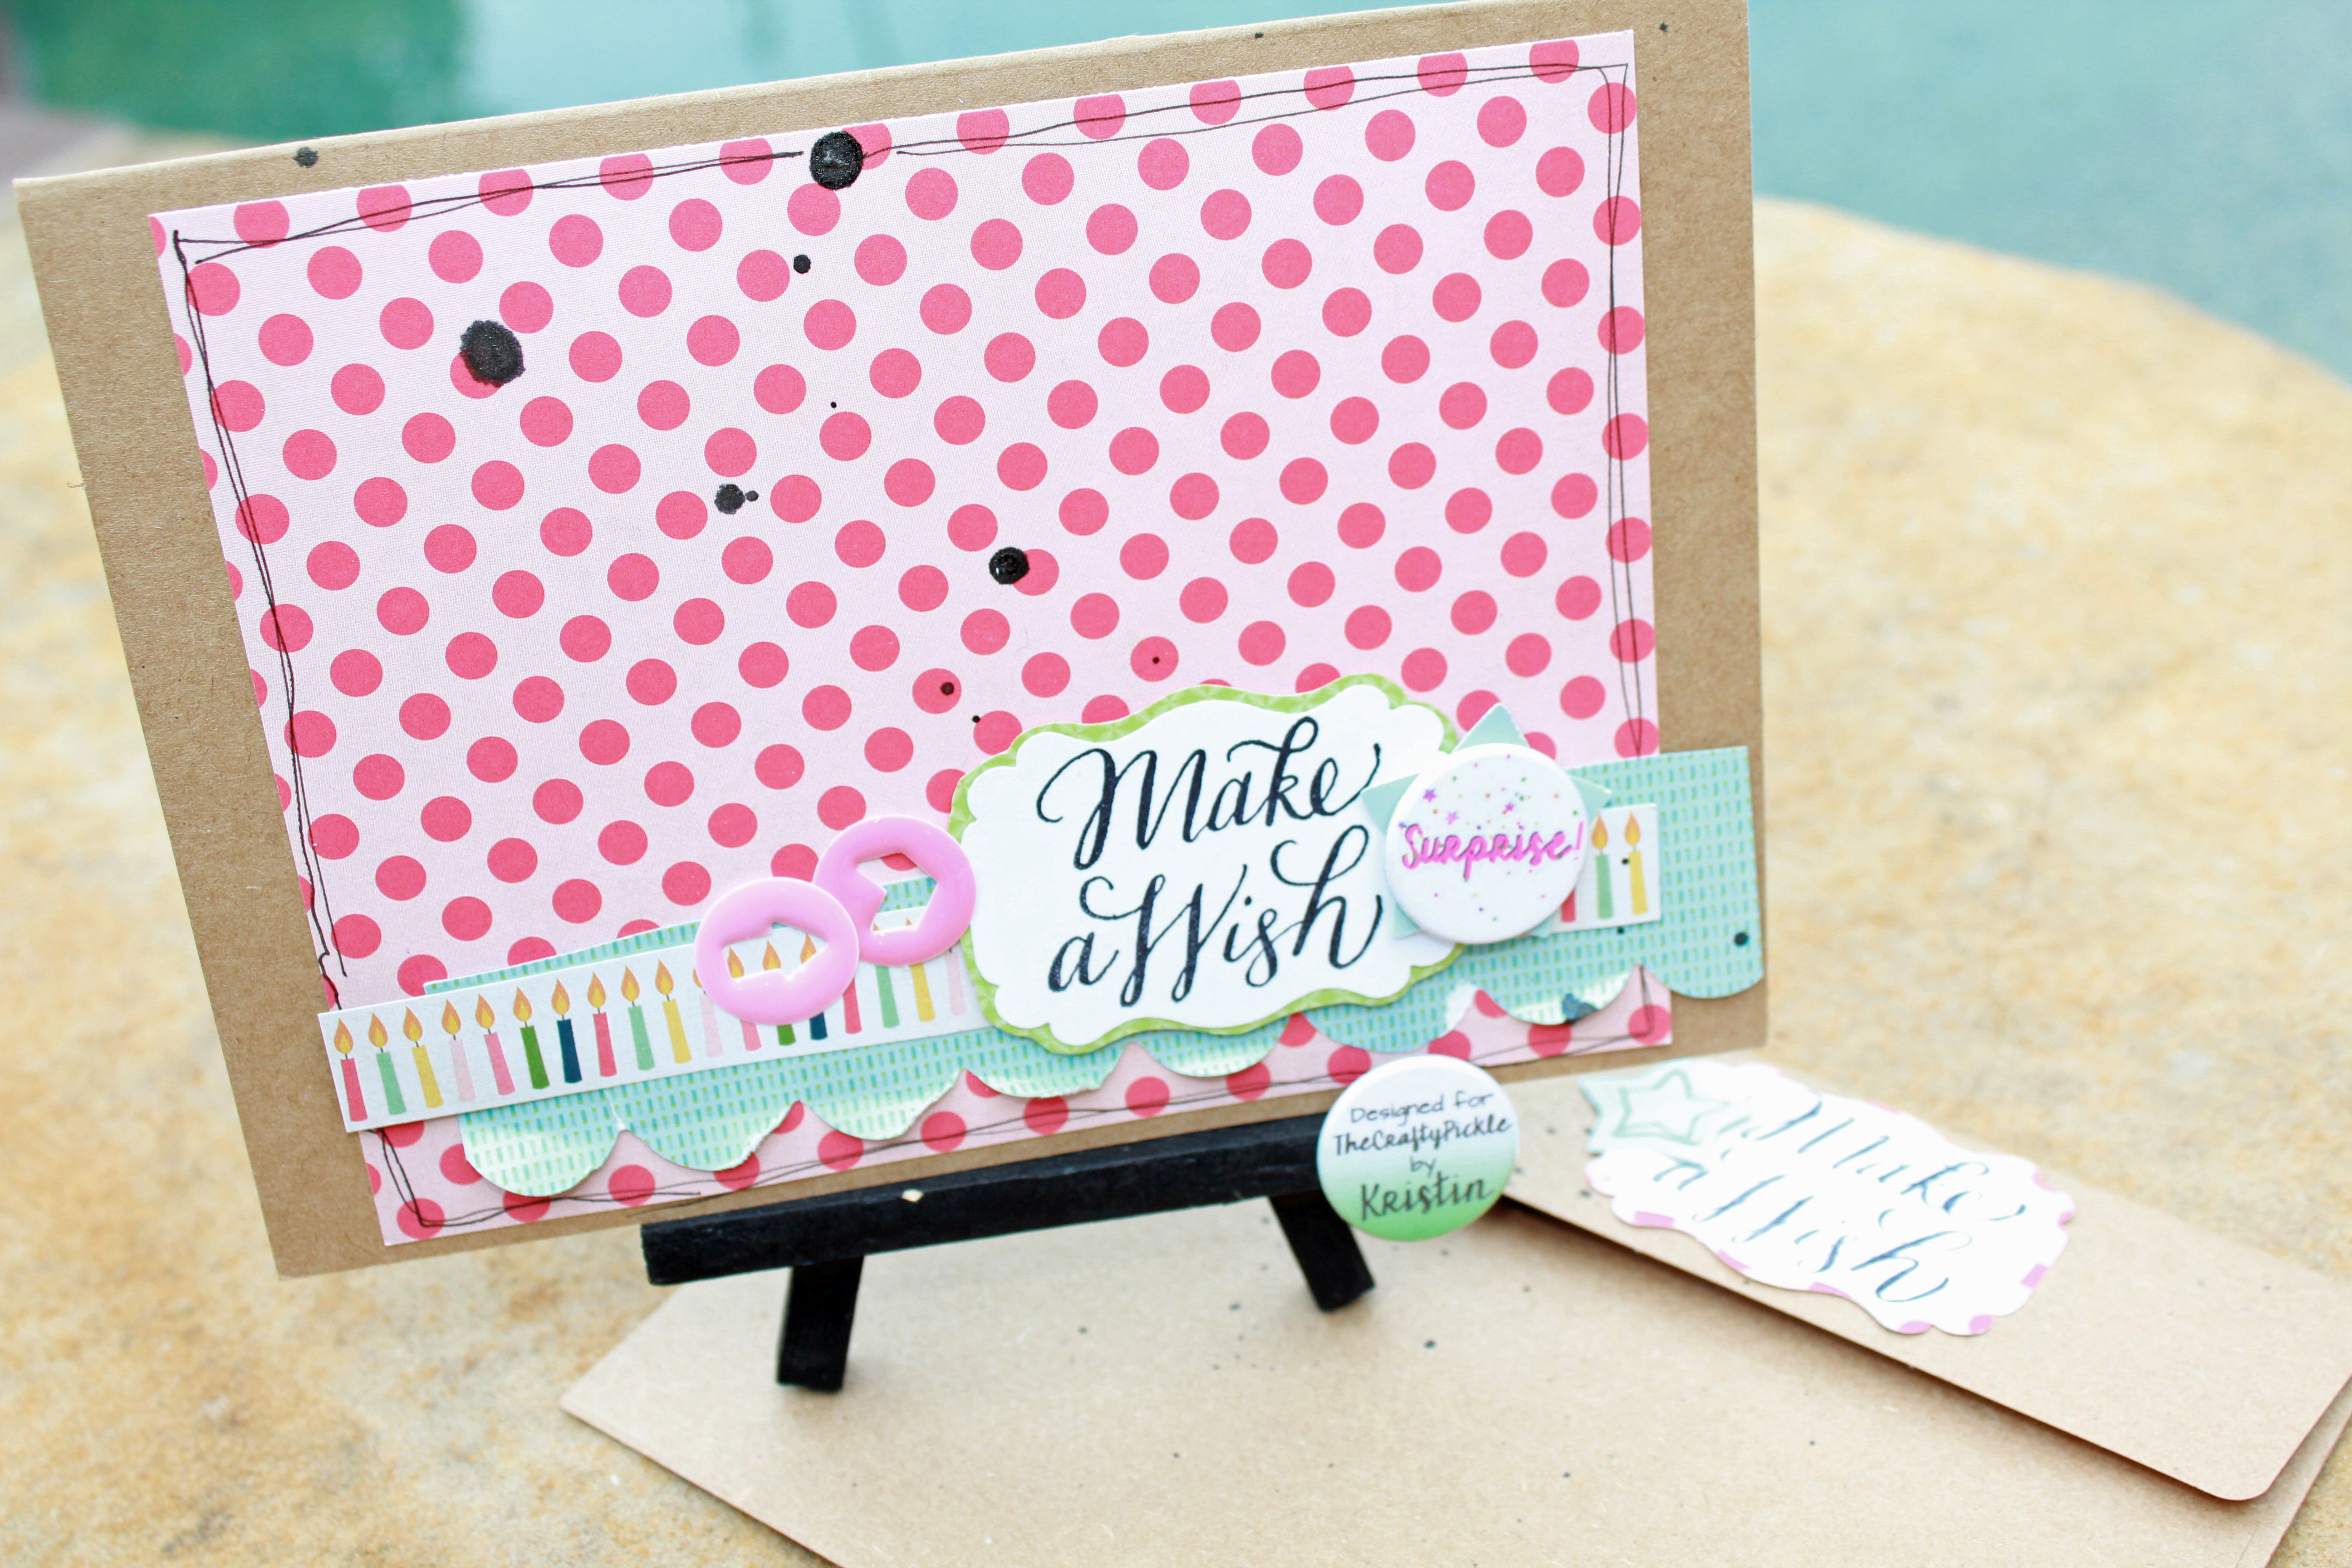
I used this fun and fast birthday stamp, Washi tape pack from Close to my Heart     Suprise Single Flair

treasa

How sweet is this card by Treasa with this cute big candle right on the front and the Suprise Single Flair

Next …we have Stephanie’s so sweet circle shaker box card with the red white and blue Star Spangled confetti mix

11224760_10204222829960940_9165851818059871934_o

How will you use flair on a greeting card?????

Stop by The Crafty Pickle Etsy Shop if you haven’t been by recently. We will be releasing a few little things between now and our next big release. We will also be having a big TCP Birthday celebration this month with giveaways and a brand new exclusive foil flair coming mid July!

Dont forget to use the hashtag #FlairTasticFriday to play along with us!

See you for more FlairTastic Ideas next Friday!

Till Then….

Happy Crafting!

thecraftypickle.com

30 Day Color Challenge: Day 1 (officially)

Hi Crafty Friends!

Yesterday I posted that I was taking TheDailyMarker’s 30 day color challenge to complete 30 handmade project life cards. Well I guess I was a little excited and the official start date is TODAY…. so I will end up doing 31 cards during this challenge.

30 day marker challenge from TheDailyMarker.com

For today’s Project life card I am using two different Close To My Heart stamp sets. The first is the CTMH Stamp of the month : Choose Happy, the second set is Your own kind of wonderful. I was so excited to use the new SOTM that this was a perfect time to break it out. This design would work fantastic on a card as well and you could put pretty much anything in the frames.

choose happyyourownkindofwonderfulHere is the PL card that I created.

PL card using CTMH March SOTM: Choose Happy @Thecraftypickle.com

I stamped the frame with Memento black ink and then masked off the frame leaving the center open to stamp the butterflies. I used Copic markers to color in the large butterfly and then covered with CTMH Liquid Glass. Once everything was dry, I cut out the frame and used foam adhesive to pop it up on top of another framed stamped image on a 3×4 card.

PL card using CTMH March SOTM: Choose Happy @Thecraftypickle.com

Now I have a fun spring filler card for my Project Life album.

Thanks so much for visiting. See you back tomorrow for day #2 of the color challenge!

Happy Crafting!
The Crafty Pickle

Kathy’s 30 Day Color Challenge!

Hi Crafty Friends,

If you haven’t heard, Kathy, From TheDailyMarker.com is starting a 30 day color challenge starting today though April 2nd. I read about her idea and thought this was a great opportunity to do something creative every day for 30 days. I get caught up in a lot of things between family, chores, business stuff, ect… That I forget to do something creative for myself. You can read more about her challenge and see how she is preparing for the 30 days HERE.

I have not only decided to play but to put my own little spin on it. For the next 30 days I plan on making 30 colored Project Life cards to use in my 2015 album. I think this will help me get more practice in with a variety of markers, pencils, and watercolors that I have been neglecting.

I was up late last night so I got an early start on today’s coloring. My newly turned 15-year-old had a sushi lunch for his birthday so I made a project life card that will be perfect for that day.

Coloring Challenge day one @TheCraftyPickle.com

For this first card I used the Paper Smooches stamp set “Calorie Free” and my Copic markers. I even added a little wink of stella glitter to the ginger and used some glossy accents for the plastic grass. To finish it off I did some doodle lines around the card.

It’s simple and didn’t take me any time at all but it felt great to get into the creative mode.

Will you be joining me in taking Kathy’s 30 day color challenge? If so, please link me your projects in the comments this month, I would love to see what you will be creating!

Happy Crafting!

The Crafty Pickle

Worlds Greatest Brother

Hi Crafty Friends!

  Today we have a card for you by our fabulous DT member, Joann! She has a great card using both CTMH product and TCP flair! Take a look.

Hi, thanks for stopping by today! I am sharing with you another masculine card. A quick tip that I found was, pick your color combo out first and you’ll find out that the card will come together quite quickly.

I started off with a dotted stencil and some CTMH Lagoon ink to created a faded corner background. I cut the label using the CTMH Art Philosophy cartridge and stamped the image with a coordinating stamp set Perfect fit- Frames Flair with some CTMH Slate Ink,
I also used the stamp set Perfect fit- Dad Holiday to stamp the “World’s Greatest” on some vellum, finished the card off by cutting a few banner shape pieces, some yellow orange twine and of course some TCP Family Themed Flair!
Hope you enjoyed today’s card and as always thanks for stopping by!!
Supplies used
CTMH Inks:  LagoonSlate
Thank you so much for sharing your creativity with us, Joann. This has to be one of my favorite cards!
Happy Crafting!
The Crafty Pickle

CTMH Lifting Spirits: One Stamp Set. Two Looks.

Hi Crafty Friends!

Today we have something special for you. Design team member, Carrie Bryant, and myself have teamed up to bring you two looks with the CTMH stamp set “Lifting Spirits”.

Here is a photo of the stamp set:

Lifting Spirits by CTMH @thecraftypickle.com

I had a lot of fun creating with this stamp set. It is one of my favorites ever since it showed up as a seasonal set last year. It is now in our annual expressions catalog for $13.95. Not only can you use the sentiments included in the set but there are other sentiments like “Happy Birthday” for example, that would look great in the banner as well.

I wanted to create a one layer card but still show some dimension as well. I chose to use alcohol markers as my main medium and used a bit of ink on the edges.

Here is my finished card

CTMH Lifting Spirits card by Taniesa@TheCraftyPickle.com

I started by stamping out the images and sentiment in Memento Tuxedo Black ink. I colored the clouds, airplane, banner, and background all with alcohol markers. I used the CTMH Touch Twin markers and for extra shading used a few Copic markers as well.

Once everything was dry I took a Wink of Stella clear glitter brush pen and a Sakura Gelly roll clear glitter pen and added glitter accents. I used the Sakura pen where I wanted a high amount of shine (around the lines mostly) and the Wink of Stella as a filler.

CTMH Lifting Spirits card by Taniesa@TheCraftyPickle.com

For the final touch I used CTMH Liquid Glass to cover the body of the airplane to make it all shiny. Once completely dry, I mounted the panel on printed paper and then on a note card. You can kind of see the shiny on the airplane in the photo above.

CTMH Lifting Spirits card by Taniesa@TheCraftyPickle.com

I had a lot of fun making this card. I think this is one of my most favorite CTMH sets so far.

Here is a little peek at Carrie’s card, you will need to visit her blog HERE to see more photos as well as a walk-though on  how she created her card.

CTMH Lifting Spirits by Carrie Bryant for TheCraftyPickle.com

I love the dimensional look she achieved with her card!

I hope you enjoyed our One Stamp Set – Two Looks special feature. Let us know if you would like to see more of these kinds of posts in the future by leaving a comment below. There is some wonderful new stamp sets coming out in April!

Also, don’t forget about our Blog Hop giveaway that closes this Wednesday 2/25. Click HERE to get to the first post in the blog hop.

Have a “Uplifting” week!

Happy Crafting!

The Crafty Pickle

Handmade Greetings with Carrie Bryant

Hi Crafty Friends!!!

Today our designer, Carrie Bryant, has some beautiful cards she has created with just one Close To My Heart stamp set. Take a look!!!

Hello! Today I am sharing with you a few Handmade Greeting Cards that I created using my new “Your Own Kind of Wonderful” CTMH Acrylix stamp set  
 As you can see there are six different sayings along with six different sized butterflies.  Making this a great value with twelve different stamps in one set.
I love this set for it’s versatility in creating cards for several different occasions.  I like to make up several cards at one time so I always have a handmade card on hand for any special occasion. After all who want to pay $5.00 or more for a store bought card? Any everyone loves a handmade card better anyway.
 I used some pre-made chalkboard style cards for my base, I then pulled out my watercolors and painted the background for my stamped image.  I really like the bold outline of the butterflies and when I painted the inside with my watercolors they really pop off my cards. CTMH Arcylix stamps are some of the highest quality stamps I have worked with.  They stamp a clean image every time. They peel off the backing and are super adhesive to the stamping block, they also clean up really easy.
 I used the same butterflies on this card. After I painted them in I fussy cut them out and used some 3D pop dots to mount them to my card base.  I then created a watercolor banner that I stamped my sentiment on.  I used some sequins to embellish my cards too.  You can find this pretty Fruity Pebbles sequin mix in TheCraftyPickle Etsy shop. 
This one is my favorite. I just love this sentiment. I plan on giving this one to my daughter for her Graduation this year. 
 
Thanks for stopping by today.
Happy Scrappin’
Carrie

I just love that stamp set and what you did with it too, Carrie. Thank you for sharing with us! What is your favorite Close To My Heart stamp set or product? Leave a comment below to win a Close To My Heart stamp set and goodies out of The Crafty Pickle prize bin. Winner will be chosen Monday,Feb. 2 2015! Good Luck!!! 

Happy Crafting!

TheCraftyPickle.com

Christmas Mixed Media Layout

Hi Crafty Friends!

Today we have an amazing layout by designer, Elodie! Take a look!!

Hello Friends! Today I want to show you a layout. December arrived and Christmas approach I thus made a page in mind of Christmas, which this year, will be even more special with the birth of my little boy.

DSCN1160

I began by sticking two bands of stickers at the top of my page with a small touch of gesso. Then I used a stencil with some modeling paste to give a little interest to my page. I splashed some ink and used some stamps from ” Close to my heart “. I arranged my photo, my papers, some TCP flair as well as sequins.

season

Supplies used:

CTMH All the details

The Crafty Pickle is in the process of opening a new shop so please stay tuned for more info or follow on facebook The Crafty Pickle.

Thanks for stopping by

Elodie


I just love how use used her clusters for such an eye-catching page! Thanks Elodie!

Happy Crafting!
The Crafty Pickle

Gift a candy bar!

Hi Crafty Friends!

Is your gift list a mile long? It’s always hard for me to come up with a clever gift that doesn’t cost a lot of money. Designer, Joann, has came up with a beautiful way to gift a simple candy bar! Check it out!!

Hi! Today I have fun little project to share with you today and my first ever step by step tutorial (so this is a warning that it is a LONG post, lol)!

I wanted to create some fun treat holders to give to a few friends and family some in which I could fit a snicker bar. I searched for a few ideas and came across many (pinterest of course, lol) and most of them used the envelope punch board, but I wanted to be able to make one without the punch board.

Here is what I came up with…


I started off with cutting some 12 x 12 Cranberry card stock from CTMH at 9 1/4 x 5 (you can get 2 treat holders out of a 12 x 12). I then placed my card stock long ways on my scoreboard (9 1/4) and scored it at 1 1/8, 2 1/8, 7, 8. I then took my card stock and rotated it (5) and scored at 3/4, 1 7/8, 3 1/8, 4 1/8.  It will look like this…
Taking my scissors I started to cut (black lines indicate where you need to cut and the “x” indicates the areas that will be removed).

You will then be left with this (I marked the 4 areas with stars for the next step below)…


The 4 squares with the stars (shown above) will need a small diagonal cut off of 2 sides (picture on the left). After all four squares have been cut, your treat holder should look like the picture on the right. This will help with the closure of the box.

I used my grid mat to place small dots on the top and bottom squares of my treat box (picture on the right). I took my scissors and meet the side dots to the top. You should end up with the picture on the left.
I took CTMH stamp set Snowflakes to stamp a few images for my box and turned the box on its back and placed some strong adhesive on the 3/4 side (one of the sides is slightly smaller than the other, I did it this way so when the box is closed, the closing on the back is down the middle and not to one side).
I found the easiest way to line everything up was to fold the box and carefully push down so both sides stick to the adhesive and then I opened it to run my finger inside, making sure it was secured.
I cut an image from the CTMH Artiste that coordinates with the Holiday Tags CTMH stamp set and stamped it with some Cranberry Ink and placed a TCP Flair in the center (the glitter on this flair is stunning). Punched a hole on top and ran both ends through it so I could tie a nice bow on top of the tag.
I know this was a lengthy post but once you get one done, I promise the others will be super fast. I appreciate you making it to the end and I hope you enjoyed my first tutorial.
Just a heads up…
The Crafty Pickle is in the process of opening a new shop so please stay tuned for more info or follow on facebook The Crafty Pickle.
Thanks for stopping by.
Supplies used:
Thanks, Joann! I can’t wait to make some of these for school office staff!
*Special Note* My Etsy store is currently down. If you need any flair for the holidays please send a email with your order to tcraftypickle@gmail.com and I can send you an invoice. A new store interface is coming SOON and will make shopping even easier!
Happy Christmas Crafting!
The Crafty Pickle

Fun and festive door hanger with designer, Alicia!

Hi Crafty Friends

Today, designer Alicia is sharing a cute little door hanger using some patterned pop flair! Check it out!!

Hi Alicia here with a holiday card using  Blue Patterned Color Pop Flair  from
http://thecraftypickle.com

the  tree in the  card is from  http://thecraftypickle.ctmh.com
C1559 Always grateful Seasons & Nature
The sequins are from  the are the Winter Sequins mix
to see all the great products they have, you will love it!
Thanks Alicia, totally cute idea to have a cheerful festive door-hanger!
Have a great week friends!
The Crafty Pickle

Crisp and Cool layout by designer, Cathy!

Hi Everyone!

 I hope you are all recovering nicely from turkey overload and shopping madness. Today we have a beautiful layout to share by design team member, Cathy! Take a look!

Hi everyone, Cathy here with a layout I created using awesome products from The Crafty Pickle!  My layout was inspired by one I saw created by Lilith Eeckels.  I loved the way she cut the large woods paper into 3rds to create interest and divide up the image.  From there I used a variety of embellishments, including flair badges and sequins from the The Crafty Pickle and stamps from Close to my Heart.  I just love how it turned out and I am so happy with my products from The Crafty Pickle.  The flair badges are just fantastic and who doesn’t love sequins right?


Beautiful work, Cathy. Love it!
Happy Crafting!
The Crafty Pickle