It’s Paula here with a few pocket scrapbooking cards and some shaker pockets I made. For the cards I just cut some cardstock to 3×4 and decorated with patterned paper and stamps and then added some sequins from the relish mixes in the shop…so cute!
I also added some of the awesome Disney flair and washi tape in the shop!!
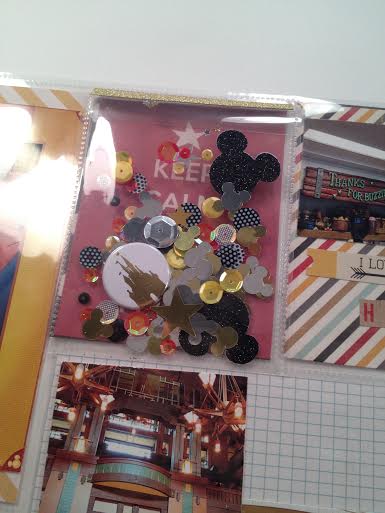
For the shaker pocket I used a Simple Stories Photo Flip and added relish mix, a Disney flair and a few Disney punch out shapes. Then I sealed it with double sided tape and put some glitter washi tape on top of that. Easy peasy!
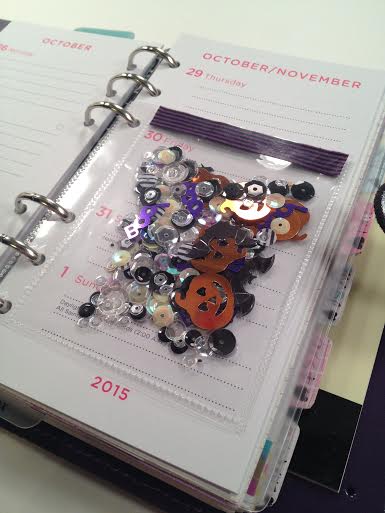
For the planner shaker pocket I used a Heidi Swap 3×4 card pocket and added relish mix and some Halloween shapes and then sealed it the same way…works perfectly!
I’m excited to share another Project Life layout this week and I decided to document another Scrapbook Expo from 2014 for my first page in August.
Yes 2014. Don’t judge. I’m THAT behind but that only means I have lots and lots to create with right? 🙂
I couldn’t wait to use my customized flair for this spread!
I used the new Dear Lizzy Documentary line to compliment The Crafty Pickle yummies!!
Stop it. Isn’t the flair adorable? We had a blast at the Crop and we shopped and literally dropped at midnight.
I love using the glitter tape because that glitter ain’t movin’ for nothin’! I usually cut the tape in half because I like thinner strips to accent. My title card deserved Relish mix 😉
I like applying washi to my wood veneers and was just about to do that when I forgot I picked up some “potty people” diecuts from Hobby Lobby on clearance! I used some of the black heart washi from the shop and put it on top of the diecut like i would the veneer and cut around. Voila! Custom embellishments!
Paula and I found a HUGE Daiso and we went crazy inside. I love using these Pickle Spots on my cards. The different shades are so nice because you are bound to find the right color for your project or planner layout.
Isn’t the road washi and Pit Stop flair perfect? I thought so too.
Thanks so much for stopping by! Sorry I don’t have a process video up this week but life has hit me hard this past week and I just picked myself back up!
I did film a quick video for my subbies and I hope you stop by!
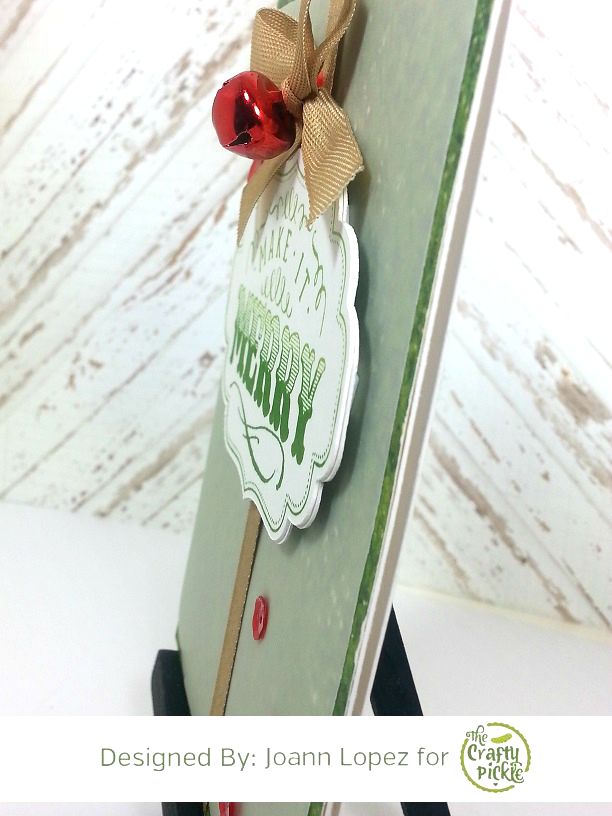
I used CTMH Artbooking Cricut Cartridge to cut my tag, which coordinates with this stamp set. I took CTMH Pear and Topiary Inks to stamp my image onto my tag (I tried to create an ombre effect, it’s acutally a bit more noticeable in person). I cut a piece of vellum a bit smaller than my colored card stock and then tied some ribbon to my top panel before gluing it down to my card base.
I finished it off by adding a bell to a bow I tied, scattered a few TCP Relish Mix and popped my label on some foam adhesive to add a bit more dimension to my card. That is all for this card!
Now my next card is mimicking a card that I posted on my blog a few days ago. I loved how it turned out, I did make a few changes to make it a little different.
Here it is…
I took some stitched circle dies I have to cut my circles out of some pattern paper. I stamped my sentiment, also from “Make It Merry“, onto some vellum with VersaMark and heat embossed it with some black embossing powder.
I drew some white lines and then glued my circles down, adding some dimension to 2 of them. I scattered some tone on tone TCP Relish Mix to match with the pattern paper. Super easy and simple!
Well that is all for today! Thank you so much for stopping by!
Happy Tuesday to everyone checking in on the blog today …
First there really are no rules to journal in your Bible but I got this cute little card in the mail the other day and thought I would share it ….I am no expert in this field just enjoy playing in my Bible …
I usually come home from church on Sunday and that evening try and make my little entry into my Bible ..sometimes I like to think about what I am going to do for a bit and sometimes I just want to do a little bit in my book..just depends on my mood … but all the products from the store work fabulous for my book and all the CTMH
stamps work wonderful in the side margins of your journaling bible also…
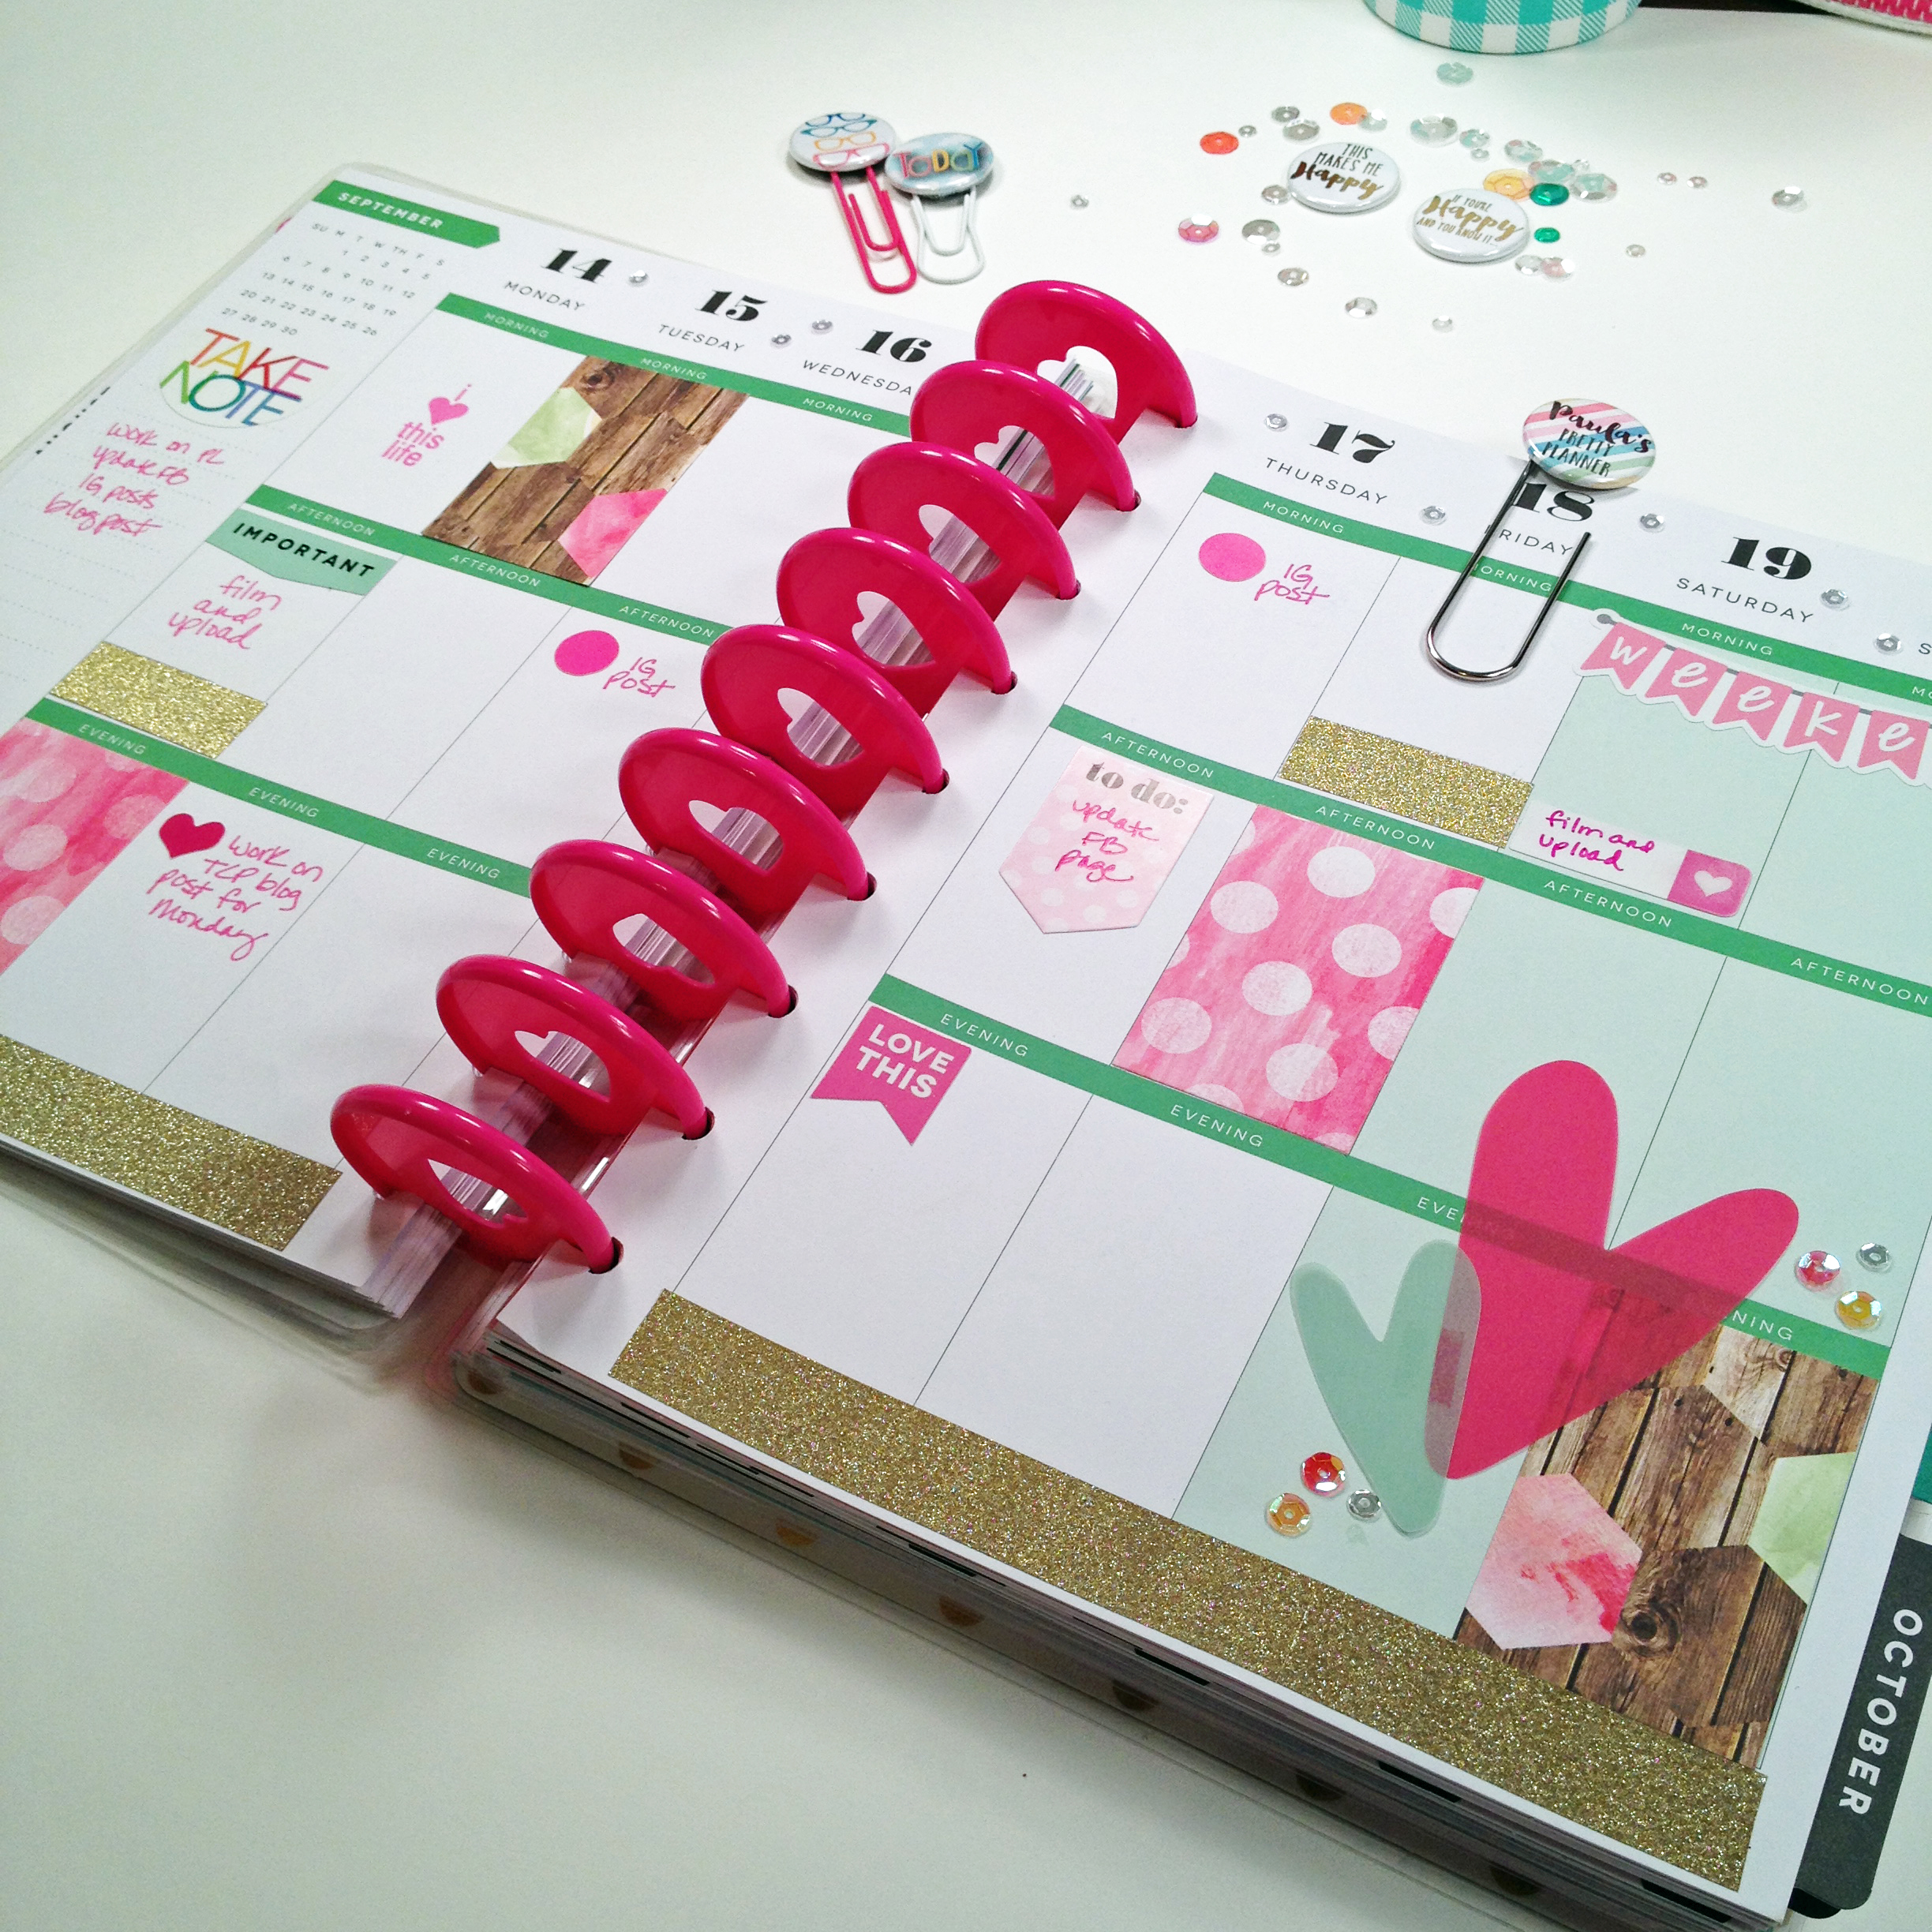
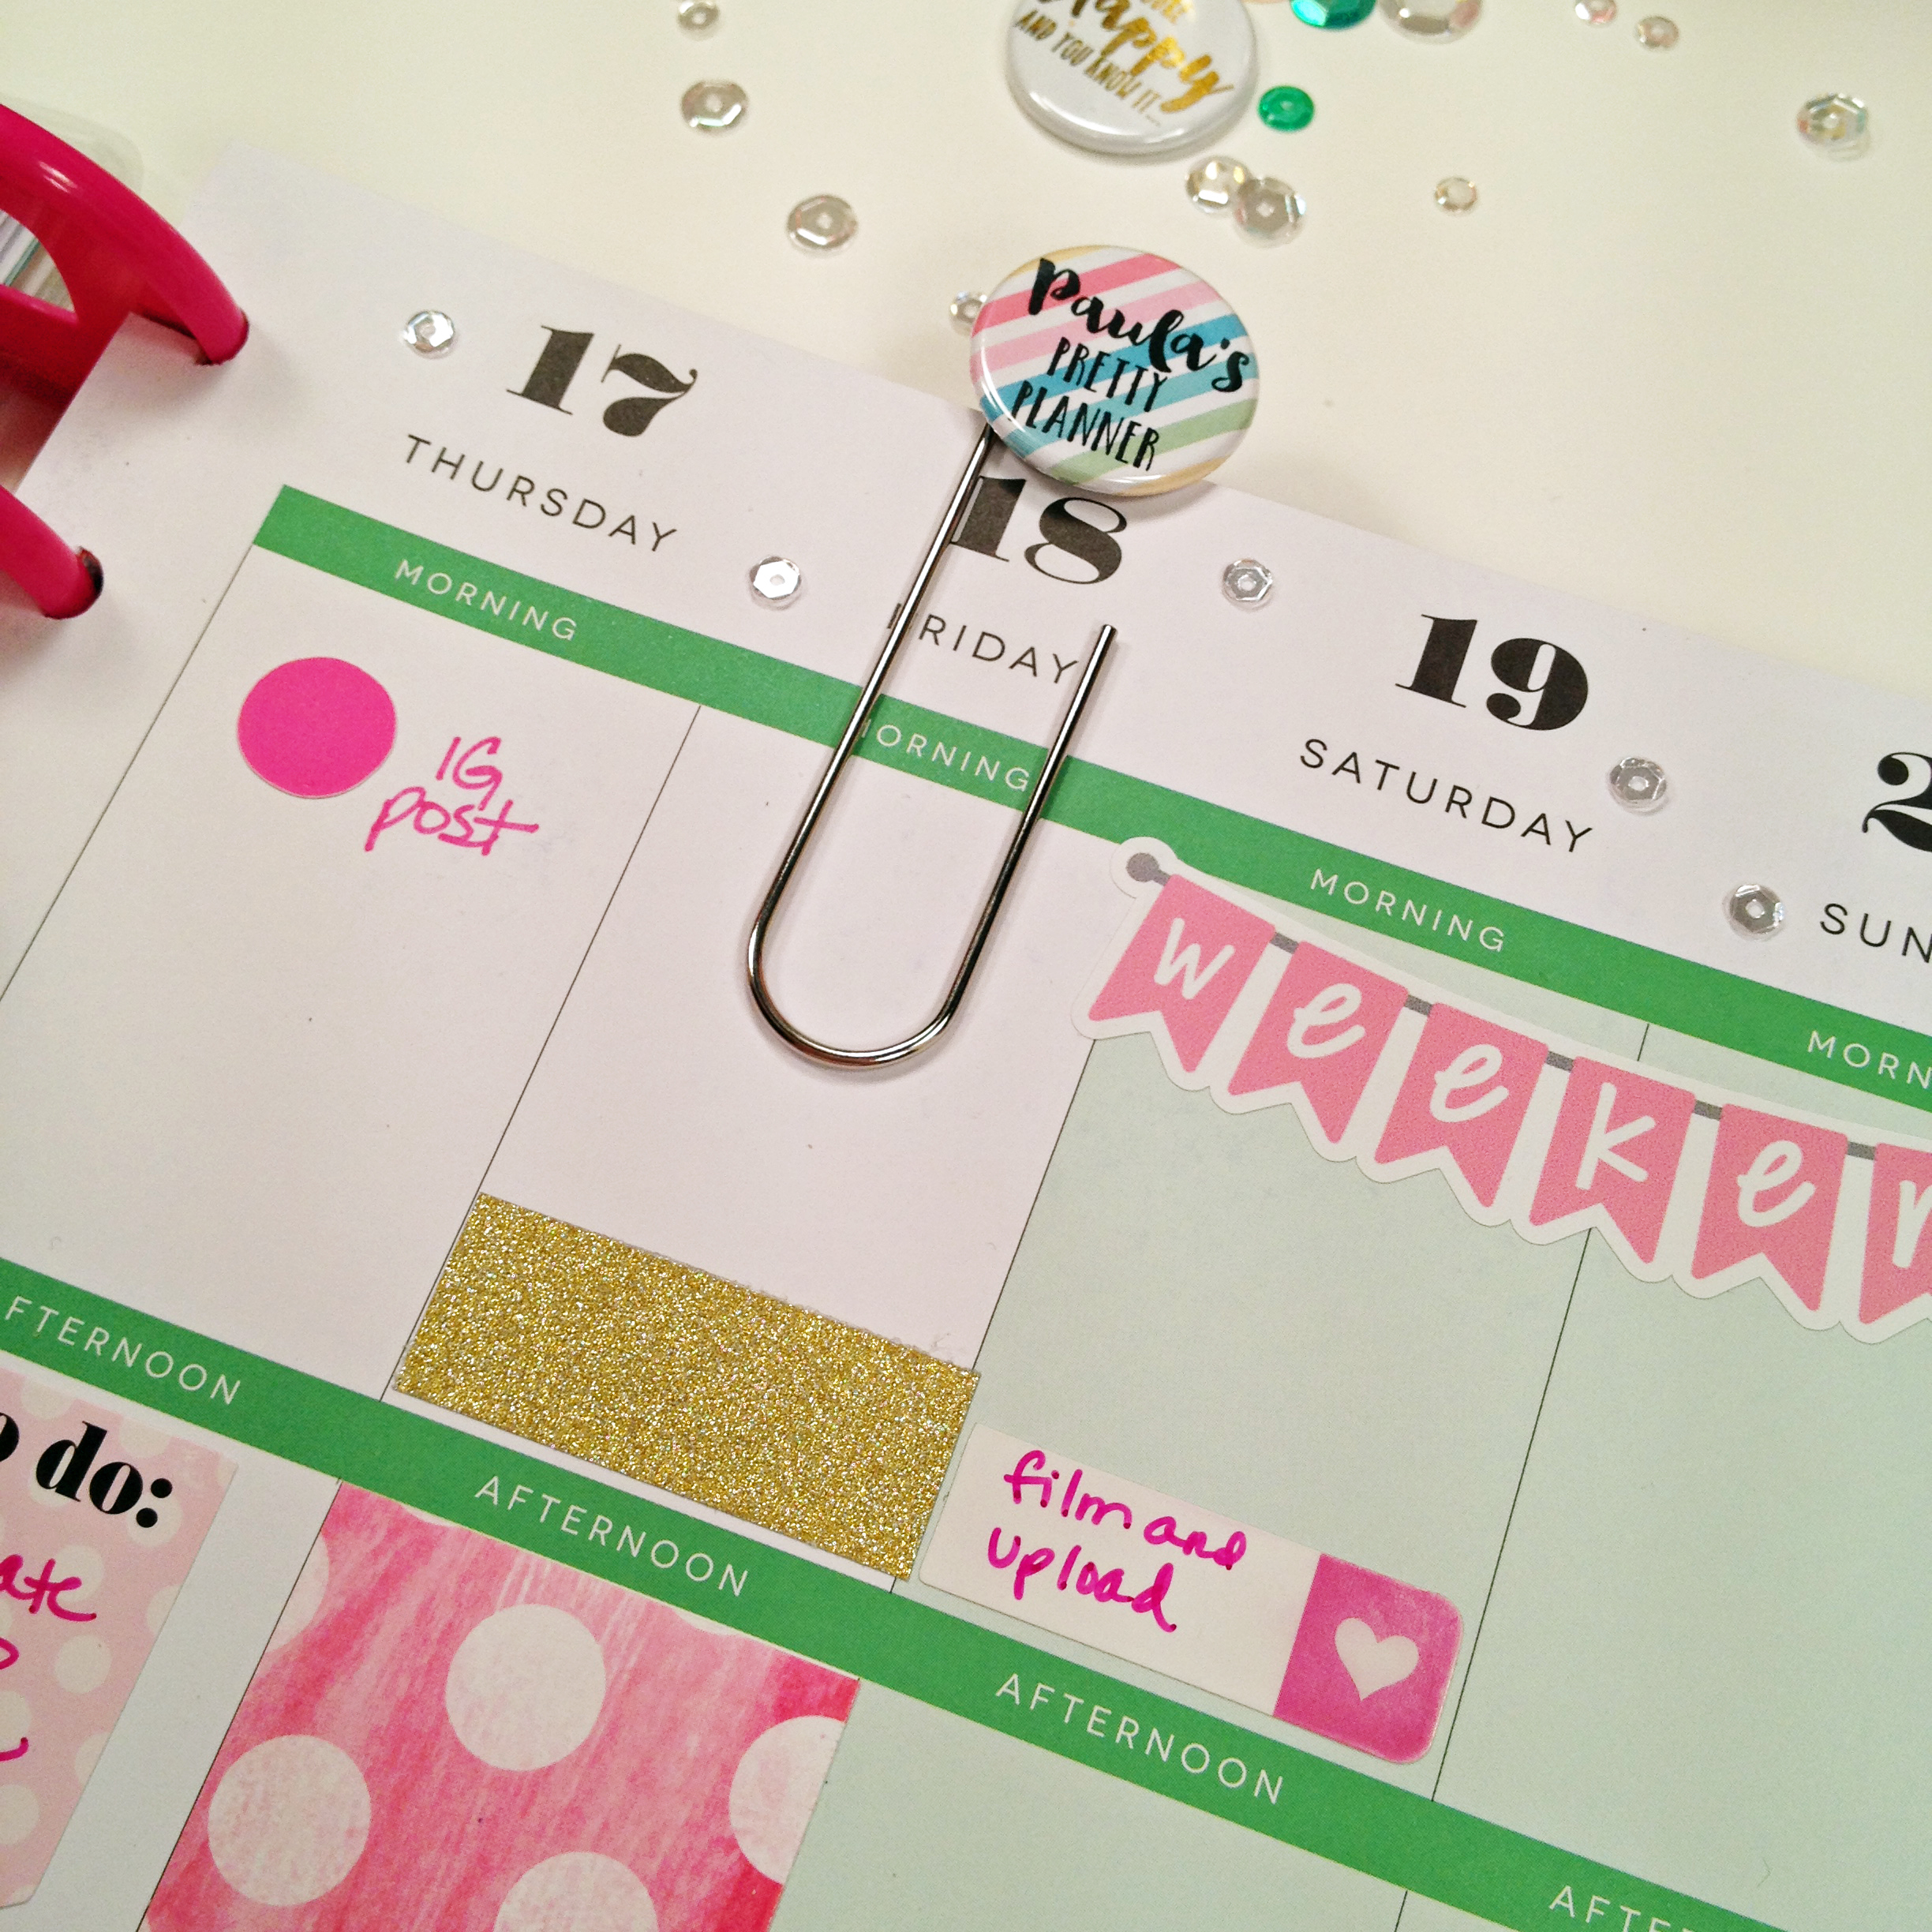
It’s Paula here to share my planner layout for this week with you.
I am using my MAMBI Happy Planner to plan out my week for my video, design team, and IG postings so I wanted to share how I am using some of the awesome planner items in The Crafty Pickle shop!
I want my planner to be functional first and foremost but I also want it to be pretty and fun! First off I am loving the large planner clip to mark my page. It is so cute and functional! For this week’s layout I used the gold glitter washi to add some glitz and glam. I used some of the Fruity Pebbles Relish Mix and Amy Tangerine vellum hearts which go perfect with the colors for September in the planner. I also used some of the Sticky Pickle Spots as bullet points for my posting reminders. And finally I used some Close To My Heart stamps to make the layout fun!
It’s Marisa again with another fun project using TCP products!
This time I went outside the box..big time. But in a good way. Like I LOVE it good way.
I love documenting my life, especially the part with the 7 of us in it. I scrapbook, do Project Life and also love art journaling and mixed media. Well I added a new way to remember all the details of our crazy yet awesome days!
Enter my fauxbonichi. My knock-off of a Hobonichi. You can Google it. Or go on Instagram and ooh and ahh over how creative people can be in journaling their daily life. I know I did 🙂
I wanted to see if I could incorporate my CP products in this newfound love of mine.
I did just that.
I wanted to make a band to keep my soft bound leather book closed. Keep the pages safe. The cover gets pretty dinged up.
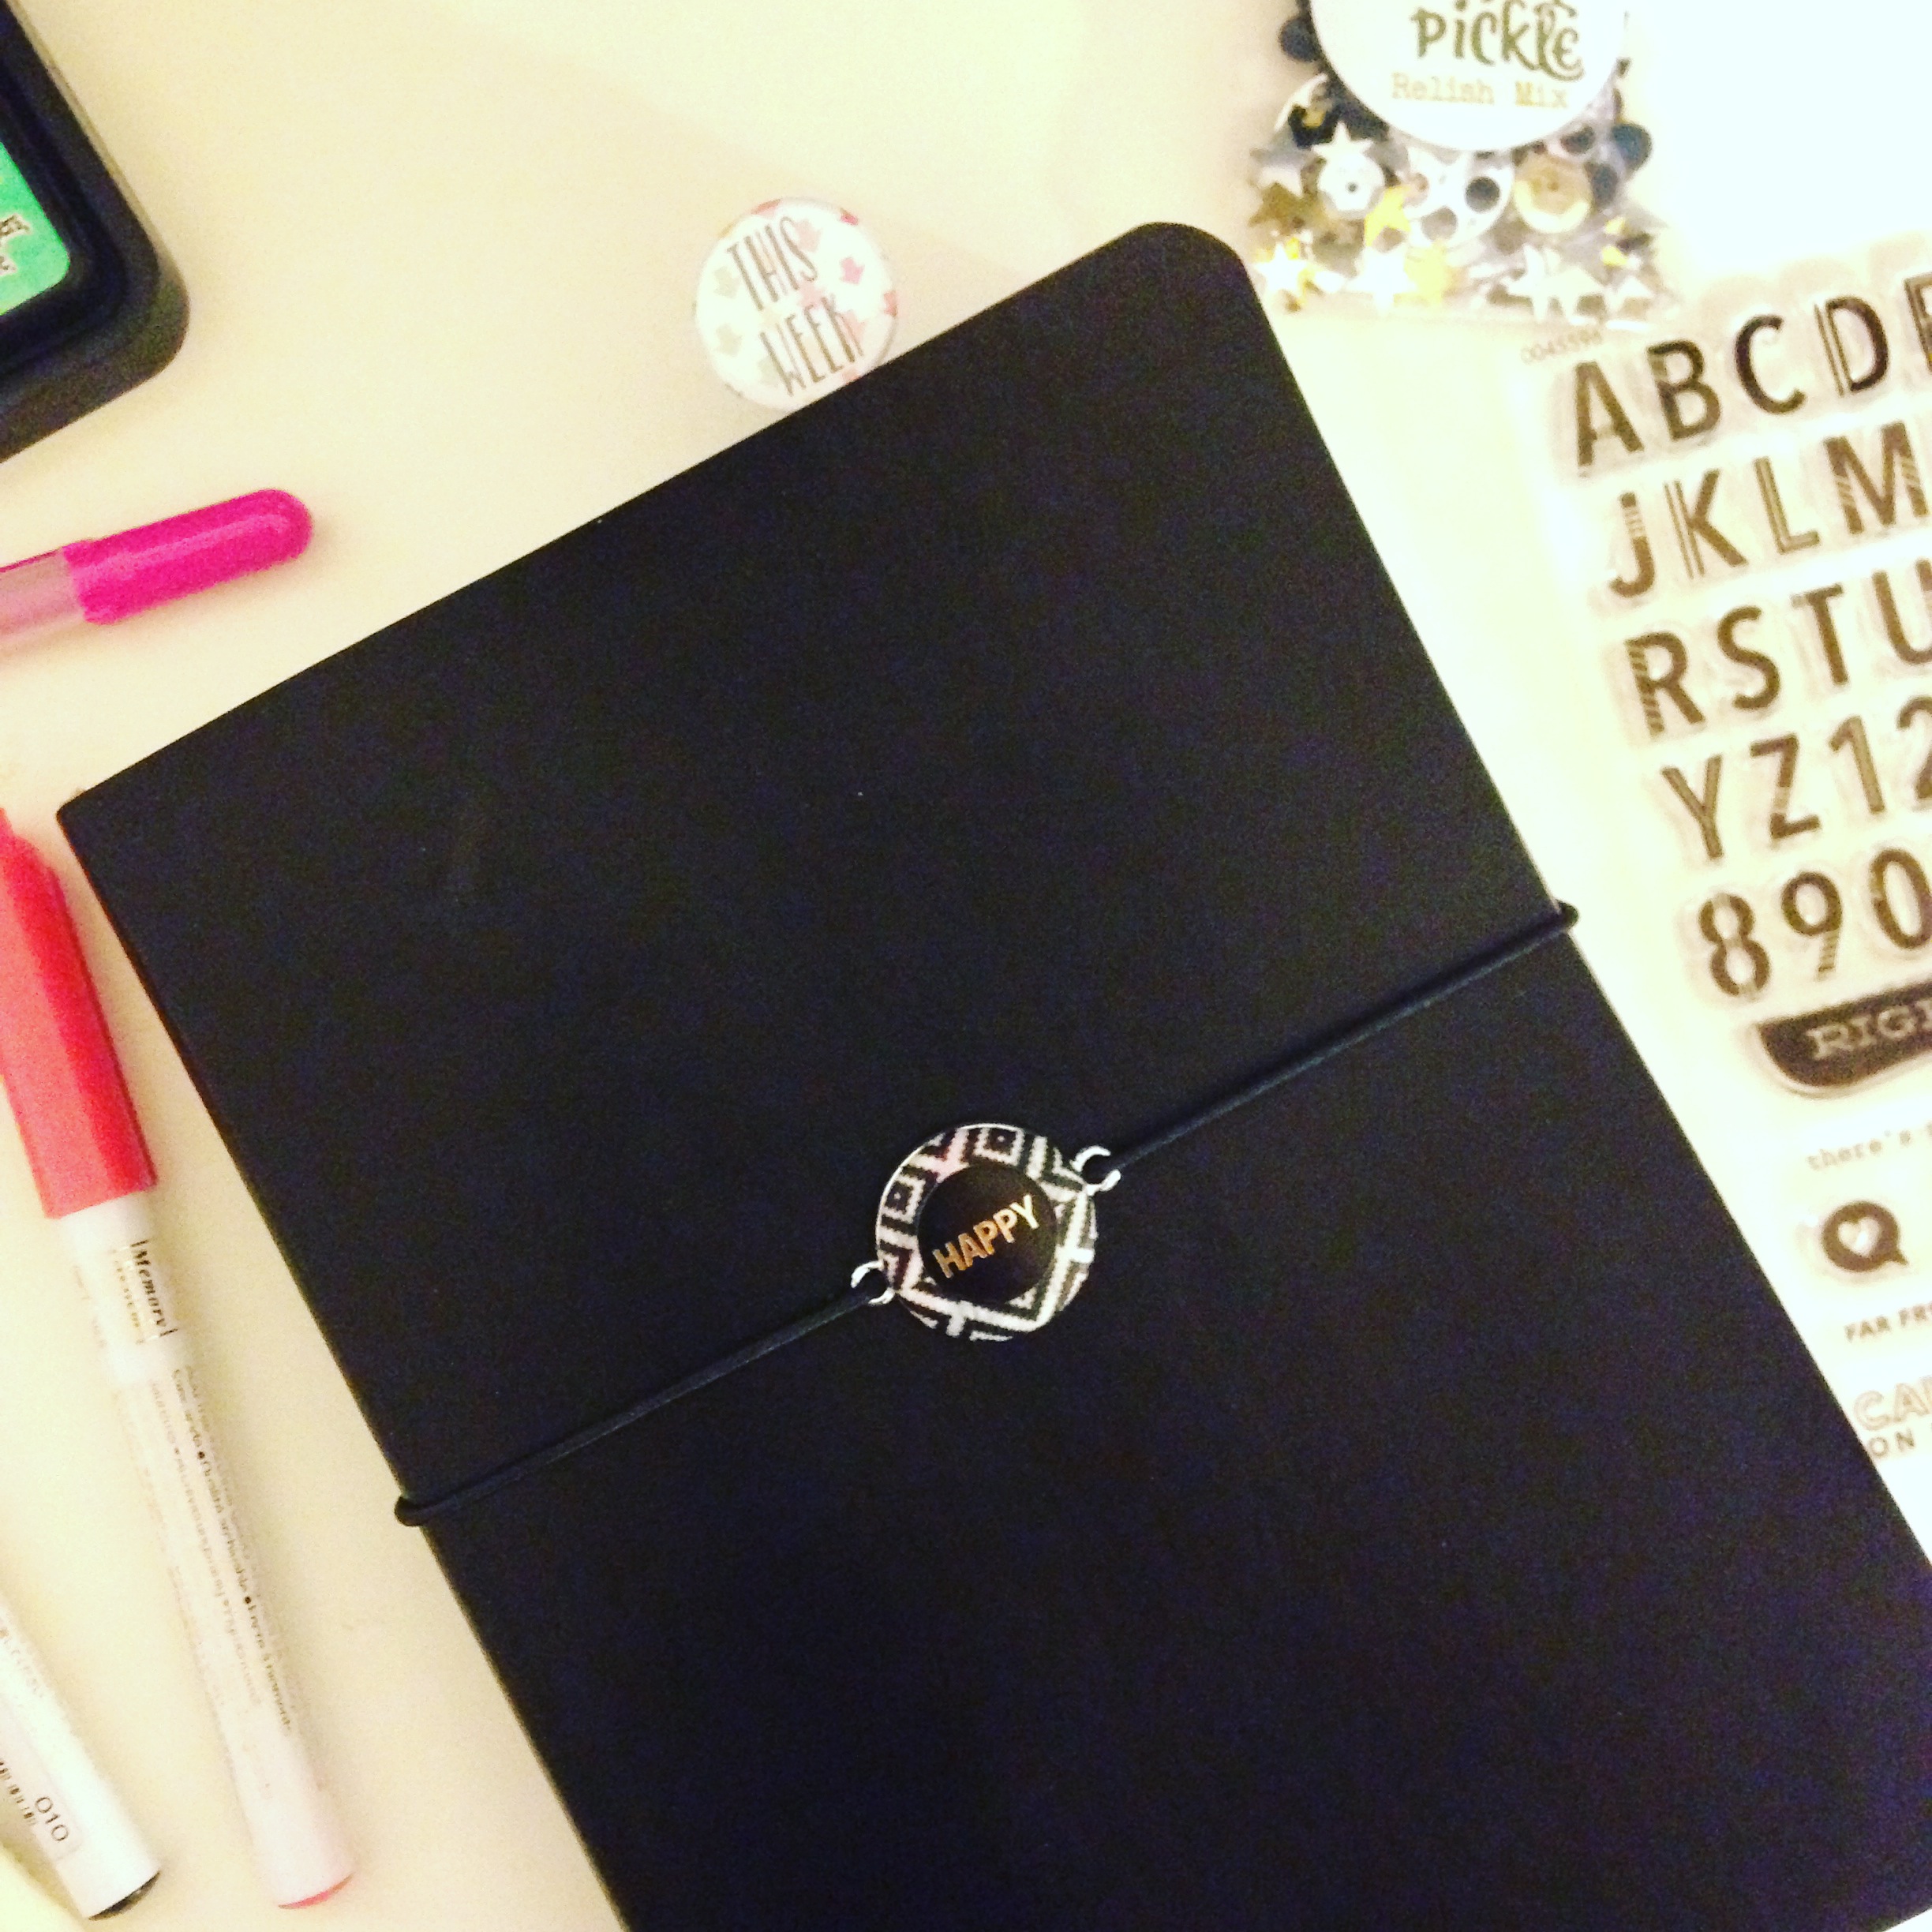
I took the magnetic interchangeable piece from the shop that said Marisa’s Pretty Planner and temporarily altered it. I used washi tape and a cute sticker, tied elastic cord on it and BAM Cutest button ever. I also like using the This Week planner clip to mark where I am. Not just for planners anymore!
I used some cute washi from the shop to make a box for my Lister’s Gotta List daily challenge. Instead of using numbers on my list I used the Sticky Pickle Spots. Perfection.
The Relish Mix sequins in the shop work perfectly in my spread. They lay completely flat and add no extra bulk to my book. As much as I love chunky journals, this is one I want to keep on the flatter side. I used some star Pickle Spots as well.
The road washi was spot on for my story about my trip to Mike’s! Those Pickle Spots are really growing on you aren’t they? You’re welcome.
I’m so happy I busted out my products and made them work. Most of all I’m happy it added fun pops of color and helped me tell the story of my day.
Check out my video to hear a few stories of how fun and unpredictable my days can be! Oh and to see the goodies up close 😉
Hi friends, Joann here today sharing some mini note cards that I created for my son’s teacher using CTMH Treats of Friendship stamp set!
I stamped my images on some watercolor paper and colored them in using some Zig Clean Color Real Brush markers. I stamped my sentiment and layered my top panel to some fun foam for some dimension and stacked that onto some colored card stock.
I finished my cards by adding a bit of glossing accents to my sprinkles…really liked the way they turned out. Well that is all for today, thank you so much for stopping by! Have a wonderful day!
Hey there it Treasa with another Project Life Kids post. Today I will be sharing a video of me and my granddaughter creating a couple cards to show her love of Minecraft.
Products used: Minecraft Flair set
Silver washi tape
Project Life roller stamp
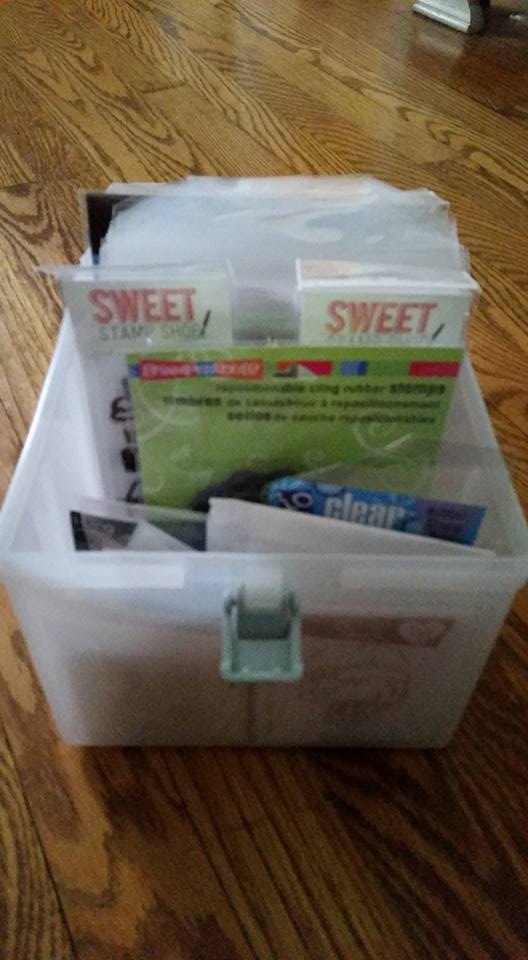
Good Morning! Today I’d like to share with you one of my favorite organizational products ever! And it just happens to be the My Acrylix Organizers from Close to My Heart!
As a former consultant for 5 years (and my best customer), and having been a loyal customer ever since, I have amassed quite the My Acrylix stamp collection! I absolutely LOVE the quality and versatility of the clear cling stamps–and with the CTMH My Acrylix organizers the stamps are so easy to store and access quickly when I want to sit down and craft. The containers are stackable, have a hinge-top lid with a handle (so you can pack up your favorite sets easily for crops!), and they retail for only $14.95 each. I have added to my container storage as I have added to my stamp collection and it has been well worth the investment to have a cohesive place to keep all my stamps neatly (especially since my craft room is also our family dining room).
Each container stores 15 CTMH stamp sets right in their envelopes!
And if you have collected other brands of cling stamps, you can make them fit to flip through them and store them in the containers as well. I ordered Avery Elle clear stamp envelopes to store my sets where the plastic packaging had ripped and they fit right in!
I have also recently discovered that my hoard of 6×6 paper pads will also fit inside of these handy storage boxes–which opens a whole new world of organizational possibilities! Think about putting together little “kits” with these boxes to make pulling one down and crafting quick and easy without having to dig through your whole stash! For example, you can put your Fall 6×6 pads, stamp sets, and a few embellishments all in one organizer! (Each organizer comes with 2 removable dividers that create 3 sections inside.)
I hope that you learned of a useful product on the market today that will help you get organized and therefore make it easier to access and use more of your stash! I really couldn’t live without these and it’s a system that really works for me!
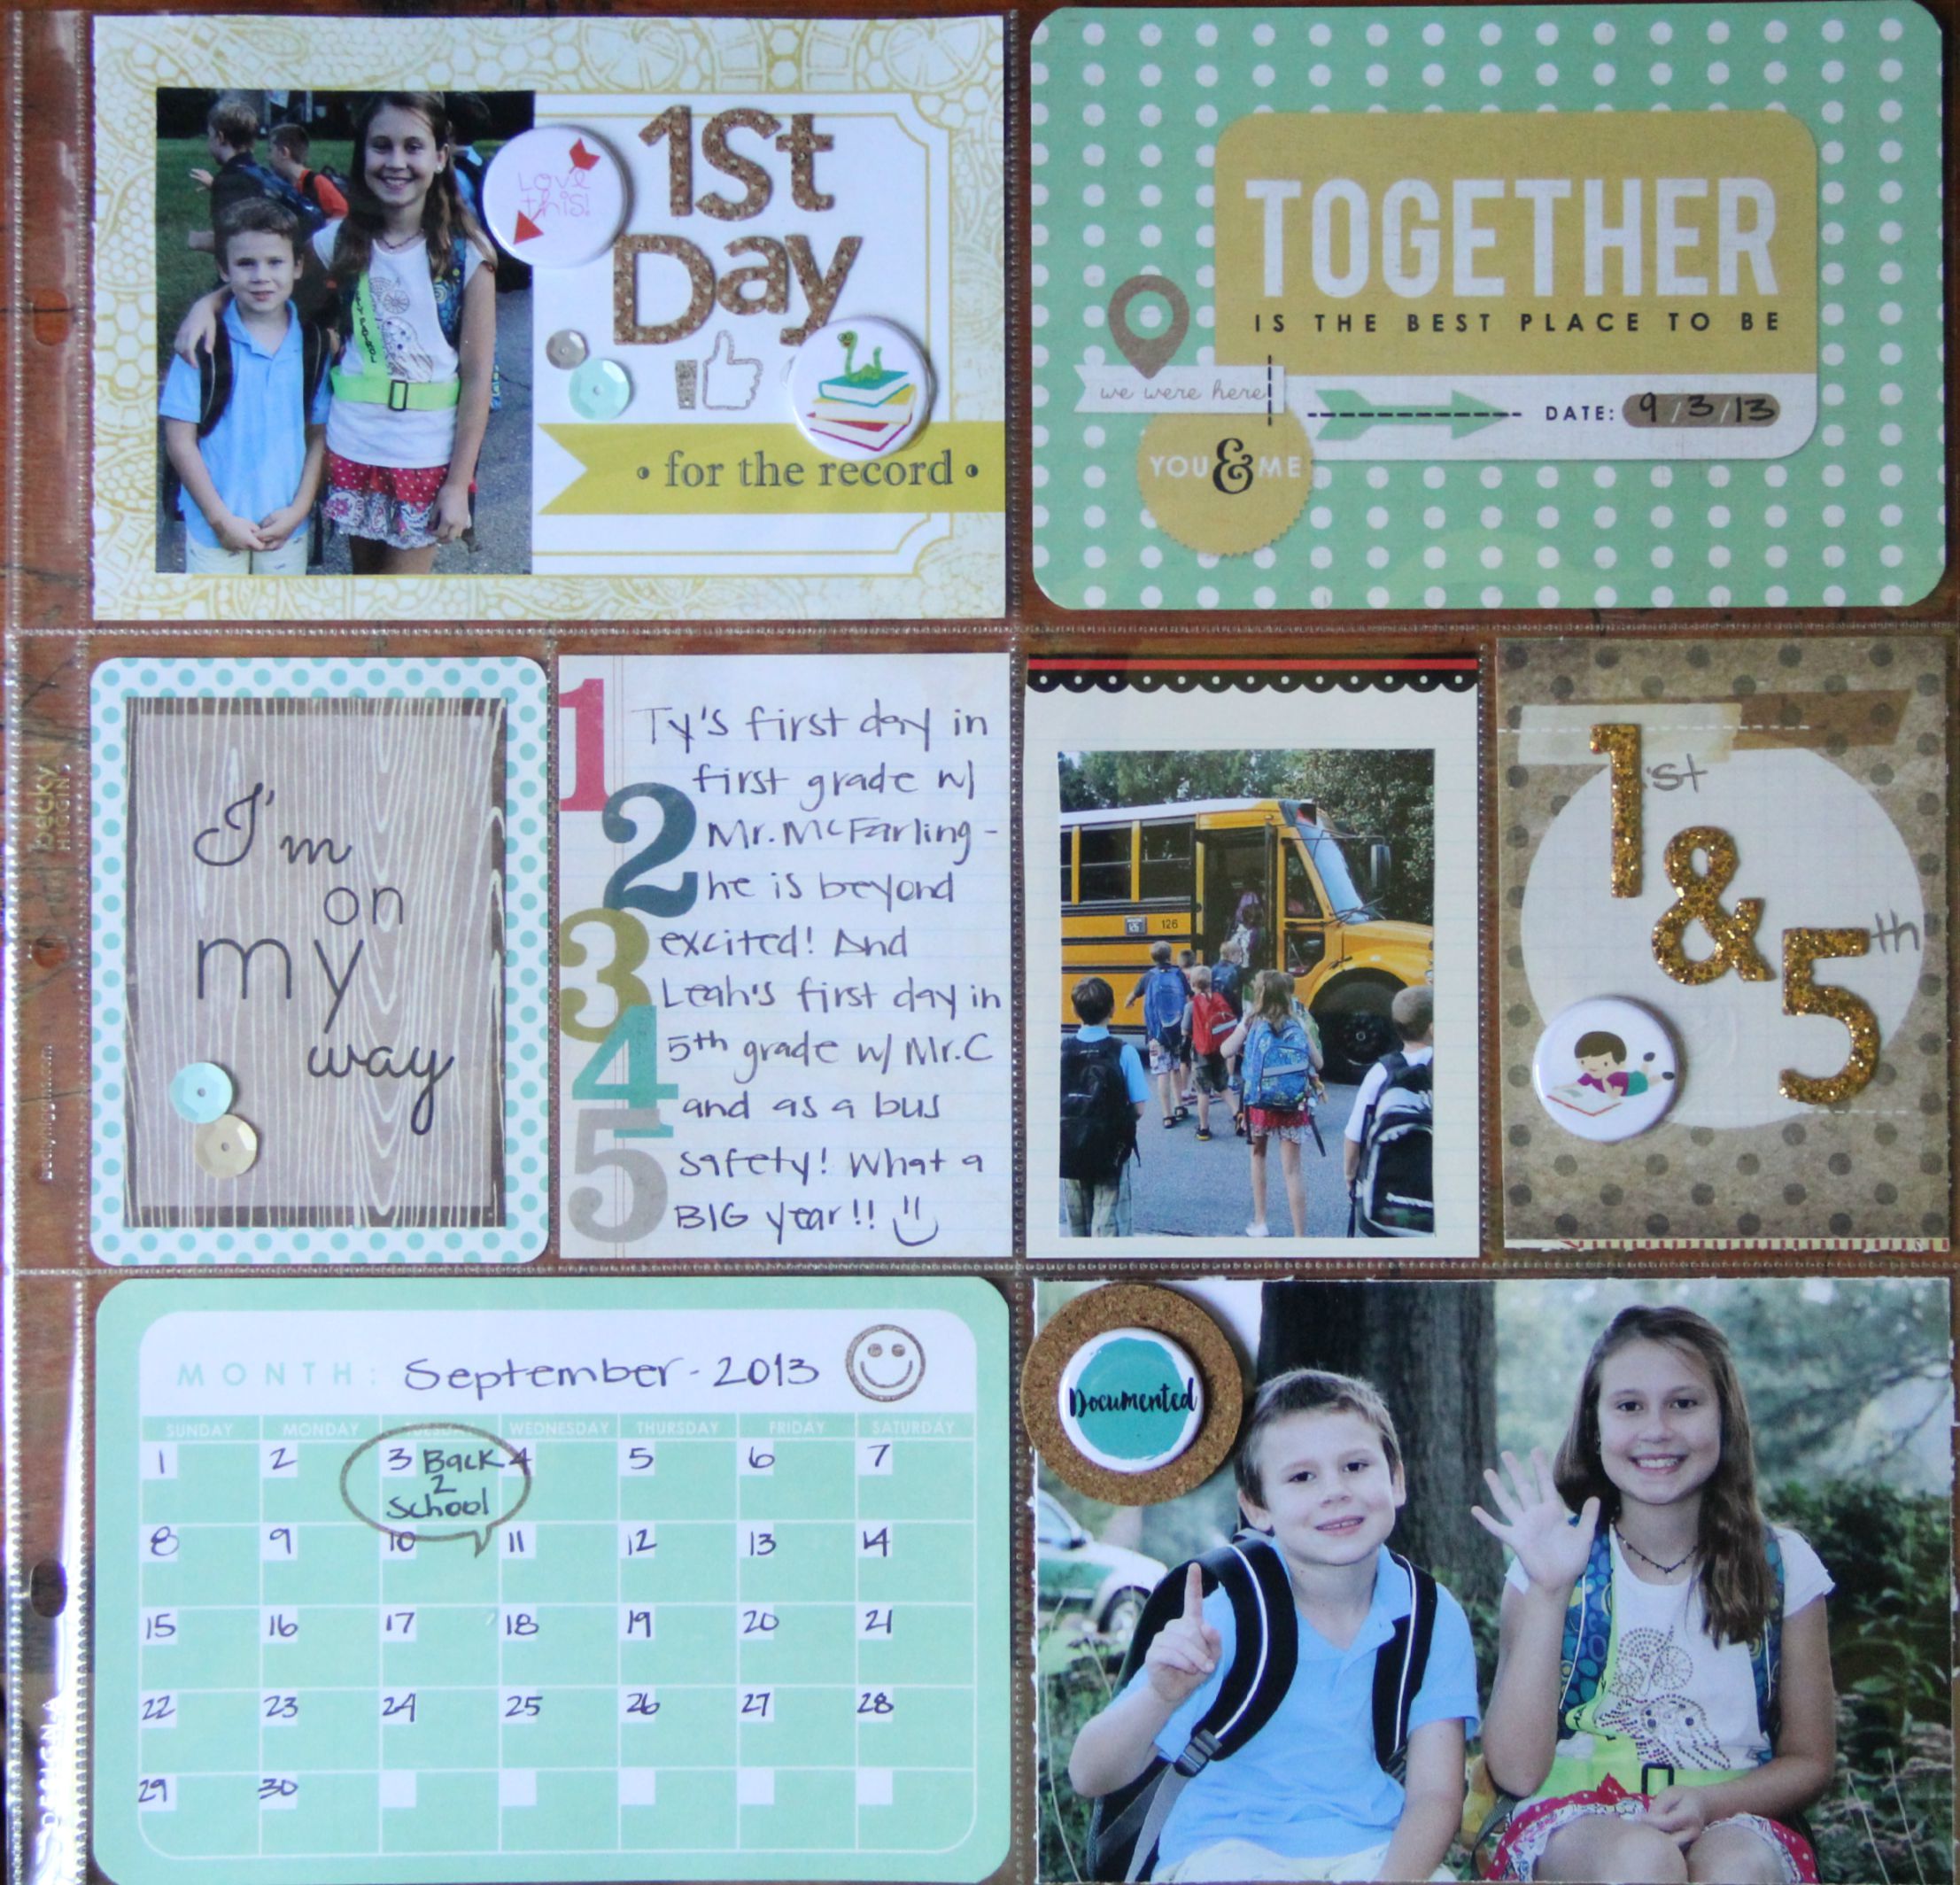
Hi Crafty friends! It’s Stephanie here today to share a layout that I created in the PL style. My kids just went back to school last week, so in honor of the big day, I made a 1st day of school page! (Granted, the photos are from two years ago-but they’re now scrapped!)
I used several flair buttons from The Crafty Pickle as well as some small stamps from Close To My Heart that work great for Project Life projects!!
Now is a great time to buy some stamps from CTMH. Click here to view all of the wonderful stamps!!